The owl is not only an intelligent and beautiful bird, but also a popular symbol today. It is believed that such a toy gives children calmness, perseverance and patience, and increases their learning abilities; gives young girls mystery and femininity; for young men - strength; and people experiencing financial difficulties - financial well-being. And if you make an owl with your own hands from fabric or other materials, then the power of such a talisman will increase many times over.
If it seems that sewing a forest beauty is difficult and for this you need to have tailoring skills, then this is a mistake. Even children can cope with the creation of the product, and they will gladly take part in the birth of a new family friend.
How to make a three-dimensional paper owl with your own hands
Paper is an excellent material for creating crafts with your kids. This material is affordable, and it can easily be processed in various ways. You can make interesting and unusual crafts from paper. For example, today we offer you a master class with photos on how to create a 3D or 3D owl out of paper with your own hands. Such voluminous animals are even more reminiscent of the original and fit perfectly into the interior. Anyone can make such a craft. The technique for creating this craft is quite simple and very exciting!
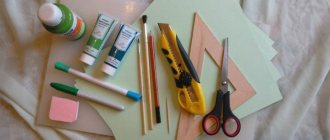
To work on a paper owl with your own hands, prepare:
- medium weight colored paper;
- paper towel or toilet paper roll;
- scissors;
- glue stick;
- gouache or watercolor paints;
- brush;
- pencil.
How to make a three-dimensional paper owl with your own hands?
Step 1
So, let's create the base of our owl. To do this, bend the upper part of the sleeve inward as shown in the photo.
We'll do the same on the back side of the cardboard spool.
We press all the lines thoroughly, making them clearer and smoother. The result is a blank owl with ears.
Step 2
Now we paint the cardboard blank with gouache or watercolor paints.
You can choose the color you will paint the part at your discretion. Leave the workpiece for several minutes so that all the paint is completely dry.
Materials for making an owl from fabric
To sew a simple owl from fabric, you do not need to purchase any special materials. Everything you need can be found at home. So, for this you will need:
- Pattern or templates (download and print on a printer, or redraw by hand);
- Pieces of fabric;
- Threads;
- Scissors, needle;
- Buttons and other decor;
- Glue (if an applique will be made);
- Filling (holofiber, fabric, ordinary cotton wool, etc. for a voluminous toy).
The list is small, but the scope for imagination is huge. You can choose any fabric, but it should not crumble around the edges or be see-through. Old clothes are suitable for this craft, for example, jeans, bright sundresses, a jacket and even a terry towel. Each time, even with the same pattern, the result will be different, but always excellent.
How to make an owl out of paper with diagrams and videos
Making toys from paper is an activity that will never lose its popularity. Paper crafts can be very beautiful and original, and making them is a great way to keep children busy and teach them to be methodical, persevering and neat. This article will be about how to make an owl out of paper in different ways.
From a cardboard core
The main thing for such an owl is a round cardboard cylinder onto which all other elements are glued. There is huge scope for imagination; you can come up with as many finishing options as you like. Let's consider one of them.
We will need:
- a cardboard cylinder or tube on which toilet paper was wound;
- colored paper;
- scissors;
- glue;
- gouache or watercolor;
- pencil.
Let's look at the workflow.
First of all, we process our cardboard blank sleeve. We bend both upper edges inwards as shown in the photo to create “ears”. This part of the workpiece must be pressed and ironed with your fingers so that the base is as neat as possible.
After this, we choose the color of the future owl and paint it with gouache or watercolor. The base should dry well.
While the paint dries, we will have time to cut out eyes, beak and feathers from paper. We select paper of the desired color, fold several sheets of paper together, draw small circles on the back of the last sheet with a pencil and cut them out - these will be the feathers on the owl’s chest.
Next we make the eyes - two white circles with a diameter of 4 cm and two black circles of a slightly smaller diameter. You can make a highlight from one more small white circle - for expressiveness.
Cut out a small triangular beak from brown or burgundy paper.
We make feathers in the form of “tongues” from paper of the same color as for the breast circle feathers. These feathers are suitable for an owl's tail.
Now you can start gluing the base with all the decorative elements. We do this in the order shown in the photo:
The paper owl is ready, but you can show your imagination further, for example, by decorating the owl’s head with a bow, a bug, etc.
Origami paper owl
Let's consider two methods - classic origami (from one sheet) and modular origami (from many small paper blanks).
Classic origami
We take a square cut out of colored paper and bend it along both diagonals with the colored side inward, and then straighten it. We turn the title over and fold it crosswise, but now there should be a white part inside. Then, having worked with pre-planned folds, we bring the model to this form. The three upper corners need to be placed on the lower one (more details on how to do this in the video below). The “wings” of the triangles need to be folded and unfolded. We bend the top of the workpiece and unfold it again.
Next comes a more difficult task. You need to open the top of the workpiece, squeezing it from the sides, and do the same on the back side to form a rhombus (this process is shown in more detail in the video). The front and rear sections are folded so that the flaps face down. And we bring the upper corners to the axis. Pulling the part out of the middle and pressing it down, we make a wing, then do the same for another. And fold the top part. The owl using the classic origami technique is ready.
For greater clarity, we recommend that you watch the video:
Modular origami
This method of making an owl from paper is more complicated, but the result is very beautiful and unusual.
As mentioned above, when working using the modular origami technique, a craft is formed from many pre-made small parts - modules. This is another way to make a paper owl three-dimensional and not flat, as is the case when working using the classic origami technique.
First, let's prepare the modules. The following scheme is used for their manufacture:
- Take a small piece of colored paper and bend it in half lengthwise and then across it;
- The workpiece is straightened, the right and left parts are folded to the resulting fold line;
- The figure turns over. The lower edges are folded to form an even triangle;
- The triangle is bent in half. The module is ready.
See also video on the topic:
Now that we have learned how to make modules, we should know how many of them we will need. To make a paper owl, you should prepare:
- 274 blue modules;
- 102 black modules;
- 62 white modules;
- 1 pink module - we will make a beak from it.
Let's start assembly. To begin with, take 2 blue parts and connect them with another one - either the same blue or black. The workpiece should consist of 3 rows, the last of which should have 22 modules. A ring is assembled from blanks. From 20 blue and 2 black parts we make rows 4-6. In rows 7 to 9 there should be only blue modules, 22 pieces. In row 10, 1 white module should be installed so that it is above the middle of the black ones located below. The remaining modules – 21 – are blue. 11th row - two white ones attached to the bottom one, and 20 blue ones.
Required number of parts for the following rows:
- 12 row: 19 blue, 3 white;
- Row 13: 18 s, 4 b;
- Row 14: 11 s, 9 b.
Next you need to make a neck, while directing the modules a little differently. Their number in rows:
- 15 row: 14 s, 8 b;
- Row 16: 13 s, 9 b;
- Row 17: 12 h, 8 b.
Row 18: the black module is placed in the center, and on both sides of it there are 2 and 3 white ones, with 15 black ones around. Row 19: take 12 black modules and place them on the sides in 6 rows. Row 20: 2 and 1 black modules on the sides, 3 white ones in the middle. 21 row: 2 and 1 black on the edges, 2 white in the center. Row 22: 1 black on the edges, 1 white in the center. 23 row: 2 black modules. 24 row: 1 black module.
It turned out to be an ear. We do the second one in exactly the same way. Finally, add the beak – a pink detail. It needs to be installed in the 18th row between the white ones. All that remains is to glue on the eyes and, if desired, some decorations, and the owl using the modular origami technique is ready!
And finally. The easiest way to make an owl from paper is using ready-made templates that can be printed on a printer.
Video on the topic of the article
See also a selection of videos on the topic:
dekormyhome.ru
Owl made of fabric using applique technique
The first thing you can make from fabric is applique. The simplest and fastest option, which both children and beginners in the handicraft world can easily cope with. To do this, you can take this diagram or those presented below.
- We draw by hand or print the template we like. To begin with, you should choose a simple one, from 6-8 elements. It is best if it is made of dense material, such as cardboard or an old box;
- We distribute the available pieces of fabric among the parts of the owl’s body. For appliqué, it is best to use felt - its edges are quite dense and do not require processing. The base can be made colored, the belly can be made plain (or vice versa). The main thing is to avoid a large number of colorful details, but this is also acceptable if you are planning a funny comic toy;
- Using a pencil, thin chalk or a piece of dried soap, trace the outline of the template and transfer it to the fabric;
- We cut out the parts along the contour and assemble the future owl. If you are satisfied with the result, we take up the glue and carefully glue all the parts. You can choose any sequence (either start with small elements, or, on the contrary, from the abdomen);
- The finished toy must be allowed to dry in a ventilated place for at least 6-8 hours so that the glue dries and the unpleasant smell from it disappears.
Below are patterns that you can print out and use to create a variety of colorful owl appliqué designs.
You can use felt or regular fabric.
The appliqué technique is also suitable for decorating children's clothing, bags and bedding. For example, owls will look very beautiful on a pillow.
paper, photo, applique, wooden
The owl with its penetrating gaze has long been considered a symbol of wisdom and knowledge, so an owl craft is a wonderful souvenir for September 1 or Teacher’s Day. Nowadays products made from natural materials are valued. They carry the warmth of nature, and cute owls, made with love, will become a favorite and safe toy for kids.
Owl postcard
A paper owl looks attractive. With a postcard in the shape of this bird you can congratulate your favorite teacher on his professional holiday.
Required materials and tools:
- scissors, a simple pencil and glue;
- colored paper, ribbon and cardboard.
Completing of the work:
- You can print out an owl template or make it yourself by drawing a figure directly on cardboard.
- Future wings are folded inward and unfolded so that the fold line is clearly visible.
- Coat the outside of the future postcard with glue and glue a piece of colored paper to it, smoothing it well with your hands.
- Colored paper is used to cover the inside of the bird's wings.
- Transfer the owl's head to multi-colored cardboard, cut it out and glue it to the base.
- Glue on the breast, beak and eyes.
- They write a wish on the chest, fold the owl along the fold line with its wings inward and secure the card with a beautiful ribbon.
Another option for an owl greeting card made of cardboard and paper may come in handy. The manufacturing technique is more complex, but this craft also looks much more interesting.
Required materials and tools:
- White paper, multi-color double-sided, corrugated green;
- Cardboard;
- tape and glue;
- toothpicks, wire, a simple pencil and scissors.
Procedure:
- Cut strips about 5 cm wide from orange and brown paper, the number of elements depends on the size of the bird.
- The orange strips are screwed onto a toothpick, the end of each strip is coated with glue, the next strip is glued and screwed again. Do the same with all orange stripes until a circle of the desired diameter is formed.
- Glue the brown blank to the last orange strip and continue to wind the now brown blanks. The result is a two-color body of the owl.
- Next, cut strips about 3 mm wide from black, beige and light brown paper, and then form eyes by twisting strips onto a toothpick, starting with black, then beige and light brown.
- Twist the black stripes, creating the base of a cylinder hat. Cut a square out of black paper and fold it diagonally to form a triangle, which will serve as the top of the hat.
- Again, cut beige and light brown strips 2 mm wide, twist them into circles so that the beige color is in the center.
- Make 6 similar circles, form them into ovals, crushing them slightly on the sides, and glue 3 pieces together. The resulting wings are glued to the body of the bird.
- A small oval is again made from beige stripes - a beak for an owl.
- Roll up a piece of white paper in the shape of a scroll, which the owl will hold in its wings.
- The eyes are glued together, glued onto the body, and a strip of light brown color is attached on top of them and its ends are slightly twisted - these are the eyebrows.
- Attach a key and a cap.
- Papyrus is inserted into the wings and, like the wings, 6 ovals are made from beige paper to form legs, which are also glued to the body.
After the owl is made, the remaining elements of the application are completed:
- 5 large and 10 small blanks are rolled out of brightly colored paper strips 2 or 3 mm wide.
- Ovals are formed from the circles, the upper and lower corners of which are pinched.
- Insert 3 smaller ones into each large oval and glue them together, slightly fluffing the middle. You should get 5 petals, which can be edged with a crimson stripe.
- Cut out a medium-sized rectangle from beige paper, cut a fringe on it and roll it into a tube, forming the center of the flower.
- Glue 3 petals together, insert the core and glue the remaining 2 petals.
- Draw a maple leaf on beige paper and cut it out.
An owl is a symbol of knowledge and wisdom, so this voluminous craft is complemented by a book.
- Cut out a beige rectangle, bend it in half, bend the side edges towards the middle. This turns out to be the cover of a book.
- Rectangles of white paper will be book pages.
- The pages of the book are fastened in any way.
- A rolled strip of beige or light brown paper is glued onto a maple leaf to form a stump for the owl.
- An owl is glued to it, a little further - a book, and a flower is attached to it.
- Glue a piece of paper with an inscription to the book and slightly twist its ends.
- The entire composition is pasted onto a rectangle cut out of beautiful glossy cardboard.
- According to the principle of making petals, 6 leaves of green paper and 3 large petals are created. Fix 1 petal and 2 leaves on a thin wire at a certain distance.
- The finished branch is wrapped in green corrugated paper, fixed and secured to the base.
- The edges of the base are delicately decorated using a figured hole punch.
The craft is ready to please teachers at school and kindergarten teachers.
Little owl from nature's gifts
Nature prepares us a lot of materials for creating all kinds of crafts. They just need to be collected in time.
A cute mini-owl from nature’s gifts that can decorate any interior will result in:
- from acorn caps, dried leaves and cones;
- beads and buttons;
- pieces of felt, thick cardboard and glue.
Completing of the work:
- Having retreated a little from the beginning of the cone, remove a couple of petals, freeing up space for the eyes.
- Place the cone using good glue on thick cardboard.
- Separate the caps from the acorns and glue them in place of the eyes. Buttons and beads are glued into the middle.
- The wings are formed from multi-colored dried leaves, and the legs and beak are cut out of felt, thick fabric or colored cardboard.
If you cut a stand out of wood, glue a twig to it, and an owl on top, you will get an amazing souvenir that you cannot buy in any store.
Dough owl
A good alternative to plasticine is salt dough, from which you can make a lot of different crafts.
Ingredients for preparing the dough:
- 2 cups of flour;
- a glass of regular salt;
- ¾ glass of water.
All ingredients are mixed until a thick elastic dough is formed.
Required materials and tools:
- salty dough;
- paints and brush;
- plastic knife and tablespoon.
Completing of the work:
- Roll the prepared dough into 2 balls. The larger ball is used for the body of the bird, and the smaller one for the head.
- The balls need to be flattened a little.
- From balls that are smaller in size, they form the bird’s head, flattening the front side.
- Connect the head to the body
- A strip of dough is molded, a fringe is cut on it - this is a scarf for the bird, it is wrapped around the bird’s neck.
- Using a knife, draw stripes on the body, outlining the wings.
- Roll out 2 small balls and press down. You get the eyes of a forest owl, which are glued to the head.
- The beak is made in the same way.
- Form an oval from the dough, divide it in half and attach the resulting legs to the body. Use a knife to draw on the claws and leave the owl figurine to dry.
- Then the figurine is painted, adding eyebrows, pupils, feathers with strokes and decorated as desired.
Several multi-colored salt dough owls can be baked in the oven to create original handmade figurines.
garden decoration
The original owl is made from plastic bottles. To work, you need to prepare a bottle of the required size, a marker, acrylic paints, brushes, hot-melt scissors and a stationery knife.
Procedure:
- For a garden owl, it is best to take a large bottle, but for a home you can use a smaller one. Here the size is not important, since a colorful bird made from a plastic bottle will not get lost in any interior.
- Remove the label and draw lines with a marker where the cuts are made.
- They cut out the blanks along the lines, throw away what is unnecessary and connect the body and head of the future owl using a heat gun. In order not to deform the plastic, glue should be applied along the edges of the cut in a small amount.
- The bird is painted. It all depends on your imagination. The main thing is that the bird’s eyes are large, round and expressive. If the owl is being made for a summer residence, then you can use car paints, which apply well to plastic and are resistant to temperature changes and high humidity.
To prevent a home-made owl from flying away in a strong wind, it is filled with plaster through a hole at the bottom of the body. You can make a big bird and attach it to a tree. An owl on a branch in the middle of green foliage will look original.
www.hobobo.ru
Product examples
How an owl can be made is already known, and other products can be made in a similar way with pine cones. Spruce and pine cones make beautiful owls, you just have to try a little.
What other crafts can be made using pine cones:
Toys for the New Year:
- The basis for this craft is a pine cone. The wings, beak and eyes of the bird are made of colored paper. The owl is decorated with a cute cap. You can sew it yourself. It is also necessary to attach a string to the owl in order to be able to hang the toy on the Christmas tree;
- Christmas tree toy, more labor-intensive. A cone is used as the body of the bird. The plumage can be made from small twigs. Ready-made plastic eyes are used as eyes. They are attached in the center of a pompom, which can be made from tinsel or thread.
Big owl on the wall.
This craft is labor intensive and requires a lot of spruce and pine cones to make a large owl. They are glued together and, if desired, can be attached to the frame for reliability. A similar craft can be made in a large children's group, then it will become a decoration for one of the walls.
Natural composition of leaves, artificial plants and other natural materials.
The cones can be attached to a plasticine base. Bird wings can be made from leaves. The eyes are made by analogy with the previous example. The beak can be sculpted from plasticine. Twigs are used as plumage. An owl sits on a snag. You can attach artificial plants to plasticine nearby.
Other crafts. You can make other cute animals from pine cones with your own hands, for example, a hedgehog or a bear.
Do you need an owl made from pine cones and want to learn how to make such crafts? If so, you can't miss today's educational article about it. Many of the crafts presented are ideal for children, as they are easy to repeat. We hope you enjoy it.
Simple crafts with children. Paper owl
Some parents refuse creative activities with their children, believing that it is too early. But here you need to choose the right craft that is as easy to make as possible. For example, in this master class we show the process of creating an owl from an ordinary paper circle.
To make such an owl we prepared:
- pink, black and white paper;
- a small piece of orange paper;
- compass;
- scissors;
- black marker;
- glue.
The basis for our owl will be a circle cut out of paper. We decided that our craft will be pink; if desired, it can be made from paper of any color. Using a compass, draw a large circle and cut it out.
Now we bend the sides of the resulting circle towards the center. In the future, these parts will become the wings of an owl.
We bend the upper part of the circle down; this will be the head of our bird.
Next we prepare the eyes. To do this, cut out a couple of circles from white paper and draw black dots in their center. Afterwards we glue the eyes to the blank of our owl.
Cut out a small triangle from orange paper; this will be the beak.
We cut out the paws from black paper.
After that, glue them from below to the back of the craft.
All that remains is to design the owl by finishing its plumage with a black marker.
Our owl made of paper is ready.
azbukivedia.ru
Owl made of corrugated paper and pine cones
This product is similar to the previous one, except that the bird parts are made of corrugated paper. The craft looks very unusual, and it can be used as a gift to friends or relatives for the holiday.
What you will need for production:
- fir cone;
- corrugated paper of different colors;
- glue;
- colored markers.
The whole process is divided into several stages:
First you need to cut out all the elements from corrugated paper - the bird's head, wings, beak and eyes. To make them, you can use a diagram that shows all the elements. You can print the diagram, then cut out all the details and transfer them to corrugated paper.
Eyes can be drawn on paper with markers using yellow and black colors.
After this, all parts are glued to the base using glue. The craft is ready! To hang it on the Christmas tree, you can attach a thread or string to it.
DIY owl pillow, how to sew, master class with photo
The pillow is a very comfortable and useful thing! It gives you the opportunity to relax and have a good rest. Also, the owl toy pillow will perfectly highlight your design with its modern style. In this article we will look at how to sew an owl pillow with your own hands.
To create an owl pillow you will need: colored cotton, thick cotton fabric (teak), zipper, felt, thread, needle, sewing machine (optional, you can sew it by hand), padding polyester filler, textile glue, a piece of leatherette, newspaper, a simple pencil , scissors, iron, ruler, satin ribbon, lighter.
Sew an owl pillow
Master Class
- Draw the contours of the pillow (silhouette of an owl) as shown in the picture. The base (bottom) of the pillow should be level. Make two such silhouettes.
- Attach the pattern to teak (thick cotton fabric), leave a 2-3 cm extra fabric for seam allowance and cut the fabric to the shape of the template.
- Place the pieces right side inward.
- Sew them together with a straight stitch, leaving the hole at the bottom unsewn.
- Cut off the seams and finish with an overlocker.
- Fill the pillow with padding polyester.
- Hand stitch the opening using an over edge stitch.
Sew a pillowcase for an owl pillow
Master Class
- Cut a square of newspaper measuring 40x40 cm.
- Draw the contours of the pillow (silhouette of an owl) as shown in the picture. Make the base (bottom) of the pillow flat, as the zipper will be located there. Make two such silhouettes. Use the same pattern template.
- Draw the eyes (two large circles) and nose (in the shape of an inverted droplet) of the owl.
- Attach the pattern to the cotton, make a fabric allowance of 2-3 cm for seam allowance and cut the fabric to the shape of the template.
- Cut out the eyes and nose of an owl from felt.
- Sew the eyes and nose to the cotton fabric. If you have a sewing machine, sew with a zigzag.
- Draw eyelashes on the leatherette and cut them out.
- Glue the eyelashes onto the owl's eyes using textile glue.
- Use an overlocker or a zigzag stitch to finish the bottom edge seam (if you don’t have a machine, sew it by hand).
- Fold the seam allowances to the wrong side.
- Sew one part of the zipper, the edge of the fabric should half cover the teeth.
- Attach the second part of the zipper in the same way.
- Place the pillow pieces with the right sides facing in.
- Sew them together along the contour with a straight stitch.
- Trim seam allowances, then overlock.
- Make 4 owl legs from fabric as shown in the picture.
- Place the pieces in pairs with right sides facing inward.
- Sew along the outline using a regular straight stitch, but leave the bottom edge of each pair unsewn.
- Trim the seam allowances.
- Turn out and iron the paws, make a line along the contour.
- Finish the unsewn bottom of the legs with an overlocker.
- Place the paws on top of the zipper on the front side of the owl.
- Sew on the legs, turn them under, then sew again with a regular straight stitch.
- Place a pillowcase over your pillow.
- Fire-treat the ends of the satin ribbon.
- Tie a bow on the owl's ear.
- Sew an owl-boy pillow in the same way, and this couple will not be left without attention.
I recommend watching the video lesson with a detailed master class!
The owl pillow will be an excellent handmade gift. Give such a creative and modern surprise to lovers on Valentine's Day or wedding anniversary!
Loading…
svoimirukamy.com
We sew an owl from fabric
If you have mastered the appliqué technique, you can move on to mastering the sewing technique. It's best to work with soft felt, but almost any fabric you have on hand will work. Since to make an owl in this case you will need to work with scissors and a needle, you must be careful. If children are involved in creating a toy, they must be supervised by adults. The process itself is quite simple. There are two differences from the previous technique: to attach the elements we will use a needle and thread, and to make the owl voluminous we will use filler.
- As in the previous technique, we find a template or pattern we like, or we come up with it ourselves. We transfer it to the fabric and cut out the details of the future owl.
- In order to sew one part to another (wings, eyes, belly), it is best to use a hand stitch called “forward needle”. The technique of doing it is that one stitch is made from the face, the other from the outside. The length of the stitch and the skip on the front part of the product is equal.
- Having sewn together the parts of the front and back sides of the owl, we proceed to the main thing - sewing together the two halves of the owl. To do this, you need to combine the parts, fasten them with sewing pins and sew them “forward with the needle” in the same way, leaving about 2-3 cm unsewn.
- We fill the toy with filler through the remaining hole.
- We complete the seam and hide the end of the thread inside the toy.
- The resulting product can be decorated by gluing plastic eyes, bows, buttons, pockets, bow ties, etc. to it.
Depending on the pattern used, a wide variety of owlets can be obtained.
By sewing a loop to the resulting toy, you can use it as an interior decoration (crib, Christmas tree, fireplace, bookshelves) or a key ring.
step-by-step assembly instructions (instructions + video tutorial)
The art of origami is very ancient, but even today it has not lost its popularity. People of different age categories are interested in it. Origami can be done alone or in groups, especially by parents and children.
Today I would like to look at a beautiful origami in the form of an owl using modular technology. However, it will take about 10 hours to create, so you will need iron patience.
Contents of the article
Necessary materials
Creating an origami owl is quite a complex and time-consuming task. In addition, you will need to watch the origami owl master class for beginners and the following materials:
- blanks measuring 4 x 7 cm from colored paper, of which 368 blanks are blue, 59 are white and 1 is yellow;
- thick paper of white, black, blue colors - 1 sheet of each color, respectively, for the eyes, pupils and wings;
- PVA glue;
- office clips (binders) – 6 pcs.;
- glue gun and rods;
- scissors.
The modular origami technique involves creating a variety of shapes by folding modules, i.e. small paper elements. In some cases, their number can amount to hundreds or even thousands of small parts, especially for 3D crafts. The photo clearly shows what elements an origami owl consists of.
A voluminous origami owl made by yourself can be added to your collection of original hand-made crafts.
How to make an origami owl with your own hands
To create an owl out of paper, you will need special folding patterns. The operating procedure is as follows:
Creating Modules
At the beginning of work, you need to prepare a paper sheet 4 cm wide and 7 cm long. Fold it lengthwise strictly in the center, then similarly across. Open the pocket and fold the corners inward diagonally.
Now do the same steps, but on the opposite side. And bend it in two. The first modular element is ready, there are still 427 pieces left to make (blue - 367, white - 59, yellow - 1).
Beginning (creating the zero tier)
To do this, you need to glue together 5 prepared modules with non-opening edges using a glue gun. To tightly fix the glued elements, it is necessary to clamp them with binders (stationery clips) and leave to dry.
Create 4 more sets similar to the previous one and one of 3 units. This should only take 28 pieces. All glued elements must dry, only after that you need to remove the clamps.
Next, apply glue to the ends of the small elements and glue them together to form a circle. Secure with clamps, dry and remove the clamps.
Creating the first four tiers
To do this, the craft must be securely fixed, add the first row of glued models on top of the zero one, as described in the diagram for folding an owl from paper: 1st: consists of 10 pieces of white and 18 blue elements.
The next row (second) includes 9 units of white and 19 units of blue. For the 3rd, there are enough white ones - 10 pieces, blue ones - 19, for the 4th one: white ones - 9, blue ones - 19. After this, the structure is slightly compressed towards the bottom.
Assembling the next 10 rows
For the 5th row, use white modules - 8 units, blue - 20. For the 6th: white - 7, blue - 21, and for the 7th: white - 6, blue - 22. To create the 8th row you need only blue modules in the amount of 28 pieces. The 9th row consists of 28 blue modules laid on the back; this row is the owl's neck.
Next 5 rows (from 10 to 15) contain only blue elements in the amount of 28 units, which are stacked face up. The design of the owl's body and head is ready.
Creating a crest and tail
The crest is constructed as follows: take a couple of blue modules and insert another one on top of them, fix it and add another one to these two from below.
Attach the resulting crest to the owl's head with glue. The tail consists of 2 blue modules, on top of which another one is worn. It is attached to the lower part of the owl's body. You can fluff it up a little.
Beak and wings
Make a yellow module and attach it to the right place on the owl's head, this is the beak. Wings can be drawn or copied from the Internet, cut out and attached to the owl’s body with glue.
Eyes
To do this, you need to cut out two ovals from white paper and two pupils from black paper. Glue the pupils to the white ovals and fix them on the owl’s face.
The three-dimensional craft in the shape of an owl is ready. We hope our instructions helped you, and now you know how to make an origami owl correctly.
Owl decoration made of pine cones and felt
This master class with step-by-step photos clearly shows how to make an owl from a pine cone and felt. And although we are making crafts to decorate the Christmas tree for the holidays, they can be used all year round. These cute little owls are made in three formats. Experiment and try to further combine head design options, creating your own unique birds. Felt is an excellent material to work with; it is pleasant to the touch, easy to cut and safe for children. The guide used color combinations of blue, green, grey, white, yellow and brown. Your choice is unlimited. Use these colors or take existing ones. We think this craft is perfect for kids and adults! To implement the project, use the power of your imagination.
The process is not at all complicated. Save and print the pattern provided below or draw a template yourself. Try repeating all the steps with your children. We are sure that this process will bring a lot of pleasure, and the result will be cute birds.
Still haven't decided on a craft? Then look at our selection of photographs on this topic. We have collected photographs of different levels of complexity from children's to professional ones. Perhaps you will like some of them and want to repeat them.
Large owl made of fir and pine cones
Watch a video from the master about a large heavy owl made from a huge number of spruce and pine cones.
As you can see, thanks to the detailed master class, it’s not difficult to repeat someone else’s experience. The necessary materials are easy to find in modern craft stores. If something is not clear to you, do not hesitate and leave a comment with a question that interests you. We hope that the article was useful. We wish you beautiful crafts!
An owl made from pine cones is always a win-win option for crafts made from natural materials dedicated to autumn events. The owl looks catchy and presentable, causing affection in everyone around him, and especially in children.


