Hi guys! In this material we will talk about how to make a paper airplane for 100 meters of flight . Generally speaking, almost any aircraft can fly quite far - it all depends on the altitude from which it was launched. The design features of paper airplanes affect their ability to glide. So an airplane that can glide for a long time will fly for a very long time and far from a height, for example, the 16th floor. The wind will additionally help speed up and prolong the flight of such a paper craft. Let's start our rating of the farthest flying aircraft .
DIY aquarium made of paper and cardboard: master class
If a child does not have his own pets, then to entertain him, you can try to make an interesting and beautiful aquarium out of cardboard.
For the craft you will need:
- Large cardboard box with lid;
- Fishing line or thread;
- Blue fabric;
- Paints of blue shades;
- Colored paper;
- PVA glue;
- Fish from any materials and other marine life;
- Shells, stones and sand for decoration.
Master class on performing the work:
- The box is cut on three sides, so that the back wall, top and bottom remain.
- The surface of the back wall is painted in blue tones and decorated to resemble the depth of water.
- Glue is applied to the bottom, and shells, pebbles and sand are glued onto it.
- Several parallel cuts are made in the upper part. The fish is attached to them using threads. At the top, a fishing line or thread must be tied to buttons or toothpicks. Now the inhabitants of the aquarium can be moved.
The bottom of the aquarium can be strewn with large crystals of sea salt. They will look extremely impressive, and inhaling their vapors is good for health.
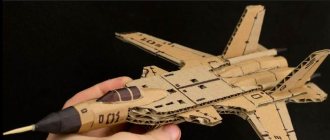
Cardboard airplane
You will need: colored cardboard, a simple pencil, scissors, an empty matchbox, a ruler, PVA glue.
Master Class
- Cut a strip 21 cm long and 1.5 cm wide from colored cardboard.
- Cut 2 identical strips of cardboard measuring 17x4 cm, then round the corners.
- Fold the long strip in half and glue it exactly in the center of the matchbox.
- Apply glue to the top and bottom of the box and immediately glue the wings.
- Cut out the remaining parts: 2 strips measuring 5x1.5 cm; propeller and chassis.
- Cut and round the corners of one of the strips.
- Glue 2 strips to form the tail of the plane.
- Glue the propeller and landing gear to the plane.
An airplane made of cardboard and a matchbox is ready! I recommend watching this video!
How to make a paper airplane - step-by-step instructions
To ensure that the assembled model holds its shape well and does not fall apart when touched, you need to adopt a few tips:
- It is optimal to use small sheets with a density of 100 g/m².
- During work, you must strictly follow the instructions, iron the bends well and fold the material according to the pattern.
- To launch a paper airplane, it is important that all parts are symmetrical. Especially for balance, you need to pay attention to the nose and tail.
Simple airplane
When teaching aerogamy to children, it is better to start with mastering simple models. The method for making a classic layout is as follows:
- Prepare a landscape sheet. Turn it towards you with the short side.
- Fold the sheet in half and mark the middle of the sheet. There is no need to smooth out the fold.
- Unfold the paper and fold the edges so that the corners touch the marked center line.
- Grab the top of the sheet so that the fold is where the two folded corners meet.
- Fold the top left corner in the same way. Repeat the same action with the upper right corner.
- A triangle should have formed, bend it upward.
- Fold the model in half. Form the wings.
Airplane
This model is almost no different in assembly method from the previous version, the only difference being the blunt nose. To assemble the airplane, follow these instructions:
- With a piece of construction paper, do the first 4 steps from the instructions above.
- Bend the upper left and right corners so that a straight line 0.8-1.5 cm long remains in the center.
- Secure the part using the lower triangle.
- Turn the model out along the center fold.
- Straighten all the parts, set the desired wing angle.
Paraglider
Thanks to its wide wings, this model can soar beautifully in the air. To make an airplane from a sheet of paper, you need to follow the tips:
- Bend and unfold the rectangular sheet lengthwise as always.
- Measure about ¼ of the way from the top and fold toward the center.
- Bend both corners inward so that their noses do not extend beyond the intended line.
- Turn the model over and fold the folded half over itself.
- Fold and fold the small corners in the center.
- Fold the model along the central fold, unfold the nose and form the wings.
small plane
The dimensions of this model are small, so be prepared to do some painstaking work. How to make a paper airplane:
- Take any sheet of paper measuring 20*20 cm.
- Fold in half, press the fold.
- Fold in half again to form a square. Mark the center.
- Fold one half of the piece of paper onto ¼ of the sheet and make a mark.
- Bend the sheet inward from the ¼ mark to the top edge to form a triangle. Press down the edge.
- Turn the edge out so that a small triangle forms on top.
- Turn the sheet over and bend the other side of the triangle inward.
- Bend the wide end towards the pocket, not reaching the edge a few millimeters.
- Do the same with the other side.
- Place the fingers of one hand under the fuselage and hold the nose of the plane with the other. Lift the paper slightly with your hands.
- Fold the corner into the pocket. Repeat the previous two steps on the other side of the sheet.
- Fold the side of the large pocket up. Do the same on the other side.
- Open the model, bend its front edge inward.
- Turn the workpiece over and press the front part, using the corners as a guide.
- Fold the plane in half, go along the folds.
- Fold one side down along a line that is parallel to the center fold.
- Do the same on the other side.
- Fold the edge of the wing up for better aerodynamics. Straighten the model with your hands.
Big plane
This model can be used to decorate a child's room. To fold the liner, prepare cardboard, glue, scissors, a matchbox and follow the instructions:
- Cut a long strip of cardboard, 2cm wide. Fold it in half.
- Using glue, fix the edges in the center of the matchbox at the top and bottom.
- Cut two strips of cardboard 4 cm wide. Round the edges.
- Glue it to the matchbox on the sides.
- Cut a thin strip of cardboard and fold it in half.
- Fold the edges of the strip up, making a 1 cm indent from the edge.
- Glue the blank to the tail.
Square plane
Many people are used to seeing flying machines with a pointed nose, but not all models can look like that. Try folding a paper airplane differently:
- Turn the sheet of paper with the wide side facing you. Fold in half.
- Turn the sheet over to the other side, with the narrow side facing you. Fold in half.
- Unfold the sheet to the other side. Fold the edge toward the center of the fold.
- Fold the corners on both sides.
- Turn the sheet over so the folded side is facing you. Fold the edge up to the center.
- Fold the plane along the center perpendicular line.
- Fold the folded edge over. Open the pocket, holding the center with your fingers.
- Unfold your pocket. Fold the wings to the triangle marked in the center.
Volumetric airplane
After you have mastered simple patterns, you need to learn to understand more complex patterns. Below are step-by-step instructions on how to assemble a three-dimensional flying plane:
- Bend the sheet lengthwise and unfold it.
- Fold the paper in half. From the center, fold the edges down, and then unfold half.
- Unfold the sides, tuck each flap inward.
- Bend some of the wings back.
- Bend the wings from the bottom a short distance.
- Press the fold lines with your fingers. Bend the resulting lines parallel to the folds of the wings.
Children's plane
You will need: cocktail tube, colored paper, scissors, tape with a pattern.
Master Class
- Cut 2 strips of colored paper.
- Shorten one of the strips slightly.
- Connect the ends of each strip and secure with tape. You should have 2 circles.
- Attach the circles with tape on different sides of the cocktail straw as shown in the image.
- Send the structure into flight.
A children's airplane made from paper and a cocktail tube is ready!
Video instructions for making an airplane with your own hands
This version of a flying car is quite simple to manufacture; even a child can handle the technology if he is diligent enough. The advantage of this model is its flight range - with it you can safely organize competitions with very real chances of winning.
To complete the craft you need:
- We take a sheet of A4 paper, fold it in half along the long side, unfold it, bend one corner, unfold it again, bend the other corner, so we get the desired edges.
- Now we wrap the triangle towards the center and to the side, then the second, obtaining a complex figure of three-dimensional triangles.
- We bend the free edges towards the center.
- We bend the small triangles, then bend the outer edge of the large triangle to the side, and do the same with the other edge.
- We bend the inner triangle, mark with a ruler in the center from the top point 5.5 cm and 0.5 from the edge, make a fold along the line - this is the future wing of the aircraft, repeat with the opposite side.
- We lay the tail of the plane, to do this we fold the bottom corner to the edge of the paper.
- We bend the wing, unfold the outer part, turn the center line outward, repeat with a symmetrical edge.
- We return the wings to their place.
- At a distance of 3.5 cm, make a point in the center, bend the nose down along it, and unfold the craft in half.
- Mark a 5 cm point at the bottom, bend the wings along the line, repeat with the other wing.
- We straighten the nose, using our fingers to place folds along the intended lines so that the wings unfold beautifully.
- Along the indicated line, we bend the tail of the plane and bend it inward, using scissors we cut a triangle along the resulting lines.
- We straighten everything with our fingers and fix the center with a glue stick.
Of course, such work requires attention and fine work, but if everything is done correctly, we will get a car with an ideal flight path. And the last secret - for extra strength it is better to use paper from a glossy magazine.
A banal airplane, of which everyone at school has remade several dozen, can surprise us with its diversity. Origami, glued, cut out according to a template, there are so many homemade flying machines! Children will like this craft, allowing them to watch the flight of a launched craft and organize competitions, and it will also come in handy when congratulating our beloved men on February 23, if you think through the design and design of such an aircraft. Good luck!
A classic version of the traditional paper airplane
You will need: a minute of time, a sheet of A4 paper
- Create a winged car in 6 steps, free and easy
Operating procedure
- Fold the rectangle neatly in the middle, smooth out the fold and straighten it again. The center of the sheet is fixed.
- Fold the left and right edges of the paper towards the resulting center. Use your thumb to press the folds into place.
- Bend the formed corner, orienting the apex to the center.
- Repeat step 2, but the sides of both corners should not tend to the middle of the sheet, they should go as if obliquely, forming a blunt edge.
- Bend the peeking corner well; it must hold the folded corners.
- Fold the airplane model in half, forming the crisp sides of the wings. Ready to launch!
We launch the airplane. On this windy day, we specify the direction: North, west, south, east.
Folding diagram of a simple paper airplane
How to make a military plane out of paper
Boys who are interested in war games, shooting games and armored vehicles will love the idea of creating a collection of military aircraft at home. There are a lot of models of such aircraft. You can fold a Fighter, Bomber, IL-2, Messerschmitt or other equipment. To make such toys look colorful and be as similar to the original as possible, it is recommended to make them from colored paper.
Fighter
Options for making such paper toys can be found on the Internet, or you can make a fighter out of paper according to this scheme:
- Take a rectangular sheet. Fold in half along the wide part.
- Bend two corners towards you.
- Bend the corners diagonally again, starting the movement of the hand from the sharp nose.
- Fold the product crosswise so that the sharp part is in the center of the opposite side.
- Turn the paper over and fold the top edges down.
- Turn the resulting corner towards yourself.
- Bend the figure in half. Shape the wings and flaps of the airplane.
Bomb carrier
This beautiful model is a little more difficult to create, but the result is worth the time spent. To make everything work, follow these tips:
- Fold the top of the sheet into a double triangle.
- By analogy, bend the left corner, aligning the top of the sheet with the right side.
- Make a fold of paper that will pass through the intersection point of all the resulting lines.
- Fold the side triangles inward along it.
- Mark a center line at the bottom of the paper.
- Draw a line that is parallel to the base of the triangle.
- Turn the paper over to the other side.
- Fold the corner towards you.
- Turn the layout over again and fold two corners up, first folding the top in half.
- Turn the figure over and bend the corner.
- Fold the right and left edge that is inside the layout.
- Bend the corner away from you, fold the plane along the central fold.
- Bring the edges inward, fold the shape in half, and then unfold it towards you.
Long-haul aircraft
This model can cover any distance. It has good aerodynamics, is well balanced and weighs little. A long-distance aircraft is made like this:
- Make marks in the center of the sheet and bend the upper corners.
- Fold the sheet in half, forming a roof with sharp corners.
- The edges of the future wings are folded inward to sharpen the nose even more.
- The layout is turned face down, then the back is folded vertically. without touching the bottom corners.
- Bend the wing so that it covers the entire length of the workpiece.
- Set the wings to the desired angle of inclination.