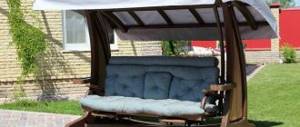
Assembling a playpen for a child with your own hands from wooden beams and fiberboard sheets
To make your own playpen for a child from these materials, you need to acquire the following:
1. Wooden blocks with a section of 20x30 mm and 30x30 mm.
2. Fiberboard sheets 5 mm thick.
4. Synthetic winterizer or foam rubber.
7. Furniture stapler, staples.
The dimensions of the future structure are strictly individual, as they depend on the availability of free space in the house and the activity of the child. The workflow will be as follows:
1. Corner supports are made from bars with a cross-section of 3x3 cm, the height of which is at least 80 cm.
2. Lateral horizontal connections will be made from bars with a cross-section of 2x3 cm.
3. The edges of the side elements are joined perpendicular to each other. A support is installed in the inner corner formed by them. The connection is made with self-tapping screws.
4. The length of the self-tapping screws should not exceed the thickness of two bars, so that the child does not subsequently get scratched on the protruding tip.
5. Horizontal segments are mounted along the upper and lower edges of the side supports.
6. The assembled frame is sheathed on the outside with fiberboard sheets. Installation is also done using self-tapping screws.
7. On the inside, the walls of the fiberboard frame are carefully treated with glue. Synthetic padding or foam rubber is laid on the treated surface.
8. Fabric is secured over the soft material. Stretching is done using a furniture stapler. In places where staples are attached, the material should be folded several times.
Possible ideas for a children's room for a girl and a boy, what should you pay attention to when decorating the interior?
When can you use the playpen?
If desired, the playpen can be used almost from birth, if it is intended for such a young age and has a hard bottom that will provide support for a fragile spine. But such an item will become especially useful or even necessary when the baby learns to roll over and tries to get up. The walls will help prevent falls and will be used as support, thus helping to master walking skills.
As for the age up to which the playpen can be used, everything is purely individual. As practice shows, this accessory becomes unnecessary when the baby begins to walk well, sometimes earlier. But some children enjoy spending time in the playpen even at one and a half years old, especially if the mother offers new toys and the child himself is calm.
The assembly of the structure proceeds as follows:
1. Pipes are cut into segments of the desired length. The presented design is assembled from four sidewalls. To assemble the two sides, pipe sections and corner fittings were used. To assemble the two longer sides, pipe sections, angles and tees were used.
2. The elongated sides must be reinforced in the middle with vertical posts (connected via tees) for greater stability of the structure.
3. To make the podium, padding polyester is glued onto a sheet of plywood, after which the latter is covered with either fabric or oilcloth. The edges of the protective material are folded from below and secured with staples.
4. The clamps (clips) are screwed with self-tapping screws to the edges of the podium. The spacing between fasteners is at least 50 cm.
5. The sides are installed on the edges of the podium and fixed with clips.
6. The mesh, made by weaving fishing nets, is stretched over the sides. With its help, the sidewalls in the corners of the structure are pulled together.
Installation of a barrier from a standard crib
Any parent can assemble such a playpen for a child with their own hands. To do this, you will only need to purchase the following materials:
1. A budget crib with a simple design.
2. Metal corners.
3. Wooden beam 30x30 cm.
5. Furniture hinges for doors.
The peculiarity of this option is that it is stationary. A free corner of the room, or even part of it, is allocated for its installation. The work is carried out in the following order:
1. In the part of the room reserved for the fenced area, a beam is mounted along the edge of this area.
2. Using metal corners, the side sides of the crib are mounted perpendicular to the walls opposite to each other. The lower edge of the sidewalls is screwed to a beam fixed to the floor.
3. Door hinges are attached to one of the sidewalls. The head of the crib is also mounted on the hinges, which forms a closing enclosure door.
4. A latch is fixed to the door, the loop of which is secured to the second side panel against the opposite wall.
In a fenced area, you can mount a podium, discussed in the previous design option, or cover the floor with carpet, which is less practical, or use a floor puzzle rug.
What is a railway playpen for children on a train?
This device is reminiscent in appearance and functionality of a regular, already familiar playpen . The main difference between the train playpen is its soft floor and the absence of a hard rim on top. That is, it is made of fabric and mesh, and with the help of carabiners and slings it is attached to the top shelf of any train. Therefore, for your trip, you can buy or sew a playpen yourself so that your movements do not cause panic and horror, but proceed calmly. For a child, for example, in the summer heat it is also difficult to be held in your arms all the time. He will be uncomfortable and very hot with you, so the playpen on the train will be a good helper on your journey.
Children's playpens. Typical designs
There are many types of playpens for children. They are divided according to configuration:
Along the enclosing perimeter:
- Wooden fence. Preferred option. The material is environmentally friendly, strong, durable. Disadvantages: If it falls and hits a wooden grate, it can cause injury.
- Net. Lightweight, soft, smooths out impacts, softens falls. Disadvantages: the baby's fingers may get tangled in the cells.
- Game. It is used to develop the baby’s motor skills, as a temporary device for several hours. The industry produces these products in a variety of shapes, from modern and classic materials. The bottom of the arena is covered with rubberized fabric or raincoat fabric. Average cost from $67.
- Cot-playpen. They come in two types: wooden and mesh. Wooden ones are made stationary or folding, with a folding front wall, with the ability to adjust the height of the side. The playpen is selected taking into account the growing up of the child. In such a sleeping playpen, a child will sleep until he is 3-4 years old. The advantage of this type is the high stability of the structure. Disadvantage: the material is poorly processed with hygienic means. Average cost from $100.
- Screen. Placed depending on the area of the apartment and the preferences of the parents. The main functionality is temporary fencing. Convenient for creating safe movement of the baby around the apartment. Masks and protects the child from entering dangerous places: stairs, fireplaces, office equipment. Average price from $40.
- Inflatable. Has a seasonal purpose. Made from food grade plastic or rubber. Brightly colored, has bizarre shapes. Convenient for trips with a child to nature, the sea, or a summer cottage. The average cost is $20.
For small apartments, a classic crib fenced with round wooden rods is a rational playpen. The rigid design reliably holds the baby who is beginning to stand up and allows him to take his first steps around the perimeter.
size, materials, assembly procedure, fencing, video
When a child begins to crawl or walk, it is necessary to think about his safety. The ideal way to protect your baby from injury is a playpen. While mom and dad are busy with their own business, the baby will play comfortably. There are different types of such structures - many of them can be made with your own hands.
Contents of the material
Types and forms of playpens
Children's playpens differ:
- configuration;
- type of fencing;
- purpose.
There are several forms of such structures:
- rectangular;
- polygonal;
- square.
Another factor when choosing a playpen is the type of fencing. The structure can be:
- Mesh . In this design, a special mesh is stretched along all edges of the playpen, which protects the baby from falling;
- Lattice . Instead of a mesh, a lattice made of wooden rods is used. It is she who forbids the baby to go beyond his boundaries.
By purpose they can be classified as:
- Gaming . This type is used to develop the child’s musculoskeletal skills and to improve his orientation in space. Rubberized fabric is used to make the bottom. When falling on it, the child will not hit.
- Inflatable . It is made from rubber or plastic. You can take this playpen with you outdoors.
- Temporary . It looks like a portable screen that simply creates a small space for the baby to move around.
- Playpen-cot . This design is used not only as a playpen, but also as a crib in which a child can sleep. The sides can be adjusted in height, which allows it to be used for older children.
Choosing a playpen (video)
How to make a classic playpen
To make a playpen with your own hands, you first need to determine the dimensions of the future structure. You cannot make it too small, as then the child’s musculoskeletal reflexes will develop with difficulty.
In order to assemble a classic wooden playpen, you need to use:
- wooden rods;
- bars;
- drill;
- wood saw;
- tape measure;
- sandpaper;
- varnish and primer;
- latch or hook;
- metal loops.
During work, special attention should be paid to the height of this structure. After a year, the dimensions of the crib should be as follows: the height of the bars is up to 100 mm, and the distance between the bars is 50–70 mm. heavy wood species for the structure . This will make it more stable. This will allow you to assemble the playpen for children from 1 to 3 years old.
Construction takes place in several stages:
- First, mark the rods and bars.
- The excess parts are sawed off.
- Non-through holes are made on the horizontal slats through which the rods will be threaded.
- The workpieces are polished and roughness is removed.
- The wooden parts are primed and varnished.
- After the parts have dried, insert the upper and lower parts.
- The side parts are fastened with bolts so that the playpen can be rearranged at any time.
- The walls are assembled in pairs using pendulum loops.
- A safety hook is installed.
Gallery: types of playpens (25 photos)
Children's playpen boat
If the apartment is small, then a baby box crib in the shape of a boat would be the ideal solution. The structure is distinguished by its compact design, mobility and the presence of a secure fence.
How to make a playpen without bars
The soft version, which will absorb a child's fall, can be assembled in a few hours. The main thing is to prepare the necessary tools and materials in advance.
To make it you will need:
- net;
- hacksaw;
- plexiglass tube;
- scissors;
- sewing machine;
- roulette;
- crayons;
- threads
The dimensions of the child restraint are selected according to the size of the apartment. First you need to buy a mesh. It should be selected according to several parameters:
- Calm color, preferably in a cream or beige shade. Too bright a color will irritate the lens.
- Average cell size. The baby will stick his arms and legs into a mesh that is too large. A very small one will make the baby feel lonely. The optimal size is 20–35 mm.
- The synthetic thread should have a medium thickness. You need to choose a product that is not twisted, solid, without inserts of fishing line or metal, so as not to cut the baby’s skin.
Stages of manufacturing the structure:
- Segments are made from the pipe using a hacksaw.
- A mesh pattern is being prepared with a reserve for the drawstring through which the pipes will be threaded.
- The pattern is transferred to the grid, outlined with chalk and cut out.
- The drawstrings are wrapped and sewn with threads to match the material.
- The pipes are inserted, the material is stretched and hemmed. The first wall is ready.
- Then they move on to assembling the remaining three sides, and assembling the limiter.
- To make joints strong and safe, they need to be wrapped in soft material. A removable pad is suitable for this.
Soft fencing
The wooden playpen for children is durable and hard , but the baby can hit himself. It's easy to make it soft. Instead of wooden inserts, you need to stretch the mesh using plastic tubes. The main thing is to make the base heavier. Then the baby will not be able to turn it over when he wants to lean on his elbow.
Wooden playpens up to 3 years of age allow you not to worry about your child; it will be a safe place where the baby develops motor skills and relaxes. Curious children always want to sneak away somewhere. To prevent this from happening, parents need to use a space limiter until they are 3 years old. This will help protect children from injury. It is quite possible to assemble a structure for a child yourself. After all, this design is no worse, and even better, than the purchased one. And material costs will be significantly lower.
DIY playpen (video)
domokode.ru
How to assemble a playpen with folding sections
Start assembly from the side walls. In our case, there are 6 of them.
- The ends of the bars for the crossbars are trimmed to ensure the same length. The extra centimeters are cut off.
- Sandpaper No. 1 is taken and used to sand the bars.
- The smoothness is checked on all sides by hand.
- Take sandpaper No. 0. Each block is cleaned to perfect smoothness.
- The same operations are performed with bars for gratings.
- Select a bar for the bottom crossbar of the fixing posts. Mark the installation locations of the rack and the cylindrical bars of the lattice.
- Markings are made on the upper crossbars, taking into account the vertical alignment of the parts.
- Using a drill, through holes are drilled on both crossbars for connecting bolts.
- Drill out a socket for the bars of the bars. The depth of the hole is up to the middle of the bar. The distance of the rods is selected up to 100 mm. Precaution: Your baby may stick his head through wide openings and cause injury to himself. The ideal gap parameter, tested by more than one generation of parents and children, is 70 mm. A lattice that is too dense is also not good. The baby will stick an arm or leg in and will not be able to pull it back out.
Tip: The required depth of the socket is done as follows: a 7 mm shorter strip is attached to the drill, parallel to the drill. 7 mm is the size of half the thickness of the crossbar. The drill, having passed a depth of 7 mm, will rest against the bar with the bar.
- The walls of the recesses on the bottom crossbar are coated with PVA glue.
- The ends of the bars are inserted into the lower sockets. Fixed until the glue sets.
- The recesses of the top bar are coated. Connected to the ends of the beams.
- The assembled six sections are placed in a warm, ventilated place to dry.
- Assembling the fixing posts is an important work process: the posts are responsible for holding the structure in a vertical position and in a horizontal position when folded. To strengthen and reinforce the rack under increased load, the glued glazing beads are reinforced with self-tapping screws.
The finished structure is assembled:
- Through holes for large bars are combined with through holes for small bars. The connection is made with bolts.
- All wooden parts are coated with water-based varnish. The baby will want to taste the upper parts of the playpen, so the covering is selected taking into account hygiene, water resistance and health safety.
According to the proposed instructions, a large playpen is made. It can accommodate 2-3 kids at the same time.
Advice: do not allow large toys into the spacious playpen. An inventive child will place a toy on the bottom, stand on it and risk falling out.
How to make a playpen of a classic design
1. The optimal maximum size of the crib is selected, taking into account the dimensions of the room. The area of the playpen is important for the development of motor reflexes and skills in the child. It is better to move the furniture and free up an extra part of the room for a crib than to save money and build an inconvenient narrow or short bed. 2. Prepare materials:
- bars made of hard wood: birch, maple, alder. Diameter 30 mm;
- bars for grating diameter 5-10 mm;
- electric drill;
- wood hacksaw;
- construction tape;
- water-based wood primer;
- sandpaper No. 0 and No. 1;
- varnish, water-based paint;
- double-action pendulum hinges with a wide shelf;
- latch.