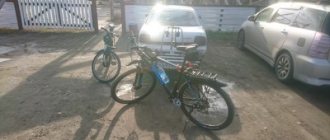
Three years ago I bought a bike trailer that I used to take my son out for a walk. In principle, the trailer suited me with the exception of:
- The trailer is quite low. And although there is a small flag on it, which makes it more visible, drivers in traffic may not see it.
- Since the child is one meter away from me, I can’t see what he’s doing. You have to constantly turn your head, which is not very good while driving.
During a trip to Europe, I saw a large number of cargo bikes on the streets that were used to transport children. At first I thought about buying a cargo bike. But the price turned out to be too high and I decided to assemble the tricycle myself. Since this was my first self-assembled bicycle, during the assembly of the trike many situations arose that had to be solved by trial and error. But in the end I managed to make a cargo trike with my own hands. After searching the internet for a trike model to go with, I settled on the Christiania Trike. So, let's try to make a cargo tricycle ourselves!
How to make a bicycle with a differential?
Overall, it must be said that a 3-wheeler bike for adults with a differential is more responsive, controlled and maneuverable, as well as stable on turns and rough roads. By installing a bridge, space appears for a trunk or bike bag in which you can transport loads weighing several kilograms.
Oddly enough, assembling a tricycle for adults with your own hands with a differential is even easier than without it.
First of all, you need to disassemble the rear end, remove the wheel, chain and disconnect the brakes. The assembled factory bridge is fixed to the frame with clamps.
The axle of the bridge is inserted into the mounting points of the rear wheel. After installing the bridge, it is necessary to achieve an angle of 90˚ relative to the frame. The bicycle is placed on a smooth surface, a “level” is hung on the handlebar - a weight on a string. The thread should stretch strictly parallel to the frame, without deviating. After such a check, the bridge fastenings are tightened again with clamps.
A new chain will also need to be installed. The structure has lengthened, and the chain should become longer - so we add additional links.
The final stage of assembly is adjusting the rear gears. Making a tricycle with your own hands is not an easy and expensive task.
And finally, here are some general tips for choosing a bike:
- Choose a high-quality and reliable model, because your safety depends on it!
- It should be stable and comfortable.
- It must have a bell and brakes. It would be a good idea to install reflective elements.
- Pay attention to the dimensions - whether it fits into the elevator and onto the landing, how convenient it is to transport it in a car. Is it possible to fold it compactly without extra labor?
Finally, it doesn’t matter whether you assemble an adult tricycle with your own hands or buy it in a store, the main thing is the reliability and safety of the chosen model.
How to handle assembling a bicycle yourself
Bicycle with differential
Why do you need a differential?
Experts insist that the three-wheeled bicycle includes a do-it-yourself differential for a bicycle. This will solve several problems at once:
- The tricycle becomes as controllable and comfortable as possible.
- It doesn't skid to the sides when turning.
- An area is formed for a trunk or bike bag, where you can put things or hand luggage weighing up to 3–4 kg.
Some believe that a DIY bicycle differential complicates the design, so the bridge is bypassed. Other craftsmen note that such a tricycle is even easier to assemble than without a differential.
Step-by-step instruction
Experts tell us how to make a tricycle at home quickly and easily:
- Remove the rear part from the two-wheeled iron horse, and then disconnect the wheel, chain and brake pads.
- Attach the differential, which was assembled at the factory, to the frame using clamps.
- The axle of the bridge is placed onto the fixing section of the wheel located at the rear of the vehicle. When the bridge is secured in place, pay attention to the angle formed when looking at the frame, ideally it should be 90 degrees.
- Place the bike on a flat surface and place a so-called level on the handlebar, which is a weight that is held on by a string. The thread should be pulled parallel to the frame, without bending to the side. Also inspect the rear and front wheels - are they parallel?
- When the check is completed, tighten the bridge clamps tightly with clamps.
- Now you need to install a new chain. Why do this, because there is an old one? The fact is that the design of the bicycle has become longer, so the appearance of additional links is a prerequisite. The bike won't run without a new chain. You can make one long chain from two standard ones. If there are too many links, grind off the rivet and mount a lock on this area, or alternatively, build a completely new rivet.
- Continuing with the instructions on how to make a tricycle with your own hands, experts focus on the final stage - adjusting the rear gears.
- If you need to install new brakes, it is better to go with disc ones.
If you want your homemade product to move at high speed, then be prepared to build a homemade differential for a bicycle, consisting of 2 disc-type hubs, brake discs, calipers and a brake lever, which is placed on the handlebars.
Bikes for drifting and their differences
The design of drift bikes consists of three wheels and a low seat.
Although it is similar to the design of a bicycle, which everyone is familiar with from childhood, riding such a bicycle is very dangerous and requires a lot of experience. The main differences between these bicycles can be identified:
- Unusual design;
- The presence of three wheels;
- Low seat position;
- Use only for drifting - controlled skidding.
Design Features
The main feature of this vehicle is its uniqueness.
It is very often invented and made by amateurs themselves. Features of drift bikes:
- The front wheel is small. Unlike regular bicycles, this product has a medium front wheel. Its diameter is approximately 20 inches. It is the same as on BMX trial models;
- The rear wheels are six times smaller than the front. The size of their width can exceed the diameter at most twice. The important thing is that they are made of hard and smooth material. It is worth considering that the rear rollers do not have rubber tires;
- Low seat. These bikes have a very low seat position. The rider can adjust and set the most comfortable position for the seat. In a homemade bicycle, you can use a regular car tire as a seat;
- As a support for the legs, you can use a special support, which is installed on the front fork near the axis of the front wheel. This support can also be used to control the bicycle while moving.
No pedals needed
Few people have seen a tricycle on the road, so many have no idea what it looks like, much less how it moves.
It is worth noting that pedals on this vehicle are absolutely unnecessary and are an unnecessary design element. The whole point of drifting is to go down hills. And for lifting, it is best to use the assistance of a car. To do this, you simply need to hook the bike using a cable to the back of the car. If you pedal on a drift trike, you can accelerate to a maximum of 25 km/h. This is a very low speed.
In order to perform exciting stunts on a three-wheeled trike, you need to accelerate to 60 km/h. Many cyclists on a special drift track on this bike make peculiar movements in the form of snakes, or fall on their side. It's certainly dangerous, but it's worth it.
Drift cars with engine
Of course, drifting bikes are expensive and not everyone can afford them.
Therefore, there are very few of them, since they try to make them themselves. A drifting machine called the Big Wheel Drift Trike is manufactured by an American company called SFD Industries. This company mainly specializes in the production of spare parts for bicycles.
Design features of the drift machine:
- Engine. Compact gasoline engine. Its power is 6.5 hp;
- Front wheel. The front wheel size is 26 inches;
- Rear wheels. They are very small. The diameter of each wheel is 3.5 inches. In addition, they are dressed in special replaceable plastic tubes. This is necessary so that the rollers do not wear out when sliding.
It is also worth noting that the cost is very high. The average price of a trike with engine can reach up to $2,000. If you pay an additional $200, you can purchase a trike with a more powerful motor. And with an additional payment of another $200, the entire throttle system will be replaced.
The relation of law to whim
In Russian legislation, a trike for drifting refers to ordinary bicycles. The traffic rules do not differentiate between tricycles and two-wheelers. Therefore, this vehicle does not need to be registered. As for driving licenses, they are also not needed.
However, this is a very dangerous activity and can often lead to serious problems. Many extreme sports enthusiasts, riding these bicycles, very often ride onto the roadway, thereby creating problems for traffic. Sometimes these races can lead to serious traffic accidents. While professional athletes choose closed asphalt tracks for drifting on these bikes.
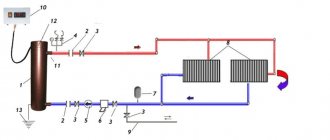
Velomobile differential
That is the satellite axis, on the other side it is the same.
Added after 1 minute 33 seconds: But the drive is not clear.
From amphibian. It seems to be a differential too.
Added after 1 hour 7 minutes 19 seconds: Another overtaking one.
Post #1. All difi cars. type - on 2 conical satellites + 2 conical. gears on shafts. The cases are different.
Post #6. Overrunning differentials: -1st, and 4th for the Z block, 2nd for the Z cassette, 3rd for the star.
Post No. 13. Overrunning differentials: -1st double freewheels; 2nd double freewheels - one in block Z; the second is through the spacer between the rotors; 3rd overrunning differential through 2 freewheels in a common housing (classic). 4th is not clear; similar, but collapsible.
Added after 2 minutes 42 seconds: Z-star or block of stars (mine).
Added after 21 minutes 15 seconds:
Overrunning differentials - “Poltava project”.
Added after 27 minutes 33 seconds: Overrunning differential on freewheels: one in the Z block, the second is screwed into the welded (cut) Z with an M43x1 thread, and the skirt in it is cut off with a thread. Auto
r Vladimir Aksentievich.
Added after 6 minutes 30 seconds: Errors:
4th file-repeat. 6th file, author Vladimir Aksentievich.
Mazur4ak wrote: 6th file, author Vladimir Aksentievich.
Lovely! Wouldn't it hurt to take a photo of me - how to center the star nut? Both ratchets can be slid onto the 22mm pipe. A section of the steering wheel is shown. Red - tack areas
Quote: “Both ratchets can be slid onto a 22mm pipe.” We selected an F22 pipe with +, which came from an old tubular cornice.
Now, all sorts of differentials are needed: 1. On the satellites, they have reverse (reverse). 2. Overtaking vehicles cannot have reverse gear.
Now we need industrial designs: on satellites like Shtrakin and Co. Overrunning-type "classic" with a common cassette housing (here, I noted). Well, the type that I showed is an amateur version. The disadvantage is welding. And the fur option. connections from Poltava are not disclosed. We are waiting for your suggestions for using any. option.
Added after 5 hours 35 minutes 48 seconds:
Doubt: ". 2nd for cassette Z. "(?). Need translation.
Added after 51 minutes 51 seconds:
There is a block of stars with rivets. A flange is flanged on the largest sprocket, and an F43x1 thread is cut into it, into which the left freewheel is screwed. The system differs in that the connection is made by introducing a flange. In amateur conditions, the flange is bolted to a large star with centering on the inner surface, or along the outer protruding flange of a conventional block.
Added after 56 minutes 19 seconds:
I found a sketch. There the skirts are cut off - M35x1 thread, the welding is crossed out. and the flange is designed. on the 6th star.
Added after 4 minutes 27 seconds: The minus system turned out to be non-separable, but it can be bolted on.
1. Commentary on the file. There is a photo of the disassembled overtaking. dif. The big star has 6 orig. holes. 2. In amateur conditions, as an option, the threaded flange is connected to the large star using a bayonet lock, WHICH has end radial bends that enter with their hooks into the holes of the large star and are tightened into the gap between the stars.
Added after 7 minutes 2 seconds: Later I will give a drawing of a connecting flange with a bayonet lock.
Vladimir, what is this? I understand the nuts and bolts. . I twisted the sprockets this way and that, but I can’t figure out how you fastened the two ratchets together.
And, if it’s not a secret, do Kuznets’ pullers produce rods? Or were the pipes welded? How did you connect?
Its axles are loaded, and spline pullers are welded to them. The differential rests with its protruding parts on the crankcase bearings. I forgot. how and what.
What is shown on my diff is a welded Z14 sprocket with an M43x1 thread, removed from the second freewheel. As an amateur option.
If someone wants to mass-produce the differential, then they can use worn sprockets. For example, Semiokhin uses them for souvenirs. In Poltava there is such an opportunity to produce samples without body kit.
A flange, the same as a sprocket, only without teeth. It can be stamped from a sheet of 2.2.2 mm, and screwed to the large star of the Z block with bolts. I will describe how to make a flange later. The bayonet is a type of castle nut, but also a flange.
Making a tricycle with a differential
The stable design of a tricycle is chosen not only by parents of small children, but also by people in old age, so more and more people are interested in how to make a tricycle without any help. The convenient design of the vehicle with three rims ensures the safety of the cyclist, prevents injury during sharp turns and minimizes the load on the back and legs.
Bicycle with three wheels
Another advantage is that the three-wheeled unit is comfortable to ride regardless of physical fitness, the low-mounted frame ensures a comfortable fit, and the high load capacity allows even obese people to engage in cycling.