Euwa tree
This stunning tree became popular due to the movie Avatar. It glows blue and has a magical atmosphere.
You will need beads of different shades of lilac and purple colors, which will need to be mixed.
Then simply string the beads onto the wire.
Make a wire frame for the tree. Fasten several wires together and wrap them around. Make the curves of the wood the way you like. Now we will begin to hang the trunk with falling branches.
Make a plaster stand for the tree by pouring liquid plaster into a bowl and removing the dried material along with the tree. The tree trunk also needs to be coated with gypsum mortar . Then paint the barrel and stand brown.
For greater effect, you can mount blue LEDs into the stand, and then you will have a real night light. The tree in the dark will glow with a soft, enchanting blue light.
What you need to do topiary for Teacher's Day
To make a beautiful autumn topiary, which is quite suitable for Teacher’s Day, you need to first prepare certain materials.
The most preferred option for coloring crafts is gouache.
What you need to have:
- Sticks for the trunk of the future tree;
- Artificial leaves of different colors;
- Artificial grass;
- Styrofoam;
- Colour pencils;
- Pot;
- Tree decorations;
- Wire or paper clips;
- Hot glue;
- Gypsum.
To create a topiary, ordinary pots for flowerpots are suitable.
Having prepared all the required materials and tools, you can proceed directly to making a beautiful and unusual tree.
Wisteria beads
Wisteria is a very beautiful tree with flowers flowing to the ground and having a gradient color. Check out our tutorial on beading wisteria.
You will need a lot of beads (transparent, pink, light pink, white, purple, green), wire, plaster.
First you need to make flower clusters. We start weaving with a purple loop like this.
Then we’ll make a few more loops at equal distances.
Then you need to alternate beads to create a gradient effect in the future. The lower ends will be dark, and towards the top they will become lighter.
Related article: Asian braid with knitting needles: master class on scarf and hat with video and diagrams
Then twist the two ends of the looped wire together and you will get one branch. Make several of these blanks; the more there are, the more magnificent your tree will be.
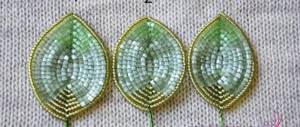
Now let's weave the leaves. Take green beads in two shades and weave in a similar way as you see below.
Connect the branches from the leaf with the branches on which the flowers grow and intertwine the resulting branches with each other. Reinforce the trunk with a layer of wire.
Make a plaster tree stand using any mold.
All you have to do is decorate the stand and your beautiful tree is ready.
Step-by-step instructions on how to make topiary with your own hands
- 1. Take a foam ball, the size of which will determine the diameter of our tree. They can be purchased inexpensively online. We will also need a small thickened branch, with smooth edges at both ends. It will act as a trunk.
- 2. Using a glue gun, glue the stick to the ball in the middle. Apply the hot solution to the foam, then attach a branch and fix it in this position for a while in your hands so that the structure hardens.
- 3. An example of what you should get is shown in our photograph. As you can see, everything resembles a child's lollipop.
- 4. Select the brightest and smoothest samples from physalis, leaving dry and broken ones aside.
- 5. Our task is to secure all the boxes of this plant to our structure. On the one hand, it seems that there is nothing complicated, but this must be done slowly and as carefully as possible.
- 6. Taking a glue gun, apply a dot of solution to the center of the ball, which will be parallel to the stick and place the physalis there. Then start surrounding with other boxes. If necessary, cut off their “tails”, but in theory they should not interfere, as they are easily crushed.
- 7. This way you should get a completely covered tree. If you notice and look at our photo, you will see that some of the buds are slightly crushed. This is done on purpose to prevent empty space. But don't be discouraged if you can't remove it completely. In subsequent steps, we will solve this problem.
- 8. Take a small stump, in which a hole must be drilled in advance equal to the diameter of the tree leg. Insert it there and check how firmly it fits. In principle, the tree has already acquired its desired appearance.
- 9. Add branches with berries around the entire perimeter of the topiary, thereby hiding any glimpses of the foam. Each box will be surrounded by greenery. We strongly recommend that you use artificial samples instead of real ones.
- 10. Place pre-prepared moss down, which will hide the fastening of the tree and give it an even more natural look.
- 11. Take a ribbon from any fabric in the color of the overall composition and tie it in the middle of the trunk. It will act as an additional decoration.
- 12. We will glue the same tape in the middle of the stump, and decorate the place where they are connected with two beautiful flowers. They must also be artificial. The topiary is ready and you can put it in the place that was prepared for it in advance.
In the photo there is a finished version - topiary from physalis
Pearl tree
A pearl tree is a wonderful wedding gift. You can make it lush and bohemian, or you can make it elegant and more modest. The choice is yours.
You will need pearl beads of different sizes and wire.
Take a large bead and thread it into the wire, tighten it.
Let's take two smaller beads and place them on the sides of the large one.
Next, at both ends of the wire you need to make loops from the smallest beads. You can weave a decorative leaf.
Be sure to intertwine the branch.
Make several of these branches and then intertwine three of them together into one large branch.
Wrap all branches with tape.
Take several wires and twist them together to make a tree trunk frame. Make a free-form frame and attach your branches to them. Wrap the trunk with masking tape and paint it. The tree is ready. You can decorate it with ribbons, bows and other elements.
If the tree is planned as a wedding gift, hang artificial wedding rings or dove figurines on it.
You can find many tutorials on weaving various trees. Winter and autumn trees, made in the appropriate colors, also look very beautiful. Look at the examples in the photo.
Related article: DIY shell painting: master class with photos
What's good about topiary?
The good thing about topiary is that, unlike ordinary plants, it does not wither and does not require watering or special daily care. In a sense, this is an excellent solution for those who live with pets. Many people know the genuine interest of cats in any pot with a flower. In this case, you do not risk anything, and the usual set of which any such thing consists will not be of interest to them.
Generally, topiary is easy to make. Despite the large number of complex models, more simplified options (like ours) also look great. At least none of the visitors to your home will say that the work was not done by a professional.
You can put this “tree” in your work, home, hallway, kitchen, and any other place that requires the energy of the plant. Even in this form.
Making a frame for topiary
We will make the base ball for the topiary from toilet paper, newspapers and threads. You can crumple the paper into a ball and wrap it with threads, giving the ball the shape of a ball, or you can do the same using the papier-mâché technique. You can use only one paper, or paste over a small balloon (this will be easier), wait for the structure to dry, deflate and remove the balloon through the hole.
The trunk is presented in the form of several branches intertwined together - two thicker branches and several thin poplar branches. Next, we connect the barrel to the ball and fix the joint with hot glue.
Next you need to prepare a gypsum solution. We dilute the powder with water, bring the gypsum solution to the consistency of thick sour cream and fill the pots with this mixture. We immerse the topiary trunk in it and hold it in an upright position for some time until the alabaster sets.
Pearl tree | Country of Masters
Last year my parents celebrated their 30th wedding anniversary. Pearl wedding. We have been looking for a gift related to pearls for a long time. Somehow I was surfing the Internet and came across a photo of a pearl tree. Then the idea came to try to weave a pearl tree. Unfortunately, I couldn’t find a master class on how to make it; I had to come up with it myself. I looked at the basics of weaving other trees and started creating. I bought beads and beads of different sizes. I remade the barrel several times. He didn’t want to get it from me the way I had planned. This is what happened in the end. After that I became interested in weaving trees
Unfortunately the background is not very good. We took photos the evening before the presentation.
Decorated with beads and shells. I brought shells from Crimea a long time ago. They lay in the box for a long time waiting in the wings.
stranamasterov.ru
Making sepals for roses
Cut out sepals from dark and light green napkins. To do this, we put several napkins together, fold them in half and cut out the sepals in the same way as children cut out snowflakes from paper. Cut off the middle. Please note that for each rose you need 1-2 of these sepals, so you need to prepare a lot of them.
We slightly curl the edges of the sepals according to the same principle as rose petals - this will give them clarity and naturalness.
Making roses from napkins
Let's start by creating roses. Take some napkins and cut off the folded edges. For work we need fifty to sixty napkins of the same color. The result should be approximately 200-240 squares.
Fold the napkin square in half and begin to twist the folded edge in the middle (to do this, it is better to slightly moisten your hands, otherwise it will not be so easy to twist the napkin).
Then we twist the corners on both sides
The result is a petal like this:
Let's make 6-7 petals in this way and one petal with a straight edge - this will be the core of the rose.
We roll this rectangular petal into a loose roll, place the remaining corner diagonally and grab it with our thumb, then wrap it in each subsequent petal in a similar way.
Make sure the rose petals are open. We secure the lower part of the flower with thread and cut it off almost at the base.
We make buds in the same way. We divide the remaining napkins into quarters, without folding them in half, we immediately curl them along the edges. One bud requires three to four petals and one core.
We twist the corners of the halves of the napkins in greenish shades, then twist them into a leaf. For topiary you need to make about 25 of these leaves.
We design one edge of a quarter of a green napkin in the form of cloves. We twist the bud into this quarter, forming a twig. We fix the structure with a drop of glue.
Next, you need to put the bud on the stem into the prepared leaf with a drop of glue, connect and twist them together.
Then we take another leaf with a drop of glue and twist one bud with a leaf and another bud without a leaf into it.
So we twist several stems together in a checkerboard pattern, we get a sprig of roses. We make a couple of such branches and as many more in a different color.
Decoration
We connect the sepals to the bases of the roses and immediately glue the flowers to the base ball using hot glue.
It is better to start forming the crown of the topiary from the bottom of the base and gradually rising to the top.
So, slowly, we cover the entire ball with roses, alternating the colors of the buds.
We place leaves and single buds in the gaps between the roses.
Additionally, as decoration, you can add inflorescences of small artificial flowers, and also place them here and there between the roses, this will add tenderness and completeness to the composition.