- >
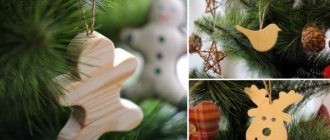
- Made from natural material
#4-5_years
#Instructions
#Natural_material
#Early development
Natural materials are diverse and the same craft can be made in different ways, or rather from different materials. Here is a horse made of corn, think about what else you can make it from.
Purpose of making crafts:
- Teach children to make a horse toy from various natural materials;
- continue to develop the ability to plan a sequence of actions;
- consolidate the skills of connecting craft parts using pointed branches;
- cultivate persistence in achieving goals.
Horses made from natural materials
Dear friends! I am pleased to present to you a master class of needlewomen from the already familiar folk arts and crafts club “Svetlitsa”.
Solar horse from talash
The master class was sent to me by Tatyana Efimenko:
Take talash - corn cob leaves, soak them in warm water for 1 hour (if they are very dry). Let the water drain and get to work.
We will also need thread and scissors.
We tear the leaves into small strips. Take a bunch and tie it on one side.
Next, we form the head - bandage the base of the skull.
We place a piece of talash under some of the fibers, this will be the mane.
We bandage it under the mane.
We fold the mane in half and divide it into small parts, tying each part with a thread using the counter-snake method.
We tie another bundle. We divide it into two parts, and also divide some of the fibers below the mane.
We insert the upper part of the second bundle between the pieces coming from the head, and wrap the two parts of the bundle in the opposite direction from the direction of the head - we tie it together.
From the two parts that remain from the head, we make legs, wrapping each part with thread using the counter-snake method.
We determine the length of the body and bandage it.
We divide the entire remainder of the fibers into three parts: two equal, and the third smaller.
From two equal ones we will get legs if we wrap them with thread like the front ones. And we’ll simply cut the tail and give it a shape by squeezing the fibers. We will tie a long thread to the muzzle - reins. This is such a funny horse:
You can make such a Sunny Slavic horse from linen fabric.
How to make a beautiful horse amulet from threads, watch in this video:
Linen horse
Linen horse - work for a competition from Lyudmila Evseeva .
Such horses can also be made from straw, thread, strips of fabric and any other material. Here's how it's done:
“Take a strand of flax, tie it in the middle, turn it around the knot and tie it, you get a spout.
Bend under the curve of the head and tie at the beginning of the neck.
Wrap down and then up the neck.
Next, divide into two parts and form legs, tuck inward. Bandage at the bottom, forming hooves.
We wrap the second strand around the front part above the legs and tie it. Having stretched out the body, we divide the strand into three parts: the tail and two hind legs. At the feet, we tuck the strands inward and tie the hooves. We tie the tail in the butt area.
Around the upper part of the neck we put on 7, 9, 12 strands for the mane. We tie each one in a knot near the neck.
You can leave them fluttering, or you can trim them.
I decorated the horse with an embroidered blanket.”
And now the whole trio is already rushing towards the New Year:
Video “Sunny horse - a talisman made of bast”:
See also how to make fabric horses with your own hands:
Did you like the product and want to order the same from the author? Write to us here.
In order not to forget the page address and share with friends, add to your social networks:
How to choose?
The horse will become your child's faithful friend for several years. The kid will spend many days playing games, imagining himself as a knight rushing to defeat a dragon, or a princess who decided to go on her own adventures. Considering that the baby will spend a lot of time with the toy, its choice must be approached very responsibly.
Important: before purchasing, make sure that the rocking horse you choose is suitable for your child. To make your choice easier, there are a number of criteria that should be followed:
Material
A wooden horse is the most stable because it is quite heavy. It will be difficult for a child to accidentally turn it over and fall, even if he swings very intensely on it. Wood is the most optimal material for playing at home. Summer is the best time to play outdoors. If you want the rocking horse to become your baby’s companion on the street - on the playground or in the country, it is better to choose plastic. This material is wear-resistant, does not fade under the sun, and is not afraid of water.
The plastic is easily and quickly washed off from street dirt - ordinary wet wipes are enough to wipe it.
A rubber toy has one important advantage - it is hypoallergenic, which is especially important if the baby is prone to allergies. It is made of durable, high-quality rubber, which is very easy to wash, and the horse will not collect dust. On such a horse you can not only swing, but also ride due to the elasticity of the rubber, which is very useful for the physical development of the child.
The most comfortable and beautiful option is a plush horse. The frame is usually made of plastic or wood, but the upholstery is much more reminiscent of a real horse. The animal has a long mane and tail that are fun to comb and decorate. This toy is a great gift for a birthday or New Year; a child will remember it for a long time.
Safety
Of course, rocking chairs for children should not only be beautiful and durable, but also safe. When choosing the right model, be sure to look at the label; the information on it should indicate the age of the child for whom it can be used. Check the stability of the skids and the swing amplitude. If the toy swings too much, it will tip over along with the little rider. This is especially true for plastic horses - they are the lightest.
If your baby has allergies, you should not buy toys with plush upholstery - the fleecy surface will collect too much dust. Pay attention to the quality of the varnish coating - small children are not averse to tasting their toys, so it’s better not to take risks.
Important: check the quality certificates before purchasing a toy.
Comfort
Of course, a baby rocking chair should be comfortable. When purchasing, consider the size of the toy and the height of the baby, as well as the length of his arms and legs. If the horse is too big, the baby may not be able to reach the arms. The handles themselves, which he will hold on to, should be located at such a level that the child does not have to constantly hold his hands above or below shoulder level - his limbs will become numb. The comfort of the seat is very important - it should follow the anatomical shape and have fairly soft upholstery. It is best to purchase rocking chairs with high backs so that you can lean on them.
DIY horse made from natural materials
From time to time we all want to do something with our own hands, create beauty and share this achievement with the world. Making crafts from natural materials can be classified precisely in this category of hobbies. Working with natural materials not only calms you down and helps you take your mind off the hustle and bustle of everyday life, but it can also become a profitable business.
Useful to read: Summer crafts made from natural materials
Making a variety of crafts from natural materials is an excellent hobby not only for adults, but also for kids who will receive a lot of positive emotions from the process. A beautiful craft will be an excellent gift or a successful addition to the interior, because hand-made products are valued much more than similar items from the store.
Decorative wooden sculptures in the garden (video)
Garden figures are very interesting , and creating them with your own hands is not only entertaining, but also useful, because each object of your skill is not only a small masterpiece, but also an excellent decoration for the landscape of your dacha.
Comments: Comments to the post Do-it-yourself wooden horse in the garden are disabled
Dachas have always attracted people not only as a place where you can relax from the bustle of the big city, but also as a space for creativity and imagination. You don’t have to buy decor for your dacha in a store; you can make it yourself from scrap materials. For example, a wooden horse.
DIY crafts made from natural materials: master classes
In order to learn something, it is absolutely not necessary to take courses or study tutorials on your own. All you have to do is attend master classes from specialists or watch training videos where you can learn all the nuances of working with natural materials. The craftsmen will not only give an excursion into the specifics of manufacturing, but will also talk about what materials and tools will be needed in the process. There is a separate master class for almost every issue that may raise doubts in a beginner. Here you can see not only the specifics of making crafts, but also learn the secrets of professionals.
Wooden horse made from old branches and roots
There is another interesting way to construct a horse figurine, but it will not require you to spend high-quality material, although it will require you to use all your skill and imagination. In this case, we will talk about a figure made of roots and branches.
At the dacha there are always a lot of branches that we simply burn or put in compost, but they can also serve as decorative decorations, for example, to create the same figurine.
Wood crafts
Wood is a beautiful and malleable material that anyone can learn to work with. It's best to start with small things: photo frames , boxes , etc. However, a beginner may find that it will be necessary to purchase special tools. The specifics of the equipment directly depend on what you are going to create.
To create a wooden box, we will first need to make a blank stencil . The stencil can be of any shape and size. To do this, we draw a drawing where we indicate the parameters of each detail of the future craft. To ensure that the space between the lid and the sides is even, it is better to glue the blanks together into a single whole, and then evenly separate the upper part from the bottom.
To work we will need tools such as:
- clamps for gluing boards;
- jigsaw;
- ruler;
- sanding cloths;
- glue;
- brushes for applying glue.
It is best to use soft woods - pine , alder or linden . The wood should not have cracks, chips or knots. When assembling the box, it is better to take wood glue, ideal for working with wood.
- We transfer the drawing to the boards . To do this, it is best to use a ruler and a simple pencil.
- Afterwards, you can safely cut out the parts with a jigsaw. The walls of the future box should be the same thickness (about 1 cm).
- It is necessary to sand all the parts with sandpaper, after which we adjust the joints.
- Now you can safely start gluing the parts . Here we use a clamp, since this way the glue will better hold the parts of the box together.
- We fasten the resulting parts with wood glue and clamp them into a clamp until completely dry.
- After drying, you can fasten the lid and the main part of the box with beautiful hinges, which are sold in specialized stores.
- If desired, the box can be varnished or decorated with fittings (legs, corners, handles).
Fastening horse parts
Attaching garden craft elements depends on the material of the pots. Today there are adhesives for various materials (plastic, ceramics, and metal), but you can strengthen the structure with wire or even a metal rod, and in the case of plastic or metal pots this will be easier. But you can choose clay pots that have drainage holes. The second option is to drill such holes yourself.
Use a bucket or bricks or building blocks to hold the horse's head/neck while the glue dries.
Drilling ceramics is actually not that difficult: we use a drill and a special drill for glass and ceramics. We will find out more about this here; in the material on making holes in ceramic tiles, as many as 5 methods are given. And drilling ceramic (clay) pots is similar to drilling tiles.
If you only use glue, then it should be selected not only depending on the material, but also on the type - use glue for exterior work (facade or other), otherwise the craft will quickly disintegrate under the influence of moisture and the sun.
Horses for the garden can be of different sizes and different colors. If you decide to paint these garden crafts , choose a paint that matches the base - for plastic, ceramics, metal. And definitely for outdoor work.
Stone crafts
You can make a huge number of interesting things from natural stone: from a beautiful decoration to an original rug. It all depends on what stone you are going to use in your work.
To create a beautiful rug for your bathroom, you can use ordinary pebbles. We will use a rubber bath mat of the required diameter as a basis.
- We take several kilograms of pebbles. It’s better to take 5-6 kilograms at once.
- For gluing we use universal polymer glue , which can be bought at any hardware store. We will also need yacht varnish .
- Select a pattern and turn the rug over. Transfer the design to the surface of the mat. For these purposes we use a marker.
- We wet our hands in water and place the pebbles on the resulting pattern in the desired order until the desired pattern is formed. Then glue the stones to the mat one by one.
- Carefully blot the joints with a brush so that there are no voids.
- We make “ formwork ” from tape. We coat the rug with varnish several times. Let the product dry on the reverse side.
Horse and cart
To make a horse and cart you will need thick and thin birch branches, self-tapping screws, bottle caps, and rubber winding.
- A thick birch branch is suitable for the body of the horse. You need to cut out a body 50 cm long from it.
- Take smaller branches for the legs. In order for the figurine to stand firmly and not wobble, you need to drive its legs into the ground. In this case, all work must be carried out in the place where the horse will stand; foresee this in advance.
- In the block that will serve as the muzzle, you need to cut out a recess for the mouth.
- Connect the head to the body using the neck, all wooden parts are fastened with self-tapping screws.
- The eyes for the horse can also be cut out of wood, or you can use ordinary bottle caps. You can simply glue them to the muzzle with wood glue.
- For the mane and tail, you need to take thin branches and weave them into a broom, attach them with nails to the body.
- For the reins and saddle, you need to take the rubber tape and attach them in place using glue or nails.
- Next came the turn of the cart; it can be built in different ways. You can take four wheels and connect them to birch sticks with screws, this will create a simple cart. You can take wooden boards and make a wooden box out of it, like a real cart, and attach four wheels. You can fill the cart with soil and plant flowers in it. Vegetables growing from it, such as pumpkin, look interesting. Or you can put a toy old man in the cart, then the composition will be completely completed.
Applications of leaves and flowers
Bright, colorful leaves and flowers delight us every season, however, they can give others positive emotions all year round. From leaves and flowers you can make beautiful appliqués that adequately decorate boxes, create a colorful ornament on the tabletop, or conduct a personal design experiment. Whole paintings and panels , which will then take their place of honor in your home. Dry leaves, herbs and flowers are used for work.
The surface of the material must be perfectly flat, so to dry, leaves or flowers are placed between thick pages of books for several weeks. After drying, you can start working. To glue applications to the surface of the paper PVA glue ; most often, no special tools are needed.
- First, on a sheet of thick paper, lay out the leaves and flowers in the desired order, forming a pattern.
- If necessary, trim foliage or floral material to create a symmetrical shape.
- We fix the result with glue.
DIY decor from shells
Beautiful shells from the beach can become an interesting decorative element in the interior of your home. Such a craft will not only bring originality to the decor of the room, but will also remind you of fabulous days of relaxation on the banks of the river or sea. You will need glue and a finished product, which we will decorate with shells. It can be an ordinary photo frame , a picture frame , a lamp and much more.
When working, you can use shells of different sizes. A large shell will turn into an unusual vase , soap stand or jewelry vase A sink of the right size is ideal as a lampshade; small shells can be used as candlesticks. It is enough to show your imagination and ordinary things will turn into real works of art.
For work, many craftsmen recommend using liquid nails , which hold parts firmly and dry quickly. You can also use regular all-purpose glue.
Take the blank and stick the shells on its surface in the required order.
DIY wooden horse in the garden
To make decorative garden decorations, you will need wooden materials, namely boards, logs, saw cuts, bars, as well as binders - screws, nails, glue and ropes.
We decided to make a small horse so as not to spend too much on production, and therefore we select the simplest materials, which may even be at the dacha, and begin.
Body of a wooden horse
For the body we need 2 cuts, 3-4 cm thick and 20-25 cm in diameter. On these cuts we stuff boards 15 cm wide and 50-60 cm long (the thickness is arbitrary - 2-3 cm), so thereby forming a rounded box. This will be the body of the horse.
Feather crafts
Feathers are a rather unusual material that usually does not require any additional equipment to work with. However, the product may simply fall apart if the base of the pen is not firmly secured and fixed in one position.
To create a beautiful Christmas tree made of feathers we will need:
- white paint;
- cardboard paper;
- feathers of any color;
- glue;
- brushes;
- small beads.
It is worth purchasing several sets of feathers for work. The kits sell feathers with the special curve we need and a certain size. You can take feathers of different colors or make a plain Christmas tree.
- a cone out of cardboard - this is the shape of the future craft.
- Glue the feathers to the cone, starting from the bottom edge. You can use a hot gun or PVA glue. Glue should be applied with a brush to the base of each feather and glue the workpiece to the cardboard.
- a bead to each feather for beauty .