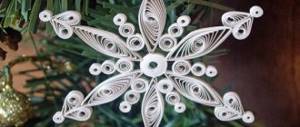
DIY fluffy snowflake.
Step-by-step instructions with photos Nikiforova Evgenia Olegovna, teacher of additional education, GBOU boarding school s.
Vorontsovka, Yeisk district, Krasnodar region. Goal: make a snowflake from yarn to decorate the room. Objectives: teach how to make snowflakes from yarn; introduce the technique of making yarn pompoms; teach how to use scissors correctly when cutting threads; develop fine motor skills, imagination, thinking, perseverance, accuracy; open the mind. Application: can be used as a Christmas tree toy or simply for interior decoration. And my students actually suggested that if you make the snowflake larger, you will get a beautiful and soft pillow. Equipment: yarn; cardboard rings; scissors. On the eve of the New Year holidays, as a teacher of additional education, I was tasked with conducting an unusual master class on this topic. And for some reason I immediately remembered a snowflake made from yarn that I made when I was a schoolgirl. There are no specific age restrictions for creating this craft; in my circle group there are students in grades 5, 7, 8, 9, everyone did it perfectly, and most importantly, they really liked it. If you use this material for a lesson, then I suggest using a thematic physical exercise: Snowflakes are falling from the sky, Like in a fairy-tale picture. We’ll catch them with our hands And then we’ll show it to mom (hands above our head, grasping movements) And there are snowdrifts around, The roads are covered with snow (stretching our arms to the sides) So as not to get stuck in the field, Raise our legs higher (step in place, raising our legs high) There’s a fox in the field is jumping, Like a red, soft ball (jumping in place) Well, we go, we go (walking in place) And we come to our house (they approach the tables) And now we move on to the master class itself! PHOTO 1. So, we will need yarn, two identical cardboard rings and small narrow scissors (so that we can cut the threads without any problems). In order to make the rings, we will need cardboard (any cardboard, since I have a creative circle, I have a lot of cardboard packaging left over, which I never throw away, but use for various templates) and a compass. We need to draw two circles (the sizes are at your discretion; for example, I drew circles with a diameter of 6 cm and 18 cm) and carefully cut them out. We should have two such rings. The yarn must be wound into small balls so that each ball fits freely into the hole. I took two colors of yarn: blue for the snowflake itself and white for tying the base and rays.
PHOTO 2. Take one ring and cut the thread (white in my case), which will later tie our base. We tie the thread (at one time, not in a knot) and place it on the ring, as shown in the photo. PHOTO 3. Next, we cover our structure with a second ring so that two threads are on the outside. PHOTO 4. Now we will wrap the rings with yarn (in my case blue) so as not to lose the outer two threads for tying. When we wrap the rings, we need to make sure that the threads fit tightly to each other without gaps. And since our internal diameter is smaller, the threads there will periodically overlap each other. PHOTO 5. This is how it turned out after winding the first ball. Next, take the second one and continue wrapping the rings further. PHOTO 6. This is how you get completely wrapped rings, with the tying threads sticking out. I used two balls, the threads were wound in one row tightly to each other. You can also wind the second row, then the snowflake will turn out softer and fluffier. PHOTO 7. Now we need to carefully cut the threads along the edge of the rings with scissors, so as not to accidentally cut our threads for tying. I have thin nail scissors, and it was convenient for me to cut by running the blades directly between the cardboard rings. PHOTO 8. After we have completely cut the threads in a circle, we need to slowly and carefully tighten the threads that we had on the outside for tying. PHOTO 9. Then we carefully remove our rings. After that, we tie the threads into a knot so that our base for the snowflake holds well. PHOTO 10. Now we straighten and straighten the snowflake the way we had it on the rings. We hide the threads that were tied up. PHOTO 11. Let's start forming rays. First, we divide the snowflake strings in half, then each half in half again. PHOTO 12. Next we will need to cut eight small threads (white in my case) to tie the rays. We divide each quarter in half and tie it with thread. PHOTO 13. We form eight identical rays, cut off the excess threads, and align the rays of the snowflake, if necessary. And now, our beauty is ready. By the way, you can also decorate it at will with sparkles, sequins, etc., and make eyes and a nose. As your imagination tells you. Thank you for your attention. I will be glad if my master class will be useful to someone. It is customary to prepare for the New Year in advance. The apartment is being thoroughly cleaned, carnival costumes are sewn, a holiday menu is selected, children study their roles in the script for New Year's parties, and adults study their roles in corporate events. And you create a lot of crafts with your own hands. After all, you need to decorate the house, prepare nice gifts for loved ones and do your homework - make a craft for the New Year. This master class offers a New Year's craft for the youngest children - a snowflake made of threads. Shall we try?
Materials and tools:
Thin threads for knitting; - ordinary cotton threads; - scissors; - cardboard; - eyes; - beads; - beads; - compass; - glue.
Required materials and tools
In order to make this or that product, you will need the following list of materials and equipment:
| Plywood | When choosing, take into account the features of the manufactured crafts: for small elements and products of complex shapes, it is better to use sheets of small thickness; for more massive structures, material of greater thickness is needed - from 10 mm or more. In addition, the location should also be taken into account; for options installed outdoors, it is necessary to use moisture-resistant plywood; for interior work, a regular option is also suitable |
| Cutting tool | Again, the choice depends on the thickness of the sheets being processed; if for thin options and is suitable, then for thick plywood it is better to use either an electric jigsaw or a special hacksaw for figured cutting with a small tooth size |
| Required sketches | If you know how to draw well, you can make all the drawings on paper yourself, but you can also use ready-made options. You can find many solutions on the Internet: entire compositions of New Year’s characters, and drawings of snowflakes made of plywood. You just need to choose the option that you like best and which you can implement |
| Paints | It is almost impossible to make interesting and bright crafts without decorating them, so take care of the paints in advance. If any option is suitable for interior work, then for exterior structures we need weather-resistant compounds that should be able to withstand adverse weather conditions well. |
Advice! If you find a drawing that is smaller than the required size, don’t worry, increase its scale to the required size and print it in this form, all the ratios will be preserved, and the parts will fit together perfectly.
When it comes to making various crafts, there are two options – two-dimensional or three-dimensional designs. We will consider each type separately, since the process has some differences.
2D products
If you do the work yourself, you should adhere to the following recommendations:
- First of all, you need to purchase the necessary material; for the street it is best to use plywood glued with bakelite resin, or use laminated sheets that are well protected from moisture;
- Next, you need to make a sketch of the product on a scale of 1:1, so you need to transfer the drawing to a large sheet. If you need a big Santa Claus made of plywood, doing it yourself is problematic, but modern copying equipment increases the scale to the required level automatically, observing all proportions;
- The design is transferred to the plywood either using carbon paper, or simply glued if the product is large, and cutting is carried out directly on the paper. Naturally, in the first case the sketch can be used several times, and in the second only once;
- Cutting is carried out along the line; it is important not to allow significant deviations, as this will negatively affect the final result of the work. Next, you need to process the ends with sandpaper: remove burrs and lint, round the edges and make the surface as smooth as possible;
Advice! To ensure that the material cracks less when cutting, the surface is impregnated with a mixture of wood glue and water in a ratio of 1:2.
- The last stage is painting; it is better to first apply a primer and then paint the product. Pay special attention to the ends; they absorb moisture best and need special protection from adverse influences.
3D designs
We will tell you how to make a sled from plywood with your own hands. This type of product will be appreciated by children, as they can be used in winter.
The work process looks like this:
- First of all, you need to find or make your own drawing of a plywood sled; as an example, we will show one simple option;
- You also need to cut out the seat, for it it is best to take material 10-12 mm thick, its dimensions are shown in the diagram below. Cutouts on the sides and front allow you to hold on to the seat and attach a rope, and the handle on the back is great if you need to ride small children;
- When cutting, the closest attention should be paid to the connecting grooves and. The elements are assembled using self-tapping screws 35-40 mm long, for which holes with a diameter of 2 mm are pre-drilled;
Greetings, my dear readers.
So, today I will make a snowflake from wood with my own hands. I wrote this article back on the New Year holidays, after I received a letter from Ucoz, where the admins organized this interesting competition:
Competition for the most creative!
What do we have to do:
draw or make your own uSnowflake from any material (U logo on a snowflake is welcome!);
No nominations - only prizes!
5 gift certificates in the amount of 5,000 rubles from the OZON online store
15 exclusive secret souvenir gifts;
5 lifetime premium packages;
3 individual site audits from a specialist;
traffic to the site.
To my great joy, I finally moved from Yukoz to WordPress, but I decided to leave the article anyway - maybe someone will be interested :)
Crafts from pompoms for the New Year
The most noble material for crafts made from threads is pom-poms. There are many things that needlewomen make from them: Christmas trees, wreaths, snowmen, various animals and much more. Making a pompom is very easy; you can use a special device, a cardboard circle, your hand or a fork. It all depends on what size pompom you need. But the essence is the same everywhere: wind the yarn around the base, fasten it in the middle with thread and cut the ends. If necessary, trim the ends of the pom pom.
The more yarn you wrap around the base, the fluffier the pompom will be!
Christmas tree made of pompoms: do-it-yourself New Year's crafts
For pompom lovers, we offer a master class on making a Christmas tree. It is better to make pom-poms of different sizes, then the Christmas tree will look more harmonious. In this MK it is proposed to make the Christmas tree multi-colored, but you can use pompoms of the same color, for example, green, in which case the Christmas tree can be additionally decorated with beads. But the multi-colored forest beauty does not need additional decor!
Continuing the theme of pompoms, we invite you to familiarize yourself with a master class on making a New Year's wreath. You will need: a thick base, a lot of pompoms, glue. Cover the base of the wreath tightly with pompoms, wait until the glue dries and you can decorate your apartment!
Pom-pom gnomes: make Christmas decorations from threads with your own hands
Little fox made from pompoms: step-by-step master class with photos
Crafts for the New Year from pompoms: making animals, owl
New Year's crafts from threads: making a hedgehog from pompoms
Do-it-yourself pig from pompoms: making a symbol of 2020
Crafts from threads for the New Year: hummingbirds
Mini Christmas tree made of threads: decorating a New Year's gift with your own hands
DIY pompom snowman: New Year's MK
Garland of pompoms: making Christmas decorations from threads with your own hands
New Year's garland “ice cream”: step-by-step MK with photos
New Year's craft from pompoms ice cream
Christmas pudding from pompoms: making Christmas crafts from threads with your own hands
New Year's garland made of pompoms: decorating the interior with “cupcakes”
How to make a snowflake from wood with your own hands
In order to make something - be it a snowflake or, you need to decide on the end result of the finished product. That is, you need to clearly understand what you want. And to do this you need a drawing or at least a sketch (sketch).
Snowflake made of plywood - drawing
This is of course very approximate, but I already have something to build on.
I take a piece of plywood and draw a small circle on it - I plan to place the logo in it.
Then we draw an outer circle - these will be the edges of the future snowflake, and divide it into six equal parts.
And after some time I received a finished drawing of a wooden snowflake
How to make a snowflake from wood with your own hands?
So, the drawing is ready. Hands to feet, I take a jigsaw and start “cutting”, or to be precise, sawing out...
And once...
And two...
And this is what happened...
I cut a snowflake out of wood and now it needs to be sanded a little to remove the “burrs”
Let's move on to the next stage...
How to paint a snowflake made of wood?
I spent a long time deciding on the color and decided that I would paint it blue. After using up almost a year's supply of children's paint, it turned out like this.
At first I thought that I would paint only the main part, but after thinking a little, I decided that I needed to paint the side part as well, in order to eliminate “bald spots”
Well, I did all the operations described above, and after waiting for the base layer to dry, I started drawing the patterns. I'm a terrible artist, so it turned out like this snowflake
I screwed up the main logo a little, but after a little witchcraft it turned out not too bad! (If you don’t praise yourself, no one will praise you).
That's it, friends, with a little handiwork, I made a snowflake out of wood with my own hands and no plagiarism!
PS
Friends, to my regret, I did not become one of the first three winners, but received a consolation prize - 3 months of a premium package from Ucoz, although at that time I already clearly realized that it was time to switch to WordPress :)
Good luck to everyone, and I just have to remind you that in touch with you was a true connoisseur of hand-to-hand combat - Alexander Alexandrov.
- We will need:
- plywood, large enough to make a snowflake
- snowflake template (click to download the snowflake stencil)
- electric garland, you can use a garland powered by batteries or mains power
- drill and bits
First of all, you need to apply a snowflake stencil to the plywood. You can use any one you like or take the one we offer you. We printed a stencil in a printing house on a sheet of A2 paper, cut out a snowflake, placed it on plywood and traced it.
Next, we cut out a snowflake from plywood using a jigsaw; the process is labor-intensive and requires care and precision. You can use both a manual and electric jigsaw. Follow safety regulations.
Once the snowflake is completely cut out, you can use fine sandpaper to sand down any rough edges.
in those places where the garland bulbs will be, we make holes with a diameter slightly smaller than the diameter of the garland bulbs. Light bulbs can be placed like we did, in the center of the snowflake rays or along the perimeter.
Now it's time for painting. We paint the snowflake in any color you like. We chose white.
It's time to attach the garland. Disconnect the light bulbs, thread the garland socket into the hole made in the back, and insert the light bulb into it from the front. Since the holes are smaller in diameter than the bulbs, they will hold on and not fall out.
Secure the mode switch or other heavy elements on the back side with tape.
Snowflakes are one of the most beautiful symbols of winter and New Year's holidays. They are made from various materials using most known techniques: cut, folded, embroidered, sewn, knitted, woven, sculpted. They decorate interiors, clothes, accessories, textiles, covers, notebooks, postcards. “Snow motifs” can be found in jewelry, souvenirs, toys, pillows, panels, carpets and much more.
Everyone knows how to cut openwork snowflakes from paper. And today we will tell you what other methods of making snowflakes exist. Choose the option you like, prepare the materials and create New Year’s decorations with the whole family!
Crafts made from threads for the New Year using isothread technique
An excellent New Year's craft would be a painting using the isothread technique, or it is also called thread graphics. The essence of the technique is very reminiscent of String Art (paintings made from threads and nails), but instead of boards and nails, cardboard and a needle are used in isothread. This kind of embroidery is quite original and interesting, but it is not entirely suitable for children, as there may be certain injuries during the work. For New Year's crafts using the isothread technique, you will need cardboard, a suitable picture, thread, and a needle.
There is a more alternative and acceptable option for Christmas tree decorations purchased in a store, which will allow you to decorate your apartment in accordance with modern standards. To do this, you can make your own crafts, decorations, and much more. DIY Christmas decorations look quite beautiful, have some creativity and inspire you to come up with new ideas.
The decoration of a room, apartment or your office can be organized based on the creation of various snowflakes toys from scrap materials. You can do this with your child, friends, and employees. In the latter case, company managers can use this technique to raise the corporate spirit of their employees.
As the main materials, you can use paper, cardboard, PVA glue and much more. But our task is based on making snowflakes from PVA glue without spending a lot of time, not counting the drying time. You can create many other interesting toys from PVA; you can turn everything your imagination is capable of into reality.
Instructions for making snowflakes
New Year's decorations made from glue have many advantages: it is a hypoallergenic structure, an unbreakable design, and the possibility of quick production. You don't need to spend a lot of time to complete the work.
The most important thing is to do everything sequentially, first we need:
Snowflake templates PVA glue Transparent oilcloth Brush Sequins or any other materials for decoration Thread, needle, tape, wire
You can make templates yourself or download them on the Internet, it all depends on your desire. In fact, creating your own creative stencils can be much faster and more interesting. In the same way, you can make various figures to decorate the Christmas tree. If you are going to attach the resulting decorations to windows, then you should wipe them off from excess moisture in advance so that the tape sticks better.
1. Cover the resulting ones with transparent film and gradually apply glue. The layer should be as thick as possible, but the width should not be large. It is best to buy glue with a thick consistency, so the snowflakes will turn out voluminous. 2. After you have received the snowflake, you need to sprinkle it with glitter before it dries. They will stick instantly. After drying, the glitter will not fall off. These decorative elements can be replaced with metal shavings, semolina or finely chopped pieces of tinsel. 3. It takes about a day for a PVA snowflake to dry. In this case, there is no need to rush in this case, since if the glue inside does not dry out, damage may occur and your snowflake will lose its structure.
There are a considerable number of videos and master classes on the Internet that will help you cope with the implementation of the task. In fact, this is one of the easiest ways to make interesting window decorations. Their main advantage is that they do not get wet from condensation that accumulates on the glass.
Making snowflakes from PVA is as easy as shelling pears, but decorating them correctly and covering them with glitter is quite difficult. Therefore, this procedure must be approached with special responsibility. Once you have completed everything, the stencils can be hidden until next year.
How to make the right snowflake mounts
The advantages of dried PVA are that it has a dense structure and the fastening used does not violate its structure. At the same time, snowflakes that hang on white threads seem to be floating in the air. To complete the task, you will need a needle, which you use to make a small hole and pass the thread through. This way you get the optimal toy for the Christmas tree.
To decorate the window, you don’t have to make these holes; you can use tape. To do this, wipe the glass with a dry cloth and fix the resulting snowflakes. In fact, the panel of snowflakes turns out spectacular. Especially when the garlands are lit at night, the sparkles shimmer and create some enchanting atmosphere.
Storing PVA snowflakes
To organize all storage conditions, you do not need any special skill. First of all, you can use a bag in which you can put all the snowflakes until next year, but there is a possibility that some elements of the toy will be damaged. Therefore, it is best to find a small box. We fold each snowflake alternately with a napkin, this way you can protect the sparkles from mixing.
You need to store the received ones next to the Christmas tree decorations, away from heat. That is, it is best to put it in the closet. Next New Year, you just take out your snowflakes and hang them up again. Today, this is one of the most optimal storage options.
How to choose the right materials
There are no special recommendations on this matter, but if you are planning to make snowflakes with your child, then you should buy glue only in office supply stores. It is much safer than its construction counterpart. The rest is up to you. You can glue snowflakes in any way, using threads, buttons, tape, wire and much more, in general, complete freedom of action and wishes.
Modern New Year's decorations that are sold in the store, of course, have a lot of interesting compositions and beautiful design. But each person can, based on their capabilities and materials purchased ten times less, create more creative jewelry and toys. Thus, it is best to spend a few hours and create truly beautiful details for the New Year's decoration.
Both children and adults enjoy making crafts for the New Year from threads and glue. After all, it is very simple and literally in a matter of minutes a craft is created that will be a worthy decoration for a Christmas tree or room.
The most common New Year's craft is balls made of thread, from which you can then make a funny snowman or an original Christmas tree decoration. But today we decided to publish a master class on making snowflakes from threads. If you have a child of primary school age in your family, he will be happy to get involved in the work, so don’t deprive yourself and your baby of the pleasure of doing a little crafting for the New Year. Well, shall we get started?
DIY snowflake made of wood: photo
To ensure a tight fit, move the file close to the lines that define deep, unshaded cuts. If they turn out to be too narrow, they can be widened with a file.
Make a template for marking and cut out cuts in the second layer
Instead of cutting along the lines of a paper template, trace the template made from scrap plywood with a marking knife to ensure a tight fit.
When cutting cuts in the second layer, the file should not touch the marking lines. If necessary, the width of the cutouts can be adjusted later.
THERE ARE CUTOUTS IN THE HALVES ALSO
Dividing the third layer into two halves, mark and cut out the cutouts on the straight edges, again leaving a slight allowance for adjustment.
DRILL A SMALL HOLE
Using a thin drill, make a 6mm deep hole in one of the inner corners where all three layers intersect. Don't be upset if the drill goes right through, because no one will notice.
