Home/Articles/Do-it-yourself snowflakes from strips of paper - master class
As New Year approaches, homes, offices and shopping centers are filled with paper snowflakes. This is not surprising, because hand-made snowflakes from strips of paper give the room an atmosphere of celebration and anticipation of a miracle.
Making beautiful paper products is called papermaking. This technique is based on the plastic properties of paper. To give it the shape and desired volume, techniques such as embossing, cutting and folding are used. They can be used together or separately.
Stage 1: Starting with a square
Start with just a square white piece of paper. I usually make two snowflakes from each A4 sheet, so I first cut it in half, then cut a square out of each half. The size of the snowflakes is about 10 cm. If you are just learning, it is easier to start with larger snowflakes, cutting one out of a whole A4 sheet.
Making a square from a rectangle is very simple. Place the piece of paper in front of you and touch one of the top corners of the sheet to the opposite side to form an isosceles triangle (like the one you see in the photo). The extra piece of the sheet just needs to be cut off evenly.
What you need
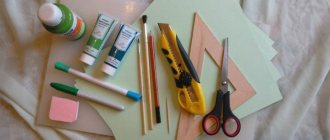
So, we have already figured out how to make a round snowflake: cut it with scissors, a knife or a hole punch. Now let's decide on materials and tools. Prepare the following:
- paper;
- scissors;
- pencil and eraser if you will draw a pattern template for cutting;
- diagrams (optional);
- a compass (if you use it to make a blank for a snowflake);
- hole punchers with figured cliches (for small snowflakes).
In fact, to make a spectacular decoration, all you need is thin paper and sharp scissors.
Step 4: Fold in thirds
Imagine a triangle divided into three equal parts, and fold it in three. If you like to be precise, you can use a protractor; every third is equal to an angle of 30 degrees.
Step 6: Cut off at the top
Cut the top edge of the paper at an angle. Make sure you cut all layers of folded paper so that the cut is the same on all edges of the snowflake. The corner cut forms the tops of the snowflake. Over time, you will learn to cut at different angles to create more or less sharp points.
Stage 7: Pattern
And this is where your imagination comes into play. Start cutting different shapes along the sides of the folded paper. It's easiest to cut small triangles, but be sure to experiment with different shapes. For this snowflake, I changed the top edge a little so that my tops were a different shape. I also cut out a couple of “spines” on the inside. Use your imagination for decoration! I don't use any stencils for my snowflakes: I just cut and design as I go. I never get two alike. Sometimes I find some elements I like and use them in a few snowflakes, but I've never copied an entire pattern before.
Stage 8: U-Turn
Once the cutting is complete, carefully unwrap the snowflake. The snowflake won't be straight and flat at first, so I usually put the snowflake between the pages of the book for a while to help it level out. I also ironed them (between two sheets of paper) to get them perfectly smooth. In this case, be careful as the paper may become very hot (never use a steamer!). Therefore, before picking up a snowflake, let it cool. And of course, remember about the flammability of paper. Ironing will make the snowflake a little stiffer, which is very good if you plan to hang it rather than glue it to some surface.
Stage 9: Inspiration
Materials:
- Use sharp scissors and keep your hands clean. Dirty hands will leave marks on the snowflakes, which is not very festive!
- Some people recommend using nail scissors as they are easier to cut out intricate designs. I don't like this for two reasons. Firstly, nail scissors are uncomfortable to hold in your hand. And is it important. Secondly, you can go overboard with the ornateness of the pattern; too many tiny cuts and not enough cutting along the contours can turn a snowflake into a lace doily. The look and idea are lost.
- Snowflake carving experts recommend using tracing paper and an X-acto knife for more subtle designs and more perfect symmetry. But I still prefer plain paper and scissors - they are in every home and are safe for children, you can cut out snowflakes together.
- Some people cut out snowflakes from wrapping paper or other colorful paper. You can use any material to create the desired effect. My soul is closer to clean, white paper simply because I wildly like to create beauty from something simple and ordinary.
Cutting process:
- I usually make my snowflakes while I'm sitting on a couch or chair with a coffee table in front of me and a small urn at my feet. It’s convenient for me to fold the paper on the table, and then I get comfortable and cut out the design, throwing the scraps into the urn. This way I don't litter around me in the process.
- When folding paper, steps 4-5 are the most difficult, especially dividing the triangle into three equal parts “by eye.” When you fold the second side part, it very often turns out that it is not equal to the other two. Then you will have to unfold and bend the parts again, and so on until you get three equal parts. The more identical parts you get, the more symmetrical the snowflake will be in the spread. Given the thickness of the paper and the number of folds, it is almost impossible to get a perfectly symmetrical snowflake. The biggest asymmetry will be in the center: look at my snowflakes. The asterisk in the center of some of them is not perfect. Real snowflakes have imperfections too, so don't worry too much about it.
- Avoid what I call “voids.” This is when you cut out the snowflake in step 7 and leave a large space of paper without any cuts. Any place on a snowflake larger than half a centimeter can be decorated, for example, with the same “spines” that I cut out in my snowflake. Otherwise, when you unwrap the snowflake, you'll end up with a rough design instead of a patterned, detailed snowflake. You shouldn’t be too fussy in the pattern either; it’s better to use small and large parts together.
Snowflake decoration:
- You need to place a small piece of double-sided tape on each top of the snowflake and stick it to the surface to be decorated. I like to hang them on windows so they can be seen from both the inside and outside. At night they look beautiful in the dark.
- You can also hang snowflakes from the ceiling, but be careful as they are quite fragile. For such purposes, it will be better to cut out snowflakes with thicker outlines and not too detailed designs (imagine a snowflake with a wide “skeleton and small details around the main lines). White thread or fishing line is suitable for hanging.
- Snowflakes can be used to beautifully decorate New Year's gifts instead of bows. I like to simply glue one snowflake to the gift box and a card with the recipient's name on top of the snowflake. The lacy snowflake creates a beautiful background for your signature.
- Do not throw away the scraps of A4 sheet after cutting out the squares. Use this paper to cut out small snowflakes that hang beautifully between larger ones. This will create a beautiful scattering effect and allows you to fill the space between large snowflakes. Unfortunately, this idea came to me after I took the photos below.
Ready-made templates for cutting
In order not to think for a long time about how to make a round snowflake of a beautiful shape with carved and openwork details, take any template that is in special periodicals for needlewomen. Typically, diagrams are depicted next to the version of the finished product that will be obtained using this stencil. Redraw the template onto your folded piece. And if you want to make a lot of identical snowflakes, it’s better to make a stencil out of cardboard and trace it on the workpiece.
Analyzing the found diagrams, you must understand which part of the circle they are intended for cutting out. The number of folds that need to be made on the original workpiece will depend on this. The illustration shows templates that are designed for 1/6 of a circle. This can be easily determined by comparing the diagram and the finished sample.
The selection below shows diagrams for 1/12 of the circle. If your paper is thin, or you are working with foil, then the previous templates can easily be used for 1/12. All patterns are mirror symmetrical, and therefore if you take only half, then you will need to cut out fewer elements with scissors.
If you have a good imagination and don’t like ready-made patterns, you can combine your patterns based on the patterns you see.
Step 10: Analyze it
If you want to try to copy snowflakes you saw somewhere, then you need to understand the idea of how you can even repeat someone’s drawing. Looking at the finished snowflake, try to visualize a repeating fragment of the ornament. This snowflake contains 12 identical fragments. This will be a fragment between two lines. One line bisects the top, running from the center. And the second line runs between the two vertices in the middle. We can imagine a snowflake as a clock, and the lines we need are between 12 and 13 o'clock. See the designations in the photo. This fragment shows what cuts need to be made on both sides to end up with the same snowflake. If you look at a dark background, then all the dark fragments are what need to be cut out.
How to make a beautiful round paper snowflake
This option is made on the basis of a workpiece created using a compass. Work like this:
- Draw a circle on the sheet.
- Cut out the workpiece.
- Fold it in half twice to make a quarter circle.
- Do one more addition (usually they stop there).
- If the size of the workpiece and thickness allow, you can fold it again.
- Cut out the pattern. You can unfold the last fold (if the workpiece is too dense) and cut a few more small parts.
By experimenting with the number of folds and cutting options, you can make an unlimited number of the most intricate products. If you are tired of working with scissors, you can use a hole punch with any cliche, even a standard round one. With its help it is easy to get very unusual snowflake patterns.
Stage 11: Recreating a real snowflake
From time to time I try to copy real snowflakes that I find in a book or on the Internet. Of course, it is impossible to completely recreate a snow crystal, since a snowflake has a very complex structure, and it is a three-dimensional figure, not a flat one. Snowflakes are often multi-layered, and we are dealing with just one piece of paper... However, you can try to get as close as possible to the shape of a real snowflake. Real snowflakes have a lot of “gaps” in the patterns that don’t look very good when transferred to paper. I flipped through the entire book of photographs of snowflakes, and very few of them looked like simple hexagons with simple details. If the snowflake you choose has too much “free space”, still use it in the paper copy, making the pattern more complex. Since this is not an exact copy, you can improve it without any problems! Use the technique described in step 10. Imagine that the snowflake is a pie, and the repeating pattern is a piece of it. Or think of a snowflake as a clock face. Above are examples of snowflakes that I tried to copy from real ones. I have added a photo indicating the repeating fragment.
Save the article as a souvenir by reposting it
