Machine lace collar
The collar of this model is simple to make; the main thing is to choose a spectacular lace 18-20 cm wide, in which both longitudinal edges have a beautiful figured contour. You will need about 100-110 cm of lace. This collar should lie loosely on the shoulders with small tails. If the edges of the lace have a different pattern, then the most spectacular edge is best placed on the shoulders.
When making a collar, you need to make sure that the lace pattern does not turn out “upside down”. If you don’t have lace of the required width, you can use two types of lace, one wider for a wide frill located on the shoulders, and a narrower one for a narrow frill located at the neck.
Collar processing
If the collar is made of lace 18-20 cm wide, then you must first process the side sections of the lace manually using a narrow hem seam. Then set aside about 5 cm from the top edge of the lace (narrow frill) and draw a line parallel to the top edge of the lace. Gather the lace along the intended line to the desired size (the value of the dimension attribute Neck circumference plus an increase in looseness of fit). To fix the assembly along the intended line, sew the finished braid (ribbon) on the front or back side of the collar. Both side cuts of the braid (tape) are folded to the wrong side. The edges of the braid (ribbon) can be flush with the edges of the collar or protrude from one side by about 1.5-2 cm (fastening allowance). The collar closure in the first case is with a hook and loop, in the second case with a button.
If the lace width is less than 18 cm, then the collar is made of two strips of lace with a connecting seam. The lace for a narrow frill should be about 6 cm wide, the lace for a wide frill 13-15 cm. Connect both laces together. Hand stitch the side edges of the collar using a hem stitch. Gather the collar along the seam and stitch a braid (ribbon) onto the seam, as in the first case.
On the collar, at the level of stitching the braid (ribbon), make thread loops (loop loops) to secure the decorative cord. Thread loops are made with threads matching the color of the cord.
Collar made of cambric lace (sewing)
This flat collar model is made of cambric lace (sewing) of two different types. The collar consists of two layers: the top layer is a lace frill, the bottom layer is the base of the collar (cambric without embroidery) with a lace frill along the outer edge. The top frill covers the base of the collar. The total width of the collar along the shoulder line in the presented model is 13 cm.
This collar will suit many women, including those who cannot boast of a long neck. The collar can be sewn into the neck of the product or be removable.
Collar base drawing
Align the shoulder sections and the tops of the neck of the front and back parts of the product. Mark a line for the outer edge of the base of the collar at a distance of 5 cm from the neck line of the product (see drawing 3). Copy the detail of the base of the collar onto a separate sheet and draw it in one piece along the center line of the back.
Cutting out parts
Collar base - 2 parts; cut from cambric with seam allowances equal to 0.8 cm on all cuts. The lace for the bottom layer of the collar is cut equal to twice the length of the outer edge of the base of the collar plus allowances for processing the side cuts. The length of the lace for the outer layer of the collar should be shorter, it should lie loosely, with light folds, on the shoulders. The width of the lace along the upper and lower layers of the collar is about 8.5 cm.
The collar base gasket is cut out from a very thin adhesive gasket material, similar in properties to cambric. If the collar is removable, as in this example, then a strip of cambric 2.5 cm wide is required to edge the cut of the neck of the collar.
Collar processing
1. Finish the sides of the lace for the inner and outer layers of the collar with a hem seam, hemming the folded edges by hand using invisible stitches.
2. Duplicate one of the parts of the base of the collar with cushioning material.
Gather the cut of lace for the bottom layer of the collar to a size equal to the length of the outer edge of the base of the collar. Place the prepared frill face down on the front side of the base of the collar, align the cuts and baste or stitch, stitching along the seam allowance. Fold the outer and inner parts of the base of the collar with the right sides inward, align the cuts and stitch along the outer and side sides. Trim the seam allowances, turn them inside out, straighten the seams, press. Align the cuts of the neck of the base of the collar and secure.
3. Place the lace for the top layer of the collar along the top edge in small folds (with an interval of approximately 2 cm), fix the folds along the allowance at the top edge.
4. Place the top layer of the collar face up on the front side of the bottom layer of the collar, align the cuts, and secure. If the collar is not removable, then at this stage of processing it can be sewn into the neck of the product.
5. If the collar is removable, then you should edge the sections of the collar neck with a strip cut from cambric, then make a thread loop and sew a small button on the wrong side of the part.
DIY decorative collar: ideas!
Beads with mother-of-pearl, lace and ribbons are most often used in decorating collars:
Very painstaking work. Not everyone can do such meticulous work.
The option without mother-of-pearl beads looks no less attractive:
Buttons are also worth considering as a decorative material:
Do you know how and love to embroider? Then you know how to make and how to decorate a decorative collar with your own hands:
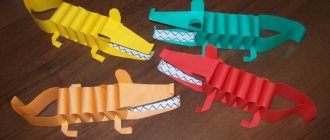
Choose a topic and go! Animals, New Year and Christmas, seasons, favorite hobby, Internet memes, flowers - it can be anything.
Finally, a whole collage of collar decor ideas. Notice how interesting you can use beads and a regular zipper. It is not at all necessary to cover the entire surface of the collar with beads and sequins; there are many options:
You can also use faux fur, patches, badges and much more!
Content
Every woman always strives to look impressive and keep up with fashion trends. Recently, the fashion for removable collars has begun to return, which can be successfully combined with clothes of different styles. This accessory can transform any look and become its highlight.
The idea of wearing a separate collar first came to the minds of Italian designers. Since then, this trend has spread to the people.
Of course, now you can find a huge selection of similar accessories in stores and fashion boutiques. But if you want to show your creativity and create something unique, then below are 3 detailed master classes on creating detachable collars.
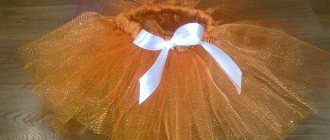
Organza collar
The presented organza collar model has a relatively stable shape thanks to its clear cut and several layers of material.
Collar drawing
The collar drawing is made based on the drawing of the basic basis of the dress. The front and back need to be aligned along the shoulder lines and a flat collar of a model shape should be drawn: put 13 cm down from the neckline along the line of the middle of the front, from here at a right angle to it draw a line 3 cm long to the right and decorate the end of the collar. Along the middle line of the back, place 13 cm down from the neckline and from the resulting point draw a smooth line for the edge of the collar. Copy the collar from the drawing. On the drawing of the collar, indicate the outer contours of the remaining layers of the collar, as shown in the drawing (Fig. 09) or as desired. Draw a stand-up collar in accordance with the drawing.
Collar details
Cut out the details of all layers of the collar from organza in one piece, without seams along the middle line of the back. Seam allowances: along the neckline of all layers of the collar - 1 cm; along the sections of the ends and the departure of the lower layer of the collar, 0.5 cm each; The upper and middle layers of the collar are cut out without seam allowances along the ends and flaps.
For the stand-up collar, cut out two parts from organza (outer and inner) with seam allowances of 1 cm along all sections.
Thin non-adhesive interlining material in the color of the base material is used as a stand-up collar gasket. A narrow (0.5 cm) satin braid is used to trim the edges and ends of all collars. To glue seam allowances along the edges of the collar, use a narrow (0.5 cm) strip of adhesive web.
Collar processing
1. Place a non-adhesive interfacing on the wrong side of the outer stand-up collar and baste along the edges. Place the stand-up collar pieces right sides together, align the edges, and stitch the ends and top edge of the collar. Remove the basting stitch (do not remove the temporary stitch along the lower edge of the stand-up collar), trim the seam allowances, cut out the allowances in the corners, turn the collar right side out, straighten the seam, iron.
2. Pin a paper collar pattern onto the part of the lower layer of the collar. Glue a strip of adhesive web to the edge of the pattern (Fig. 10). Remove the protective layer of paper from the adhesive web and iron the seam allowances (0.5 cm) onto the web along the ends and the flap of the lower layer of the collar, respectively, gluing them. It is important to be careful and precise when performing this operation. Remove the paper collar pattern and glue the pressed seam allowance to the collar.
3. Sew a satin ribbon over the glued allowances along the edges of the ends and the flap of the bottom layer of the collar. The ribbon should be joined using small stitches with very thin threads matching the color of the ribbon, either manually or by machine (with preliminary basting). If the edges of the collar have the shape of straight and gentle curved lines, then sewing on a satin ribbon will not cause any particular difficulties. If the edges of the collar have the shape of lines of significant curvature, then the use of satin ribbon is not advisable; in this case, it is better to use bias tape with edges ironed on the wrong side or braid, which can be given a rounded shape.
4. On the wrong side of the upper and middle layers of the collar, glue the adhesive web strictly at the edges and ends (Fig. 11).
5. Remove the protective layer of paper from the adhesive web first from the middle layer of the collar. Place the middle layer of the collar on the bottom layer of the collar, straighten the parts, baste and glue the middle layer of the collar to the bottom layer using adhesive web (ill. 12).
6. Glue the top layer of the collar onto the middle layer of the collar in the same way.
7. Cover the sections of the upper and middle layers of the collar with a satin ribbon, sewing it with through stitches and connecting the layers of the collar to each other.
8. Connect the stand-up collar to the bottom of the collar (Fig. 13).
9. The collar is fastened end-to-end with a hook and loop.
Video material
There are a lot of options for how to sew a collar on a dress. Perhaps you will come up with some version of your own, or perhaps use the ideas presented in the article. In any case, we wish you great creative ideas that will help you transform any item from your wardrobe in simple ways!
These decorations are again present in the haute couture collections presented at Fashion Weeks in Paris, London, Milan, New York, Berlin, Moscow, Barcelona... The only, perhaps, update of the trend is the emphasis on stand-up collars or stand-up collars . But Russian women, with less sharp and more pretty features, undoubtedly should not give up turn-down necklace collars and collars in the form of frills or a collar with a frill. In addition, they are crocheted, woven from beads, pearls and chains.
One of the reasons for the popularity of these decorations is that they are quite easy to make with your own hands at home, and in addition, they provide unlimited scope for the manifestation of creative imagination. But the main thing is that you make an original decoration that becomes the highlight of your chosen image. Collar-necklaces can be of very different shapes, and they are also decorated in a variety of ways.
You will need:
- sequins
- Swarovski crystals
- beads
- large beads
- untreated semi-precious stones
- pearls
- chains
- lightning
- blocks
- rivets
- buttons
- ribbons
- braid
- lace
- brooches
- coins
- decorative fabrics.
By the way, the collars of shirts and dresses decorated with the elements described above are a separate issue. Removable necklace collars are considered super fashionable. Our website already has a detailed step-by-step guide on how to sew a separate stand-up collar from a regular shirt according to all the rules.
In this master class, the edges of the collar are trimmed with scalloped braid; this is just one of the many options for starting the decor. Other braids and ribbons are also suitable for finishing the edges, for example, ready-made and hand-made ribbons with rhinestones, beads, beads sewn or glued on them, or narrow lace, or... in general, call on your imagination to help. Next, we decorate the surface of the collar or sew a decorative brooch, button, rhinestone, etc. instead of a regular button on the collar stand. The surface of the collar - in addition to the methods described above and below, can be decorated with decorative buttons: to do this, you need to bite off the legs of the buttons, level the bottom surface and glue the buttons with using a heat gun. If you have unnecessary stud earrings lying around, then you simply pierce the surface of the collar with them, and on the reverse side of it, bend the ends of the rods with pliers so that they do not scratch your neck. Volumetric metal blocks are the hit of the season, especially with spikes. An ideal youth decoration for those who want to demonstrate their desire to isolate themselves from harsh reality. The combination of delicate lace and pearls looks very gentle and romantic - perfect for a naive and youthful look. Decor made from pieces of fur is also a fashion hit, even in summer. Of course, you can’t wear such a necklace on a hot summer day, but on a cool evening it can effectively complement an outfit.
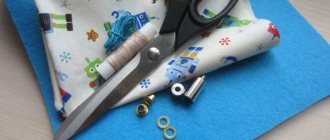
Felt turn-down collar
Step 1
Using the template of a round turn-down collar (take a pattern from any Burda model that suits you or directly copy from and adjust to your size), cut out four parts from felt (see figure), onto which glue a variety of decorations using a heat gun. Felt will give the necklace the necessary rigidity.
Step 2
Next, you will need a strong chain, which must be glued along the inner edge of the collars, releasing the ends of the chain of the required length from behind to attach the necklace to the neck.
Step 3
Now glue the top parts of the collars on top. In conclusion, all that remains is to beautifully arrange the decor you have at home on the surface of the collar and glue it with a hot-melt gun.
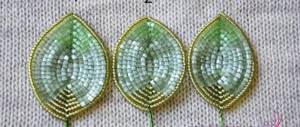
Collar with handmade lace
This collar model was created under the influence of historical prototypes. The cape collar made of fine linen with delicate handmade lace inserts is reminiscent of the “times of Wallenstein.”
Collar drawing
The collar drawing is made based on the drawing of the basic basis of the dress. Align the front and back along the shoulder lines and draw a flat collar of a model shape: put 15.5 cm down from the neckline along the line of the middle front, from here at a right angle to it draw a line 2.5 cm long to the right and decorate the end of the collar with a curly angle. Along the middle line of the back, set 15.5 cm down from the neckline and from the resulting point draw a smooth line for the edge of the collar.
Copy the collar from the drawing. On the drawing of a flat collar, indicate the location of the collar trim and lace insert, as shown in the drawing or as desired, depending on the width of the lace. Draw a stand-up collar in accordance with the drawing (Fig. 15).
Collar details
The outer and inner parts of the parts of the flat-lying collar are cut out of the main material in one piece, without seams in the middle of the back. For the outer parts of the parts of a flat-lying collar along all cuts (except for the neck cut), cut out more internal parts by the width of the edge of the facing seam, approximately 0.2 cm, or cut the parts equal, but when connecting them, mix the outer parts along the sections relative to the internal parts by the amount of the edge overcast seam. Seam allowances are 0.8 cm on all cuts.
For the stand-up collar, cut out two parts from the main material (outer and inner) with seam allowances of 0.8 cm along all sections. Cut the outer part of the stand-up collar along the top cut and the ends of the ends larger than the inner part of the stand-up collar by the width of the edge of the facing seam, about 0.2 cm, or cut the parts equal, but when connecting them, shift the outer part along the cuts relative to the inner part by the amount edge of the facing seam.
Thin adhesive interlining material on a woven basis is used as a lining for the flat-lying collar and stand-up collar; The direction of the warp thread on the spacer parts must coincide with the direction of the warp thread on the parts cut from the base material. The seam allowance for all cuts of the interlining parts should be such that it falls under the edge turning line by 0.1-0.2 cm.
Collar processing
1. Use an adhesive pad to duplicate all the details of the flat collar and stand-up collar.
2. Fold the outer and inner trim pieces of the main collar with the right sides inward, and baste, seating the outer piece in the corners (ill. 16). Hem all the edges, trim the seam allowances according to the general rules, cut off the seam allowances in the corners, turn them inside out, straighten the seams with edging from the outer part of the main collar trim, iron them.
3. Process the main collar and stand-up collar in the same way.
4. Before connecting the lace to the collar, either decate or wash it. It is important to position the lace pattern correctly - it should be symmetrical on the left and right sides of the collar. Using wet-heat treatment, give the lace the shape of an insert on the collar (pull the outer edge and iron the inner edge).
5. Sew lace by hand to the corresponding edges of the flat collar pieces on the side of the inner collar pieces (Fig. 17). The protruding corners of the main collar and the trim of the main collar are joined by hand using invisible stitches.
6. Connect the stand-up collar to the flat collar according to the general rules.
7. Sew a hook and loop at the level of the stand-up collar seam.