An artistic railway is the dream of almost every child. Just watch how children “stick” to exhibition stands and museum exhibits simulating a railroad. It is very interesting to see trains and carriages that are smaller copies of the real ones. The trains can be controlled, they stop at stations, sound signals, pass through tunnels and enter the depot. This is a very beautiful sight, but doing all this is not at all easy.
In order to assemble a road model, you need a lot of time, skills, materials and financial costs. A child cannot do this. But many adults are ready to spend time, effort and money on creating their own model railroad. This is a very exciting activity
, and the reward will be a layout that can be developed, improved, added rolling stock and landscape details.
A little history
The miniature railway is not at all a tribute to fashion and not a new phenomenon, because the history of railway miniatures and model making goes back more than one hundred and fifty years. For the first time, a model railway appeared as a toy in the nineteenth century (in the second half). Germany, represented by the manufacturer Märklin, took upon itself to ensure the necessary industrial volumes. Their miniature railways were so high quality and good that even the royal family ordered such a model for the Winter Palace.
Based on the scales of the railways presented in the miniature German production, scaling standards for model railways were later adopted. By the end of the nineteenth century, America also got involved in the matter, launching for the first time in the world an electric model railway (manufactured by Carlisle & Finch).
Almost until the middle of the last century, an ordinary toy in the form of railway rails with a train, and a perfectly accurate copy or a miniature railway were perceived equally, however, after the toys stopped causing such a stir, and modeling began to take shape as a serious hobby, gradually finding more and more more fans.
Therefore, manufacturers tried to please their new admirers - adults who were eager to assemble a full-fledged miniature model of the railway. To do this, they began to produce more advanced models, where the rails could be folded into a full-fledged railway track in miniature, where locomotives and cars had many parts and elements, which also included various buildings, road paraphernalia and signs, semaphore, etc.
Nowadays, there are practically no global giant companies left that would be engaged in such production, however, there are many small successfully operating companies that specialize in the production of certain models of trains or additional accessories, without which a miniature railway is impossible.
Scales, components and other nuances
To make a model of a railway, you must understand many nuances, for example, on what scale a miniature railway is usually made, what type of kits and configurations of the craft can be obtained, whether a diagram is needed and where to get it, what to do with the components and necessary parts and various accessories, etc.
Standards of scales and sizes for railway modeling are very different. The most common sizes are those bearing the symbol TT and NO.
Standard size TT - from the English Table-top trains - means that the model of the railway is made on a scale of one to one hundred and twenty (1:120) with a track width of twelve millimeters. Such a miniature railway is also called twelve-millimeter. It also makes all the moving model trains - this is done by supplying electricity along the rails, although it is also possible to connect an electric locomotive through the contact network.
A large number of models and various accessories for assembling railway miniatures of this standard size are produced:
- German companies Berliner TT Bahnen, Tillig;
- European manufacturers Roco and Piko have a small selection;
- the Jago company delights fans with rare models of vintage locomotives;
- Russians and the “TT-model”;
- American PossumValleyModels, GoldCoast (some models of cars and locomotives).
Another common standard size is BUT. The name comes from the English abbreviation HalfZero or half zero. In this case, the model of the railway is made in a scale ratio of one to eighty-seven (1:87). There is also standard size 0, in which the scale is taken twice as large, that is, 1 to 45. And here we get half a zero, but the Latin letter O is used instead in the designation.
A miniature railway on this scale is considered the most popular and widespread in the world due to the fact that it can be made without using complex devices; moreover, these model railways are large enough for detailing, but at the same time quite convenient and compact for placing the layout in a house or apartment.
A miniature railway of this standard size is also mobile: energy is supplied from the contact network or along the rails (in the case of electric motors in locomotive models). Plus - you have the opportunity to use additional interesting elements when creating crafts:
- device of a smoke generator that will run on oil and create a smoke effect over diesel or steam locomotives;
- installation of a sound decoder in rolling stock - you can play any sound files that simulate the noise and sounds of train movement, etc.;
- signaling devices, which stands for alarm, centralization and blocking.
There are various other sizes available. For example, the large-scale standard G, the development and production of which has been carried out since 1968 and is still being carried out by the German company LGB. This is a prime example of a garden railway designed to be located outdoors. In general, the larger the scale at which the miniature railway is made is chosen, the more detailed the prototype should be repeated, the smallest details and elements should be taken into account.
Goals and objectives of our future layout
Main goal: psychomotor development of the child.
Therefore, the copy number
,
beauty
(and such that you can’t touch it with your hands) and
excessive complexity
fade into the background. But this does not mean that we should make a “simple circle” and “stupidly drive” a train around this circle... In other words, we need to make the layout as functional and interesting as possible for the child.
Our tasks
:
- development of fine motor skills
: coupling and uncoupling cars, loading and unloading, building various objects on the model itself and many other small operations; - development of thinking and problem solving:
this is something like a puzzle, for example, you need to remove a carriage from the middle of the train (not just with your hands, of course, but with maneuvers) and leave it on sidings (so as not to interfere) or for loading and unloading. It seems elementary, but believe me, such a task can sometimes “strain” even an adult a little; - interaction of the child with other players
: for example, the child controls the train, stops the train and asks the other player to switch the switch. Or the child drives the train exactly to the loading location, waits for another player to load the car and then transports this cargo; - gaining knowledge
: to give an idea about various types of transport and their interaction. Transportation of various cargoes (for people we will use a passenger car, for large cargo - a platform, etc.). “Combined” transportation, for example, we will load something into a container (directly inside this container), then transport the container itself and then unload it at the place of arrival.
This list, of course, can be continued endlessly...
The basis
Let's talk very briefly about the base: rails, locomotive, cars and power supply.
The most common and convenient scale is H0
or 1:87 (∼90-95% of all railway models).
Keep in mind that it can be written as the letter "H" and a zero (more correctly), but also as the letter "H" and the letter "O". The track width is 16.5 mm. Remember, the “H0
” scale [“ash zero” or “eh zero”] - look, ask, buy only this scale!
There is one more detail. As you know, there are straight rails, and there are also curved ones. So, this “degree of curvature” is measured by radius. Those. if we assemble a circle from curved rails, we can measure the radius. If you plan to use only a small two-axle locomotive, then there is no problem. But if you use a large six-axle one (two bogies with three axles each), then it will not be able to travel with a small radius
. It's like a truck with a long trailer can't drive down a road with sharp turns. I won’t bother you with this, because... Different manufacturers may have different “curvature” markings. You just need to remember this.
It’s good if you purchased a ready-made set, and from it you can assemble more than just a “ circle”
or “
ov
al”, and it has arrows, dead ends... But what if you need to assemble it yourself from scratch? First, you need to decide what size the layout will be (see below). Then you need to sketch it on paper. And then the drawing can be made in full size. And if you already have rails, assemble them directly on the drawing and outline them. With this huge “picture” you can already walk around and select the missing rails, simply by applying them to the drawing! By the way, now there are flexible rails on sale, you can bend them as you wish, i.e. you can put one of these instead of 4-6 usual ones and the most important thing is that this long rail can be either straight or curved at your request, exactly repeating all your fantasies in the drawing!
The simplest and cheapest is the analog railway model.
Everything is simple here: we send current along the rails (minus on one rail, plus on the other) and the locomotive moves, because
it has an electric motor. They stopped supplying the current - the locomotive stopped, changed the polarity - the locomotive went in the other direction. Recently, digital control
.
In this case, the rails are always energized, but the peculiarity is that a command is sent to the locomotive (along the same rails) so that, for example, the engine, or lights, etc. turn on. Each locomotive is assigned its own unique code. If there are two locomotives (even next to each other), then you can control one of them, the other will not respond to these commands. In other words, different compounds can be controlled independently. Such a system is much more complex and its cost is an order of magnitude higher. For our purposes and tasks, simple, old and reliable analog control
with an inexpensive power supply is more than enough.
Where can I buy
On many sites that describe the construction of a model, they offer to immediately buy a starter kit. If you “don’t have money” and you are too lazy to do something with your own hands, then this is not a problem (they will do everything for you, and by the way... what are you forgetting here?). You need to keep in mind that a child can break something during the game. In other words, the layout should not be “cheap”, but it should not be too expensive so that the child can only look at it. In addition, we don’t just need identical cars, we need variety: a platform, a car in which the door opens (for loading), a passenger car, some kind of tank, etc. Therefore, to start, I would advise looking for used sets, and then supplementing them as necessary with both new and used objects. In fact, many people have such sets lying around.
.
In Montreal, where we live, they can be purchased at /registered users only/
.
There I bought a starter kit for only 20 dollars when the regular price is 100 CAD! I also saw a lot of good offers here: /*****/
But be careful, prices are often unreasonably high!
Very good prices in the store /*****/
You can also buy online, for example at
/*****/
, but this is mainly for supplementation.
By the way, when we lived in St. Petersburg, I saw a lot of things /*****/
.
Do it yourself or buy it?
Today you can find many thematic forums and special publications dedicated to railway modeling. You can purchase various elements separately and then assemble them together to create your own model railroad.
However, first of all, you will need to decide on the available free space. Can you dedicate half or even an entire room to the layout? If not, then you will have to first start building a sub-model or equipping a special place. To do this, you can use at least a separate table or make a retractable / folding tabletop that will be used only for your project and nothing else, which means you don’t have to fold and put away the layout every time.
There are also options for modular layouts, which consist of individual blocks, cantilever structures (you can attach sub-layouts to the walls, like shelves) and lifting ones (easily removed from the ceiling).
It is also better to take an appropriate scale for an apartment, for example, with a standard size of 1:87 you will not do much, because you will need a minimum space of one by three meters. It is better to stay at a scale of 1:120 or 1:160, since designing a layout in an even smaller standard size Z (1:240) will require a lot of skill, effort and financial investment.
To create your own miniature railway, you will need to invent and think through its future appearance down to the smallest detail. Perhaps it is worth starting with the simplest scheme, for example, making only one rail ring and a locomotive with several cars. Over time, you will add additional tracks, trains, semaphore and signs, a station and buildings, figures of people, etc. to the project.
Experienced craftsmen already know how to create entire detailed landscapes - mountains and plains, bridges and tunnels, forests and fields, miniature streets, numerous forks in paths, depots and other interesting things.
Even for the simplest project it is better to make a diagram. Just try to draw what exactly you want to create. If your plans are to create a railway of a certain historical era, then you will need to thoroughly study all the available information on this topic, find archival photographs, copy them, etc.
You will also need a detailed diagram for making models of steam locomotives and carriages. You can use a diagram of a specific machine by finding a photo of it. Just divide the actual dimensions of a particular train by the scale you need and you will have a ready-made construction plan.
DIY railway model
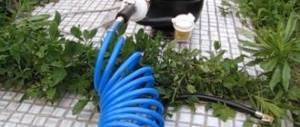
You can play on the floor, but assembling the railroad itself will take 30-40 minutes, after which you will no longer have the strength to play with your child. Then the rails will constantly be disconnected somewhere, and the cars will leave them... It will be necessary to endlessly put everything back! Also, contact will often be lost, you will need to look for where there is no contact. The child will walk, step on the rails, sweep away objects he has built, or may even step on the train... But all this time you will crawl on all fours
(like me in the photo above). I’ve already been through this and it “finished” me...
Layout size
The requirements for the layout parameters were as follows:
- so that he can easily rush through the door,
- so that we can put it against the wall (when we’re not playing),
- so that during the game you can walk around the layout,
- so that the layout is as large as possible,
- so that the child can calmly play “like on a table”,
- so that we adults don’t crawl on all fours and so that we don’t have to make an appointment with a massage therapist after such games.
So, we measured a couple of rooms where we planned to play railroad games, estimated and came to the conclusion that a size of approximately 1.5 x 2 meters would be suitable. In order not to complicate the design of the layout, for now we decided to simply place it on four stools during the game.
Step-by-step work plan
- Provide space for the project and make a base (a simple configuration can even be placed on a sheet of plywood).
- Transfer the diagram of the future railway miniature to the sub-model (draw how the rails will go, mark forks and turns, roads where you will place buildings or structures). For a complex rail arrangement, the circuit can be designed on a computer in a special program.
- Laying the rails. Rail material can be purchased at a specialty store or made yourself. Since current passes along the rails in moving roads, craftsmen make them from thick copper wire, rolling it to a rectangular cross-section on a hand-held machine. Sleepers are made from thin blocks, which are also cut on a machine. The tracks are attached in two ways: either glued or nailed with small nails to the base; then the rails can be soldered to the same nails or the rails can also be glued to the sleepers.
- For a moving model, you need to additionally develop an electrical circuit, and then mount it on a breadboard. Homemade units are usually used as a power source, but a factory one can also be used. Do not forget about the safety rules - the output voltage cannot be high, use a power supply up to sixteen volts, and if the model is small, then six to nine volts will be enough. An electric motor for a train can be purchased at a radio store or removed from a toy. Conduct electricity from two rails to the engine. To distribute electricity throughout the base, stock up on connectors and copper wires. Think through all the details before wiring - where the semaphores and traffic lights, barriers will be located, whether the lights will be on, etc.
- Dump and lay ballast, selecting it according to size among aquarium soils or any household bulk materials.
- Think over and create the relief and landscape. To make your layout look like the real thing, be sure to decorate it with a beautiful landscape. You can use professional materials such as spatula, forest litter, meadow powder, different layers of earth, crushed stone, sand, gravel and other interesting accessories from well-known manufacturers. If you choose more budget options, then to imitate mountains you can get by with construction foam, which can then be easily painted in any desired color. Hills, fields, vegetation and other decor can also be recreated from plywood, gypsum, fiberglass, papier-mâché, wood and other finishing materials. To paint the parts, use acrylic paints.
- If you don’t have the time or desire to bother so much, then many elements can be taken for a model and in finished form, for example, from toy sets, which contain figurines of trees, and dummies of grass or bushes, animals, cars, signs, people.
- The situation is the same with buildings - either use ready-made options, or build them yourself from cardboard, wood, plywood, papier-mâché. Use photographs of real train stations and other buildings as samples.
- Add the necessary components: paint roads, paint the grass, place human figures and place trains on the rails.
A passion for railway modeling can begin with a gift of a set with railroads and trains. Although such a hobby requires considerable effort and expense, it undoubtedly helps to develop, think, create and not stand still.
An artistic railway is the dream of almost every child. Just watch how children “stick” to exhibition stands and museum exhibits simulating a railroad. It is very interesting to see trains and carriages that are smaller copies of the real ones. The trains can be controlled, they stop at stations, sound signals, pass through tunnels and enter the depot. This is a very beautiful sight, but doing all this is not at all easy.
In order to assemble a road model, you need a lot of time, skills, materials and financial costs. A child cannot do this. But many adults are ready to spend time, effort and money on creating their own model railroad. This is a very exciting activity
, and the reward will be a layout that can be developed, improved, added rolling stock and landscape details.
The history of the appearance of layouts
The areas of modeling that fans of layouts are interested in are different:
- Collecting rolling stock, rails, trailers.
- Collecting full-fledged railway models.
- Making miniature roads.
- Making copies of real existing trains and compositions.
- Creation of park models in the open air.
The first models appeared in Germany in the second half of the 19th century, and subsequently the scale in which they were produced was adopted as a basis by other manufacturers.
Layouts that copy the shapes and sizes of real trains
, are very different from children's toy roads with trains. Almost a century has passed since modeling became an exciting activity for adults. This forced many companies to begin producing improved models of trains and rails, producing houses, switches, traffic lights and semaphores, and landscape details.
Miniature roads are available in digital and analogue versions. Managing an analog railway comes down to controlling the movement of trains. With digital control, the functions are significantly expanded. Using the remote control, you can turn on the lights in carriages and locomotives, sound signals, and move switches. This is a very interesting process
, but it’s no less interesting to create such layouts yourself.
How to make a layout yourself
You should start by collecting information. Many people are passionate about model building and share their experiences, give advice, and post photographs and videos on Internet pages showing the models they have assembled. You can purchase various structural elements and assemble them. First of all, it’s worth deciding
I have space for a layout. This should be free space. A table measuring approximately two by one and a half meters may be suitable. There are ways to arrange a layout on a folding or retractable tabletop. Then you need to select the scale of the layout. There are five main scales:
- HO, 16.5 mm gauge (1:87).
- TT, 12 mm gauge (1:120).
- N, 9 mm gauge (1:160).
- Z, track 6.5 mm (1:220).
- G (1:28 or 1:22.5) - garden or street scale.
Road scale is very common. It has dimensions that allow you to place the layout in the house, and consists of fairly large elements that are convenient to work and play with. Another interesting option is to use a smoke generator
, a sound decoder, for reproducing noise during the movement of trains, and security systems.
For another common TT scale, many German companies produce models and accessories, for example, Tillig, Berliner TT Bahnen. Such models are also produced by other European companies Piko and Roco, Russian companies, Peresvet.
The choice of scale depends on the space allocated for the road. Z - the scale is too small and the layout will be difficult to assemble and work with. The most commonly used are TT and H0. When choosing a scale, you must take into account the minimum radius
crooked. For scale rails (1:87) it is 380 mm. When passing large locomotives with five axles and long cars, this minimum radius must be increased by 1.5-2 times.
Based on this, you need to calculate the required space to accommodate the rail track. At a scale (1:87) it will be three by one and a half meters. You can select a smaller scale (1:120). The minimum radius will be 275 mm and a width of one meter will be enough.
You need to start building a layout by creating a diagram. At first it can be simple, one circle with the composition. New branches, arrows, semaphores, houses and other elements will be gradually added.
Making a children's railway
Having determined the dimensions and drawn a diagram, you can begin making the layout:
- You need to start by making a sub-model of the selected size. This could be a countertop or just a sheet of thick plywood. Next, you should transfer the diagram to the sub-model, drawing the rail tracks, the installation locations of switches and semaphores, the location of the houses, depots and station buildings. The complex arrangement of paths is designed in a special application on a computer.
- After drawing the diagram, you need to lay the rails. They are glued or nailed. Rails can be purchased or made yourself from copper wire. In this case, they need to be given a rectangular shape by rolling on a machine. Sleepers are also made on a machine. They look like thin bars.
- An electrical circuit is required for rolling stock. The power supply can be homemade or purchased with a voltage of no more than 16 V. As an electric motor for a locomotive, you can use a motor taken from a toy or purchased in a store. The trains will be powered through the rails. You need to connect the leads from the power supply to them. Electrical wiring is supposed to be done using copper wires and connectors. It must take into account all the places where there will be traffic lights, semaphores, and lanterns.
- In order for the rail tracks to have a realistic look, it is necessary to add ballast. To do this, you can use aquarium soils or special model gravel.
- To give the model a finished look, you need to think through and create the landscape, make mountains, tunnels, build roads, put up houses and figures of people. You can buy soil powder for grass, trees, or make a mountain and a tunnel using polyurethane foam and paint it with acrylic paint. Papier-mâché, paper, wood, plaster, cardboard and other materials can be used well.
- Very interesting models of trains and carriages can be made from paper. To do this, you need to download the diagrams from the Internet and print them. They need to be folded along the fold lines and glued. This is an easy way to fill your layout with new interesting models.
DIY modeling is a fun activity and a continuous creative process. It takes a lot of imagination and skillful hands to bring your plans to life. It will be doubly interesting to make a layout together with your child. This is a good reason to instill in him manual skills and show how interesting the process of designing and making models can be. Joint creativity brings people together and enriches them.
Attention, TODAY only!
Brought us victory in the competition. We won a coveted box from Two Palms. Our box contained the most fascinating topic (at least for boys for sure) - Railway!
My son and I barely carried the large box home. No, it turned out to be moderately heavy. But my son was so impatient to open it that he almost had to do it on the street
At home, having opened the treasured box, we were delighted to discover a beautiful letter and a gift with a ribbon:
And under the packaging there was a whole treasure of surprises:
- flashcards
- didactic games
- crafts
- acrylic paints
- book
- applique
- painting
- sticker book
- instructions for adults
The first thing that Arsyusha noticed was not the trains... but the acrylic paints, on the box with which they were depicted. I had to start crafting right away. As the fairy-tale plot planned by the creators later suggested, we went to the paint shop for trains.
DIY Leonardo Da Vinci Bridge
What is the secret of Leonardo Da Vinci's bridge?
The first version of the arched bridge by Leonardo da Vinci was designed by the master for the Turkish Sultan.
Leonardo planned to use natural stone to build the bridge. For five hundred years, scientists believed that a bridge of this design simply could not stand. But modern scientific enthusiasts have been able to prove the opposite. It turns out that the Leonardo Bridge model is quite viable and even sustainable.
For example, the Leonardo Bridge in Norway functions perfectly, allowing a massive flow of pedestrians and cyclists to pass through.
Although Leonardo da Vinci is primarily known as an artist, he was also an outstanding architect and engineer who designed many buildings and machines for his patrons. This bridge, also called a "temporary bridge", was designed by Leonardo to be quickly constructed from trees growing near rivers, allowing soldiers to quickly cross rivers while maintaining the element of surprise that was critical to the success of the battle. The simplicity and elegance of this bridge serves as a reminder that the brilliant Leonardo sought to solve the difficulties faced by the engineers of his time.
Leonardo's invention was perhaps the first version of a collapsible bridge in history. It was not difficult to install and just as easy to dismantle when it was no longer needed.
How is the Da Vinci Bridge built?
It was possible to install plank flooring on the wicker structure. The collapsible bridge was intended not only to capture the imagination of ordinary people. In those harsh times, the bridge was primarily a military structure. Leonardo's design made it possible to quickly erect a bridge over any body of water right during hostilities, allow a large army to pass through and immediately remove it, creating a barrier for pursuers. The “wicker” bridge is lightweight and can be built from any available materials.
This construction option is affectionately called the Da Vinci swing bridge
The stone version, of course, would not be as light as the log one; In theory, a very light and at the same time durable bridge can be made even from bamboo, although its dimensions will not be so grandiose.
How to assemble a Da Vinci bridge?
As it turned out, reproducing the Da Vinci Bridge with your own hands is not so difficult, and you can do it on an ordinary coffee table.
What parts are needed for the Leonardo Bridge? -The base is a wooden board, a sheet of plywood or thick cardboard, and 24 round sticks of equal length (you can use regular pencils). That's all.
- To begin, take a sheet of plywood, the opposite sides of which will become the “shores”.
- On each “shore” you need to make 2 holes. The distance between the holes on one “shore” is a little more than half a pencil; between the holes on different “shores” - slightly less than the length of two pencils.
- Insert sticks into the holes. In the future, the construction of the bridge will be carried out from one “shore” to the other. .
- Now we have to install each section, consisting of two longitudinal pencils and one transverse one. Since the sections are not held in place during the assembly process, you will have to install the bridge together - one holds the already made part, and the second installs a new one. (However, an experienced “assembler” can handle it alone)
- When the last section is connected to the supports on the opposite “shore”, the bridge will no longer need to be held by hands: on the contrary, this wicker structure itself will begin to hold everything that is placed on it.
Other bridge designs designed by Leonard Da Vinci
The two most famous versions of prefabricated Leonard bridges are the Arch Bridge and the Abutment Bridge.
By the way, the Da Vinci Bridge in Istanbul is an arched bridge.
In this article we talked about the version of the Arch Bridge that was designed by Da Vinci.
There is also a project for a sliding supported bridge by Leonardo da Vinci
Read previous Where to celebrate New Year in Vienna
Read next Paleontological Museum Egidio Feruglio
25.11.2019
Related Posts
Treasure of Two Oceans - Panama
Sights and excursions of Bali island
Moscow Zoo
Where to celebrate New Year's Eve - popular destinations
The nerve-wracking airport of Gibraltar
History of Yedikule Fortress and City Wall
Serpukhov Historical and Art Museum
Istanbul honors traditions
Why should you choose a tour to Georgia?
Crafts on the theme “Railroad”
In the paint shop, Arseniy himself painted a wooden train blank
. This is such a handsome guy we got:
Only after enthusiastic creativity, we were able to read a fairy tale in which the little hero Semaforik travels through the depot and gets acquainted with everyone and everything that is happening in the world of trains and locomotives. We cut out the cute Semaphorik.
My son really liked him and Semaforik became our friend for several days. From time to time Arseny asked me: “Mom, speak for Semaphorik.” So we ate, and slept, and played with our new friend.
Painting from grains
Semaforik suggested that Arsyusha paint another locomotive. Just not with paints, but with unusual multi-colored crumbs, very pleasant to the touch. Small grains of exactly the same size easily fit into the desired parts of the picture. When the painting was finished, the train was glued with double-sided tape. The result is a very beautiful three-dimensional picture:
Books on the topic "Railroad"
The set included a book with stickers "Trains"
. The book, in a light playful way, introduces a busy station, a freight train, and a steam locomotive. From it we learned such amazing facts as the existence of a double-decker train, what a monorail and a funicular are. There are over 50 stickers in the book, and although it is intended for children aged 6 and up, my 3 year old didn't close it until he reached the last page.
And before bed we read the book “The Wonder Train Goes to Sleep” by Sherry Dusky Rinker and Tom Lichtenheld.
.
In a light poetic form, the wonderful train collected toys and sweets, animal helpers into its carriages and platforms and went straight to sleep. A wonderful lullaby book with soothing pictures:
Geometric applique
My son really liked this picture. He himself figured out which figure to glue where, made the frame himself and placed it at our home exhibition.
I liked this applique not only because it gives ideas about geometric shapes and their sizes, but also because the child works with materials that feel different to the touch: paper, small squares of double-sided tape and decorative plastic threads - sisal. This thread gives unusual tactile sensations.
Logic games
Logic games gave us equally beautiful cards. Some suggest assembling a logical sequence using a diagram, others teach counting, and others teach the order of numbers from 1 to 9.
Arseny very quickly dealt with logic games, but, unfortunately, he did not want to return to them anymore - they turned out to be too simple.
Now on the street, we say hello to the traffic light from his brother Semaphore, tell cars and trams what color they need to go to and tell our friends about what a depot is and why it is needed.
Both my child and I are simply delighted with the “Railroad” set
. Many thanks to Lyudochka Vlasova.
Sketch
To know where you are heading, you need to have a goal in front of your eyes. Make a rough sketch on paper - where everything should be, and what the general appearance of your layout will be. Browse the Internet, look at numerous railroad models and take note of what you like - bridges, crossings, houses, stations. You can make a model of a stop station in the Wild West, or you can make a model of a station in the center of a modern city. But be sure to decide before you get to work. And make markings on the table so that you don’t suddenly discover that the track goes beyond the boundaries of the table, or that the barrier will cling to a passing train.