There has been a lot of talk lately around the use of RFID tags, with discussions even suggesting that if they wanted, people with some computer skills could hack into your home system and get complete information about your belongings.
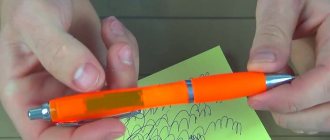
I decided to figure out this technology myself. To do this, I ordered the necessary components and assembled the RFID reader with my own hands.
In this article I will tell you how to assemble a working RFID tag reader.
Features of programming intercom keys
To understand why programming individual intercom keys only involves recording a new identifier and linking it to the subscriber on the device installed in the door, it is worth paying special attention to the mechanics of operation and the internal structure of the usual tablets and cards.
All keys are built on a one-time device circuit. If a failure or physical violation of the internal structure occurs, the personal identifier is simply thrown away or destroyed. Neither repair nor reprogramming without the use of special industrial devices is provided.
RFID
Small keychains and cards are already familiar to many people. For such a key to operate, it does not need to be leaned against the reading pad. You just need to bring it a certain distance.
The keys are ranked according to their operating range:
- with an identification zone of 100-150 mm, common format, Proximity type;
- with a detection range of up to 1 m, Vicinity type.
Despite such differences in range, all identifiers work according to a simple scheme.
An intercom using keys of this class has a low-intensity electromagnetic field radiation unit in the contact area. Inside an RFID card or key fob there is a simple circuit; it includes an inductive oscillating circuit, a miniature transmitting antenna and a chip that generates a signal.
When the key is brought into the radiation zone, energy is generated and the internal electrical circuit is activated. The card or key fob transmits a radio frequency signal, the intercom recognizes the identifier and unlocks the door if it is registered in its memory.
There is simply no simple way to reprogram an RFID-class intercom key for most types of products. The identifier is formed by a factory-sprayed chip, the number of unique combinations (cards and key fobs) is huge, changes to the code are not provided.
The key can deteriorate either due to mechanical kinks or breaks (as a result, damage to the chip or transmitting antenna grid occurs), or due to exposure to strong electromagnetic radiation, comparable in strength to a microwave oven.
Touch-Memory
Touch-Memory is the contact tablet most people are familiar with. There is also a microchip inside this key.
However, the identifier is transmitted via a single-channel electrical circuit. When the key is applied to the contact pad, the data reading circuit is closed in the intercom.
A unique code stitched into the tablet is transmitted and checked against one of those stored in the device’s memory. If identification is successful, the door will unlock.
A Touch-Memory tablet can be damaged by exposure to strong static voltage by applying the tablet to electrified clothing. This is quite difficult to do, since the pulse must pass between certain points of the contact pad, but this is the most common cause of breakdowns.
The tablet with the chip is very durable, it is difficult to damage it mechanically, the key is that, in addition to exposure to static, it can be burned in the microwave. Touch-Memory tolerates any other influences, including the most powerful neodymium magnets, without consequences.
The way to program access keys for an intercom of this class is to use a special programmer. It is used to make clones of tablets, as well as universal master keys for a series of intercoms.
Touch-Memory is divided into classes. They depend not on the internal structure and principles of operation, but on the manufacturers, each of whom creates an internal circuit with certain characteristics and a methodology for generating a unique code.
The following types of Touch-Memory are widely used:
- with markings starting with DS (Dallas), used in a huge number of models Vizit, Eltis, C2000 and others;
- marked DC, as well as Cifral KP-1 - Touch-Memory data is intended only for Cifral intercoms;
- K series, widely used in Metacom access control systems and other intercoms.
Similarly, there are classes and RFID formats, for example, the oldest HID, the popular EM-Marin, and also used in Mifare cards triggered from a long distance. Therefore, before figuring out how to program a personal key for an intercom from an entrance door, you first need to purchase a Touch-Memory or RFID compatible format.
Do-it-yourself intercom key programming
The method for encoding a personal key for an intercom from work, home or friends' entrance consists only of recording the data of the corresponding personal identifier into the memory of the device controlling the door. To do this yourself, you need to access the service functions from the front panel keypad.
The technicians who install the intercom are required to reprogram and change the factory master codes and other service information of the device.
If this is done, the methods for registering your key in the intercom using standard access combinations will not work. However, a huge number of devices on the door respond to factory codes and allow you to activate service functions.
Algorithm of actions
The easiest way is to find out how to encode the key for the intercom from the entrance door from a service company. Some of them provide such data.
But there is a set of standard actions for intercoms of common brands.
- Rainmann, Raikman - press call, enter 987654, after the beep - 123456. If the invitation P appears on the display - press 2, apply the tablet, press #, , #. Recording into memory is done with the * button;
- — dial #-999, after the invitation sound, dial code 1234 (for some series - 6767, 0000, 12345, 9999, 3535). After this, press 3, after a pause - the apartment number, apply the key, press #, *. If the factory code (1234 and others) is not accepted, the intercom will emit a two-tone signal;
- , - hold the call button until there is a reaction (sound, invitation on the display), enter 1234, then the apartment number, call. In response to the invitation to place the key, exit the menu by pressing the * button.
The most modern versions of the Cifral intercom use fairly complex code sets. The method for encoding the key to the intercom from the entrance door looks like this: call, 41, call, 14102, 70543.
Then you should wait for the invitation to appear on the screen, press 5, enter the apartment number, after the inscription on the Touch display, attach the key. A sound signal indicates recording into memory.
Conclusion
You can record any of the purchased keys, which are mistakenly called blanks, into the intercom memory. In reality, it is a working mechanism with its own unique code. It only needs to be registered at the entrance device.
A variety of key application techniques are available. The same one can be used on several intercoms of the same brand, provided that registration has been made on each one. The main thing is that the Touch-Memory tablet or RFID card or key fob must have a format compatible with the device on the door.
DIY RFID antenna or Keys in a watch strap.
In this review, I will share a method for making frameless antennas for RFID tags and installing a pass and an intercom key into a leather watch strap. Here it is, my second review on Muska. I decided to tell you about how I simplified my movement at work, namely, I sewed a duplicate pass into the watch strap, into which I later added the key to the intercom. Next, I will talk in parallel about the manufacture of antennas for 125 kHz transmission and 13.56 MHz intercom. It all started when ACS was installed on almost all doors at work. I didn’t like using the card from the very beginning and I started looking for ways to make it easier to get through with a pass.
At first I bought a silicone RFID bracelet, but I didn’t like it, you know, it didn’t feel the same. Later it turned out that such bracelets are not durable and break due to frequent stretching. There are also more comfortable bracelets on sale. I had the idea to combine a wristwatch, which I wear every day, and a pass, especially since two bracelets on my hand are too much.
I didn’t break the pass card, but bought a duplicator and rewritable key fobs for the intercom. In my case, the operating frequency of the pass at work is 125 kHz, and the intercom frequency is 13.56 MHz.
About RFID tags
RFID tags come with an operating frequency of 125 kHz and 13.56 MHz. You can determine what frequency you have by asking the guards about it, by examining your work pass, or by using the “poke” method. RF tags with an operating frequency of 125 kHz have an antenna with a large number of turns of thin wire. At 13.56 MHz marks the wire is thicker and has fewer turns.
Simply removing the tag from the key fob and installing it in the strap did not work. The antenna dimensions are quite large. I tried to compress the antenna - the reading distance decreased significantly. Measurements of the antenna inductance showed that when the shape of the coil changes, the inductance naturally changes. I suspect that the tag antenna is an oscillating LC circuit and changing the inductance will not lead to good results.
From here there is only one way out - to make an antenna of the required shape and size with the required inductance. The maximum reading distance is achieved when the tag and reader antenna sizes are the same. Those. a homemade tag will be read at a shorter distance than a card. I would like to warn you right away that winding an antenna at 125 kHz is quite a difficult task due to the large number of turns and the small thickness of the wire.
Skip to 125kHz
The measured inductance of the tag antenna at 125 kHz was about 3.57 mH (milliHenry), and at 13.56 MHz it was about 5 μH (microHenry). Measurements must be carried out in such a way as to exclude the influence of other objects on the inductance.
To pass at 125 kHz, you may need about 450 turns of 0.05-0.07 wire with an internal diameter of 7 mm and an antenna thickness of 1 mm. The wire was wound from a 24V relay. I did the winding with a screwdriver. On about the fifth attempt I got what I needed). For an intercom key at 13.56 MHz, it took about 1.5 meters of 0.1-0.15 wire with an internal diameter of 7 mm and a thickness of about 1.5 mm. Winding was done by hand, the turns were not counted. It worked on the second try.
The intercom chip was carefully removed from the key fob. The keychain is tricky and it was not possible to copy it during the transition. Everything was filled with an insoluble compound. I had to carefully break everything apart.
Factory antenna measurements at 13.56 MHz.
To wind a frameless reel, we need equipment. I found a couple of plastic caps from I don't know why. Two plastic covers or other preferably round and flat parts are fastened in the middle with a screw and nut, which forms an axis of rotation. A cardboard spacer is installed between the covers. Winding is done in the gap between the plastic covers. The wire is fixed with epoxy resin or varnish.
Equipment
The winding method is as follows: first you need to cut out a washer from cardboard, which will determine the internal shape of the antenna and its thickness. Next, lubricate the surfaces of the equipment (plastic covers) with a thin layer of silicone, insert the screw and put on the cardboard washer. The end of the wire must be secured in the screw hole. We apply a little “five-minute epoxy” around the cardboard insert, put on the second lid, fasten everything together and immediately start winding.
Winding process
I made oval shaped antennas. It seemed impossible to accurately calculate the inductance, so I wound more... After the epoxy resin has not completely hardened, we carefully disassemble the equipment. The coil should easily separate from the lubricated equipment. We measure the inductance and unwind the wire until the required inductance is obtained. When approaching the required value, I took measurements after each turn. This method can be used to wind antennas of any shape and size.
We measure
You can also always buy small RFID tags (one, two, three) and solder your own or a rewritable chip.
After making the antenna, we solder a clean chip (TK5577 at 125 kHz) to it and make a copy or solder a known working chip.
Ready label
How can we now integrate everything into the watch strap? There are three options: the first is to buy a leather strap with stitching along the edge, embroider it, prepare a niche, insert a mark and sew it back. The second is to find custom-made straps, send tags, indicate the installation location and get the finished result. The third option is nylon Milanese loop type straps. The tag can be installed inside the strap using glue. I ordered a strap from a master (look for it in the comments) and got an excellent result.
Finished strap from the master
Now, after all the experience I have gained, I can say that winding antennas at 125 kHz is quite a difficult task. A large number of turns, thin wire for small dimensions make the manufacture of such antennas a very delicate job. But making an antenna for 13.56 MHz was not difficult. There are few turns, the wire may not be very thin. It works no worse than the standard key fob antenna.
There were also ideas to add a metro card and a bank card to the strap. Only in Ukraine there is no way to top up the metro without contact. At least I didn't find it. And it’s not difficult to get a wallet twice a day. I think it’s also possible to install a bank card. People have already done this. We order a card with contactless payment, dissolve it in acetone, and then solder, etc. You can top it up via online banking. But that’s another story... I decided for myself that a pass and a key to the intercom were enough for now. It’s not time to sew RFID under the skin yet, but placing them in convenient places is quite possible. With that, thank you for reading to the end. I apologize for possible errors and inaccuracies. In general, as best I can... All the best!