This is my master class No. 2, I hope it will be useful to someone.
I will be making 2 bow ties at once - one with an elastic band, the other with an adjustable base (and slightly different in appearance), so the materials for 2 pieces at once: 38 mm grosgrain ribbon, 30 mm tartan ribbon, 9 mm grosgrain ribbon, 9 mm elastic band, edging pendants (optional) ) accessories - hook and buckle
- Share
Tools: soldering iron, ruler, scissors, thread needles, clothespins (if required) and Moment Crystal glue
- Share
Cut the ribbon into pieces - for a gray-blue “butterfly” - rep 20 and tartan 19 cm, + 6 cm tartan for the jumper. — for a black butterfly – 20 cm rep and 18 cm tartan, + 6 cm tartan for the jumper, + 40 cm 9 mm wide rep.
- Share
Make a jumper: Fold a piece of tape in half lengthwise. Run the soldering iron along the edge, sealing the strips.
- Share
Fold the tape, shifting the soldered strip as needed (in the center or to the side). I have a gray-blue checkered one, so I folded it exactly in half. And the black and yellow one has a pattern, so I folded it, moving it to the side (so that when folded there would be a beautiful pattern). Use a soldering iron along the top and bottom.
- Share
This is how the figurine will turn out. On the black and yellow ribbon, the pattern is shifted - I wanted the black cells to be visible.
- Share
On the black tape and the base of the gray-blue butterfly, we draw it along the edge with a soldering iron. It turns out to be such a “loop” with a sealed end.
- Share
Fold the blue tartan in half (to mark the middle). Forming a sharp bow (see photo)
- Share
10. We fix the bow with clothespins, fold it in the middle and see how much needs to be cut off (from above you can clearly see that it’s just a little bit).
- Share
Cut off the excess with a soldering iron. This is the top for the butterfly.
- Share
We put it on the grosgrain ribbon, align it in the center relative to the sides and top. And stitch it with thread. Please note: usually when stitching a bow, the knot is visible from the outside. But in this case, the knot remained at the bottom, this is the so-called “inner fold of the bow” - for those who didn’t know. I decided that on this butterfly I would lay the inner fold, so I stitched it like that. We tighten the thread and secure it.
- Share
Here I turn to my assistant, who walks around the bush, helping me with my work. Since the butterfly is for a 3-year-old boy, I measure the elastic according to my assistant.
- Share
It turned out to be exactly 26 cm of elastic, it stretches quite well. Sew the elastic into the ring.
- Share
We apply and try on the jumper from the front. And from behind. We put the elastic with the sewn edge under the jumper. We try on how much excess length we need to cut off from the jumper.
- Share
How to make a bow tie with your own hands
Any girl can buy a tie for her man at any men's accessories store. However, it is much more pleasant for the stronger sex to receive gifts made with their own hands. The bow tie comes in different variations, but they all fall into two main categories:
- classic elegant model a la tie, which is tied at the neck;
- an accessory that is attached to the collar using a clip or a special fastener.
According to their shape, bow ties are divided into four types:
- classic, the width of which does not exceed six centimeters;
- large bow ties with a width of eight centimeters;
- diamond-shaped butterflies;
- tie models with slightly rounded ends.
A girl can sew a butterfly with her own hands for a man with step-by-step instructions. You need to decide which material is best suited for the accessory. If you use silk or corduroy, the bow tie will have a prestigious and expensive look. A more economical option is polyester, which resembles satin models, or paper. In any case, your first bow tie should be made from inexpensive material so that you don’t have to worry about failure. In order for the product to keep its shape, the manufacturing fabric must be dense.
From paper
A paper tie can be an excellent alternative to a fabric tie if you are sorely short of time and the accessory must be ready. If you use the origami technique, which does not require gluing and stitching, you can quickly make a beautiful bow tie from a sheet of colored paper. To implement your plan, you need to take a sheet of square size, for example, 15x15 cm. It is better if the sides of the material differ from each other.
Instructions on how to sew a butterfly around your neck with your own hands:
- Turn the sheet wrong side up, bend it horizontally, and then unfold it again.
- Fold each of the four corners to the center line in turn.
- Fold the top and bottom edges towards the center as well.
- Fold the piece in half, starting from left to right.
- Fold the corners on the right to the center line and straighten them.
- Straighten the product.
- Along the created folds, fold the central part in half so that it turns inward.
- Fold the top layer of the left corner to the right, folding from the top right corner downwards.
- Fold the left side back so that the corners on the right and left coincide.
- Fold the top layer of the left corners towards the center line.
- Fold the left corners towards the center line.
- Gently straighten the workpiece, carefully straighten the central part.
How to make a bow tie from fabric
The current part of formal wear - a tie - does not have to be bought for a lot of money. You can sew an accessory with your own hands using pieces of unnecessary fabric. The decoration is suitable for both children and adults. Perhaps, when you manage to make a bow tie with your own hands once, you will want to replenish your wardrobe with a whole arsenal of these attributes for every outfit for your son or husband.
How to sew a butterfly
There are many ways to sew a fashionable bow tie. There are complex and simpler options that require minimal handicraft time. You can create a bow tie without a machine, but if you have sewing equipment, it will be easier. You will need:
- a suitable piece of fabric, preferably thick;
- sewing machine or regular needle and thread;
- ruler;
- good cutting scissors;
- button;
- rubber band.
Instructions on how to sew a bow tie with your own hands:
- Cut a square of suitable size from the material, then fold it in half and stitch along three edges.
- Turn the product inside out, forming a butterfly with your fingers, secure the middle with thread and sew with a piece of fabric.
- Sew an elastic band and a button to the tie to secure the tie around the neck. Choose the length of the rubber band based on the circumference of your neck.
For boy
A bow tie is worn on a shirt for formal events, matinees or other celebrations. To sew a decoration for a four-year-old boy with your own hands, it is better to take natural fabric with a dense texture - even cotton or linen is acceptable. For the bow tie you will need:
- a piece of material measuring 2.5x4 cm;
- a small piece of cotton measuring 3x15 cm;
- a piece of non-woven fabric 3x10 cm;
- two pieces of cotton 3x10 cm;
- a couple of pieces of Velcro;
- spool of thread;
- sewing machine.
How to make a bow tie with your own hands:
- Fold the 3x10 cm patterns face to face and press the interlining onto them.
- Sew on each side and leave a two-centimeter hole in one place.
- Turn the workpiece through the gap.
- Iron the resulting product, connecting the ends in the center with a zigzag seam.
- Fold the rectangular shape in half lengthwise with an indent of half a centimeter from the center, creating a line about one centimeter long.
- The strap must be sewn from 2.5x4 cm patterns, which are folded face to face.
- A piece of 3x15 cm is needed to create a long belt, which should be stitched lengthwise.
- Thread the belt through the belt that is used to wrap the butterfly. At the ends of the belt, sew Velcro for fastening.
For a man
A bow tie looks spectacular on gentlemen. This accessory was not used so often a few years ago, but is now coming back into fashion. Satin butterflies are especially popular. So, a bow tie is made with your own hands if you have the following materials:
- two satin ribbons measuring 6 cm and 1 cm;
- seamstress kit: thread, needle, scissors;
- colorless varnish;
- hooks as a fastener.
A bow tie for a man can be made like this:
- Take a wide ribbon of 6 centimeters and make stitches in the central part, pulling the thread together and giving the product a bow shape.
- Using the first example, create a second bow and glue the two pieces together with glue, passing the thread at the point of fixation.
- Attach hooks to a thin satin ribbon, and secure the end of the ribbon to the runner. Thanks to this attribute, you can easily change the size of the bow tie circumference.
- Attach the ribbon to the finished bow tie using thread and needle.
Ribbon butterfly | DIY master class
Using the kanzashi technique, you can create an endless variety of original jewelry with your own hands.
You just need to learn the basics, and it’s not difficult at all. This master class shows how to make a beautiful butterfly from the simplest kanzashi petals: round and sharp from two layers of ribbon. To do this you will need: 1. 20 cm each of satin and brocade ribbon, 5 cm wide.2. Kanzashi tool set: scissors, lighter, tweezers and glue gun.3. Accessories for decorating and securing the finished product. All elements will be made from square pieces of ribbon. In total, you will need 4 squares of each color. The wings for the butterfly will consist of round and sharp kanzashi petals. First, let's make a double hot wing. To do this, a piece of brocade ribbon must be folded diagonally and in half. The resulting triangle must also be folded in half, forming a petal. Its edges must be cut and scorched with a lighter from the front and bottom. After glowing with a lighter, the front part is clamped with tweezers to glue all layers of the tape together. Now it is necessary to prepare the second layer in the same way by folding a triangle from a satin ribbon. Now the golden petal can be wrapped in the top layer of ribbon, cut and singed. Double petals can be made in another way. This method is longer, but requires more skill and accuracy. Let's look at the example of making a round petal. Two pieces of tape need to be folded diagonally into triangles and placed on top of each other. The edges of the petal are bent towards the middle. The sides need to be turned back as shown in the photo. The excess on the front and bottom is cut off and fixed with a lighter. This way you get a round petal. With this method you don’t need to do it twice do the same actions, however, when working with two layers of fabric, you need to carefully ensure that all the bends are parallel to each other. To make a butterfly, you will need two petals of each type. The butterfly will be secured to a wide invisible hairpin, and the middle can be decorated with a large stone .Using a well-heated glue gun, two wings of one side are glued together. Then both sides need to be glued in the middle. When the wings are connected, you need to glue the middle and fix the butterfly on a hairpin using hot glue. The hairpin is ready! With such a butterfly you can decorate any hairpins, rubber bands , headbands and even make a stylish brooch out of it. The middle can also be formed from any pebbles or beads that are on hand. This way, each butterfly will turn out unique and inimitable. Creative success! sdelaysam-svoimirukami.ru
Video: how to make a butterfly with your own hands
After spending a little time watching several videos, every girl will be able to give her boyfriend, husband or child an excellent handmade gift - a bow tie. Master classes provide detailed instructions on how to correctly make a pattern, sequentially sew all the elements to get the desired product that will decorate any man.
With elastic band
How to sew a butterfly with your own hands
From satin ribbon
A bow tie is a recognized attribute of both women's and men's wardrobes; It is usually made from silk or cotton fabrics; wool is much less common here.
It is also interesting that there are several wearing options: in the classic version, the one who will wear the tie must independently fix it each time, tying a neat knot in the middle, while in the simplified version the tie is already formed at the factory, and all that remains is to secure it at the back using adjustable shirt collar clasps.
However, it is not at all necessary to rush to the nearest clothing store for something new - it will be much more interesting, cheaper and even more original to try to make such a bow tie with your own hands. You should begin work by preparing all the necessary materials according to the list. So, we need:
Satin ribbon of the desired color is comfortable, the width recommended for sewing starts from four centimeters. Length – one meter.
The satin ribbon is narrower, about a centimeter wide - the required length will also be equal to a meter;
Ordinary matches or clear nail polish will be useful to handle the “loose” edges of the ribbons;
A needle (preferably thin), scissors, as well as bobbin or silk threads to match the color of the ribbon;
Hooks, Velcro, buttons or any fastener convenient for you;
Fabric glue – if you don’t like to sew;
Typically, a tie of the type that we will consider in this article consists of two bows - the smaller one is overlapped and secured to the larger one. However, you can make a simpler butterfly - then it will consist of only one bow, tied with a ribbon.
A small digression: the low complexity of the craft here allows you to do without seams, using only glue, but in this case it is recommended to iron improvised “seams”, that is, places of gluing, with an iron at temperatures acceptable for a particular fabric. However, it must also be taken into account that some types of glue may not be intended for heat treatment.
For a tie of two bows, prepare two pieces of ribbon - one shorter (twenty to twenty-five centimeters), the other longer, thirty to forty centimeters long.
If satin ribbons are not found, the butterfly can also be made from nylon, but keep in mind that then all the seams will have to be carefully hidden, because they can be visible through the fabric. If you decide to make a tie from a cotton ribbon or a piece of woolen fabric, then be prepared for the fact that such material may turn out to be quite rough in structure - which means that some difficulties will most likely arise with the drapery.
Having pre-treated the edges with transparent varnish or flame, take a twenty-centimeter piece of tape and fold it in half, matching the ends of the material. The resulting seam should be at the back, so if you see it in front of you, turn the butterfly so the front side is facing you. Using a “forward needle” seam, we assemble exactly in the middle of the workpiece; at the same time, try to overlap and stitch the ends located at the back. Ultimately, the thread will need to be tightened and secured; for strength, you can even wrap the assembly area with thread and glue it. Make sure that the glue is as transparent as possible and does not leave unsightly yellow spots on the fabric. If you don’t have a suitable glue in your arsenal, you can also coat the assembly area with clear nail polish. The large bow is performed in the same way, then the bows are connected by placing the small one on top of the large one. The joint can be either stitched or glued.
Advice
:
If you decide to make a simple bow tie from ribbons with your own hands, then you may need a ribbon a little wider, say, five to six centimeters wide.
It is recommended to make the assembly more magnificent: to do this, by making one seam “forward with the needle”, you need to make two arched seams on each side, as shown in the picture: Prepare a narrow ribbon, a centimeter wide - it will act as a base that holds the butterfly and fits under the shirt collar. The length here is selected based on your own measurements, plus a few centimeters in case you plan to attach adjustable fasteners.
The edges to which convenient fasteners will be sewn must not only be singed or varnished, but also strengthened. This can be done in several ways: the tape is slightly bent and stitched close to the edge; if desired, you can sew a square of fabric whose edges do not fray. It could be felt, drape or even a leather substitute.
Cut about three to four centimeters from the wide ribbon. We will need this piece to cover the assembly point on the small bow; the required length should not be selected end-to-end, but taking into account the fact that the butterfly will move along the tape if necessary. However, if you want to leave the tie static, you can simply sew it to the ribbon, but in this case you will have to very accurately calculate its position on the neck.
The ends of a piece of ribbon are sewn into a ring at the back, and thus the tie can move freely along the ribbon.
butterfly | DIY master class
Regardless of what means a person has, he still wants to look stately and elegant.
In addition, no weather can prevent you from looking appropriate, the main thing is that you have the desire to do everything for your appearance. After all, how impressive you will look in society depends on the small details of your clothes, and the accessories that are successfully selected for them. Whether it's a ball or a regular party, you have to look chic! To do this, you don’t have to buy new things, you can just add something to your formal weekend suit, for example, a blouse. If you have a wonderful collared blouse, but don't know what you can add to it to make it look unusual, then this is not a problem! You can make your own bow tie. The bow tie is a pretty popular trend these days. An ordinary purchased bow tie will not be so elegant and unusual, but, as far as we know, everything is in our hands, so let’s not put them down, but quickly create a masterpiece with them. To make a bow tie we will need the following materials and tools: a wide satin ribbon (width – 5-6 cm, length – half a meter), thin satin ribbon (length – up to a meter, width – 0.5-1 cm), thread with a needle, scissors, glue, colorless nail polish, glue glitter (two colors) , special hooks for bow ties. Now let's start working on our tie. First of all, we cut our wide satin ribbon so that one part of it is larger than four fingers of our hand.
First we take one ribbon, fold it together and run stitches in the middle of the ribbon with a thread and a needle.
We tighten the thread and twist it several times so that we get a bow. We make the second bow in the same way.
We glue both bows and secure them with thread, so that the thread goes through two bows.
Now we glue glue stones along the edges of the first (smaller) bow. First one row, and then a smaller row with stones of a different color. We cover the top with colorless varnish and wait 15 minutes for the stones to stick well and the varnish to dry.
We take a thin satin ribbon and attach special hooks for a bow tie to it. First, we put on the runner, and on the same side we fasten the end of the ribbon in the runner, so that you can easily change the size, rather than having to alter the entire tie later. On the other side we attach the hook itself.
There is a small portion left, and you can safely try on your masterpiece tie with your shirts and blouses. We connect the base ribbon with the butterflies using a small piece of ribbon of the same color as the bows. Sew this ribbon at the back of the bow.
That's it, your bow tie is ready! Now you can brag to all your friends about such an excellent product, and also make such ties to match all the colors of your clothes. And if you decide to present such a bow tie to your friends as a souvenir or gift, it will symbolize your recognition and warm attitude.
sdelaysam-svoimirukami.ru
DIY ribbon tie decor
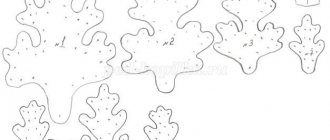
There are a great many options for decorating a bow tie. You can use both artificial or natural, precious or semi-precious stones, as well as ordinary applications (for example, if the butterfly is intended for a child). Small glitter that needs to be “planted” on a special glue is also suitable, for example, this is how you can decorate a homemade tie by applying powdered glitter along the lines marked with a blue dotted line in the picture:
A bow tie made by yourself can become both an original gift and a luxurious, exclusive element of your personal wardrobe that you will never find on anyone else.
Wear it with pleasure!
There are many ways and master classes for creating various decorations from ribbons. Most often, such lessons contain information about making lush flowers, but many are also interested in other options, for example, a butterfly made from ribbons. You can do it with your own hands quickly and without any problems. You just need to familiarize yourself with the basic elements, as well as the techniques for performing them. Beginners will be helped by step-by-step instructions that explain all stages of the work.
Making a simple DIY double bow tie from satin ribbon
The easiest way to make a double bow tie from ribbon.
1) Satin ribbon;
2) Thread and needle;
5) Clear varnish;
6) Decorative elements;
1) Cut two pieces of the required length from the tape. We process the ends with a lighter. We take one of the segments and sew its ends together. Then we make stitches in the center, tightening the thread so that a bow is formed. We perform similar actions with the second satin segment.
2) Next, attach the bows to each other, hiding the attachment point with a thin satin bridge. We attach an elastic band to the wrong side.
3) We finish the craft by decorating with the selected elements.
Such a butterfly can be obtained in the process of work. Decoration with beads and rhinestones is a more feminine option, but for a man you can leave the accessory without additional decor.
This master class will cover the stages of making a bow tie for a boy, who will decorate his outfit on a special day.
Making the upper wings of a butterfly
A DIY ribbon butterfly can be made quickly and without any problems, but to do this you need to strictly follow the instructions. To make the upper wings, cut a piece 10 cm long from a wide ribbon. The piece is folded in half lengthwise, and then its edges are shaped like an airplane. To make it convenient to work with the part, the junction of the edges must be grabbed with a needle. For a more durable fastening of the structure and for decoration, you need to glue a rhinestone at the joint near the spout.
The corners of the part need to be folded and secured with tweezers. The excess edge is cut off with scissors, and the bottom edge is also leveled with their help. To make the upper wings the same, it is better to make two parts in parallel, placing them next to each other and comparing the sizes. At the bottom, the edges are singed separately, and on the sides - together to create boat-shaped parts.
Now you need to make round inserts from a ribbon of a different color. The petal should have three folds. After this, you should make a small sharp petal, which is placed between the folds of the round one, having previously lubricated the lower part with transparent glue.
Combining parts into one design
All elements of kanzashi decoration are sewn together with a needle. The upper wings must be pierced in such a way as to capture all the folds. All parts are tied together with thread and secured with several knots. To attach them firmly, you need to apply a little transparent glue to the base of the wings.
A butterfly made from ribbons, made by hand (kanzashi), looks beautiful, but in order for the structure to be durable, you need to take care of its strong connection. The wings are attached to the body. To make it, you will need a pin on which a small bead is strung, a rondel is put on top, and then six beads of the same size. Next, you need to take the second pin and string the same parts onto it in a similar sequence. After this, both pins are inserted into one rondel, a large bead is put on, and a second rondel is placed on top. The ends of the pins are covered with beads.
Now all that remains is to connect the wings to the body. For these purposes, transparent glue and a needle with a light thread are also used.
Kanzashi dragonfly
A ribbon dragonfly will be one of the easiest crafts that you can make yourself. To work, you need to prepare a satin ribbon about 2-3 cm wide, a narrow shiny ribbon, beads of different sizes, scissors, wire, thread, a needle, tweezers and glue.
The first step is to make the wings. To do this, the satin ribbon needs to be cut into pieces about 6 cm long. One edge of each piece should be cut in the shape of an angle. After this, the edges of the resulting corners are glued from the wrong side. When the glue dries, the parts are turned out in such a way as to form a kind of petals. Next, use glue to connect the lower corners on the front side.
In this way, four petals are made and combined into wings using glue. Next you need to make a body for the future dragonfly, for this you will need two pieces of wire 10 cm each. They are twisted together, a knot is left on one end, and two free ends on the other.
Beads (no more than 14 pieces) are strung on the wire; the trailing one should be larger. The ends of the wire are secured so that the body does not fall apart.
As a result, the dragonfly needs to be collected. The body of beads is fixed to the finished wings using glue. Moreover, if desired, you can decorate the wings; shiny ribbon, beads, rhinestones, beads, etc. are suitable for this.
step-by-step instructions, interesting ideas and recommendations
There are many ways and master classes for creating various decorations from ribbons. Most often, such lessons contain information about making lush flowers, but many are also interested in other options, for example, a butterfly made from ribbons. You can do it with your own hands quickly and without any problems. You just need to familiarize yourself with the basic elements, as well as the techniques for performing them. Beginners will be helped by step-by-step instructions that explain all stages of the work.
Popular decoration: DIY satin ribbon butterflies
This element can become the decor of a hair clip, headband, elastic band, bracelet and even a ring. Cute creations made from bright ribbons will lift your spirits and remind you of sunny days all year round.
A DIY ribbon butterfly is made in different variations. But when making it using the kanzashi technique, they always use the same principle - folding petals from round or rectangular pieces of ribbon.
Simple kanzashi butterfly
When thinking about how to make a butterfly from a ribbon with your own hands, first you should pay more attention to the step-by-step instructions. The best choice would be a simple butterfly for beginners, and after that you can move on to more complex decorations.
To work, you should prepare tweezers, scissors, light threads, a needle, a lighter, transparent glue and ribbons of two colors (3 and 6 cm wide). Additionally, rhinestones, beads, beads and rondels will be useful.
Making the upper wings of a butterfly
A DIY ribbon butterfly can be made quickly and without any problems, but to do this you need to strictly follow the instructions. To make the upper wings, cut a piece 10 cm long from a wide ribbon. The piece is folded in half lengthwise, and then its edges are shaped like an airplane. To make it convenient to work with the part, the junction of the edges must be grabbed with a needle. For a more durable fastening of the structure and for decoration, you need to glue a rhinestone at the joint near the spout.
The corners of the part need to be folded and secured with tweezers. The excess edge is cut off with scissors, and the bottom edge is also leveled with their help. To make the upper wings the same, it is better to make two parts in parallel, placing them next to each other and comparing the sizes. The edges are singed separately at the bottom, and together at the sides to create boat-shaped parts.
Now you need to make round inserts from a ribbon of a different color. The petal should have three folds. After this, you should make a small sharp petal, which is placed between the folds of the round one, having previously lubricated the lower part with transparent glue.
Making the lower wings of the Kanzashi butterfly
To create the lower parts, you need to take a piece of wide tape 6 by 6 cm. Fold it in half and form a round single petal. A smaller petal is created from a narrower ribbon and glued inside a large part. The second wing should be made in the same way.
Combining parts into one design
All elements of kanzashi decoration are sewn together with a needle. The upper wings must be pierced in such a way as to capture all the folds. All parts are tied together with thread and secured with several knots. To attach them firmly, you need to apply a little transparent glue to the base of the wings.
A butterfly made from ribbons, made by hand (kanzashi), looks beautiful, but in order for the structure to be durable, you need to take care of its strong connection. The wings are attached to the body. To make it, you will need a pin on which a small bead is strung, a rondel is put on top, and then six beads of the same size. Next, you need to take the second pin and string the same parts onto it in a similar sequence. After this, both pins are inserted into one rondel, a large bead is put on, and a second rondel is placed on top. The ends of the pins are covered with beads.
Now all that remains is to connect the wings to the body. For these purposes, transparent glue and a needle with a light thread are also used.
Making hairpins: DIY ribbon butterflies
Similar elements in the kanzashi style can be a wonderful decoration for hair. A butterfly made of satin ribbons should be glued to a hoop or hairpin. Transparent glue is also best suited for these purposes.
Kanzashi dragonfly
A ribbon dragonfly will be one of the easiest crafts that you can make yourself. To work, you need to prepare a satin ribbon about 2-3 cm wide, a narrow shiny ribbon, beads of different sizes, scissors, wire, thread, a needle, tweezers and glue.
The first step is to make the wings. To do this, the satin ribbon needs to be cut into pieces about 6 cm long. One edge of each piece should be cut in the shape of an angle. After this, the edges of the resulting corners are glued from the wrong side. When the glue dries, the parts are turned out in such a way as to form a kind of petals. Next, use glue to connect the lower corners on the front side.
In this way, four petals are made and combined into wings using glue. Next, you need to make a body for the future dragonfly, for this you will need two pieces of wire 10 cm each. They are twisted together, a knot is left on one end, and two free ends on the other.
Beads (no more than 14 pieces) are strung on the wire; the trailing one should be larger. The ends of the wire are secured so that the body does not fall apart.
As a result, the dragonfly needs to be collected. The body of beads is fixed to the finished wings using glue. Moreover, if desired, you can decorate the wings; shiny ribbon, beads, rhinestones, beads, etc. are suitable for this.
Men's butterflies made of satin ribbons
A bow tie has long become an integral attribute of a stylish male look. This accessory can increasingly be seen on girls, as well as younger boys. To look beautiful and elegant, you don’t have to go to the store. We suggest making a butterfly from satin ribbons with your own hands.
To make such a tie yourself, you need to prepare two ribbons about a meter long (1 and 4 cm wide), threads, matches, scissors, a needle, special hooks and glue.
Bow ties made from ribbons by hand: step-by-step instructions
Butterflies most often consist of two bows. To make the first of them you will need a piece of wide tape about 25 cm long, for the second - 35-40 cm.
A smaller ribbon should be folded in half so that the ends slightly overlap each other, and the junction of the ends itself is located in the middle of the part. Along this middle of the butterfly you need to make forward stitches with the needle, tighten the thread and wrap it around the ribbon to make a bow. In the same way you need to make a second bow of a larger size.
Now you should start making the base of the butterfly. To do this, you will need a thin ribbon; the finished bow will be sewn to it, and it will hide under the collar. You need to cut two parts: one according to the volume of the neck with a margin, and the other - a small size for attaching a bow.
A thin long ribbon must be treated with a match flame so that the threads do not fray. Two bows are glued or stitched so that the small one is located on top of the large one. At the back of the large bow you need to attach a long ribbon and cover it with a small ribbon. The ends of the latter need to be sewn in such a way as not to fix the long ribbon; it should move in different directions.
At the end of the work, all that remains is to sew on fasteners in the form of Velcro, buttons, etc. You can buy special hooks that are used when sewing bras.
Now that all stages of the work are described in detail, a DIY ribbon butterfly can be made quickly and easily. This element will be an excellent decoration for hair clips, jewelry and even paintings.
Ties are a very ancient decoration. Its first prototypes are depicted on the terracotta warriors that one Chinese emperor desired for his afterlife in 220 BC. The statues depict scarves tied around the neck with a bow. Warriors in Ancient Rome also wore similar accessories. In those days, a tie served not as decoration, but as protection of the throat from winds and coolness.
The tie received its role as decoration around the 16th and 17th centuries. During the Thirty Years' War, King Louis XIV of France saw beautiful neckerchiefs on Croatian officers invited for negotiations. He liked this accessory so much that a royal decree was issued that courtiers should wear La Cravat at all council meetings.
At the end of the 17th century, women began to wear ties. And to this day, this elegant wardrobe detail adds a special chic to any appropriate outfit.
In this article we suggest you make several ties using the kanzashi technique. An elegant jabot made of ribbons for a charming lady or a strict black bow tie for a young gentleman.
We suggest making the first two tie brooches for girls. Such wonderful accessories are perfect for the first day of school or a special event.
So, a frill tie using the kanzashi technique
.
Materials for work:
- Satin ribbons in black and white, 5 cm and 2.5 cm wide;
- A small piece of black lace;
- Round decoration (an old brooch or a decorative large button will do);
- Thread and needle;
- Lighter or candle;
- Glue gun;
- Brooch pin.
It is necessary to cut two pieces of 18 cm in length and 1 piece of 20 cm in length from a white ribbon 5 cm wide. From a black ribbon 5 cm wide, cut 1 piece 18 cm long. Melt the edges of the ribbons over the fire.
From a black ribbon 2.5 cm wide, cut 2 pieces 18 cm long and 1 piece 20 cm long. From a white ribbon 2.5 cm wide, cut a piece 20 cm long.
For beautiful frills that create a frill effect, you need to make 21 pieces of round petals as follows: cut a 5x5 cm square of black ribbon. Melt the edges over the fire. Fold it diagonally (the fold line is on top). Make sure the corners line up exactly. Now take a needle and black thread and thread it into the right corner. Now you need to walk with regular stitches in a semicircle to the left corner of the triangle. The semicircle bends towards the lower corner of the triangle. Now all that remains is to tighten the thread and the triangle will form a beautiful petal. Fasten the thread. Trim the lower part of the petal evenly and melt it.
This is what happened.
Now you need to make the bow base. To do this, sew the previously prepared pieces of ribbon on the front side, making a slight overlap. Do not cut the thread.
Now fold the blank in half, placing the seam in the center of the future bow.
The next step is winding the thread. Wrap the bow tightly in the middle. Sew several times to secure, bring the thread to the wrong side of the bow. Pin.
Perform the above manipulations with all workpieces. This is what happened.
Now you need to sew bows of the same size from different ribbons, 2 together. Like this.
Now we sew a double bow from two blanks of 18 centimeter ribbons.
Now, onto the resulting double bow, sew the largest black and white bow from 20 centimeter ribbons on top. If it is more convenient for you to work with glue, you can glue the blanks together.
Now let's start creating the frill. Here you will need a glue gun. Glue 3 petal blanks together.
Glue the resulting trio between the top two layers of bows. (see picture).
Similarly, glue 4 more triplets one under the other.
Now we complement the triplets with the remaining petals. This is what happened.
Attach a hair clip to the wrong side.
To disguise the joints of the frill petals, glue a piece of lace to the wrong side.
All that remains is to attach the decoration to the front side and wait until all the glued parts are completely dry.
Next tie
a brooch
from ribbons
is so easy and simple that even beginners can handle it.
Materials for work:
- Ribbon 5 cm wide in white and gray colors. (You can, of course, choose any two you like);
- Brooch pin;
- Needle and thread;
- Lighter or candle;
- Scissors;
- White lace;
- Half beads and pearl colored beads.
You will need 2 pieces of white tape, 20 cm in length, and 2 pieces of gray tape, 18 cm and 28 cm in length.
Now, from two pieces of white and a short piece of gray, make bows in a manner similar to that described in the previous master class. This is what happened.
Now we will make a tie directly from a piece of ribbon 28 cm long.
Place the ribbon with the wrong side facing you and fold it in half so that the ends of the ribbon are perpendicular to each other (see picture).
Fold in half and iron. The result is a tie with a triangular end. Here it is.
All the elements are ready, all that remains is to assemble and decorate.
Sew small pieces of lace to the gray bow. Fasten the white bows into one big one. Now you need to sew a gray blank on top of the white double bow.
From the wrong side, glue the tie itself with hot glue and disguise the junction with lace.
Attach a hairpin.
All that remains is to decorate with beads. Here's how it happened. You can decorate to your liking.
These two wonderful options are suitable for fashionable ladies.
For young gentlemen, we suggest making such a wonderful bow tie
.
Materials for work:
- Satin ribbon 5 cm and 1 cm wide;
- Organza ribbon 4 cm wide;
- Thread and needle;
- Pins;
- Glue;
- Decorative elements and a lock (if you want).
Make two pieces 26 cm long from wide satin and organza ribbons.
Place the organza ribbon face up on the satin ribbon, also face up. Align the edges (if desired, secure with pins). Now you need to melt the edges of the ribbons folded together. Organza is very flammable. So you should melt it carefully. It is important not to overexpose the workpieces, especially if you are working with light-colored materials. You may end up with darkened and “smoky” edges.
Turn the wrong side towards you and connect the melted edges in the middle. You can iron the workpiece with an iron. The sides should overlap slightly (maximum 1 cm).
Pin the workpiece together with a pin and sew along the middle (where the sides are overlapped) with large stitches.
Now you need to tighten the thread and secure it. This is what happened.
All that remains is to assemble the bow tie.
Our master class offers an option for any neck girth, but if you know the parameters of the baby for whom the tie is being made, then be guided by them.
So, the ties.
Cut a piece of about 4 cm from a narrow satin ribbon. It will mask the seam in the center of the butterfly.
Measure the tape needed for tying and apply glue to the center on the front side. Glue the back of the bow to the glue-coated front side of the tie.
Leave until the glue dries completely.
Now apply just a little glue to the center of the 4 cm edge of the ribbon and wrap it around the center of the tie. Pull it tightly enough, but so as not to deform the ribbon and so that it does not wrinkle.
The ribbon bow tie is ready. If desired, the center can be decorated with various fittings.
Many small and adult men attend events where they need to look beautiful and tasteful. For children, these can be matinees, performances, festive events, for adults - parties, holidays, weddings and much more. One of the most important accessories in a man's outfit is a bow tie. But in stores such decorations cost a lot of money, but what’s stopping you from making a bow tie with your own hands from a satin ribbon at home? After all, such little things will always be in fashion, and what you do yourself will not only save money, but also give you the opportunity to make a very beautiful and original little thing.
There are several types of bow ties. This is a classic one - it is a long ribbon that must be tied into a bow tie yourself; the second type is ready-made, such ties are already fixed to the ribbon, so you just need to attach them to the shirt and you’re done. The first type of tie is quite complex, so only real men can use this type. Below is a pattern for a classic bow tie and how to tie it.
How to tie a Victorian bow tie: male and female options
A tie has long been an integral element of the ensemble of a well-dressed gentleman since the Victorian era. Despite the fact that in modern times the tie itself has changed almost everywhere, and the classic knot has been replaced by the Windsor knot, the large-scale movements of steampunk (Steampunk) and Goth, which in our time are still interested in the Victorian knot This type of bow knot was resurrected from oblivion. In addition, weddings and costume parties are events where this knot style can be successfully flaunted. However, the Windsor knot can add appropriate flair and elegance to any going out suit.
It is now extremely fashionable to tie women's scarves and scarves with a Victorian knot for any event, from holidays to the office, since retro bows are in fashion, and in some cases, men's ribbons. Please note that we are not talking about a regular tie or a regular bow tie.
All you need is a patterned or plain (for more formal occasions) scarf or a wide (7.6-13 cm) ribbon, both made of thin and light fabric (for men - medium-stiff to keep its shape; for women - any selected suitable density and hardness). Both the scarf and the ribbon should be quite long.
1. Place the scarf or ribbon over your head as usual, with the ends falling over each shoulder. The center of your fabric piece should be exactly in the middle of the back of the neck at the level of the collar. If you are wearing a shirt or blouse, immediately tuck the scarf/ribbon fabric under the collar.
2. Holding one end of the scarf in each hand, wrap each hand around the scarf once around your neck. Bring both ends of the fabric back over each shoulder (so they face forward) and again hold each end in one hand. That is, in the end you will end up with 2.5 turns of fabric around the neck: 3 at the back and sides, and 2 at the front.
This is how it is done in the correct, classic way. Accordingly, it will look more appropriate to that era. But if you couldn’t get a scarf/ribbon of the required length, or you feel too tight/hot in a triple turn, or the layer of fabric around your neck is visually too dense, just start the first step from the front, i.e. the middle of the scarf should be in front, and the ends go back, then simply return the ends forward and then proceed to step 3. In the female version, it is generally permissible not to wrap the scarf several times around the neck.
3. Tie a knot with both ends of the fabric. To do this, bring the right tip over (above) the left one, tuck it under the left one, and then pull it (from behind) straight up the center. Pull, strictly up and down, both ends until the fabric is pulled tightly enough around your neck, but not to the point that the scarf-tie begins to cause you noticeable discomfort. In the female version, the knot does not have to be pulled tightly under the neck - it is more fashionable to tie the knot a little lower, either at chest level or even lower (this is also very convenient for blouses with a sewn-in scarf with very long ends).
Place your left thumb in the center of the knot and use the right end of the fabric to make a loop around your left index finger. Hold the resulting loop between the thumb and index finger of your right hand. Use your little finger or other free finger of your right hand to hold the knot here if the fabric is “fluid” and does not want to hold the tightened knot itself. Your left hand is thus freed. Let the right tip of the scarf now lie diagonally to the right. Take the left “tail” of the scarf in your left hand, move it forward, up, and through the loop in your right hand back and down again, creating a vertical ring in front; then pass enough fabric from the remaining left tail through the ring from the left tail in front (from left to right) to create another loop. In the latter case, it is convenient to help yourself with the free fingers of your right hand. Pinch the new loop in your right hand, the old loop in your left hand, and then pull both until you have two loops of fabric of equal size.
4. Put the unit in order.
When you finish tying the knot (step 4), the right free tip will be on top and slightly behind. For a classic look, you will need to carefully bring it back and down, then the loose ends of the ribbon/scarf will not hang on the sides, but directly above each other (longer tip at the bottom, shorter one on top of it), in a masculine way, then it is stronger looks like a tie. But the ends can also hang on the sides - in a feminine way, or in a more youthful way, because this is how men also wore ties in that era (if you brought that tip the other way around: up, forward and down).
The loops of the bow should be of equal size, but in general their size is at your discretion: the larger the sides of the bow, the more romantic and feminine or youthful the look; the smaller, the stricter. The ends of the bow will turn out to be just unequal in size, and that’s what’s required. According to the classics, a men's Windsor bow knot should be straight, with no hanging loops.
Center the knot so that it is exactly in the middle of the neck, and so that only the ring is visible from the front, and not the parts of the knot that are under and behind it. The more carefully you tie this old-fashioned “tie” initially, the less fiddling you will have to do in the end. The less the scarf ribbon twists around its axis (twisted into a rope) during the process, the neater and more correct the knot will be.
5. Smooth out the knot fabric and widen the ends of the bow, showing as much fabric as possible. The distinctive feature of Victorian bow knots is that they are larger and much bulkier than other styles of neck accessories.
The floral, rich decor of the tie will stand out elegantly against the collar of a modern blouse. It can also be worn loosely with a more traditional Victorian collar with angled ends. In the latter case, do the same (steps 1-5), but do not lower the collar to the tied bow tie on the sides and back.
6. If in step 4 you brought the right end of the tie back and down, like a man, pin the ends together with a decorative pin and pin them to the shirt for a more strict and festive-official option: either as high as possible and closer to the knot (to hold the knot tightly) - a more formal look, or closer to the middle of the upper tip - a more elegant look.
And in any case, in a men's suit, either hide the loose ends under the shirt, or under the collar of a high-buttoned jacket, or under the collar of a high-buttoned vest.
In the youth male version, calculate the length of the scarf/ribbon so that after tying the knot, the ends are minimal in length.
Update: The most common palettes for these ties were paisley, polka dots and stripes, as well as red and black satin; or milky and egg white for going out.
Accessory for women
Recently, such ties are used not only for men, but also for girls. Such interesting accessories came to us from the eighties and are now used not only at special events or for the office, but also in everyday life. In addition, girls can wear such ties not only around their necks, but also decorate their hair with them, which is very important in our time.
What we need to create a women's bow tie:
- ribbons, different in width, length and colors;
- It’s worth choosing threads according to color;
- thin needle;
- universal glue, which should be colorless;
- scissors;
- measuring tape or ruler;
- elastic bands for decoration;
- regular elastic band.
Now you need to cut pieces of each ribbon of a certain length; for such a tie, the size of the ribbons does not matter.
For our bow tie you need to take white and black ribbons, which will be 2 cm in width. It is recommended to purchase a black tape a couple of millimeters wider.
We take a white ribbon and form a flat double bow from it, then sew the middle together using a needle and thread. Next, take the black ribbon and fold it as shown in the photo. The black part should consist of two pieces of connected ribbons. Cover the resulting seam with a thin black tape. In addition to the fact that this tape hides the seam, it also compresses the middle of our tie. On top of the thin black ribbon, place a piece of white ribbon, which should be double. Thin white ribbons must be threaded through this ribbon. An elastic band or fastener is attached to the reverse side to attach it to a shirt or other clothing. It is possible to glue a pebble or bead into the middle of our tie for decoration.
You can make various interesting decorative things from satin ribbons that will always look stylish. The colors of the ribbons are very large, and there are also beautiful designs that, if desired, you can make decorations for each family member.
Tie for boys
Basically, such ties are sewn not only for girls, but also for boys. After all, this accessory is specifically for men, so the master class will tell you how you can make such a tie from satin ribbons with your own hands.
What you need to prepare to create such a tie:
- black ribbon 5 cm wide, length should be 30 cm;
- white polka dot ribbon 2.5 cm wide and 25 cm long;
- thread, needle and scissors;
- hair clip or elastic band for fastening.
We cut off a small part of 3 cm from the longest ribbon. Next, you need to hold the ends of the ribbons under fire to secure the threads. You need to make a bow from a wide ribbon, as shown in the photo. We do the same with a narrow ribbon. Fasten with a safety pin.
Now we place the narrower part on the wider one and fasten it with a pin. At this moment you can see what size the future bow will be. If they are too large, then the excess needs to be cut off. Next, we sew the two parts of the bow together in the middle. We make folds as shown in the photo.
Next we secure the seam of the bow and sew the jumper on the wrong side. Now we need to attach a hairpin or other fastening to our bow, which can also be adhesive fabric, which is very convenient.
DIY butterfly for a boy
Marina • 09.09.2016 • No comments
A modern, elegant accessory for a business look is a bow tie. Today's master class is devoted to how to make a butterfly for a boy with your own hands without a sewing machine and special accessories. As a material, we will use satin and grosgrain ribbons.
Master class on a bow tie made of satin ribbon
Materials:
- Satin ribbon 5 cm wide
- Decorative satin ribbon 2.5 cm wide
- Rubber
- Tie, wire
- Narrow satin ribbon for the middle
Cut the satin ribbon into pieces 5x24 cm and 5x29 cm.
We put the short ribbon into the long one and lift the short ribbon a little.
Let's form a bow and secure it with a tie or wire.
Let's make a small bow from decorative ribbon and attach it to the main bow.
Glue the elastic band and tie the bow with a 12 mm ribbon.
Master class on a bow tie made from grosgrain ribbon
For this we need:
- Rep ribbon 4 cm wide
- Decorative ribbon with pattern
- Narrow ribbon for the middle
- Tie/wire
- Double-sided tape
- Rubber
We will make the bow from a solid grosgrain ribbon. We wrap the ribbon to make a blank for the bow, approximately 10 cm.
We will place a ribbon under this bow and bend it a little further than the top one.
We will also place tape on the other edge.
This is what the preparation should look like.
With the third layer, bend the tape slightly at an angle.
And also bend the tape at an angle from the other edge.
We will make 3 folds in the center and secure the bow with a tie/wire.
Let's cut the tape and melt the edge.
Let's make a bow from a satin ribbon with a pattern and secure the edges with double-sided tape.
Turn the ribbon over so that the bow has sharp edges.
Let's make a bow and attach it to the main bow.
Glue the elastic band and tighten the center of the butterfly with a 12 mm wide ribbon.
Wrap the ribbon twice, make a knot and place it in the center.
The bow tie for the neck is ready.
alidiy.ru