In the great variety of shapes and designs of structures in the world of bicycles, models equipped with motors are no longer considered a curiosity. Such bikes are quite expensive, many manufacturers are trying to reduce their cost by using cheap equipment and hi-ten frames, which does not make such a bike practical to use. There is a wide range of bicycle motors on the market, which also come with all the parts necessary for installation. Equipping your bike with such a motor will not be difficult, but if you want to save a lot of money, as an option, you can simply remove a suitable motor from an old moped, chainsaw or brush cutter and create a bike with a trimmer motor with your own hands.
Bicycle with trimmer motor
Upgrading an ordinary bicycle in this way will not require enormous effort, but you will have to be patient and tinker a little. First you need to decide on the type of engine that will be installed on the bike.
DIY motorbike
The domestic market offers buyers a motorbike with a D-type engine. However, such devices have some disadvantages, the most significant of which is the presence of only one gear, due to which the capabilities of the device are significantly reduced. However, their cost is not too high, so as they say, you get what you pay for.
But you can make homemade units with your own hands. For this you need all the necessary materials. Until recently, motorbikes were every boy’s cherished dream. Yes, in childhood such homemade products aroused a lot of admiration. The difference from a regular bicycle was that such a device was equipped with a gasoline engine. And the current in the circuit could be created using a regular hair trimmer. Although the use of a trimmer is not mandatory, since it can be replaced with any other suitable device.
You can create a motorbike with your own hands, but to do this, you may need a video on a similar topic. If the rights to the required video are protected, then you can use any suitable instructions.
Instructions
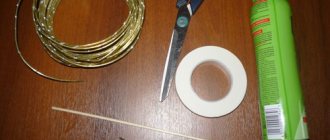
So, in order to make such a device, you need:
- bike;
- motor;
- bracket;
- homemade star;
- exhaust pipe;
- fuel tank;
- brake for the rear wheel.
Engine for bicycle
You can make a motorbike by following these instructions:
- Take an ordinary bicycle for which you have ownership rights. For this purpose, it is not necessary to use a new device, since even an old unit is ideal.
- To easily attach a welded frame, you must use a bracket prepared in advance.
- You need to install a sprocket on the rear wheel, which you can make yourself.
- You can buy an exhaust pipe anywhere. It is attached by welding.
- Instead of a fuel tank, it is quite possible to take a bottle from a soda siphon.
- An additional brake can be installed on the rear or front wheel, since the device becomes faster, and the regular brake may not work in time.
- All that remains is to connect all the parts with each other. A specialist may be needed for this if you do not have experience working with current.
In addition, you can decorate the resulting motorbike using various crafts from waste materials.
Although you do not need a license to drive this type of transport, do not forget to respect the rights of pedestrians and other road users.
Connecting individual parts to the frame
To create a motorbike, you can use any bicycle: old, rusty, folding. A motorbike requires only a strong frame as a base. If one is not available, you can make it yourself. To do this you will need several pieces of metal pipe.
The motor is attached to the frame at the junction of the lower and seat tube. This is the most optimal, but not the only option. Sometimes you can see a motor mounted on the trunk. The main thing is that the fastening is reliable. During operation, vibration will be felt, due to which the motor may fall if it is poorly secured. It is recommended to use metal clamps for fastening. A set for a motorbike may include special perforated mounts. But their use is not at all necessary.
In addition to the engine, it is necessary to attach the battery and fuel container to the frame.
Homemade bicycle with motor
11 minutes Author: Mikhail Skvortsov 373
Using a bicycle for transport has a number of obvious advantages. It is inexpensive, environmentally friendly, and allows you to maintain good physical shape. With him, any trip turns into a pleasant walk. The daily route from home to work and back brings only pleasure, because the bike allows you to avoid traffic jams during rush hours and eliminates the need to storm crowded subway cars or buses.
But if your office is located at the other end of the city, the terrain of which consists of continuous ups and downs, then an easy walk turns into hard work, and every meter you walk reminds you of the torment of the first Christians. When you finally get to work, you feel tired and exhausted. Your body requires rest, but there is still a whole day of work ahead. The prospect of having to travel all the way in the opposite direction in the evening also does not help to lift your spirits. If you also don’t have the opportunity to take a shower, then the persistent smell of sweat will accompany you all day.
What to do if you don’t want to part with your bike, but looking for a job closer to home is also somehow out of your hands? In this case, you can purchase a bicycle with a motor or install a motor on an existing one. The industrially manufactured version does not require modifications, but is quite expensive and often has a not very attractive design. To reduce costs, manufacturers use cheap components and Hi-Ten frames in these bicycles. As a result, such a bike weighs more than 20 kg, and if the engine fails for any reason, it will be very difficult to move on it using pedals.
A homemade bicycle with a motor does not have these disadvantages. In the past, such devices were quite clunky and were used mainly by teenagers, but now the market offers a wide range of solutions with which you can turn an ordinary bike into a high-tech vehicle with your own hands. Such a modification will not require any serious technical knowledge, so you should opt for this option.
Assembling the drive for a moped
For self-propelled movement, a scooter must be equipped with a belt that receives torque from the engine and transmits it to the drive wheel.
To assemble a high-quality drive for a homemade product, the operator needs to use:
- driven pulley - this unit should be slightly smaller in diameter than the bicycle wheel rim;
- drive pulley - this element must be attached to the motor from the trimmer during assembly;
- steel suspension - it will be used to attach the motor to the frame of a homemade moped.
To assemble the drive, you also need to assemble the gearbox. Once the pulleys are installed on the bike, the manufacturer will be able to install a belt with the appropriate length and width.
Self-installation of the engine
Once the drive has been assembled and installed, the operator can begin installing the motor. For safety reasons, the internal combustion engine from a lawn mower must be mounted on a moped using an additional suspension made of metal. The fastening element itself should resemble a frame welded from steel channels and angles.
The shape and dimensions of the frame must correspond to the dimensions of the motor used. Fasteners can be attached to a bicycle frame in different ways. If in the future the motor will not be removed from the moped, then the engine mount can be welded to the device. If in the future the motor will be removed for subsequent installation back on the trimmer, then a pair of bolted connections will be suitable for attaching it to the moped.
When installing an internal combustion engine from a trimmer to a moped, you must take into account in advance the need for further engine maintenance. To make it easier for the operator to repair the internal combustion engine, the operator needs to have free access to the most frequently replaced engine parts: the air filter, cylinder and seals.
Installation of the brake system.
A homemade bicycle with a lawnmower engine must be equipped with a braking system. To make it, you will need to use a pair of brake discs, installed one on the drive and driven wheels. To control the brakes, the discs must be connected using metal cables to levers mounted on the handles of the standard handle.
In addition to installing the brakes, the operator will also need to replace the standard tires on the moped's wheels. Not only the cross-country ability of a self-propelled bicycle depends on this, but also the safety of the owner when riding off-road.
Bicycle engines
Before starting work, you should decide on the type of power unit you are going to use. When choosing, you should be guided by criteria such as weight and the preferred type of fuel used. There are only two main types, so you don’t have to rack your brains too much:
- Internal combustion engine (ICE). For a long time, a gasoline engine remained the only possible solution available for installation on a bicycle. Most often these were converted chainsaws and lawn mowers. Nowadays, finding a suitable small-sized engine is not difficult.
- Electric motor. More recently, he was a clear outsider, but the advent of compact high-capacity batteries allowed him to push the gasoline engine into the background.
Gas engine
The use of an internal combustion engine makes it easy to develop significant speeds, and this circumstance often becomes a decisive factor when choosing a power plant. However, do not forget that a bicycle remains the same bicycle, and its components are not designed for such high loads. It is necessary to constantly monitor its technical condition, otherwise it may simply fall apart at the most inopportune moment.
Engine selection
Most often, an old chainsaw is used as the basis for making a motorbike with your own hands. Or rather, its engine. But here there are some restrictions. You should not take engines from small and light saws. They have too little power. Suitable for a bicycle is a motor whose power is above 2 liters. With. (or 1.5 kW). And the higher this value, the better it will be. But even at this value, the bike will be able to accelerate to 30-35 km/h.
When choosing an engine, you should also pay attention to the volume. In accordance with the Vienna Convention, this value should not exceed 50 cubes. Only in this case, a license and registration of the vehicle will not be needed. The motorized bicycle will fall into the category “bicycles with a suspended engine.”
Another advantage of such an engine is the absence of the smell of gasoline. The motor has virtually no smell, which allows you to store the bike at home. But there is also a drawback. It consists in the characteristic sound of a working chainsaw. The sound of a running engine will accompany you throughout the entire trip.
Bicycle wheel motor
The most popular and affordable type of electric motor for a bicycle is a wheel motor. This device does not have many of the disadvantages inherent in outboard motors. It is a DC electric motor mounted directly into the hub. Its power varies widely, making it easy to choose the version that suits your needs. It is much cheaper and practically does not change the appearance of the bike. Installing a motor wheel does not take much time, and anyone who knows how to read the instructions can easily handle it, and for the rest, there are a large number of drawings and videos illustrating the process in detail.
As a rule, the manufacturer offers two types of delivery: a bare motor and a finished wheel with spokes and a double rim. The first option allows you to insert the engine into an existing wheel, and the second is completely ready for use, all that is missing is a tire with a tube. Typically, the kit also includes a controller, gas and brake handles, connecting wires, fasteners and a charger. The battery most often has to be purchased separately.
Homemade electric motorbike with 15 hp power.
The article discusses an example of creating a powerful motorbike that runs on electricity. The engine used here is a power unit with a capacity of 15 horsepower and an operating voltage of 48V. A Felt beach cruiser was taken as a basis. This model was chosen because the homemade product required a strong bicycle with the correct shape, on which all the necessary elements could be placed. You can use another bicycle, the main thing is that the frame has the necessary strength and bending. The primary goal was to place the center of gravity as low as possible to road level.
Materials and tools for homemade work: - Briggs and Stratton electric motor; — as a controller for the Alltrax AX 300A engine; — throttle grip (Magura 0-5K Ohm); — rechargeable batteries 4x12V, 21A/h (lead-acid, sealed); — moped chain #35; — disc brake type Avid Bb7 160 mm; — drive sprocket with 13 teeth; — driven sprocket with 66 teeth; - large switch; - 300A fuse; — support for the engine (made of stainless steel with a diameter of 21 cm, installed instead of the carriage).
And of course you will need wrenches, welding, cutting tools, and so on.
Bike Upgrade Process:
Step one. Replacing the plug
The original rigid fork was removed from the bike. Instead, a fork with a Manitou shock absorber is installed.
Since the original version of the bike had a foot brake installed (it turns on when you pedal backwards), it was necessary to make a special mount in the area of the dropouts to install a disc brake. A hacksaw was used to cut the required piece of steel. Next, a drilling machine was needed to drill the necessary holes to mount the brake system.
Step three. Rear hub
A double front hub was used as the rear hub. It had the standard 6-bolt mounting points for mountain bikes. As a result, 6 holes were drilled into the sprocket exactly so that it would fit these 6 bolts. It is very important to accurately align the hub, brake rotor and sprocket on the same axis.
The brake mount is welded, the wheels are screwed to the bushings. The top stay of the frame needed to be bent so that the driven sprocket and chain would not cling to it.
Step four. Engine mount
The engine mount is welded from stainless steel sheets. It is welded into place of the carriage. The mount itself is in a ring, this ring was made from a piece of a lamp post. The ring width is 11 cm and the diameter is 21 cm. Considering the dimensions of the engine, the gap is only 3 mm. To allow air flow to cool the engine, the ring was drilled on a drill press. Accuracy is important here, since if the chain is skewed it will constantly fly off.
At the same stage, the footrests are installed. The footpeg mounts are made from a pair of light stands that the author welded together. As for the footpegs themselves, aluminum pegs for BMX are suitable here.
Step five. Frame modification
The author removed the factory saddle holder from the bicycle. It was then shortened and welded to the frame stays above the rear wheel. To increase the strength of the structure, a reinforcing insert was installed. A rubber cap is placed on the seat tube and the saddle clamp is unfolded.
The batteries are held using special trays made of aluminum. The trays are riveted to each other and then secured with bolts to the right and left panels. In the center you can see the power switch. To make the switch contacts easy to reach, the author made the panels asymmetrical.
The controller is located under the top tube and is mounted upside down, with its contacts facing backwards.
After installing all the necessary elements and connecting the wires, the bike was tested. According to the author, it accelerated quite intensively, but no one measured its maximum speed. It is estimated that he should travel at a speed of about 80 km/h.
The installed controller has quite flexible settings; it can be connected to a computer using RS-232 and the acceleration dynamics can be adjusted, and it is also possible to monitor statistics.
Receive a selection of new homemade products by email. No spam, only useful ideas!
*By filling out the form you agree to the processing of personal data
Rules for operating a homemade moped
To extend the life of a moped with a trimmer motor, its owner needs to adhere to a number of important rules.
Their list includes:
- timely replacement of consumable parts - if you do not change the air filter and other elements of the moped for a long time, then its important mechanisms will begin to work under increased load. This will lead to a more complex breakdown of the homemade product:
- use high-quality gasoline and motor oil for refueling - if you fill the fuel tank of a moped with low-quality gasoline, then quite quickly the bicycle owner will be faced with the need to replace the engine CPG;
- lubricate the gearbox used in a timely manner - this will prevent the mechanism from operating under high loads;
- mix gasoline and oil strictly in the proportion specified by the trimmer manufacturer - if you add more oil than specified in the instructions, this will lead to flooding of the engine spark plug;
- regularly check the condition of the fasteners - bolts that are not fully tightened threaten not only with the engine falling, but also with injury to the owner;
- paint scratches and chips immediately after they appear on the frame - this will prevent further corrosion of the moped’s frame;
- Do not allow the trimmer to overheat the engine - if you use the moped frequently, you need to take breaks. At the same time, if the bicycle is used in hot weather, then its motor should be allowed to cool down every 15 minutes of riding. If it is cool and windy outside, then the number of breaks can be reduced to 1 time for every 25–30 minutes of driving;
- promptly change the tires on moped wheels using a trimmer - in winter, you need to install tires with spikes on homemade wheels. This will prevent wheel slipping and increase safety when using the bicycle.
Also, the owner of a bicycle with a trimmer motor will need to monitor the weight of the cargo transported on the homemade product. If the luggage is too heavy, it can lead to overheating and serious damage to the engine, as well as other mechanisms of the device.
Moped made from a chainsaw. Tips and tricks
A DIY chainsaw motorcycle is a solution for those men who don’t want to spend money on a car and its subsequent maintenance and who don’t like pedaling a bicycle. In this case, an excellent way out of the situation would be a moped from a chainsaw and a bicycle, which you can assemble with your own hands in the garage, having purchased some of the necessary, missing parts and spare parts. The remodeling process itself is not particularly difficult.
Before starting assembly or if you have questions, you can always refer to the drawings and numerous video reviews available on the Internet.
What does it take to make a moped from a chainsaw and a bike?
For the most part, converting a bicycle into a moped with your own hands by attaching a chainsaw motor to it does not require any special skills of a mechanic or engineer. If you are new to this business, then numerous drawings of a moped made from a chainsaw, as well as educational video reviews, will help you. Also, not every man has everything he needs in his garage to make a motorbike from a chainsaw with his own hands. Therefore, before assembly, it is recommended to study the list of necessary parts, fasteners and spare parts and buy the missing elements.
In specialty stores you can find entire kits that include a ready-to-install engine, fasteners and other parts that are necessary to transform a bicycle into a moped. This kit will greatly facilitate the process of assembling a motorcycle, since there is no need to select an engine, suitable power, fasteners, battery, transmission belt, cable, etc.
Speaking of tools, you will really need all the popular types of auto mechanic kit components: screwdrivers, pliers, wrenches, wire cutters, etc.
Assembly instructions and drawings of a homemade moped
Firstly, we will first look at the simplest and most affordable option for how to make a moped from a chainsaw from the photo above. During assembly, the question often arises of how to install a chainsaw motor on a bicycle. It is important that it is securely attached and does not move while riding. For this type of homemade motorcycle, you need to secure the following parts with clamps in certain places:
- the battery is installed on the top tube;
- the chainsaw bicycle motor itself is mounted at the intersection of the lower front and seat tubes;
- fuel tank - near the engine.
The next step in the conversion is to create and install the pulleys on the bike. They are needed so that engine operation provokes rotation of the rear wheel. Typically, pulleys use external barrier wheels, which are about the size of CDs.
When selecting wheels, take into account the strength and reliability of both the material itself and the fasteners. To install the pulleys, the front wheel is attached to the motor shaft, and the second pulley is attached to the rear wheel hub. Next you need to put the belt on the pulleys. Sometimes men use a chain instead of a belt. In this case, the pulleys are replaced with a chain, and the principle of its installation is no different.
All that's left to do is connect the engine. First, the motor is connected to the battery, and then the ignition is assembled. To do this, you need to install the brake lever on the steering wheel and connect it with a cable to the engine.
If we talk about a more complex option, then as a result you will get a homemade vehicle that is most similar to a real motorcycle. The main differences from the previous design are a more reliable and durable frame, wider wheels that can be removed from an old moped, the presence of shock absorption and the installation of an engine from a chainsaw.
The most convenient place for the engine will be a separate platform welded at the bottom of the frame. You can also place a fuel tank there. An exhaust pipe is also attached to the engine. As for the battery, owners of homemade mopeds recommend placing it closer to the steering wheel. The next step will also be the transmission and connecting the engine. You can watch all the nuances of how to properly make a motorcycle from a chainsaw with your own hands in the video.
How to make a moped out of a bicycle: features of the process
Both a bicycle and a moped are very convenient vehicles. The fact is that their maintenance is not expensive. However, today many are interested in how to make a moped out of a bicycle. To do this, you need to select suitable parts.
Now pay attention to the body kit. It is best if it is at a high level. In order for such a miracle of technology to drive, it must be equipped with an engine. Moreover, the “heart” of the design can run on gasoline or electricity. The second option is simpler and easier, as it does not require a fuel tank. However, if you don’t know how to turn a bicycle into a moped that runs on gasoline, choose an engine from a garden equipment. Pay attention to the number of revolutions and weight of the device.
Now you should proceed to installing the gearbox. The simplest option is a regular, not too rough chain that connects the wheel and the engine directly. You can, of course, install a variator that will not reduce engine power. As for the clutch, it is better if it is automatic centrifugal. In principle, how to make a moped out of a bicycle is clear, you just need to choose the right mechanisms. For example, when choosing a motor, pay attention not only to its power, but also to the noise level it will emit.
Homemade mopeds from a bicycle can be quite convenient transport. The fact is that they do not consume a lot of energy, are not difficult to maintain and repair, and also do not require a driver’s license. In addition, the cost of such a design can be quite low, which makes this technique popular.
The electric version of such transport is more profitable, cheaper and safer. All mechanisms are installed on special fasteners, which can be screwed to the frame or welded to it. That's all the features of making a homemade moped.
Tips and tricks
Many users insist on paying attention to how the belt is held on the wheels. The degree of its fastening affects the transmission of force from the engine, and, consequently, the driving process. The chain is a more reliable and durable part, but do not forget that when using a chain on a homemade moped, gears are used instead of pulleys.
The engine that you removed from the chainsaw should be in full working order. Otherwise, spend a little more time assembling the moped yourself and rebuilding the engine. Try to fix failed parts or completely replace them with new ones.
Connecting parts
Attaching all the parts individually to the bike frame is only half the job. Next, you need to connect all the elements into one system. Otherwise, a homemade motorbike will lose all its new capabilities.
The first step is to connect the motor so that it transmits rotation to the wheels. A special mechanism must be provided for this. There are two options for these mechanisms: with pulleys or chains.
A belt drive involves a pulley system. This is a simpler option. One pulley fits onto the motor shaft. The second is attached to the rear wheel hub. A tension belt is put between them. The disadvantage of this option is the shorter life of the belt (which stretches faster) compared to the chain. It is worth noting that V-belts in terms of their characteristics (service life) are not inferior to chains.
In the case of a chain drive, rotation from the engine to the wheel comes through the chain. On one side it fits onto the rear wheel sprocket. On the other hand, on a gear mounted on the motor shaft. Chain drives are more durable than belt drives. But it requires regular care.
The battery is connected to the engine ignition and brake handle. Next you can install the exhaust pipe. You can do without it, but the exhaust fumes will spoil the trip.