Despite the abundance of electrical appliances, candles are still popular, and if you want to make a candle with your own hands, then you need to know how to make a candle wick. Candles add a special mood during the holidays, they can create a special atmosphere during a romantic dinner, and candles can also come in handy during a power outage, from which no one is immune. You can buy a candle in a store, or you can try to make it yourself - any shape and size, with various decorative elements or scented. But before you start making a candle, you need to make a wick.
The wick is a kind of capillary through which the molten candle mass enters the combustion zone. Each type of candle has its own wick. The texture and thickness of the wick may depend on the thickness of the candle, its material, coloring, its filling with decorative particles and much more. For example, there are candles in which only the middle burns out, while the walls remain intact, and for them their own types of wicks are used.
For each candle, the wick is selected by trial and error, and sometimes you need to try several options. It should be remembered that a wick that is too thin will constantly go out, and a thick wick will smoke and the candle will melt too much.
Usually the wick is woven from cotton threads. They can be twisted, braided and even crocheted; the optimal type of weaving is selected based on the characteristics of the candle. If the candle is made of wax, then thick, loose threads are used as the wick and they are not woven tightly, but for other candles, on the contrary, thin threads and tight weaving are used to avoid soot. This is due to the viscosity of the molten candle mass: more viscous wax requires wide capillaries, and lighter paraffin, stearin and various fats need thinner capillaries, otherwise, due to an excess of flammable material, the candle will become very smoky.
Typically, wicks are impregnated with solutions containing sodium nitrate, namely:
- 30 gr. slaked lime, 8.5 g. sodium nitrate and 550 ml. water;
- 5 gr. ammonium chloride, 5 g. sodium nitrate, 10 g. borax and 5 gr. calcium chloride is dissolved in 500 ml of water.
- 1 gr. ammonium chloride, 1 g. sodium nitrate and 700 ml of water;
Homemade wicks are also made as follows: dissolve 2 tablespoons of table salt and 4 tablespoons of borax in one and a half liters of warm water and dip a cotton thread or twine of the required thickness into the solution for 15 minutes. The soaked wick is hung and kept for 5 days to dry completely. Then a paperclip is attached to the wick and dipped into the melted wax 3-4 times until completely covered. After this, the wick is also hung until completely dry. Prepared wicks should be stored wrapped in newspaper.
Pyrotechnics, both large and small, have long been an integral part of almost any holiday. Moreover, we are talking not only about fireworks, but also about sparklers, firecrackers and firecrackers.
The key to safety when using pyrotechnics is, first of all, strict adherence to the operating instructions. However, there are situations when it is necessary to improvise in order for the holiday to really be a success. For example, a purchased firecracker has a too short wick, and it is dangerous to use, but you really want to. Then there is a solution: make a wick for firecrackers with your own hands.
There are several ways to do this. The difference between them lies mainly in the choice of flammable substance.
Therefore, each method has its own characteristics:
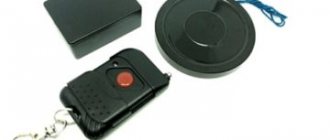
- You can use insulation from wires or a pen refill that has run out of ink as a cord. We fill the wire with sulfur removed from match heads and crushed into powder. Tamp the filling thoroughly with a needle or toothpick. Be careful as friction may cause accidental fire. The denser the sulfur is packed, the longer the wick will burn.
- To avoid crushing the sulfur heads, you can simply break them off carefully and place them in a row on tape. Then roll the tape into a tube so that the sulfur is inside. The more heads, the longer the cord.
- An ordinary thin rope can be soaked in a solution of saltpeter, which can be purchased at a gardening store (this is a good fertilizer). The saltpeter will need to be dissolved in water until well saturated, and then the cord will need to be lowered there for several hours.
- A flammable composition can be made from potassium permanganate and super glue. These two components must be combined and mixed well. At first, the mixture will turn out to be liquid, but over time it will thicken to the state of plasticine. Roll the resulting substance into a thin sausage. Here's the wick for you.
- In summer, poplar fluff is suitable for making wicks. Collect it, remember it well and wrap it in a paper tube.
Origin of the wick
It may seem logical that the wick should be contemporary with the candle, but this is not the case. Candles appeared a little later. About fifteen centuries later. At first, wood chips were used as a wick. Later we decided to use pieces of fabric. This was in those days when candles had not yet been invented, and for lighting they used small bowls with a liquid flammable substance (mostly fat), which mercilessly smoked and smelled disgusting.
However, if you think that a wick is the simplest particle that can be made from anything, then you are deeply mistaken. It is not as simple as it might seem. In order to know how to make a wick with your own hands, you must understand how and why it burns.
How does the F-1 grenade fuse work?
In the normal state, the striker is loaded with a mainspring and secured with the fork of the safety lever, which is associated with its shank. The upper end of the mainspring rests against the chamfer of the guide washer, and the lower end rests against the chamfer of the firing pin washer. Fixation of the safety lever is ensured by a safety pin inserted into the holes of the housing and lever.
After removing the safety pin, the fighter must hold the lever with his hand. When thrown, the spring forces the lever to rotate, resulting in the release of the firing pin. The mainspring pushes it, and it punctures the body of the igniter primer, which causes the moderator to ignite. After the latter burns out, the fire reaches the detonator charge, which causes the F1 grenade to explode.
Processes in the wick
For a wick to be of high quality, it must consist of several interconnected fibers. This is important so that capillary forces come into play, which lift the liquid fuel to the combustion source. At the molecular level, a candle wick serves as a kind of pumping substation, which allows, among other things, to better saturate the liquid with gas. As a result, the vapor pressure increases and the flash point decreases. All these processes, of course, take place at the microscopic level, but this does not make them any less interesting. And understanding them will help you make a high-quality wick that is most suitable for a particular product.
F-1 grenade device
A hand grenade consists of:
- metal case;
- UZRGM fuse;
- explosive charge.
The body is the location of the trigger mechanism, the firing pin of which is guided by a washer fixed inside the grenade. In addition, an igniter equipped with a threaded bushing is screwed into the body.
The design of the trigger mechanism assumes the presence of:
- safety lever;
- safety pin with ring;
- striker with mainspring.
The detonator is in a metal case, and its device includes:
- detonator capsule;
- igniter primer;
- powder retarder.
What can a wick be made from?
Throughout history, people have tried to make a wick with their own hands from everything that burns. Thin wood chips, pieces of fabric, woven threads and even compressed poplar fluff - this is an incomplete list of materials.
Today, the most reasonable option seems to be to use cotton thread or fiberglass. The fundamental difference between these materials is that cotton burns completely, while the fiberglass wick remains. If suddenly you have a legitimate question about who needs this and why, then perhaps you are not aware of a new fashion trend - making shaped candles with a frame. For example, you bought a candle in the shape of a cute cat, and when it burned down, you find a frame in the shape of the skeleton of this very animal. Some connoisseurs are simply delighted with such ideas.
Interesting detail
When thinking about how to make a wick for a candle, pay attention to the fact that its size and diameter must be selected in accordance with the size of the candle itself. If it is too thin, it will simply fade. And if it’s too thick, it will smoke mercilessly. In automated production these parameters were calculated long ago. But when you make a wick for candles with your own hands, most often you have to achieve the desired proportion through trial and error.
Another trick is that a long wick also produces smoke. And as the fat, wax or paraffin burns, it inevitably lengthens. In the Middle Ages, this problem had to be dealt with manually. Houses always had scissors to cut off the ends of the wicks. That's what they were called - wick scissors.
Nowadays, this problem has been solved in a very original way. A candle wick (which in the vast majority of cases is a thread woven from thin fibers) began to be made using an asymmetric weaving technique. As a result, the tip bends to the side and completely burns out completely on its own.
Wide field of activity
Once you have already figured out how to make a wick at home, think about where you can use it. To be honest, working with candles is quite a fun activity. And from a cute hobby, it may well transform into a decent source of income.
Candles come in different types. The simplest ones are household ones. Their only function is very mundane - to provide light in case of a power outage. They have a simple cylindrical shape and a boring translucent white color.
Table candles are already more attractive. Various dyes are used in their production. Their shape varies from cylindrical to twisted. Such candles may well serve as an important element in creating the atmosphere for a romantic dinner.
Made with the addition of substances that have a pleasant odor. In some cases, they can also be used in aromatherapy. This way you can not only lift your mood, but also improve your health.
Gel candles are also very popular these days. Firstly, because they are unusual, secondly, because they are beautiful and, thirdly, because they burn absolutely without any odor. They are easy to make. All you need is a transparent container (preferably in the shape of a bowl), some colored sand, beads or decorative figurines (this depends on your imagination), a wick and a melted gel mass, which is used to fill the composition.
So go for it! All in your hands.
Pyrotechnics, both large and small, have long been an integral part of almost any holiday. Moreover, we are talking not only about fireworks, but also about sparklers, firecrackers and firecrackers.
The key to safety when using pyrotechnics is, first of all, strict adherence to the operating instructions. However, there are situations when it is necessary to improvise in order for the holiday to really be a success. For example, a purchased firecracker has a too short wick, and it is dangerous to use, but you really want to. Then there is a solution: make a wick for firecrackers with your own hands.
There are several ways to do this. The difference between them lies mainly in the choice of flammable substance.
Therefore, each method has its own characteristics:
- You can use insulation from wires or a pen refill that has run out of ink as a cord. We fill the wire with sulfur removed from match heads and crushed into powder. Tamp the filling thoroughly with a needle or toothpick. Be careful as friction may cause accidental fire. The denser the sulfur is packed, the longer the wick will burn.
- To avoid crushing the sulfur heads, you can simply break them off carefully and place them in a row on tape. Then roll the tape into a tube so that the sulfur is inside. The more heads, the longer the cord.
- An ordinary thin rope can be soaked in a solution of saltpeter, which can be purchased at a gardening store (this is a good fertilizer). The saltpeter will need to be dissolved in water until well saturated, and then the cord will need to be lowered there for several hours.
- A flammable composition can be made from potassium permanganate and super glue. These two components must be combined and mixed well. At first, the mixture will turn out to be liquid, but over time it will thicken to the state of plasticine. Roll the resulting substance into a thin sausage. Here's the wick for you.
- In summer, poplar fluff is suitable for making wicks. Collect it, remember it well and wrap it in a paper tube.
How to make a wick at home
If your candle will be made from wax, you will need a thick wick with a loose (not tight) weave. If the starting material is paraffin or various fats, the diameter of the wick should be small, and the individual threads should be twisted quite tightly.
This is done because these substances have different viscosities. In order for the wax to successfully rise through the capillaries of the wick, fairly wide passages will be required. If the same ones are left for less liquid paraffin, then it will simply lack the necessary traction, and the candle will burn dimly, unevenly, or even go out altogether.
Required impregnation
When you make your own candle wick, remember to soak it before direct use. This process is not particularly labor intensive. However, it will take time, since the soaked wick must be thoroughly dried.
Impregnation is carried out so that the wick burns better and less wax or paraffin deposits are formed.
Various solutions can be used. Here are a few options.
- For 500 ml of water: 5 grams of ammonium chloride, 10 grams of borax, 5 grams of sodium nitrate and 5 grams of calcium chloride.
- For 550 ml of water: 30 grams of slaked lime and 8.5 grams of sodium nitrate.
- For 700 ml of water: 1 gram of ammonium chloride and 1 gram of sodium nitrate.
The wick is immersed in the solution for at least 15 minutes. And then they hang it out to dry. It is recommended to dry the workpieces for at least five days.
Among home craftsmen, a solution that requires fewer specialized chemicals is popular. And although it is somewhat inferior in quality to the mixtures described above, since we are still talking about how to make a wick at home (trying, as far as possible, not to turn the house into a branch of a chemistry room), we will consider this option.
It is done as follows: take 2 tablespoons of regular table salt (not iodized), add 4 tablespoons of borax and stir it all in one and a half liters of warm water. When the solution becomes homogeneous, you can send the wick blanks there for soaking.
For better preservation of the wicks, after complete drying, you can additionally impregnate them with molten wax. To do this, you need to dip them in pre-melted wax three to four times. After this procedure, the wicks must be dried again. However, wax impregnation is only needed if you want to prepare the material for future use. The wick will be able to perform its direct function in the candle you have made without this final touch.
The history of the creation of the Russian F-1 grenade
The following systems, which were in service at the beginning of the last century, became the basis for the development of the first version of the Russian grenade:
- French F-1 hand grenade;
- English grenade of the Lemon system.
This is precisely what explains the markings of that grenade, which is used in the Russian army to this day, as well as its widespread nickname “Limonka”.
In the early Russian version, a far from perfect fuse of the Koveshnikov system was installed, the explosion delay time of which was 6 seconds. This defensive grenade was first modernized in 1939. Two years later, in 1941, a Vinzeni system fuse was installed in it, which delayed the grenade explosion by 3.5 - 4.5 seconds. Later, this element began to be called a unified fuse for hand grenades (UZRG), which until the eighties of the last century was a single fuse for all fragmentation hand grenades being developed. Its characteristics have satisfied and continue to meet the requirements of modern close combat.