Without a case, our phone feels very uncomfortable - just in case it gets accidentally scratched or dropped. Of course, now there are phone models on sale that are not afraid of scratches or other damage. But they are not available to everyone, and it is even more pleasant to give yourself or your loved ones a gift created with your own hands. In this master class we will tell you how to sew a phone case with your own hands.
Required materials and tools:
- dense fabric for the main, front and rear parts of the exterior;
- thick fabric for accent;
- lining fabric;
- twill tape;
- Velcro;
- metal or plastic ring;
- lightning;
- threads;
- transparent ruler;
- chalk;
- iron and ironing board;
- scissors;
- roulette;
- tailor's supplies;
- sewing machine.
Cut out the details of the case
Today we will tell you how to sew a phone case with your own hands. First of all, download and print the template here. Cut out the pieces along the solid lines. From the fabric for the main, front and back parts of the exterior, we cut out the following parts: one rectangle measuring 12x19 cm. Cut one using the cover template. A pouch is cut from the front and accent fabric. From the fabric for the lining you need to cut two rectangles measuring 12x19 cm. Cut 22 cm from the twill tape. Cut 2.5 cm from the Velcro. Sew one Velcro to the front side of one outer part.
Sew on the ribbon
Place one piece of lining wrong sides together with the Velcro piece so that the Velcro is on the back side. Find the middle of the lining and draw a line. Attach twill tape to this line. Insert the metal ring. Sew using a sewing machine. Sew the ribbon crosswise as shown in the photo.
Sew on a zipper
Find two corner pieces or cut them out using a template. Fold the edges of each piece 0.5 cm and press with an iron. Take the zipper and place it between the two pieces. Sew using a sewing machine. Find the remaining piece of lining and fold the back side of it together with the front piece. Unzip and stitch along both sides and along the bottom edge.
Sew the details
On the front and back pieces, fold back the top edge and stitch using a sewing machine. Place the two main pieces right sides together. Use a sewing machine to sew along three sides and finish the edges with a zigzag stitch. Trim the seams and corners at the bottom edge. Turn right side out. Sew along the top edge again, catching the metal ring. Ready! That's how you learned how to sew a phone case.
Then, first, you need to decide on the type of case and materials. Today you can make a case from almost anything:
- Sew a cover from fabric, felt, leather.
Make a case using silicone glue and a hot gun.
Make a multifaceted case from a regular plastic or TPU transparent case.
Use neutral covers as a basis for creativity.
Case and holder for headphones 2 in 1.
Home charging station for your phone.
Now let's get down to business. How to make a phone case with your own hands? Let's consider all the options in more detail.
Many bloggers offer a wide variety of patterns and styles of smartphone cases.
Here are models of organizer cases from a Japanese blogger. She offers simple patterns, stylish solutions due to original patterns on fabrics.
Pros: these cases are functional, quite durable, and look unusual.
A fabric case is suitable for gadgets of non-standard sizes; you can design the model yourself and choose the appropriate size of the case.
Cons: if you are not very comfortable with a needle and thread, or are simply not ready to spend several hours of time, you should pay attention to other options, or look at the website of our online store for ready-made accessory options. For example, here you can see
Silicone adhesive case
You can make an original case using silicone glue and a hot gun.
For this you will need:
- glue gun,
silicone glue sticks,
baking paper,
Masking tape,
simple pencil.
Wrap the phone in parchment paper, secure it with tape, and draw the design you like with a pencil
on the smartphone body. You can use a stencil. When you draw your drawing, try to mark the locations of the buttons and connectors on the paper. After the design has dried and cooled, the case can be removed from the phone.
And here the fun begins: decorate the case in bright rich colors! You can use regular nail polish, acrylic paint, spray paint, beads, rhinestones, which must be additionally glued with a glue gun.
The advantages of this design: it’s quite simple once you get the hang of it. This bumper looks original and creative.
Cons: if you don’t have a glue gun at home, but really want such a case, you will need to spend money on materials.
Update the look of a regular plastic or TPU case or Scissorhands
Do you want to learn how to make a phone case with your own hands in just a couple of minutes, using a sheet of paper, scissors and a regular plastic or TPU cover-cover? Easily!
To do this, take a boring transparent case, a sheet of paper with an interesting photo, picture, inscription, print, circle it as shown in the picture, add slits for the camera, naughty inscriptions, put it in the case, put it on your smartphone, and enjoy!
Pros: just a couple of minutes and your new design is ready!
Cons: practically none. But, if you don’t have a transparent case nearby, and you like the design, you need to purchase it as a base.
Use neutral covers as a basis for creativity; for example, give a boring white case a quick makeover using colored tape or duct tape.
A foam sponge, acrylic paints, and a little imagination will also help transform the case into the cosmic sky, a funny monster, or Hawaiian motifs.
The trend of recent seasons is rivets! It's stylish, fast, creative. You can use special tapes, as in the picture, which are available for sale in any textile store.
If, as a child, you liked to put buttons on your neighbor, they can also be used for a lightning-fast, shocking remake of an ordinary cover-cover.
Pros: you can make such cases in 20-30 minutes, they look stylish, and the design is individual.
Cons: you need to tinker with glue, find or buy some details for the design.
The eternal problem of a person is headphones, which, as if already in a frying pan: get tangled, tear, break. Sound familiar?
You can solve this problem with the help of a holder case or a headphone holder case!
This is not just a bear, a panda, and other cute animals, these are your friends and keepers of your favorite gadgets.
If you are not yet ready to sew a case, you can make a small headphone holder from fleece, leather, paper clips, cork, clothespins and other improvised means.
Pros: both your phone and headphones will always be easy to find, because they will be in one place. The problem of headphones getting tangled is solved!
Cons: to make a case and holder you will need sewing skills, materials, and a little effort.
Here are 5 more stylish video ideas on how to make a phone case with your own hands, spending a minimum of time and materials.
6. Portable phone charging station
In addition to phone cases that you can carry with you everywhere, you can also make a home charging station. This unique stand will be a bright, stylish addition to your home interior.
Materials can be very different: paper, cardboard, fleece, bottles from household chemicals, drinks, and even old sunglasses! The resulting device can be painted with acrylic paints and varnish.
Pros: if you have inconvenient sockets or the wire is too short, you can make a hanging basket from under a bottle, as, for example, in the picture.
Cons: you will need to spend some time searching for a suitable bottle, cutting out the design and decorating.
Read the next article for a couple of fruity and juicy ideas for a portable charging station. You can find various types of ready-made docking stations and stands at.
If you want to find a ready-made accessory, you can use the menu at the top by selecting the manufacturer of your gadget, or use the search (in the form of a magnifying glass) in the same menu bar.
Thank you for attention!
Today, stores sell a large number of cases for smartphones, but when it comes time to choose a product for your phone model, there is no suitable one or there is little choice. That is why we advise you to familiarize yourself with the options and ideas on how to make a case.
Everyone wants to be unique and stand out from others, so our instructions will help you create a beautiful and comfortable case for your phone.
We sew a phone case with a retractable ribbon
I would like to bring to your attention a master class on making a phone case codenamed “Heart…”. I must say that the idea to sew a phone case came to me from the moment I lost my old case and was looking for a new one. But since I was radically unsatisfied with the options offered in stores (sometimes in terms of quality, sometimes in price, and I just didn’t want to be “like everyone else”), so I thought - why not try? I tried it, I was pleased with the result, I suggest you try it too!
So, enjoy and, I hope, useful viewing!
For work we will need:
- Artificial leather (or natural, or textile, possibly wool);
- Beading needle and regular needle;
- Bead thread and regular thread;
- Copper openwork pendants in the shape of hearts;
- Beads of 3 types - 2 shades of Czech No. 10 and tiny Miyuki No. 15 (copper color);
- Crystal rondels are bright red;
- Felt for the inside;
- Satin ribbon;
- Glue “Moment” crystal;
- Non-woven adhesive for sealing;
- Scissors, ruler, pencil, cardboard for a pattern.
I forgot about the important thing - good mood!!!
Stage 1 “Preparatory”.
We begin work by making a pattern. To do this, place your phone number on a sheet of cardboard and trace it with a pencil. Next is the key point: in accordance with the thickness of the phone, we need to decide on the seam allowances. My phone thickness is 11 mm. I added about 5mm on each side.
Important! If in doubt, allow a couple of millimeters less than you want! The fact is that, according to my observations, it is better if the phone fits into the case a little tightly at first (over time the material will stretch a little), but if it is initially loose, then later the phone will simply fall out. Why do we need this?
So, we gave seam allowances, cut out the resulting pattern. We apply the pattern to the leather, outline and cut out two identical parts of the future cover.
Next, I thought that my leatherette was a little thin and I decided to thicken it a little. I took a white adhesive interlining (or black - it doesn’t matter at all here), cut out approximate rectangles slightly larger than our workpiece and ironed it with an iron (in case anyone doesn’t know: we take the workpiece with the wrong side up, put a layer of interlining on it (the side with the glue bumps) to the surface on which we are gluing) - ironed, then the next layer, etc.),. It didn't compact too much - two layers of non-woven fabric for each half was enough. I cut off the excess and trimmed it. Like this.
Stage 2 “Decoration”.
Here the flight of fancy can be turned on to the fullest... The only thing I limit my imagination in such cases is that the decor should not be too convex and voluminous, because the case is still a functional thing, the phone goes in a handbag, pocket, etc., and something bulky may not withstand such tests). That’s why this time I came across such cute openwork hearts (well, it doesn’t matter that Valentine’s Day is not soon! I’ll be “hearty” every day!). And I decided to put them to use! I twisted them, twirled them, couldn’t decide how to fit them?
I decided to make a kind of “heart attack”. I marked out the places on the skin where these pendants would be located and started.
Important! I do not recommend placing any decorative elements close to the edges, because when you place the phone in the case, the decor may end up right on the fold - this will be both inconvenient and possibly short-lived.
For lining the hearts, I initially chose two types of beads: orange-red Czech No. 10 and Japanese copper No. 15 (along the way, another tone of Czech was added, I can’t think through everything down to the smallest detail, for some reason!)
For embroidery I use Titanium 100 bead thread. At this stage, I am quite happy with it - durable, almost tangle-free, the price is reasonable, and there is a wide range of colors.
So, I apply the first heart (I decided to do without glue, because I was afraid that the glue would appear unsightly somewhere through the “openwork”), I press it tightly with my fingers, from the wrong side I bring the needle into the hole of the pendant itself, I put a crystal rondel and a small copper bead, I bring the needle out again. For strength, I repeat the manipulation again.
Next, I need to lay a row of beads No. 10 around the heart. Since our pendant is attached in only one place so far, I hold it tightly with my fingers so that it does not run away. I lay an even row of beads using the needle backward method. Moreover, I pass from the loop - pendant to the loop - pendant on the other side (without going around it). We walked.
Then I collect a copper bead and lay a mosaic row on top of the red beads, tighten the thread. Our heart is already fixed, our fingers can be relaxed.
Then, in the opposite direction, I fill the resulting “teeth” with another row of beads.
But this seemed to me not enough, and for greater strength, I went through several places with thread in the middle of the openwork (the thread is not even visible), and secured it in one place with three small beads. Ready!
We design the rest in the image and likeness. I alternated only the main beads: two hearts are trimmed with red beads, two with golden brown beads.
Stage 3 “Making the lining.”
Next, the stage of preparing the internal part begins. For this we need felt (I have red-brown, but you can take any, including a contrasting color (relative to the main color of the case). Again, take the cardboard pattern, apply it to the felt, trace it and cut it out. Again, two identical parts.
Now you need to prepare a “springboard” for the retractable tape. We take one half of felt, find a point that will divide it in half and make approximately the same slot 12 - 13 mm long.
Please note that the length of the slot should be a couple of millimeters longer than the width of your tape. My tape is 9 mm.
We will attach this part to the front side of the case.
You need to make two cuts on the other felt half. To do this, divide the part into approximately three equal parts. And at the boundaries of these parts we make equal cuts. Like that.
The tape will go in through the bottom cut and out through the top cut.
Remember how in the cartoon about Winnie the Pooh? “In and out. It’s turning out great!”
This part with two cuts will be attached to the back of the case.
Now again we take the part with one slot, insert the tape into the slot (don’t forget to singe the edge!) and sew it firmly to the felt in any way convenient for you using regular thread. Like that.
The side where the tip of the tape peeks out will be the “wrong side”, and the other side, with the tape that directly comes out of the slot, will be temporarily the “front side”.
Now we connect the two parts using tape.
Stage 5 “Assembly”.
Now it's time to put the whole “sandwich” together! Take a piece with “heart” embroidery, apply glue to the entire back surface of the piece and place a felt piece on top with the wrong side sewn to the glue with tape . Smooth it out with your hand and adjust it so that all the edges match. Ready.
Now we take the ribbon and thread it into the lower slot of the second felt piece, and pull the ribbon out of the upper slot. We take the second piece of felt, apply it with the “front side”, coat it with glue so that it is around the perimeter, and the inside is not glued. Otherwise, the retractable tape will not work, it will simply stick! So, we missed it, we put the remaining half of the leatherette (which is without embroidery) on the felt with two slits, making sure that everything lies evenly, without folds or creases, so that all the edges match. Glued. You can take a break and drink tea!
Stage 6 “Edge processing”.
Now comes the finish line - edge processing. You can trim it in any way - even without beads, but I like this option. I sheathed my previous cases using the “Russian” method, but now I decided to try the “American” one (although Russian is still more familiar to me :).
By the way, I found excellent visual pictures of these two methods and decided to share. On the left is the American method, on the right is the Russian one.
This time I took a double bead thread, for greater importance and greater strength. I carefully connect the two halves edge to edge. I insert a needle between the halves (in this case I pierce a layer of felt and a layer of leatherette) and bring it up, pick up beads and pierce the lower part (also felt + leatherette) of the case, tighten the thread and bring the needle into the same bead, and so on.
Important! Try to maintain an equal distance between the stitches and in the depth of the stitches, because... This directly affects the appearance of the product.
Important! Fix both halves firmly with your fingers, constantly checking whether the edges match (if something moves, it can pull the skin/fabric and the appearance will be hopelessly ruined)
We sheathed the bottom part, moved to the side and stopped about 1.5 cm short of the edge (let's call it point “A”). Then “our paths will diverge.”
Let me explain: if you continue to sheathe it higher, it will not be very convenient for the phone to enter/exit the case/out of the case. And subsequently the threads may not withstand excessive tension (or the fabric will begin to tear).
To do this, not reaching 1.5 cm from the edge, we move to the front wall of the cover and sheathe it. Next, we will continue sheathing the opposite side part and stop at the same distance (point “B”). Check that point "A" and point "B" are at the same height. Then we sew the two halves again, reach the bottom, connecting with the previously sheathed edge (then I realized that it would be more logical to immediately start from point “B”, go down, continue along the side wall, go through point “A” and sheathe front wall, return to point “B”, but, as you know, a good thought comes later!).
To my great regret, I was not able to take a photo of the very last stages of the work, so I will try to explain everything in detail!
Here in the photo you can see the side “cuts” from points “A” and “B”.
We still have the back wall of the cover unlined. We trim it. Ready.
Stage 7 “Final”.
And finally, the final touch in this work is the design of the retractable ribbon. We place the phone in the case (to the very bottom, so that the tape goes down as much as possible), leaving a small piece at the top (well, about a centimeter and a half). We cut off the excess and singe the edge. Cut out a small rectangle from leatherette. It should be slightly wider than the tape itself. And the height I got was about a little more than 2 cm. In such a way that by folding this rectangle in half, you could grab it with two fingers and pull the tape to remove the phone. We fold the rectangle in half, and between the two halves we place the tip of the tape, glue and trim the edges with beads according to the same principle as the entire case.
I put in the phone, check the “work” of the tape, and decide that the phone is both in and out! It comes out so quickly!
That's all! I hope that my first master class was interesting to someone, and perhaps useful to someone!
Here are some more variations on the theme:
I would like to say finally that the method of attaching the retractable tape itself was not invented by me, but I finalized all the other points and experimentally tested it myself. If material is copied, please provide a link to the author.
As a postscript, I want to say that I’ve been wearing this case for about 2 months now. Overall I’m happy, but I decided for myself that there was no need to sew on the red rondelles with a bead on top. No, they didn’t fall off, but it’s not very convenient to put the phone, for example, in a jeans pocket (the beads are still convex, I always remember about them and try to put them carefully, which is a little annoying). Thus, the conclusion is this: the flatter your decor, the better. Although, if you only carry your phone in your purse, nothing will happen even with this decor. The previous cases are “alive and well” to this day.
Thank you to everyone who had the patience to read and/or watch to the end.
If you have questions, suggestions, constructive criticism - you are welcome!
Regards, Anna.
Hot glue
What can you make a phone case from? From hot glue. This approach will allow you to create your own pattern as you see it. All you need to make is a glue gun with glue, nail polish, tape and parchment paper.
The first step is to wrap the phone tightly in paper and glue the seams on the screen. On top of the paper, it is important to mark the sockets, connectors and control buttons, then use glue to glue it around the perimeter of the phone, and then smoothly move on to the patterns on the back of the smartphone so that the structure is solid. When the product is dry, you need to remove it and paint it in your favorite color.
Common Mistakes
Problems when working with a heat gun arise from trying to make a drawing by squeezing out the entire contents of the chamber at once. As a result, a large, scalding clump of glue is squeezed out, which, when removed, can cause a thermal burn. To make a patterned mesh, briefly press the trigger. A drop from the nozzle is applied in a pointwise motion, stretching it across the surface. The remaining glue is removed onto parchment paper. The next drop is applied nearby, and the next curl is performed in the same way.
See also
Composition and use of conductive glue, the best brands and how to make it yourself
Book
Such phone cases can be made of leather and fabric, but we will consider a simpler model that can be upgraded if desired. To create, you will need a notepad with an elastic band, suitable in size for the phone, a stationery knife and ruler, a pencil, glue, felt, cardboard and an eraser.
It is necessary to cut out sheets from the notebook and prepare it for further work. The next step is to glue the felt along the entire inner surface of the notepad. Next, you need to glue rubber bands on the top and bottom of the notepad, where the smartphone will be attached.
It is necessary to make this as tight as possible so that the device does not slip out. If desired, the notebook can be decorated or left as is, in which case at first glance it will seem that it is actually a notebook.
Felt
Now we’ll learn how to properly sew a phone case. Production does not require a lot of materials, and the work does not take much time; moreover, the cover comes in the form of a pocket.
So, for production you will need felt, you can take different colors, a needle, a ruler, scissors, thread and a glue gun. You need to place the phone on the fabric and mark the edges, and then cut it out with 1 cm indentations on each side.
When two such blanks are ready, they must be sewn together with an outer seam. When finished, you can decorate the case or attach a clasp to prevent the phone from flying out of the pocket.
Fabric cover
Knitting and weaving fabric covers with your own hands is also common, so you can make such a product literally before your eyes. To do this, you need thick fabric, threads, a needle, acrylic paints, colored paper, scissors, glue and a stencil.
First, you need to cut two identical blanks from fabric according to the size of the phone with free edges. On one side you can draw a design that will appear on the back cover of the phone. You can use cardboard to make an elastic frame from the back of the phone.
When all this is ready, you need to sew both halves together from the inside out, and then turn the cover out. You can see photos of similar handmade smartphone cases in the article.
In this article, we looked at several master classes on do-it-yourself smartphone cases. You can always add to them or come up with your own version based on the instructions provided.
Note!
A case can be made from literally anything that is at hand, you just need to use your imagination. Moreover, such cases can be presented as a gift, which is always needed. We wish you creative success.
Glasses
Another great solution is to make a felt glasses case. It will be a great gift for both grandma and anyone who wears sun protection products. In addition, this is a fairly easy process that will not be difficult.
To begin, cut out the pattern to the required dimensions. The back should remain a little larger. Next, we create a blank from black felt, and two from light felt. If you want, you can decorate the base with decorative elements - various ruffles, braid, beads or just appliqués.
All that remains is to sew all the parts together, and then the back together with the front. A button will act as a fastener - sew it on, and do not forget to make a small cut for it to cling to.
- Making a diaper cake with your own hands: a step-by-step master class on how to fold a gift for newborns (100 photos)
DIY crafts from egg trays: original toy ideas for children and useful crafts for adults (115 photos)
DIY birch bark crafts - techniques and master class for making crafts for beginners (105 photos)
Photos of DIY phone cases
Note!
Note!
Nowadays, communication stores have a large selection of cases for phones and smartphones. But when you start looking for a case, you are often faced with the problem of a small selection specifically for your model. Or it is available, but in the wrong format and has a boring, standard color. To do this, we have selected for you several master classes on how to make a case with your own hands from improvised materials. After all, every smartphone owner wants to be unique and make it beautiful, bright and convenient. So let's look at several options for covers that you can make at home.
Paper case
The simplest and most budget-friendly option for you might be a case made of paper. Its assembly will not take much time; it is made using a simple origami technique. This, of course, will not last a long time, but if you urgently need a case, then this option will be excellent. Let's take a look at the step-by-step instructions.
You will need:
- A4 sheet of paper
- PVA glue
Progress:
- Place a sheet of paper horizontally with your phone on top of it.
- Now wrap the phone in paper until the end of the sheet.
- Wrap the lower part several times to the place where the phone is located.
- Now, to make the bend hold better, bend the triangles upward, at the bottom of the cover.
- If you need a stronger structure, use glue to seal the folds and joints. Our paper case is ready.
Video paper case
How to make it yourself
The manufacturing technology of the cover is simple. This does not require any special skill. The main conditions are the availability of tools and source material.
What you will need
There are several types of hot melt adhesives on the market. They differ in composition and purpose. Before purchasing glue for crafts, you need to read its instructions. The necessary material is produced in the form of rods (stickers) with a diameter of 7 and 11 millimeters, and a length from 4 to 20 centimeters. Melting point - 105 degrees. Hardening time varies from a few seconds to several minutes. In addition, they have different colors:
- colorless (transparent);
- white matte;
- colored.
Transparent stickers belong to the universal group. They can be used for gluing any surfaces, creating stable shapes and structures for handicrafts. Once hardened, they can be painted with oil paint or nail polish.
See also
Characteristics and types of cork glue, instructions for use
White rods have two purposes, one of which is to fasten glass surfaces, the second is to hold other white materials. Colored stickers are used for gluing markers. The covers are made from multi-colored stripes with glitter. Black and gray varieties are classified as thermosealants.
In terms of chemical composition, adhesives are polyolefins, polymerization products of ethylene and vinyl acetate. For crafts and homework, use vinyl acetate without a metal additive, residual stickiness (PSA), the curing time of which is 3-5 seconds.
Stickers are used to refill heat guns. Devices for hot glue gluing have differences in technical characteristics in terms of power and productivity.
To work with paper, textiles, and plastic, manufacturers offer special guns that operate at a minimum temperature (105 degrees).
Power indicators are not significant for the manufacture of a cover, since the fluidity of glue having a melt temperature of 200-300 or 105 degrees does not change. The rate at which the solid adhesive structure turns into a gel is less important than the capacity of the chamber in which the material is heated. The volume of the chamber determines the performance of the gun: the amount of gel produced in 1 minute. For handmade lovers, the optimal performance of a heat gun will be from 5 to 30 grams per minute.
To make a phone case, you will need:
- 2-3 stickers (transparent or colored, with glitter) with a diameter of 7 millimeters;
- heat gun with a power from 30 to 150 watts, with a productivity of up to 30 grams per minute.
When choosing a gun, you should pay attention to the diameter of the rod it is designed for, so as not to disrupt the circulation of heated glue and not break the device.
Manufacturing process
Before you start making the case, you need to prepare the phone by isolating it from contact with glue while maintaining its shape. To do this, it is wrapped in baking paper or foil. Paper or foil is wrapped tightly around the body. The paper ends are placed on the screen so that they do not diverge and glued together with superglue. The foil is tightly twisted into a knot for a better fit, also on the side of the keyboard.
See also
Description and technical characteristics of KS glue, instructions for use
The procedure for handling the base for a paper and foil cover is different:
- Paper. Through it, the connection points for charging, headphones, power and volume keys, and the location of the webcam are clearly visible. These places are carefully outlined with a felt-tip pen to leave them open for access in the case. If desired, a decorative pattern is applied to the paper. Using a gun, glue is applied along the drawn contour, starting from the bumper. After 2-3 minutes, when the composition has hardened, the paper is removed from the phone and carefully removed from the case. If the cover was made of colorless glue, then it is painted with nail polish or oil paint using a spray bottle.
- Foil. To prevent the pattern from blurring, a thick cream is applied to the foil. It will not be possible to make a preliminary sketch on foil, so the drawing is applied directly from the gun. Once cured, the foil is removed from the phone and removed from the case. Staining is carried out in the same way. The disadvantage of making a decorative overlay on foil is the possibility of errors when applying the pattern and overlapping the connector and video camera locations.
Working with a heat gun begins with filling the rod and connecting the device to the power supply. After 3-5 minutes, check the readiness of the melt by briefly pressing the trigger. Liquid glue is squeezed out through a nozzle and applied to the prepared base.
The glue from the nozzle is periodically cleaned so that the thickness of the ornament is approximately the same. To do this, use a piece of parchment paper, where the unused composition is transferred.
At the end of the work, the heat gun is not turned off until the remaining glue is squeezed out of the chamber and the nozzle is cleared of it.
Cover made of rubber bands
A phone in a case made of rubber bands will look very original. Such a case will require time and patience from you, but the result will delight you and surprise your friends and even strangers. We have prepared step-by-step instructions for iPhone 5, but for other smartphones you just need to take a different number of rubber bands. So, let's start making crafts with our own hands step by step.
You will need:
- Rubber bands of 3 colors - 500 pcs.
- Hook
- Weaving machine
Progress:
- There should be 2 rows on the machine. The holes in the top row should face left, and the bottom row should face right.
- We begin to put on the rubber bands from the top row of the second pin, and put it on the cross on the 3rd row of the bottom.
- Next, we put a cross on a cross from the 2nd bottom row to the 3rd pin of the top row.
- In the same way we make the next one from the 3rd pin from above to the lower 4th. And then from the lower 3rd to the upper 4th.
- There should be 3 crosses like this.
- Pass 2 pins in the center and continue to weave 4 more such crosses. On this side you should get 4 crosses intersecting each other.
- There should be 2 free pins left along the edges of the machine.
- The next row is to put rubber bands on the top and bottom pins that are opposite.
- So we put it on all the pins of the previous row.
- Turn the machine vertically towards you so that the top pins point their heads towards you.
- We put on the first elastic band without crossing it on one upper and one lower part.
- We fasten the remaining rubber bands, without crossing them, along the top row, one after another. In this row we are not missing the two middle pins.
- We do the bottom row in the same way, connecting it on the second side with an elastic band, just like we started the row. It turns out that we walked one row in a circle.
- Starting from the bottom row, we use a hook to remove two rubber bands from each pin, which are located at the very bottom. We skip the middle pins. Thus, there should be two rubber bands left on each pin on the machine.
- We do the next row in the same way as the 3rd, in a circle, one elastic band after another. For this row we take rubber bands of a different color.
- Next, remove the bottom 2 loops in a circle.
- We put the elastic bands on again in a circle, using a different color, and then remove the bottom loops.
- In the same way, we make two more rows alternating colors. One row means putting the loops on once and then taking them off.
- Let's start making a hole for the screen. Turn the machine vertically, the left row of bayonets should be facing you.
- We start working in the left lane. We remove the bottom rubber band from the 3rd pin and put it on the next 4th one. Thus, the last loop should transfer to the 7th pin.
- Now remove the remaining loop from the middle 5 pins. There should be 3 pins on each side with rubber bands on.
- We knit the next row in the usual way (elastic band by elastic band). We do this clockwise, starting from the 3rd working pin. We are not working with five pins on one side yet.
- We need to remove the bottom rubber bands; there should be 2 loops left on the pins.
- In the same way we need to knit 11 more rows. Don't forget to alternate colors.
- Next, we knit a row clockwise, now filling in all the pins.
- Remove the bottom rubber bands from the pins. But we don’t remove the five who were not previously involved in this row.
- In the row where there are unknitted pins, we skip two workers and from the third we remove the lowest loop and put it on the next pin. We do this, leaving only the last 2 free.
- Now knit one row.
- Take the machine vertically and, along the right row, remove the bottom loop from the second working pin and put it on the next bayonet.
- The last loop should be placed over the 4th working pin.
- Now we remove the lower loops from the 3rd and 2nd.
- Next, we put on the loops in a circle, leaving our 2 free. Then remove the bottom hinges.
- On the next row we put on rubber bands, using all the pins. We remove the loops in the usual way, without touching only the two pins, where there are only 2 rubber bands.
- On the first pin we swap the top and bottom loops and transfer the top one to the next pin, connecting our structure. From the next two pins we remove one bottom loop and transfer it to the next pin.
- Next we knit the row in the usual way.
- We begin to close our case. We make a row of crosses as at the very beginning, without missing a single pin.
- We make the next row with crosses between opposite pins.
- Next, we begin to remove the lower loops, leaving only the rubber bands from which we made figure eights. There should be 3 loops left on each pin.
- Now we transfer the bottom loop of each pin to the next one.
- We also do the next row.
- On the right side, use an additional elastic band to make a knot and remove the cover from the machine.
- Now straighten the protruding loops and hide the knot. Now you can use this original case.
Video on how to make a phone case from rubber bands
Hot glue bumper case
Using a gun and hot glue, you can make a beautiful bumper phone case. It looks very interesting and unusual. And its originality depends only on your imagination. Such a cover can be openwork or simply with a flat surface and patterns.
You will need:
- Glue gun
- Nail polish
- Parchment paper
- Scotch
Progress:
- Cover the phone with parchment paper so that the back and sides of the phone are seamless. Secure the joints in the screen area with tape.
- Mark the places where the buttons, camera and sockets are located.
- Now use hot glue to go along the sides of the phone and highlight the designated areas along the contour.
- Make a swirl pattern on the back of the phone so that it connects to the side.
- Wait for everything to dry and paint it in the desired color with nail polish.
- Now you can put a beautiful case on your phone.
- If you don’t know what pattern to make, you can use the video master class.
Balloon phone case
A very simple way to make a phone case with your own hands is to use a regular balloon. This case will not protect you from impacts, but will help keep your smartphone dry. Let's see step-by-step instructions with photos and video descriptions of how to make a phone case from a ball.
You will need:
- Balloon
Progress:
- Inflate the balloon, do not tie it.
- Place your phone with the screen facing up on top of the ball.
- Now, pressing the phone into the ball, gradually deflate it.
- When there is little air left, release the ball while continuing to press the phone.
- The ball will fit around the phone and the case is ready. You can also take a ball with some kind of muzzle or design, then your phone will become more original.
Request instructions
Did not find the right step by step instructions?
It is possible that one of the site visitors can help. Leave a request right now if you are sure that this topic has not yet been covered on our project!
visibility
373 views
Not only cases and removable protective panels can make your phone bright and interesting. You can add brightness to your gadget yourself, for example, by painting its back cover in an original way. Read and see the step-by-step instructions to find out which paints are best suited for these purposes and how to decorate your phone panel without the paint coming off after a couple of weeks.
Materials
Before you paint your phone yourself, prepare:
- paints in cans of different colors (they must be combined with each other);
- spray varnish;
- sandpaper;
- sponge for coloring;
- small thin screwdriver.
Step 1
. Remove the back cover of your gadget. If it is difficult to remove, pry it off with a thin screwdriver or a metal file. If necessary, remove the buttons and speaker grille from the cover. They are found on some phone models and do not need to be painted over. Place these parts aside.
Step 2
. Be sure to wipe the phone cover from dust and dirt. If the back panel has a glossy surface, sand it with sandpaper. This way the paint will adhere better. Sand carefully, being careful not to leave deep scratches. After working with sandpaper, be sure to wipe the panel with a rag.
Step 3
. Cover your work surface with papers or rags to protect it from paint. Place the back cover of the phone on any unnecessary object so that it hangs in the air. It will just be more difficult to work on the table, since you will also need to paint the sides.
Step 4
. Cover the phone panel with a heavy base coat of paint. The paint will be white.
Step 5
. Paint the back cover with paints of different colors. Apply them in layers, making the layers thin and not completely painting the surface. Before applying the next coat of paint, allow the previous one to dry slightly.
Step 6
. Add more visual effects in the form of paint splashes. To do this, apply the paint to a brush and spray the panel with it, or use a sponge for painting.
Step 7
. After letting the paint dry, spray the surface of the back cover with varnish. It can be glossy or matte. It depends on your preference. Apply varnish in two or three layers to even out the surface of the phone panel.
Step 8
. After the varnish has dried, you can attach the phone cover in place.
On some modern smartphones, the panels cannot be removed so easily and to paint them, you need to unscrew the small mounting screws and only then, after removing the cover, paint it. The dyeing process in this case remains the same.
Difficulty level: Not easy
Phone case
A book case will require additional costs, but you can choose the color and shape of such a case yourself. It can protect your smartphone or phone from damage if it is kept closed. The shape of such a case has a special charm, because the cover can have absolutely any design.
You will need:
- Phone-sized notepad with elastic band
- Stationery knife
- Ruler
- Pencil
- Narrow elastic band
- Cardboard
Progress:
- Using a knife, cut out the notepad sheets and side parts.
- Divide one side in half and mark with a pencil.
- Cut with a knife along the line to the outer grain of the cover.
- Now in this place you need to cut a strip about 0.5 cm wide, so that later it will be easy to make a fold here.
- Carefully glue the inside sides of the cover with glue.
- Draw a shape for the inside of the cover along the outline of the cover on felt.
- Place our felt blank on the inside of the cover and cut the felt along the side fold.
- Glue the felt blank to the cover.
- On a piece of cardboard, outline the phone and cut along the line. Glue it to the felt and cut it according to the shape, retreating from the cardboard to 1 cm.
- Cut the felt at the corners with two cuts on each side so that you can bend it. Glue the corners.
- Glue two rubber bands across this blank so that you can then attach the phone here.
- Glue the blank onto the outer bending half.
- Now our case is ready for use.
Original book case for tablet or phone
Hello again.
This time we will do a not very complicated, but very necessary thing, without electrics and mechanics. Let's put the soldering iron aside and pick up a needle and thread. And so the topic of this article is making a case - a book for a tablet, phone, e-reader, etc. and so on. Using these instructions, you can make a cover - a book for any tablet. And also just make a notebook. I will show the process using the example of a seven-inch tablet (which I have) and a small notebook. For others, you will need to change the dimensions of the workpieces. We will use:
— Plastic, 1–2 mm thick. (or a stationery tablet with a clip) - Elastic band 10 mm thick. (it can be thicker, it doesn’t matter) - Threads, preferably stronger and synthetic. (color optional) - Stationery knife - Scissors - Awl - Glue (moment gel or for rubber) - Ruler
Step 1 Making blanks.
The base of our case will be plastic. It is quite durable and more practical than cardboard. You can order from an online store or just buy sheets of plastic. In my city, I did not find stores where they would sell me sheet plastic. If you sell it, great. I found it on Aliexpress, but I didn't want to wait a long time for delivery. Therefore, I took the simplest route, went to a stationery store and bought a regular plastic tablet with a clip. It was enough for a 7-inch tablet, I think it’s enough for an 8-inch tablet. With larger sizes, of course, it’s more difficult. Most likely, for larger sizes you will have to take two of these tablets:
We cut out two blanks measuring 20 cm by 12.5 cm and one 20 cm by 1 cm from a stationery tablet or other plastic. For two large blanks, make two edges rounded. We will use the thin one in the middle. For tablets of other sizes, do this: measure the tablet, increase the width and length by 1.5 cm - these will be the dimensions of large blanks, add 0.2 cm to the thickness of the tablet - this will be the width of the small blank (which is in the middle), its length is the same, as well as the length of the large ones:
Now we take the blanks and lay them out as in the photo. This is our future case in unfolded form. The distance between the blanks is 0.3 cm. Draw a line along the perimeter of the blanks at a distance of 0.5 cm from the edge. This is the seam line. Place a board or sheet of plywood (chipboard, fiberboard or the like) over the workpiece, apply a ruler to the line, take an awl in your hands and make holes in 0.5 cm increments:
Having made all the holes, pay attention that there are “pimples” on the back side of each hole.
I use a utility knife to cut them off, since they will interfere with us in the future.
Step 2 Cover with fabric and stitch.
The appearance of the cover largely depends on the fabric you choose. Here, as they say, everyone has different tastes and colors. You can use leather, leatherette, velor. I like denim. It is practical, quite durable and looks good. We glue the blanks onto the fabric, keeping a distance of 0.3 cm between the blanks. The glue must be elastic, for example, moment gel, rubber or shoe. Along the edges of the blanks, the fabric should protrude at least 1 cm. Also, make sure that they are on the same straight line:
After waiting for the glue to dry, cut off the excess fabric, leaving 1 cm at the edges:
We wrap the edges of the fabric and thread the needle into the pre-prepared holes and sew with straight stitches. If the fabric stretches, like mine, try to stretch it slightly:
If there is too much folded fabric, it should be trimmed. We turn our now single piece over and glue it to the fabric again. You can use two types of fabric: leather on the outside, velor on the inside, for example. This is what you like, there is a lot of room for imagination. The main thing to remember is: the first glued fabric is the outer one, the second one is the inner one. The rules are the same - at least 1 cm along the edges. I’m not good with imagination, so it’s still the same denim:
When the glue dries, trim off the excess fabric along the edges:
This time we bend the edges of the fabric inward, so that we get an edge like this:
We sew along the same holes, only so that the stitch is in the place where there was a gap before. You need to sew an elastic band into one of the sides from top to bottom; it is needed to close the cover. We sew it in at a distance of 2 cm from the edge:
On the other side we will sew an elastic band in the corners to secure the tablet. We retreat 2.5 cm from the edges:
When opened it should look like this:
With tablet inserted:
If desired, you can add a footrest so that you can place a case with a tablet.
Step 3 Decoration.
This step is for people with good imagination! You can embroider your name on the front, or the name of a loved one. Or just a phrase, a slogan, whatever. And also a great option, in my opinion, is to use a patch with hot-melt adhesive. You can buy one at a clothing repair and tailoring shop, or an embroidery store, or order it on Aliepress. It will look interesting, and most importantly – unique. There will definitely not be another case like this!
The Groot patch looks nice:
And children will definitely like the funny cucumber:
How about a cactus:
In general, there is a wide field for imagination. I used the same principle to make myself a notebook.
It turned out convenient and original.
Sheets for it were made from A4 sheets cut into four parts:
And more photos inside:
But for the note I added a clasp instead of an elastic band:
The same fastener can be made on the case for the tablet, depending on who you like:
You can rivet such a fastener without a special tool, using a hammer and a pin of a suitable diameter or a blunt nail.
Become the author of the site, publish your own articles, descriptions of homemade products and pay for the text. Read more here.
Cardboard case
A cardboard cover does not require additional costs, and is made from improvised materials that are found in almost every home. The case will have a neat and pleasant appearance. Now let's get started with the craft with step-by-step instructions.
You will need:
- Sheet of cardboard
- Scissors
- Rubber
- Marker
Progress:
- Draw the phone on the cardboard twice with a gap of 0.5 cm between them.
- Cut along the outline.
- Make two folds along the lines in the center of the workpiece, the case is almost ready.
- Now glue one side of the case to the back of the phone.
- To make the case close, you can put a thin elastic band on it, or make holes in the sides of the sides of the case and attach a ribbon or rope.
OFF Pocket - a case for the paranoid
This term is translated into Russian as the well-established, but little-explaining “Baseband processor,” and apparently there is no standardized Russian version at all. Therefore, if you allow me, I will risk calling it a radio processor, which will at least make it easier to understand. The idea in general terms is as follows: in parallel with the central and graphic processors, RAM and other hardware available and used by the main operating system (Android, iOS, etc.), digital mobile devices always have a tiny, invisible to the user, separate microcomputer (it would be more correct call it a picocomputer), responsible for the radio part. Its basis is the same radio processor, which has its own memory and even its own operating system - usually real time. For example, on most Android and iOS devices these are the Nucleus RTOS and ThreadX operating systems. The baseband operating system takes up a few kilobytes (“pico-core”) and works wonders for its size: it includes cryptography, file systems, and even windowed graphics, if necessary. But in the vast majority of cases, we, of course, do not see the baseband components: they work invisibly, independently, taking on the task of direct communication with cellular stations.
BBP-1
The radio processor and its equipment is a topic as interesting as it is little-studied: even making a memory dump here is a non-trivial task, let alone analyzing the code and modifying it. The same Nucleus RTOS runs on almost three billion devices (simple cell phones, smartphones, USB radio key fobs, etc.), but how many times have you heard about it? Only a rare coincidence of circumstances sometimes gives the user a hint that the smartphone is probably much more complex than it seems: for example, if during a phone call the main OS freezes (on my overloaded Android LG Optimus One this, alas, happens quite often), the call For some reason it doesn't stop. In addition, it is the software for the radio processor that has to be changed in order to “unlock” the mobile phone and break the connection to a specific operator.
The baseband processor communicates with the outside world through several low-level interfaces such as audio I2S, network SPI, and the ancient AT command language (probably familiar to those of you who have dealt with modems). However, I repeat: information on this topic is extremely scarce - and it would be great if experts among the readers clarify and add details. In the context of today's topic, two facts are important. Firstly, the baseband computer lives its own life, which the owner of the phone may not be aware of (for example, he is able to periodically wake up and contact the cellular station without revealing his activity). Secondly, the radio firmware can be changed - at least from the phone, but maybe remotely (no one except the manufacturers usually knows all the intricacies of the baseband software running on a specific device).
Felt phone case
This case has a beautiful appearance, its shape resembles a pocket in which you hide your phone. To make a phone case from felt you don’t need any special skills, just a little imagination and the necessary materials. You can find step-by-step instructions in the description below.
You will need:
- Felt in different colors
- Scissors
- Ruler
- Needle
- Threads
- Glue gun
Progress:
- Place the phone on the felt, and stepping back from the edge of the phone about 1 cm, trace the outline. We need 2 of these blanks.
- Sew both pieces together using an outside seam.
- Now you need to make a decoration for the case. We cut out balloons in the form of drops from different flowers.
- We also cut out a house from felt, windows and a door from the same.
- Using a glue gun, attach the house to the bottom of the cover.
- Now use dotted threads to embroider the threads for the balls.
- Glue the balls over the threads, layering them to create a three-dimensional pattern.
- An amazing case on the theme of the cartoon “Up” is ready!
DIY phone case: how to make, sew, knit
Reliable felt protection
You can make a DIY phone case from felt in 10 minutes. This material is quite dense and soft, which will save the device from damage if hit or dropped. But the main advantages of felt are that it is pleasant to the touch and does not require processing of the cuts.
What you need to make your own phone case:
- • Pieces of material
- • Sewing tools
- • Button, button, Velcro
- • Ribbon
How to sew a phone case:
- You need to measure the size of the device and make a pattern in 2 copies with seam allowance. It can be in the shape of a bag or with rounded edges - it’s a matter of taste.
- Use sharp scissors to cut out the pattern. Felt does not require processing of cuts, but if cut out carelessly, nicks may remain, which will spoil the appearance of the cover.
- Sew both parts on three sides. By hand or on a sewing machine. Hand stitching “over the edge” with contrasting color threads looks beautiful, but for strength and protection from litter, you can sew stitches to match.
- The edge of the bag can be left open; if the pattern is made accurately, the phone will not jump out. But you can sew on a button and make a hanging loop; a button will also work.
- You can decorate with cut out felt figures that can be sewn or glued. You can also use ribbons, beads and buttons.
Making your own smartphone case using this method is simple and quick; even a child can do it.
Versatile denim
Making your own phone case from fabric is more difficult than making it from felt. This is explained by the need to process sections. The most popular material is denim. But any denim fabric (hard, dense, with a strong weave of threads) will do.
What you will need for work:
- • A piece of fabric or old jeans
- • Needle, thread
- • Beads, buttons, laces
How to make a phone case:
- A pattern is made. It can consist of 2 parts (as in the previous method) or one. You can make a pattern from the bottom of the trouser leg so that on one side the parts are already sewn.
- If you plan to insert a lace, then the pattern needs to be made 2 cm longer.
- The cover is turned inside out, stitched and the edges are processed using a serging method (can be done using a machine). A hole is sewn in a circle for the lace. The hole is stitched so that the fabric does not fray.
- The decor is being done. You can sew beads, fabric flowers and ribbon bows. If you are planning embroidery, then it is better to do it before the parts are sewn together, it is more convenient to work.
Instead of laces, you can sew in a zipper or make a loop with a button. For buttons and Velcro, you will need to make a fabric flap.
Magic loops and hook
If you have a little experience, you can crochet a phone case. And if you don’t have the skills, then this is a good opportunity to learn. Knitted phone cases look very cute, they will always come in handy, they don’t take much time and you can master different patterns. Another advantage of crocheting a phone case is the ability to create an original item from the remaining balls that are no longer enough for anything.
What you need for work:
- • Threads
- • Hook
- • Velcro, buttons, decor as desired
How to knit a phone case:
- You need to make a size pattern that you can use to crochet a phone case. To do this, you need to trace the phone with a pencil on a piece of paper. If you need a tight-fitting model, then add 0.5 cm to the side. For a spacious handbag-style case, you can do more.
- A chain is made from air loops, the length of which should be equal to the width of the pattern.
- From a chain of air loops, a fabric equal to two phone lengths is knitted.
- If you plan to insert the lace, you can finish knitting. For the valve you need to knit another 4-6 cm, depending on the thickness and size of the phone.
- The valve does not have to be rectangular. You can round the edges or make them pointed. The valve should be made of thick fabric without openwork elements to make it easier to secure with Velcro or a button.
- The knitted flap is folded according to the pattern and the edges are sewn. It’s better to crochet it and at the same time tie the bag on all sides, including the valve and the open edge.
- Velcro or button is sewn on.
- If you planned to insert a lace, then a fabric equal to two lengths is knitted, stitched and holes are knitted around the hole. The lace can be tied with air loops from a thread folded in half.
You can decorate such products with knitted flowers, leaves and beads. Three-dimensional animal figures, eyes, beaks and mouths look beautiful.
Cover with knitting needles
Knitting a phone case is no more difficult than crocheting. Even an accessory made with regular stockinette stitch looks very cute, and if you embroider it with beads and knitted flowers, you can get a real work of art.
The cover can be made in 2 ways:
- Knitting a whole fabric and stitching.
- Knitting on 5 double needles.
Knitting a phone case with your own hands using fabric is done in the same way as crocheting. There can be one part that is folded or two separate ones for sewing on three sides.
Knitting on 5 needles is carried out similarly to knitting socks. It is important to correctly determine the number of loops. It’s also worth considering that a self-made phone case with 5 knitting needles will stretch well in width, so you shouldn’t make a stock. You can immediately knit a pattern, bumps or braids on the cover. When the fabric is ready, it needs to be steamed with an iron and sewn.
You can make your own phone case from any available materials. Fabric can be replaced with leather or suede. Instead of the usual knitting threads, use ribbons from bags. And some needlewomen, who are not afraid of painstaking work, weave accessories for mobile phones from beads or using the macrame technique.
Fabric cover
You can also make an excellent DIY phone case from fabric. This case is perfect for fans of the cartoon “SpongeBob”. It is beautiful and original, it will please anyone. Let's see how to make such a case at home with step-by-step photos and video instructions.
You will need:
- Any thick fabric (preferably felt)
- Acrylic paints
- Threads with a needle
- Scissors
- Colored paper
- Stencil
Progress:
- Using a stencil, cut out two identical blanks the size of the phone, with wavy edges.
- On one of the blanks, draw SpongeBob's face.
- Cut out blanks for pants from colored paper and glue them onto the blank with a muzzle.
- Now sew the two halves together from the wrong side and turn them inside out.
- The case is ready!
Video on how to make a fabric case with your own hands
Leather case
Another option for a phone case is to make it from leather. You don’t have to go and buy leather in a store, just find an old leather item and use it for this craft. This case is reliable and looks high quality, and no one will guess that you didn’t buy it.
You will need:
- Piece of leather
- Clamps
- Scissors
- Cardboard template
- Thick thread
- Gypsy needle - 2 pcs.
- Eyelet installation pliers
- Pen
- Decorative thread
- Eglets - 2 pcs.
Progress:
- First, measure the parameters of your phone. Add 1 cm to the length and 2 cm to the width.
- Cut out 2 pieces from a piece of leather the size you need for your phone, adding the centimeters described above.
- Round the corners of two pieces by placing one part on top of the other.
- On a cardboard template, make small round holes at a distance of about 5 mm from each other.
- Place the template on the folded leather pieces (the parts are folded with the insides facing each other) and make holes using pliers along the sides and bottom sides. Secure the template with clamps.
- Place 2 needles on the thread on both sides.
- We start stitching from the side.
- First, go through the first hole with one needle and straighten the thread.
- Next, we sew alternately with two needles, pulling the needles into one hole in opposite directions.
- In this way we stitch the cover completely.
- Now secure the thread by passing the needle through the last hole several times. Cut off the excess part.
- On the top of the cover, make 2 through holes, at a distance of 1 cm.
- Thread a decorative thread through them, putting aeglets on the ends in advance. Tie a nice bow.
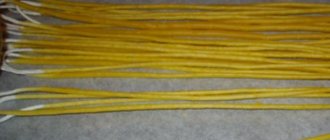
Warm thread cover
This soft white and fluffy phone case will warm your hands in winter frosts. It is pleasant to the touch and has a cute appearance. Let's try to make such a case with our own hands following the instructions with a step-by-step description.
You will need:
- White yarn
- Glue gun
- Scissors
- Parchment paper
- Scotch
- Baking paper
- Ruler
Progress:
- Wrap the phone in paper, securing the seams and folds with tape on the screen side. So that the back cover has a flat surface.
- Using a glue gun, make a base on the back cover, covering the entire surface with glue, leaving the holes for the microphone and camera free. Also process the side of the phone.
- When the glue is completely dry, remove the base, now we will work with it.
- Wind the thread around the ruler so that the threads are parallel. We wind it based on the width of the phone, it should correspond to the width of the wound threads.
- Apply glue to one edge of a ruler with threads and glue it to a base made of glue. We wait a few minutes for the glue to dry and cut the thread along the opposite edge of the ruler. We also cut the thread from the skein.
- We do this until the entire cover is filled with lint. You need to retreat about 5 mm from the previous row.
- When you have covered the entire back cover, do the same with the side parts.
- Our case is ready!