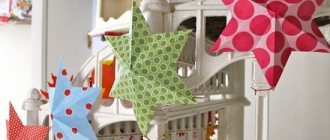
A doll house is every girl's dream. Here they are ready to play selflessly for hours, without suspecting that they are gradually preparing themselves for the future role of wife, mother, mistress of the house. And it’s not difficult to bring such joy to a girl.
Alexander Zalivako from Moscow shares his experience.
EVERYTHING YOU NEED FOR THIS ARTICLE IS HERE >>>
Is it possible to compare the construction of a children's house with real construction? It's a toy house. But, as practice has shown, the approach in both cases should be equally serious and competent in engineering, constructive and technical terms. I used FC plywood as the material for making the house (Fig. 1). For the side walls, shelves (floors) and partitions I chose plywood 8 mm thick, for the back wall - 3 mm thick.
Scheme of a three-dimensional paper house
To assemble a house from thick paper, you need to draw a similar diagram on a large sheet. The first part of the image consists of the side wall of a house in the shape of a rectangle. On top, add a detail for the roof with an extra strip for spreading glue. You don’t have to draw the bottom part, then the craft will not have a floor base. If you want to make a completely three-dimensional house out of paper, then draw a trapezoid at the bottom of all parts of the pattern. The edges are drawn truncated so that they do not interfere with the folding of the house when gluing.
The second part of the pattern is the front side of the house. It can be made of any size - narrow, as in the sample, or the same as before. Then the house will be square. The roof is depicted as triangular; additional strips are drawn on the legs for gluing. On the paper house diagram they are indicated by dotted lines.
The rest of the pattern repeats the drawing of the first and second parts. When all the elements are completed, all parts are carefully cut out along the contours with scissors. In the places indicated by the dotted line, you need to make neat and even folds of the paper by running your finger or a ruler.
The gluing strips are coated with PVA glue with a brush and all the parts are assembled together. It turns out to be a rustic one-story house with a sloping roof. You can decorate the craft with applique or paints. It is more convenient to do this before assembling a three-dimensional house from paper with your own hands, when the development is on the surface of the table.
Making toy house parts
When marking the parts of the house, you must not only take into account their rational location on the sheet, but also remember that with FC construction plywood, usually one side can be cleaner and neater than the other. So, the finished side should be on top of the shelves and roof, and the outside of the side walls.
Eight partitions (Fig. 2) are made from rectangles measuring 247 x 200 x 8 mm, making the necessary cuts with a jigsaw, and then carefully finishing the edges with a file.
The shelves (interfloor ceilings) are cut with a hacksaw (four rectangles measuring 247 x 894 x 8 mm and one rectangle measuring 222 x 894 x 8 mm). The width of the bottom shelf (Fig. 3) is selected according to location (due to the presence of a plinth). In the upper shelves, cutouts for stairs are made using a jigsaw (some of them can be made with a hacksaw).
When cutting out the side walls, remember that their lower edges have a slight bevel. Cutouts for the plinth are determined by location. Windows in the side walls are cut out with a jigsaw, having previously drilled holes for inserting the saw. Window openings are cleaned with a file.
Not only the appearance, but also the strength and stability of the entire structure will depend on the accuracy and thoroughness of the manufacture of parts.
Rice. 4. The back wall and roof are cut from 3 mm plywood. Fig. 5. Details of interfloor stairs are cut out from 8 mm plywood using a simple device. Rice. 6. A device for cutting parts of the same width consists of a plywood base with a cut and a guide and a strip to be cut pressed to it: 1 - jigsaw; 2 – strip to be cut; 3 – clamps; 4 – guide; 5 – workbench.
Photo 1. The assembled frame of the house. The parts are fitted .2.The back wall is attached to the house and connected with self-tapping screws. and roof
Assembling a toy house
When all the parts are ready, begin assembly, starting with attaching the partitions to the shelves with self-tapping screws.
Each is screwed with three self-tapping screws, having previously drilled guide holes, taking into account the location of some partitions on top of each other.
After assembling the entire structure of the house from 3 mm plywood, the back wall is cut out in place (Fig. 4) and nailed with small shoe nails to the rear edges of the partitions and shelves, and the roof is attached.
On a note:
At the assembly stage, some difficulties may arise due to the fact that the parts are slightly different from each other, and the untreated plywood “leads” a little.
To solve the problem, you need to unscrew one of the lower partitions without disassembling the structure.
Due to this, it receives an additional degree of freedom, and the side wall can be easily screwed on. After this, the partition is adjusted to the location (or a new one is made). Although its dimensions differ little from the dimensions of other partitions, the structure is already assembled without tension.
House made from juice cartons
For a travel corner in a kindergarten, you can make voluminous houses out of paper, using store-bought ready-made packaging for milk, juice or other dairy products as a basis. The plastic cover is carefully cut off. The bag needs to be washed and dried. Then the blank is covered with plain colored paper around the entire perimeter. The roof is done on the top of the package as it has a similar appearance. First, draw the tiles on paper with a marker or make an applique of ovals. Then bend it in half and attach it to the bag. You can leave it the same size, or you can lengthen it so that the roof stands out against the background of the walls.
All that remains is to separately cut out the doors and windows from paper and attach them with PVA glue to the surface of the walls of the house. Such crafts are durable. The child will be able to play calmly, without fear that the thin walls will fall apart in his hands. The package is quite dense, reinforced with plastic film on the inside. The baby will be able to pick up the toy and move it from place to place.
Stage four: next floor
How to build a house of cards next? We are building the next floor. If your base consists of three pyramids, then the next floor will consist of only two. Try to place the first pyramid of two cards with extreme care, touching the tips of the tops of the first and second pyramids of the first floor. It would be best to take one card in both hands and, connecting them with their tops, simultaneously place them in their place. Place the second pyramid on the second floor in the same way. Once this step is successfully completed, all that remains is to place one overlapping card on the tops of the second floor.
Only five cards were needed to build the second floor of our house of cards.
Be very careful. If you succeeded in installing the second floor, this means that the foundation is strong enough. And it can be saved for the future for more magnificent and complex buildings. However, remember to watch your movements. After all, you can accidentally snag and collapse the entire house of cards at any moment. Place the remaining cards with extreme accuracy and “airiness” in your movements.
Having completed the construction of the second floor, you will receive a pyramid consisting of 13 playing cards: five pyramids and three floors. But how do you build a house of cards with 36 cards? It’s very simple, you just need to add twice as many pyramids to the base.
Strength out of the box
If you still have a box of cookies or household appliances left over, don’t rush to throw it away. It can be useful for creating a three-dimensional paper house. Using a stationery knife, windows are cut out along the drawn contours. You can make a semicircular cut in the center by lowering the cut paper onto the table surface. These will be the opening doors of the fortress. If you stretch the ropes from both sides into the holes on the walls, you will get a drawbridge for the entry of knights on horses.
The top lids of the box are cut off with scissors and the entire perimeter of the craft is designed like a real fortress. These can be square elements or thin rectangular teeth. You can add towers of toilet paper rolls to the edges. You need to make cuts on them on opposite sides and simply press them onto the wall. It will be interesting for both boys and girls to play with such a wonderful house.
Second stage: determine the height
We continue to create the pyramids that were described in the first stage. We will need a sufficient number of playing cards, but the number of pyramids depends on how large the house of cards you want to make. There should be a distance between the tops of the pyramids equal to one playing card. The number of triangles at the base sets the likely height of your house of cards: any subsequent floor will contain fewer pyramids at its base. For example, if your base has three pyramids at its base, then the entire house will consist of three floors. By building a base of six pyramids, you will have more space and the opportunity to build as many as six floors. With such a geometric progression, a house of cards can grow.
Try first to create the simplest house, at the base of which there will be only three pyramids. Don't forget, to learn how to build a house of cards, you need to read to the end!
Remember to rest the new card pyramid against the base of a nearby pyramid. As a result, you will have the strongest possible foundation for your future house.
Antique bushing lock
Craftsmen never throw away rolls from kitchen napkins and toilet paper, because this is a wonderful material for crafts. The next version of a paper house is made only from them. The castle has several towers of different heights, so the excess strips on the bushings are cut off with scissors and arranged in order of decreasing size.
You can connect them together either with a stapler or by gluing them with thick PVA glue. Cone roofs are attached to the tallest towers. Other parts can be covered with thick colored paper, making square teeth on top. Small details are simply drawn with a marker or made in the form of an applique.
House made of newspaper tubes
The idea of creating crafts from tubes rolled from sheets of newspaper or magazine appealed to many craftsmen. They also paid attention to the making of the house. For such a craft, you need to first make a lot of tubes. To roll, prepare sheets of newspaper and a knitting needle. You can also use a wooden barbecue skewer. The page is placed on the table at an angle towards the master and the knitting needle is laid out on it. Then wind tightly to the end of the page. Its edge is glued to the last turn with PVA glue.
Then the parts are cut into sticks of the required size and fastened together with glue. To create the roof of the house, it is best to use a cardboard base, bending the sheet in half. A tube is then glued along the fold. The craft looks interesting on cardboard or on a base specially assembled from the same tubes. You can supplement it with a low fence around the house.
A hut on chicken legs
All children love fairy tales and their heroes, so building Baba Yaga’s house will be interesting for them.
You need to collect available materials: dry moss, conifer cones, plasticine, glue, dried berries, clothespins, leaves straightened with an iron.
- We glue the house from disassembled clothespins using Liquid Nails glue.
- We firmly fix the manufactured house on a cardboard, treat the free space of which with glue and “plant” moss on it.
- We decorate the roof with dry berries, leaves, and pieces of remaining moss.
- We paint the cones with green paint - these are Christmas trees, and we “seat” them on cardboard.
- We make forest animals - hares, squirrels, hedgehogs - from plasticine. Creating a forest picture around the hut is important for the overall background - Baba Yaga’s house, created with her own hands, is installed in a thicket.
Any material is suitable for making houses. Not only the usual paper, cardboard, plasticine, plywood, but also not quite ordinary materials: vegetables, old things, cake boxes, etc.
In addition, you spend a lot of time with your child, both of them are engaged in a pleasant activity that you enjoy. Ready-made houses delight children with their uniqueness, filling them with pride in their creativity and imagination. They play with special joy, using their crafts in games and showing them off to friends and guests.
All the houses discussed in the article are suitable for decorating an apartment without extra expenses.
What could be more interesting than how to make a cardboard house with your own hands and give it the look that you like most? A cardboard house is a toy that every child can find a use for. Some will use it for role-playing games, others for staging small skits and plays. But he definitely won’t remain idle.
Origami house
The house can be created by folding paper according to origami patterns. For the next sample, take a rectangular piece of colored construction paper and fold it in half horizontally.
Then fold in half vertically. Each half is folded again into two equal parts. Then unfold the paper. The bends were made to determine the outer quarters of the workpiece. It is with them that we will continue to perform actions. Bend it upward with your fingers and, putting your hand inside, push its edges in different directions, smoothing the fold with your hands. The result was a triangular roof and two walls.
First stage
Fold the first triangle (pyramid). This kind of “house” is considered the frame of the entire pyramid. Place two playing cards next to each other to form an upside down "V" shape. The tops of both cards must be connected, while the lower parts must stand directly parallel to each other. First, practice installing such pyramids separately so as not to accidentally destroy your buildings. Thus, after creating a significant number of similar pyramids, you will get one large house of cards.
Two-color origami
The execution of such a house is similar to the previous version, only here they combine paper of two colors at once. When folding each quarter, work separately with blue paper, and then with the corners of orange.
After assembly, the house is turned over on its back side so that the folds are not visible.
Now you know how to make a three-dimensional paper house in different ways.
This is the kind of village house I made - the idea came when I saw a house made of paper and decided to make a detailed master class
We roll the paper into tubes
First on the sides - then in the center - and then the entire tube
You need a lot of these sticks - I didn’t count how many, I just made them as needed
We take cardboard as a base and glue the sticks like this - two are long as we made them - the other two are shorter, measure, cut off the ends to the required length and also glue
After 3 rows we outline a doorway - and after another 3 a window opening that is wider than the doorway
We close the window openings and the door opening equally - we glue the edges of the door on the sides - then we take thin tubes, which I twisted with a wooden skewer, which can be purchased at any sewing store - we cut the tubes to the height of the opening - we glue them together, we glue them to the doorway and so that they do not fall inside , taped inside with tape
We also glue the window opening - we cut off thin tubes and glue them into the opening like this - I used double-sided tape - but windows and curtains can be made as anyone wants - I did it like this and taped the inside too
We make the roof like this - we fix it inside with tubes so that they don’t bend for strength.
We decorate the window with self-adhesive tape
Making tiles - I made them from strips of cardboard
Tape the corners above the window
We make the steps of the porch - we glue the tubes and wrap them with self-adhesive tape - three steps
An origami house with detailed photo instructions and three options, from the simplest to the slightly complex for children. There are many different schemes for how to make an origami house, I chose these 3, in my opinion, the most ideal for children.
Materials:
- Double-sided colored paper or origami paper for the first house;
- One-way for the other two;
- A felt-tip pen to draw windows and doors for houses, if desired.
Third stage: covering the pyramids
Carefully place one card on top of the first and second pyramids. Installation should be done carefully, try not to touch or destroy the pyramids. The scheme must be perfectly balanced with the tops strengthened in this way. Then place another card on top of the second and third pyramid. And now you have the simplest base of three pyramids, closed on top with two playing cards. In total, we only needed eight playing cards.
Origami house step by step: 1 easiest option
For origami you will need a square piece of paper, colored on both sides.
Fold the paper in half, with this action we will mark the middle of the square.
Fold the right side over, lining it up with the fold in the center.
Do the same manipulations with the left one.
Now fold the created part in half to make a fold in the center.
Open and fold the top side inward, aligning it with the fold in the center.
How to make an origami house: 2 easy ways
To work, you need single-sided square-shaped paper or special paper for origami. One side is colored and the other is white. Size is absolutely not important. It all depends on personal wishes.
Place the paper in front of you.
Fold it in half, the color should be on the outside. Then double it again, but this time connecting the other two sides.
Open the paper, there should be two intersecting folds in the middle.
Fold the top side to a horizontal fold.
Turn over to the other side, aligning the right side with the vertical fold in the center.
Point the top corners down.
Turn over to the other side. Make a small fold upward from the bottom.
Now open it.
Redirect the folded corners inward. Fold the resulting trapezoidal part up again. Due to the fact that the paper is one-sided, we ended up with doors on the bottom.
All that remains is to draw the windows for the complete set of the house.
Fifth stage: adding the top
In order to completely complete our construction of the house of cards, we still need to build the top. It consists of one single pyramid (two cards). Slowly and carefully install the two cards onto the single card covering the second floor. Take your time and hold them until they are stable on the bottom card. As soon as this happens, you can remove your hands. But only if you are absolutely sure that the top will not immediately fall, destroying the remaining floors of your house of cards. If everything worked out, you can congratulate yourself on the successful construction of a house of cards! This is the end of our master class called “How to make a house of cards”; from 36 cards you can create an entire mansion! Try it and don't be afraid to experiment with the number of cards.