Dear needlewomen, hello! And today we will create an amazingly beautiful envelope for flowers from paper and cardboard.
The thing is very necessary, because... You can easily store cosmetics accessories in it: mascara, lipstick, eye or lip pencils, lip gloss, etc. And besides, we will decorate it with chic roses made by ourselves, which will delight us for a very long time (after all, they will never wither!).
An excellent gift and a very useful thing for yourself and for friends on March 8th and birthdays.
List of materials
Well? Shall we begin?
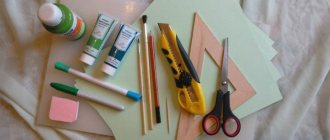
What we need to make such an envelope:
- large cardboard from a used box;
- tools: scissors, pencil, ruler;
- large tape + double-sided;
- a clean yogurt cup;
- any wrapping paper for wrapping gifts;
- decorative tape;
- penoplex 5 cm thick;
- green sisal;
- ribbons for decoration.
Why do envelopes remain in demand?
Many will say that with the development of information technology, the need for postal correspondence has disappeared almost completely. After all, any advertising letter can be sent by email or sent via SMS. Many companies do this. But a letter received by mail attracts much more attention. Unlike spam, an advertisement in an envelope will definitely be viewed.
Taping envelopes at home can be beneficial for both the employer and the employee. The first will be received by workers who carry out orders efficiently for a small amount, and the second will have the opportunity to earn money without leaving their apartment.
Build process
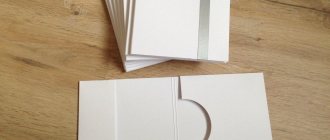
So, we cut out the desired shape of our future stand in the form of an envelope from cardboard, observing all dimensions. I specifically took these sizes, taking into account that the envelope would not fall over at the most inopportune moment and, moreover, that it would not be too small and not too bulky, but could fit in any corridor of your house. Here's the diagram.
Now, in order to bend the cardboard easily (since it is quite thick), you need to draw scissors along the marked lines where the fold will be. And then the necessary parts will be very easy to bend without additional creases (photo 1 below).
Did you do that? Then go ahead and read in more detail how to make an envelope.
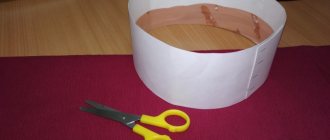
Assemble the workpiece with your hand and see if our yogurt cup fits.
The glass will also need to be prepared. To do this, wash it, dry it and cut off all protruding edges. The glass is taken in the usual size: 5.5 cm wide and 7 cm high.
Then I decided to cover the edges with decorative tape. You can do the same.
Now we need to somehow decorate our stand. To do this, I take regular wrapping paper and double-sided tape.
You need to cut out a template and wrapping paper 1-1.5 cm wider than our workpiece itself and cut it out (photo 1 below). Then stick double-sided tape along the edge of the cardboard (as in photo 2 below), you can also add it in the center.
By the way, don’t forget to cut out another piece from paper, a few mm smaller in size than the top of the cardboard blank. This will be our front side.
In order for your beautiful paper to stick well to the base without creases, you need to remove the adhesive tape on the cardboard from the second film and place IT (cardboard) on a straightened sheet of wrapping paper, and not vice versa.
We bend all protruding edges of the paper inward and seal them with double-sided tape.
To cover the front side of the base, you need to glue double-sided tape onto the paper around the entire perimeter and in the center (photo 1 below) and attach it to the cardboard.
Let me remind you! This front part of the paper blank should be a few mm smaller so that you do not have to cut off any more excess.
This is how it should turn out.
Well? Go ahead. Now we'll find out how to fold it all and secure it.
I used large tape for this so that no traces of hot glue would be visible.
I cut the tape into small pieces and from the inside began to fasten the edges to each other. Everything is holding up great!
How to make an invitation envelope with your own hands?
Making them at home is not at all difficult, you just need a little time and a little patience.
DIY envelope for wedding invitations
Required materials and tools
- standard envelope of the desired size;
- a piece of fabric;
- pencil, ruler;
- iron;
- fabric glue;
- ribbon of the desired color;
- multi-colored paper.
- scissors.
Step-by-step instruction:
- We create a model of an envelope from fabric. We fold the pieces of fabric, having previously marked the central point, i.e. We grab the ends of the fabric and direct them to the center.
- We put the resulting model into an envelope, cutting off the excess along the edges. For better fixation, we smooth the edges with an iron and connect them together with special glue.
- We put the invitation in the inner envelope and tie the product with a decorative ribbon.
- It's time for the outer envelope: from designer paper we cut out the “lid” of the envelope in the form of a triangle, going inside. Glue the paper using PVA. Be careful not to glue too much.
- The fabric envelope is sent into a paper one - the invitations in the envelope are ready!
Choosing Paper for a Love Letter
So where should you start writing a love letter? First, you need to choose the right paper. Don’t look for easy ways, because to get the desired effect, a piece of paper from your notebook and a poorly writing pen are unlikely to be suitable. Therefore, be sure to pay attention to the fact that the paper for such a letter is special and, of course, beautiful.
But you shouldn’t take these words literally and rush to choose paper with works of art painted on it or a crazy pink color, because this is what some associate with the sacrament of love messages.
When choosing paper for your love letter, stick to a plain piece of paper (white, perhaps a soothing cream or a sensual nude color). A4 sheet of paper is good for writing, perhaps a neatly taken beautiful sheet from a notebook, only if it is good quality paper.
Remember that the first thing you pick up is the sheet of writing itself and the way it lies in your hands will create a lasting impression, and the high quality of the paper will add attractiveness to the written word and show how much effort was put into writing it.
Some may want the love letter paper to look old. In this case, you can purchase already aged paper or make it yourself.
To do this, you will need a regular sheet of paper, as well as tea leaves. So, to get an antique effect, soak the paper in tea leaves (try to make it stronger). Before dipping into tea, the leaves can be crumpled a little for greater effect. After five minutes, simply remove the paper from the liquid and let it dry on a flat surface. To speed up drying, the sheet can be ironed.
Gluing envelopes at home
Despite the huge number of scammers, many honest companies also offer work. You can find many similar advertisements on the Internet. They offer a variety of work from home jobs. It does not require special skills and is completely uncomplicated. Earnings directly depend on the number of products manufactured. The more done, the more income the employee will be able to receive.
Gluing envelopes at home is extremely popular. Reviews show that such work brings great pleasure. Everyone can plan their own time. Even a schoolchild on vacation can cope with a simple task. This is a unique opportunity to earn money for your own needs. Many children dream of becoming more independent and no longer depending on their parents. After all, there are no age restrictions. Education doesn't matter either. The employer will first of all pay attention to the quality of the envelopes and the speed of work.
How to organize your workplace?
Despite the fact that you are supposed to work from home, gluing envelopes will be done better if the workplace is properly organized. You should take care of proper lighting in advance. If your eyes and back don't get tired, you can glue many more envelopes. The amount of earnings directly depends on a comfortable workplace.
The most suitable place to work may be a desk with a bright lamp. Everything unnecessary should be removed from the table so that nothing interferes with doing the work efficiently. An important point is the organization of your working time. You definitely need to take short breaks to make your work more productive. It is not advisable to glue envelopes for more than eight hours a day. Home work should not differ from office work in terms of daily routine.
For mothers who are on maternity leave, it is advisable to organize work while the child is sleeping. In this case, you won’t have to be distracted by the baby, which means the products will be made to a higher quality.
How else can you make money at home?
Home-based work, gluing envelopes, is far from the only type of income that pensioners or women on maternity leave can afford. There are a huge number of activities that allow you not only to earn good money, but also to develop your creative abilities. This is decoupage, making handmade cards, shopping bags, etc. This kind of work requires more than just automation. To create a real masterpiece, you will have to use your imagination. And the more original the product, the more expensive it can be valued.
We make handmade cards
Handmade cards are always highly valued. On the Internet you can find many employers who recruit employees to make postcards according to a certain scheme. These products are then sold to supermarkets or bookstores. This kind of home work without investment is suitable for almost everyone. It does not require special skills. All you need to do is follow a certain pattern. The earnings will not be too big.
You can earn much more if you make cards yourself and sell them online. A finished card will cost about $5. The employer will offer no more than $1 for making one postcard according to the scheme.
You can offer ready-made postcards online. Those who have managed to promote themselves in this area have created their own websites and are excellent at selling their creations via the Internet throughout the country. This is a home-based job without cheating, which brings not only good profits, but also great pleasure.
We conclude an agreement with the employer
A special agreement concluded between the two parties can guarantee that the employer is honest and all money earned will be paid in full. It will describe home work with all conditions. The employee's responsibilities will also be described here. The contract is sent by mail or email. It is considered valid only if there are signatures of both parties.
The contract must indicate the form of payment. Work from home can be paid by postal order or by bank transfer. In addition, immediately after signing the contract, the employer can offer the employee to issue a plastic card for payments. It is very comfortable. After all, every time you receive a salary, you will not need to go to a bank branch. You can withdraw your salary from the nearest ATM.

