Many novice crafters, looking at photos of the work of quilling masters, ask themselves: how to make such beautiful crafts yourself? Naturally, various MKs come to the rescue, teaching the art of making flowers, animal figurines, portraits and landscapes using the paper rolling technique. But the most important questions for beginners concern the basics of needlework in general, and not complex compositions. For example, what to make a background for a picture from or how to make imitation grass on it.
Today we will figure out exactly how to make a master class using the grass quilling technique, which is suitable even for small children, and adults will be able to come up with new, their own ideas based on it.
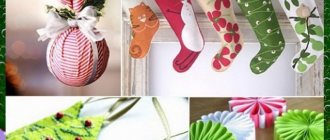
Several ideas for creating grass from paper
Required materials and tools
In order to make beautiful grass with your own hands in addition to your paper flowers, just prepare the necessary materials and then follow the instructions step by step. What you will need:
- quilling strips of green shades;
- scissors;
- PVA glue;
- toothpick or quilling tool, pencil or thin brush.
Quilling strips can be cut from green or plain white paper, then you will also need a long ruler, a pencil and a cutter. Using a sharp cutter, you can independently make strips of any width.
Additional materials:
- paint, markers or colors of different shades of green;
- sponge or sponge for applying paint.
These items will be needed by those who make quilling strips themselves. You can color paper in a variety of ways - after some experimentation with different coloring substances, you can choose exactly the ones that suit your work. For example, in the picture, the quilling strips were painted: emerald acrylic paint, light green acrylic paint, two-color markers, water-based coloring (from left to right, respectively). As you can see, the best result was obtained precisely when using color.
There are no detailed descriptions or diagrams in this lesson - only basic ideas for implementing ideas. Grass can be of any shape, thickness and color, depending on your preferences and imagination.
Fluffy grass made from a wide quilling strip
Cut a wide strip of paper from a whole sheet. Its width is the height of the grass, but you also need to leave a small distance at the bottom so that the cut fringe does not fall apart.
Using such a template - a strip of thick paper or cardboard - we cut a long fringe. This will help make its length the same, and also prevent you from accidentally cutting off your quilling strip ahead of time.
Using a toothpick or quilling tool, slightly twist the resulting grass in different directions. This must be done carefully so as not to tear off thin strips and wrinkle them. We cut off the required length, glue the blank onto a postcard or panel and straighten the uneven blades of grass with your fingers.
The thinner you can cut the fringe, the fluffier and more realistic the grass will look.
Fantasy style grass
Using strips twisted with a pencil or a brush, you can create curls like this. They will fit well into various paintings and crafts in the fantasy style. The tip of the strip, which will be at the top of the blade of grass, needs to be cut at an angle, narrowing it. You can complement sketches with such curls with simple elements using the quilling technique, which will serve as leaves of an unusual plant.
Dense openwork blades of grass for large paintings
This grass can be used in voluminous quilling work, or where the emphasis should not be on too small details. Such grass will look beautiful even without flowers: you can plant ladybugs or other insects made using the quilling technique on it. For this tutorial you will need a toothed comb or a hair comb.
The end of the strip is folded over the third tooth of the comb and coated with glue. Next, the loops are thrown over the cloves one at a time.
In total you need to put on five loops.
Now we take a strip of a different shade and do the same thing, but we fasten the end to the second tooth and make one more loops.
You should end up with parts like this.
The resulting blanks are smeared with glue along the edges and glued to each other.
This funny grass will decorate any panel, for example, in a cartoon style. And how to make animals and three-dimensional flowers using the same technique, novice craftsmen can learn from video and photo tutorials, where the intricacies of paper rolling are explained step by step.
Materials and tools
Before work begins, you should prepare tools and materials:
- Thick cardboard.
- Multi-colored paper.
- Scissors with rounded ends.
- PVA glue or stationery pencil.
- Wallpaper.
- Cotton wool.
- Felt pen.
- Cotton pads.
- Watercolor paints.
DIY autumn crafts for kindergarten from natural materials
I'll tell you about two crafts (I just couldn't choose one, both are cool). Each one is very simple, so much so that kids can handle it with ease! For the first one we will make a Lion with a huge mane. And for the mane we use leaves. By the way, use your imagination: our lion can be yellow, orange, red, green, and even multi-colored!!!!
a lion
1. Download the lion face template in 2 copies.
2. Cut out one of the templates and decorate it. We leave the second one on paper. We need it to glue autumn leaves around the muzzle.
3. Glue the first template on top of the leaves.
Author - https://www.youtube.com/watch?v=-HL9jCBfOZ8
Ready! Leo turned out to be a real handsome guy!
Composition
1. We will need different autumn leaves. It would be nice if they differed in color, size, and shape.
2. Let's take care of protecting the table. You can put cardboard wrapped in a towel on it.
3. Take paper, it’s best if you have waxed paper. If there is none, you can take regular tracing paper. We put the tracing paper on the table. We arrange the leaves on tracing paper.
4. Now we need paraffin. It needs to be thinly sliced with scissors or grated. Sprinkle paraffin over the leaves. We cover this entire structure with a second sheet of tracing paper. And we cover the tracing paper with fabric.
5. Using an iron, iron the fabric with slow movements. We need the paraffin to completely melt.
Author - https://www.youtube.com/watch?v=hYNrWesiS3w
That's all! The composition is ready. It can be glued to beautiful thick cardboard or placed in a frame like a picture.
Of course, it is better to leave the iron to adults. But all other tasks are within the child’s control.
These are our options:
You can also draw mini paintings on leaves very simply and beautifully. And you can turn leaves into feathers and fish. Here are our ideas. Painted with acrylic paints.
Beautiful autumn crafts from pine cones
The cone is an excellent preparation for future crafts. It can be used as is; just attach ears, a nose, and a tail from plasticine to it, and that’s how you get the animal. But you can also cut the cone by detaching individual scales. We will now use the second method to make the craft.
Author - https://www.youtube.com/watch?v=33gBXgCoJr0
1. We are making an owl. First we need a base. We cut out the base from thick cardboard. The shape of the base can be different: round, egg-shaped, consisting of two connected circles, etc.
2. Prepare the eyes for the owl. We cut out 4 blanks from felt: 2 larger, light brown, and 2 smaller, black.
3. Separate the scales of the cone.
4. For the tail, cut thin twigs from bushes and trees into small pieces. Glue the branches at the bottom of the workpiece. The tail is ready.
5. From the tail we begin to glue the scales of the cones. We glue each subsequent row of scales in a checkerboard pattern. When ¾ of the workpiece is sealed with scales, we begin to glue the scales, directing them first to the side and then upward.
6. From thin twine we twist a circle to the size of a light felt piece. Glue the circle of twine to the felt. Glue the eyes to the blank. Glue a black felt circle to the center of each eye.
7. Make a loop of twine and glue it on top, on the back side of the craft.
To make the scales easier to separate, the cones should be washed in hot soapy water. Dry well and then harden in the oven. Line a baking sheet with foil and place the pine cones. Place the baking sheet in the oven preheated to 100⁰ for 30 minutes. After a few days, the cones will open on their own and the scales will be easy to separate.
Story
Paper is made not only from wood. In China, this material has been made from reed or rice straw for hundreds of years. In Russia, the first attempts to produce such paper date back to 1715.
Actor Woody Harrelson founded a company that produces paper from wheat straw. It promotes the production and use of this environmentally friendly and high-quality type of paper made from wheat straw. Woody Harrelson believes that using straw to make paper can help protect the environment more effectively.
Woody Harrelson with a book on making paper from straw