I bring to your attention another way to decorate candles with napkins. The author talks in some detail about the secrets and tricks of this process, at the end of which you can get a candle of extraordinary beauty, which you can use as a souvenir for friends or decorate the interior of your home with it.
Let's prepare everything you need:
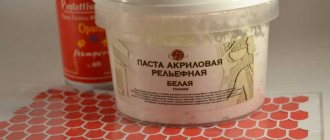
1. White thick cylindrical candle. 2. Napkin with a pattern for decoupage. 3. Regular or floating candle. We will use a spoon to heat it. 4. Teaspoon. 5. Waffle towel or bandage. 6. Contours with glitters and loose sparkles. 7. Gel 3 D for creating three-dimensional details. 8. Acrylic varnish.
1 step.
To begin with, the author explains why it is recommended to take white candles. This will save you from the need to prime the candle so that the drawing transferred from the napkin is clearly visible. And the cylinder shape will allow you to avoid unnecessary folds and creases on the napkin fragment.
First, select the piece of napkin that you would like to see on the candle. Using your fingers, carefully tear off all the excess edges of the napkin, peel it off and leave only the top layer with the applied pattern for work.
Step 2.
We apply a fragment of a napkin with a pattern to the surface of the candle and carefully smooth it out, holding it with our hand.
Now light a floating candle and heat a teaspoon over it. The spoon should be positioned with its concave side facing the fire, otherwise the soot that forms on the spoon can stain the design. Heat the spoon for about a minute and begin to move the spoon smoothly and without pressure along the pattern, from the center to the edges. At the same time, carefully ensure that the napkin fragment does not move. This way the wax melts a little and the napkin seems to be implanted into the candle. At the touch of a spoon, the paraffin melts and appears through the napkin. Make sure that the napkin is glued evenly, that is, there are no areas left untreated with a spoon. Also, do not press the spoon too hard, as dents may form on the surface of the candle.
Step 3.
Then we polish our candle using a waffle towel or other lint-free cloth. To do this, take a candle and quickly stroke it up and down. We just use extreme caution so as not to damage or tear off the previously applied drawing. If there are still deep dents from the spoon, then hold the candle over the candle light at a distance of about 4 cm and immediately wipe with a towel. The towel will absorb the paraffin and the candle will become smoother. You can also smooth out unevenness in another way: to do this, heat the spoon over the candle again, but holding it for less time, it will not be so hot and walk it over the surface of the candle again. The candle will become dull, so give it a shine by wiping it with a towel.
Step 4
Let's decorate our creation with paints and glitter. We outline the flowers with a contour and the berries with 3 D gel. When the gel dries, it becomes completely transparent.
We decorate the border with glitter, using acrylic varnish as a base. Using a green outline, we place dots along the border of the green border. Decorate the top of the candle with an outline of gold glitter. Let the contours and gel dry.
Now let's admire the results. This is the kind of beauty that can come out of an ordinary thick candle. The result depends entirely on you and your imagination. Happy creativity.
Good day, I am glad to welcome you to the “Our Secret” blog!
Decoupage candles is an affordable and fairly simple way to make a decorative candle with your own hands. Such a candle can be made for a specific event by choosing the appropriate theme, or you can choose a color scheme to suit any interior. The decoupage process is simple, and the necessary materials can be found, if not in any home, then certainly in any hardware store. The activity is fun, does not take much time, and the result will definitely please you. It is candles that are most suitable as the basis for decoupage for beginners ,
because here you can use a minimum of tools, materials and skills.
Simple, fast, minimum material and excellent results
Decoupage candles photo master class for beginners. Decoupage does not require any skills; it can be done together with your child (of course, under the supervision of an adult). Instead of a candle, you can use a mug of hot water to heat the spoon: dip the spoon in boiling water for a while, after taking it out, wipe it with a napkin, and you can get to work.
For decoupage we will need:
- Plain household candles, preferably white.
- Metal spoon.
- Multi-layer napkins with a pattern.
- A floating candle and match or a glass of water and a napkin.
- Scissors.
Cut out the selected design along the contour. Separate the top, colored layer.
Heat a metal spoon over a “tablet” candle. The spoon may become a little smoky, so we warm the inside of the spoon. You will understand the heating temperature immediately after you start working with the candle. A weakly heated candle will not attach the napkin to the candle, and an overheated one will leave unnecessary dents on the surface. The wax should melt slightly upon contact with the heated spoon, gluing the design to the surface.
Using a hot spoon, smooth the cut-out design onto the candle, paying special attention to the edges of the napkin and small elements. The candle melts under the spoon and the napkin is attached to the candle. It is better to use wide candles; the design looks beautiful on them and there is less danger of ignition during operation. And narrow candles with such decoupage can only serve as interior decor.
Do not leave lit candles unattended!
Glue the entire desired ornament in this way, heating the spoon as needed.
You can use special glue for decoupage or coat the candle with varnish, but using such a candle for its intended purpose is quite dangerous; the napkin can catch fire.
The final stage of decoration can be applying contour, glitter and polishing. These points are optional and can be omitted. Polishing is done with a soft knitted cloth. Carefully wipe our candle with a soft cloth, avoiding damage to the design. You can also use a candle. At a distance of about four centimeters, quickly warm up the polished surface of the candle and immediately wipe it with a soft cloth. The cloth will collect excess paraffin and polish the surface. You just need to do all this carefully so as not to spoil the decoupage itself.
We have such a stylish, interesting set of candles, and you can be sure that you will not find the same set anywhere else. And you must agree, this decoupage is very suitable for beginning needlewomen. We received an original decorative element and a wonderful gift for a good person.
Enjoy your creativity and successful ideas!
The technique is very popular among modern needlewomen. In it they embody the most original ideas for decorating boring household items. With its help you can create a unique gift, a stylish element that complements the interior. Decoupage of candles with your own hands looks very beautiful and festive. It creates a unique atmosphere of a real Christmas fairy tale.
The method was first used in the 12th century to decorate old and tatty furniture in the houses of Chinese peasants.
All you need is a decorative item, available materials and equipment. To ensure that decoupling candles with your own hands at home does not cause difficulties, adhere to the following rules:
- Process the surface of the selected object. If it is uneven, sand it and apply 2-3 layers of primer. With smooth and even products that have been correctly selected, there is no such need.
- Prepare your drawing. Remove the top bright layer of the napkin and cut out the desired fragment using scissors. If the picture is too small or is made on thin paper, cut out only large elements, draw the rest of the details with paints and a thin brush in place.
- Glue the pattern to the surface. Dip a flat brush into a small amount of glue and carefully spread it over the outer layer of the napkin. Make sure that no wrinkles or bubbles form on it - straighten them with a brush. Start gluing the design from the center, smoothly moving to the edges, then wait until it dries.
- When the ornament is dry, paint on the missing parts and add other decorations - rhinestones, beads, sparkles. Cover the finished work with a special varnish to fix it and protect it from minor mechanical damage. If you apply the varnish in two layers, wait until the first one dries and then apply the second.
If you have a creative idea, you can safely get to work
Cold way
This option is suitable for thin candles - the paper will adhere more tightly to their surface. The cold method is the simplest solution to how to make decoupage candles with your own hands if you are a beginner and are not familiar with all the intricacies of this technique. This is done as follows:
- Prepare the picture as indicated in the rules.
- If you are decorating a candle with a continuous layer, leave a little material for the seam.
- Coat the napkin with glue and attach it to the decor item.
- Smooth it out with a stick from the center to the edges.
- Trim off any remaining paper to create neat seams.
Hot method (using a spoon)
For the hot method you will need two candles, a napkin or card with a pattern and a spoon. Next, follow the instructions on how to make hot decoupage of a candle with your own hands step by step:
- Cut out elements from a napkin.
- Separate the two bottom layers and apply the pattern.
- Heat the spoon over the fire of the second candle.
- Use the convex side of a hot spoon to smoothly move from the center of the design to its edges.
- Do not leave it in one place for a long time to avoid paraffin streaks.
- The paper will instantly become saturated with wax and adhere firmly to the workpiece.
- Go around the circle with a soft sponge and sand the surface.
Using a hair dryer
An ordinary hairdryer can be a good assistant for a master class on how to decoupage a candle with your own hands:
- Prepare the necessary equipment in advance - white candles, napkins with pictures, scissors and a ruler, a brush, a paper knife and don’t forget about the hairdryer.
- Decide on the size of the design - add a centimeter of napkin to the height and width of the product.
- Separate the top layer with the picture and firmly attach it to the paraffin, with the pattern facing up.
- Turn the hairdryer on to the highest setting and let it heat up.
- Direct a stream of hot air at the element to be decorated and hold it in your hands.
- Then heat the napkin itself with a hairdryer, slowly moving it over the surface of the object to be decorated.
- Hold the air flow in one place until it sticks, press it with your fingers, but be careful not to get burned.
- If necessary, turn on the hair dryer, let the candle cool, and then repeat the process.
- Use a brush to smooth out any wrinkles or folds that appear.
- Cut the paper edges at the base and bend their ends, fix them with hot air.
- Use a paper knife to cut off the remaining tissue from the wick. If they start to come off, heat them again with a hairdryer until they are soaked in wax until they are completely glued.
How to make a candle using the cold decoupage technique
Even novice craftsmen can easily master this simple decoupage technique.
What do we need
To make a candle you need:
- the candle itself, preferably thick, is convenient to work with;
- a napkin consisting of several layers, one of which has a pattern printed on it;
- manicure scissors for cutting out small parts;
- PVA glue and a brush for working with it;
- wooden stick for leveling the napkin.
Progress
- Cut out the design from the napkin, leaving 1 cm allowance on all sides.
- Separate the layers of the napkin without the pattern (backing). To work, you only need the top, colorful layer.
- Evenly coat the back of the design with glue and attach it to the candle.
- Flatten the napkin using a stick without pressing on it.
- Leave the glue until completely dry.
Using the same technique, you can completely cover the entire surface of the candle; you just need to select a pattern of the desired size and fit the seam well.
What is candle decoupage?
Handicraft art is based on working with paper applications, which can be applied to almost any surface - ceramics, wood or glass. To ensure that the design remains functional, it is coated with several layers of special varnish.
A lot of time has passed since then, new decorative elements have appeared, and do-it-yourself candle decoupage has become a popular activity. For it, multi-layer napkins with various patterns or special cards made of rice paper are used.
The design method is accessible to anyone; all the necessary products can be easily found in the store.
How to choose a candle for decoupage?
The secret of beautiful and effective decoupage is the correctly selected wax blank. It is recommended to give preference to thick and white candles with a smooth surface. The color is considered neutral and is well suited for implementing any creative ideas.
When choosing it, you should pay attention to a number of the following nuances:
- Density of the top layer. The denser and smoother it is, the less likely it is that the paper fragments will quickly heat up and ignite.
- Work surface color. To work with colored products, you should choose prints or cards that are close to their tone. The colors of the picture transferred to them will be less bright than on a napkin or card.
- Thickness of candles. Thin and small wax objects will be difficult to use for their intended purpose, since they heat up immediately and completely. For them, you should choose a small pattern, small figures or notes.
Necessary tools and items for decoupage
As with any hobby related to handmade, decoupage cannot be done without special tools. The minimum set includes:
- sharp scissors for cutting out appliqués;
- palette or plastic plate for mixing paints;
- synthetic brushes and acrylic paints;
- insert file for transferring the design to the workpiece;
- cards, placemats, and picture printouts;
- universal acrylic primer and varnish-glue for decoupage;
- special finishing varnish.
A more serious hobby and participation in master classes will require additional items:
- Varnishes with different properties - craquelure, gold leaf, mastic, shimmer.
- Table and dessert spoons - for hot decoration.
- A smooth cylindrical stick - preferably glass.
- Skins for surface treatment - making them smooth.
- Thermal tapes and adhesive-based rhinestones, other decorative accessories.
- Wax blanks with which you will work.
Decoupage candles for the New Year: do it yourself
Winter holidays are a great opportunity to show your imagination and realize your inspiration. You can realize almost any idea for decoupaging a candle for the New Year with your own hands, using various elements and designs for decoration.
New Year is one of the most favorite holidays of every person.
Wax products decorated in red, gold and silver colors, decorated with sparkles and decorative braid will look original and stylish.
- In the first case, you will need a white candle, a napkin with red, yellow and green shades, a small sponge and an acrylic golden outline. Prepare and glue the drawing using one of the above methods. Apply acrylic paint to the background using a sponge and let it dry. Draw the outline of the Christmas stars and leave the craft to dry for 5-6 hours. To create a festive atmosphere, use scented products with orange, cinnamon or pine scent.
- The second option differs in color scheme - replace the gold outline with a silver one, choose a thematic picture in cool colors and add a little sparkle upon completion of the work. Fix them with varnish and let the entire structure dry for 6 hours.
- To implement this idea, take a decorative braid and two colors of acrylic outline - white mother-of-pearl and white with gold glitter, a suitable pattern, a sponge and a simple white candle. The principle of drawing a picture remains the same. Create a background using a sponge and glitter outline and let it dry for 20 minutes. Decorate the top of the candle with white mother-of-pearl stars and outline the stars with a gold outline. Set the piece aside for 2 hours to allow it to dry completely. Decorate it with decorative braid along the bottom of the picture, gluing it with special glue.
Nowadays, there are more than enough candles in stores of different shapes and sizes; they can be either decorated with a pattern or with a smooth surface. However, it is not always possible to find the right option. Then you can make a beautiful candle yourself. You will be able to get a candle that will only be in one copy. The decoupage technique may seem complicated at first glance, although it is not. You just need to select the desired napkin and carefully use sharp scissors, or better yet, with your hands, cut the part where the required design is located, and stick it to the desired surface.
Before you become familiar with decoupage techniques in detail, you need to decide which napkins are best to use. Craft paper napkins can be purchased at any craft store, but if you like a particular look elsewhere, feel free to purchase those as well. The fact is that there is no difference in quality, you just can buy the required number of napkins in a specialized store, while in others you will have to pay for a whole package.
As for the decoupage technique, the following types are used in relation to candles:
- Cold;
- Using a spoon;
- Heating with a hairdryer.
To thoroughly prepare for the case, each of the techniques needs to be considered in detail. Cold technique is suitable for candles with thin walls. The whole process consists of applying a napkin to the candle and smoothing it with a glass stick. After the napkin is securely glued to the candle, we remove the flaws with scissors and the work is ready. Decoupage using a spoon will require a little more tools. Prepare a sponge, a tablet candle and a sponge. Having selected the desired size, cut it out. Now you can light a candle - a tablet and heat the inside of the spoon on it.
You should not worry about the fact that there will be smoke on the candle; it can be easily washed off.
The spoon is warmed up for a minute, then the design is applied to the candle. Use a spoon to make smooth movements from the center to the edges. You should not stay in one place for a long time, as depressions will form that will be impossible to correct. The remaining uneven surfaces are removed with a sponge; the hard side will smooth the surface, and the soft side can polish the candle. The last hair dryer technique is used in much the same way as the spoon technique. The only difference is that you need to direct hot air streams at the drawing and wait until it attaches to the candle.
Making your own wick
If you have ever watched a master class on candle decor, you know that the work of creating candles begins with making the wick. Regardless of what kind of candle you want to get in the end - wax, paraffin or gel, you won’t be able to do without a wick.
In order to make a wick with our own hands, we only need one single element - ordinary cotton thread without any impurities. If you want variety, take colored yarn, the result will surprise you!
As for the design of the wick, there are several interesting options:
Most often a flat wick is used. It consists of many thin threads intertwined with each other. As a result, three main threads are formed from them, which are also intertwined. This wick is the most versatile and is suitable for any type of candle.
A crocheted braid is a very original solution. This wick is suitable for different types of candles and different materials.
A twisted wick is made like this: three parts of the yarn are soaked in a saline solution and left for 10-12 hours. When the yarn is dry, twist all the parts together until you get the wick of the desired thickness.
If you don’t want to bother with making a wick, just take it out of a purchased household candle. Don't forget to saturate the wick with wax in advance to get a beautiful and even flame.
Material for decoupage of candles with your own hands
In order to get started, you need to know some important points. Experts advise using only dense candles in light shades as the main material. When buying a candle, you need to pay attention to its surface; its layer should be dense. Only in this case the candle will not warm up while burning, thereby reducing the likelihood of the paper catching fire.
If you intend to decoupage a candle of a different color, you must remember that the color of the design should be lighter, since the color of the design may be lost against the general background.
Of course, standard candles can also be used for the decoupage technique, but please note that if this gift is used only for its intended purpose, the paper can quickly burn out.
In this case, it is better to choose small patterns that will not only decorate the candle, but will also be safe.
Let's give the candles some color
If you just wanted to learn the technology of making candles at home, then this step could be omitted. If you need unique candles to decorate your room, don’t neglect coloring.
For this purpose we will take children's colored wax crayons. They are the best option because... do not dissolve in water, mix well with paraffin and will not “delight” you with a surprise in the form of an incomprehensible sediment at the bottom.
The technology for adding color to a candle is very simple: you just need to select a piece of chalk of the desired color and grate it. Mix the resulting shavings with cinders using a wooden stick and send to melt. This seemingly simple process plays a big role in decorating candles and should not be skipped.
Which option for decoupage candles for the New Year to choose?
New Year is the most creative holiday for almost every housewife. A very popular way to create a feeling of New Year's magic in a room is decoration. New Year's candles are a great way to decorate the table. This is where decoupage technology comes to the rescue.
It all depends on the overall design of the room and table; it could be a delicate pattern with a snowman, or colorful holiday decorations. You can create such a candle using one of the techniques suggested above, but experienced craftsmen advise using a hot spoon.
After the candle is ready, you can decorate it with sparkles, which will add a glowing effect, and if the candle depicts a Christmas tree, then adding beads to the composition, you can create a three-dimensional picture.
Decorative candles for every smell and taste
In addition to regular paraffin or wax candles, you can try to make more original options:
Gel candles. Making them yourself will not be difficult, because the recipe is already written on the packages of gel wax - use it! A much more interesting process is decorating gel candles. Any decorations that you like are laid out on the bottom of the mold, and then everything is filled with gel wax. The effect is simply incredible!
Aroma candles. As you know, hand-made candles not only have an aesthetic function, but are also able to exude the favorite aroma of the owners of the house. Add a drop of aromatic oil to the candle base, and you can arrange a whole aromatherapy session at home!
The interior of the entire room depends on the correct decoration of candles. If you want to make the design of the room truly original, photos of the decor of candles made and decorated with your own hands will help you with this.
Choose the option that you like, listen to yourself, experiment, create and you will definitely be able to create a real wax masterpiece.
Making decoupage of a candlestick from plaster: master class
Candlesticks made of plaster using the decoupage technique are bright and beautiful. It will not only be nice to put them in a prominent place, but also to give them to family and friends.
In order to create such a candlestick, you may need the following blanks:
- Gypsum;
- Water;
- Special forms (you can use cardboard milk boxes);
- PVA glue;
- Napkins with a pattern;
- Candles;
- Decorations.
Very often, needlewomen are afraid to use plaster. However, there is nothing complicated in its application. In order to make such candles, you need to dilute the gypsum mixture according to the instructions. Next, pour the mixture into the molds and wait about 15 minutes. When the mixture begins to harden, you need to have time to stick a candle-tablet into it. This way the plaster will remember and leave the required shape.
After 15 minutes have passed, the plaster is removed from the mold and left to dry for several days.
When the work has completely hardened, it needs to be sanded and only then can you begin to decorate it with a napkin. The napkin is glued to PVA diluted with water. We decorate the finished work with sparkles, braid or other accessories you like.