Do-it-yourself decoupage of photo frames - master class for beginners
Do you know that in the endless sea of accessories, a photo frame plays a very important role? After all, it not only frames cherished memories, but is also an attractive decorative element. Decorate a lady's table in shabby chic style or add a touch of romance to the bedroom, or maybe the kids can make a bright frame with their own hands with funny images and figures?
Today, continuing to replenish my piggy bank with author’s master classes, I have prepared decoupage of photo frames for you. In it you will find a step-by-step description of the execution technique and perhaps create your photo frame in a style that is closer to you and your interior. Here we go.
Video description
The video shows a step-by-step execution of the decoupage technique:
Other decorative elements
Textiles complete the overall composition. It provides a certain privacy and becomes a bright accent. And in order to successfully fit it into a thematic interior, you need to choose the appropriate cut, color, and texture. Simple classic curtains can work here - two straight canvases in a soft pastel shade. Their upper part is usually gathered with tape into soft folds. The curtains are then hung on a metal cornice. And here the Provence decor is used again - exactly in the middle the fabric is intercepted with tiebacks (wrought iron clips, artificial flowers or satin ribbons). These ensembles look great. They are ideal for bedrooms and living rooms.
Light beautiful curtains Source comfortoria.ru
See also: Catalog of companies that specialize in the installation of finishing materials and decorative forms.
In the kitchen it is better to use Roman or Austrian curtains. For their manufacture, light fabrics with flowers and checkered patterns (linen, cotton, chintz) are used. In the first case, the design of the curtains helps to assemble the canvas into even horizontal folds. In the second, the system forms soft folds from the bottom edge of the product. If the windows in the room are high, then you can choose French curtains for their decoration. They are very similar to the Austrian ones, but here the folds are collected along the entire height of the canvas.
Textiles are an important component of decor in the Provence style Source i.pinimg.com
There is one general rule, keeping this in mind when choosing decorative items in the Provence style: everything should be simple, uncomplicated, natural. It is allowed to use accessories that could emphasize the lightness and airiness, beauty and grace of the French theme.
A rich selection of suitable decorative items Source sadkoltso.ru
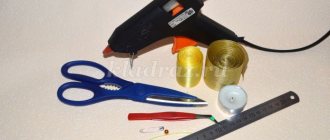
Materials and tools.
Here's what we'll need in our work:
- frame (preferably wooden)
- putty
- stencils
- primer Sonnet (black)
- acrylic lacquer
- white chalk paint (these are gypsum-based paints)
- PVA glue
- napkins for decoupage
- bitumen varnish
- brushes, sponges, cloths.
Frame blanks can be bought at the Ikea store. We prepare it for decoration; to do this, remove the glass and cardboard and put it aside so as not to get it dirty.
Screening.
My idea is to create slightly worn patterns with black paint showing through the wear and with delicate rose flowers in the corner. Let's see what happens, but for now we apply putty through a stencil. I use Parade acrylic finishing putty (it is very finely grained and sands well), and if you don’t have one, you can replace it with putty from any other company or use an artistic texture paste.
I apply putty to one side and let it dry slightly so as not to spoil it when I apply it to the other side of the frame.
My stencil has an adhesive backing and is very convenient to work with. If everything is ready, let the patterns dry well for an hour or more. After drying, lightly sandpaper to remove small particles that are not attached to the surface. Of course, they will all come off later anyway, but it is better to do this before painting with primer.
Primer.
Cover with black primer and dry.
After the primer, I applied acrylic varnish, this will probably seem a little strange to you, but without varnish, the primer easily came off when creating scuffs, along with the paint that I washed off. If you have enough time, you can do without additional varnishing and let the primer dry thoroughly, or better yet, leave it overnight.
Briefly about the main thing
Provence decor is the soul of style. This is a whole world that helps create a corner of peace of mind, imbued with the charm of the French countryside. It necessarily contains the beauty of nature, the smells of spices, wildflowers, and homemade baked goods. Each individual detail contains beauty that can demonstrate the tastes and moods of the owners. It’s easier to look for themed items in creative shops and flea markets. You can do a lot at home using the decoupage technique. Textiles complete the overall composition. Fabrics with floral prints and light tulles are suitable for its creation.
Ratings 0
Chalk paint.
Now we are working with chalk paint. But I want to note that to create delicate scuffs, it is not necessary to use chalk paint. This effect can be achieved with artistic paints. You can read how to do this at this link.
I have this decorative white aging paint Shabby Provence from Borma Wachs.
I tint it a little by adding a drop of vanilla art paint. The white color takes on a warmer, milky hue.
How to make shelves in Provence style with your own hands
To make our own shelves we will need :
- wooden boards;
- fasteners and screws;
- tools: jigsaw, screwdriver, drill;
- craquelure varnish;
- light-colored paint;
- napkins and varnish for decoupage.
First of all, you need to decide on the size and shape of the product. For the first time, it is better to choose a simple rectangular shelf that will organically fit into the Provence style.
- We cut out parts of the required size from the boards and connect them with self-tapping screws.
- For the back wall, we attach a small sheet of fiberboard using small nails or self-tapping screws. If the shelf is going to be left in the natural color of wood, then do not forget to first age the wood and decorate the back wall.
- To create a painted shelf, you need to carefully prime the wood and apply a layer of paint. Once the paint has dried, you need to take coarse sandpaper and create a scuffed effect. It should be especially strong along the edges, gradually weakening on the shelves and sides.
- A layer of white paint is also applied to the fiberboard back wall and then decorated with decoupage.
- Using craquelure varnish we create a cracking effect, which can be further emphasized with dark tones.
IMPORTANT! Do not overload the shelf with parts. If you used decoupage inserts, then leave the rest of the background plain.
Decoupage
For decoupage, I chose these roses on a white background, which I printed on my printer.
If you do not have such a napkin with a white background, then you will need to cut out the image from any other napkin clearly along the contour.
Glue it to the corner of the frame. I use ordinary construction PVA glue from Lakra. So far it has never failed, the main thing is that it doesn’t turn the napkin yellow.
Using a soft brush, we begin gluing from the middle of the napkin.
If folds form, as happens with beginning decoupage artists, do not be discouraged. When the napkin has completely dried on the surface, the folds can be sanded with sandpaper No. 600-800.
I wanted to add more drawing to this side. Let it be.
The picture seemed very bright and saturated to me, so I lightly painted the dried, sanded napkin with transparent white paint.
The paint will become transparent if you add a little water to it.
Well, the colors have become more muted and now we can fix our beauty with varnish.
I coated it with Dulux celko acrylic matte varnish.
French village setting
Provence as a design direction has been formed a long time ago. In the 15th-17th centuries, France was divided into two halves. The northern and southern regions did not quarrel with each other, but actively competed, which was reflected in all spheres of the people’s life. However, there were unifying components that determined a recognizable flavor.
Well-recognized color Source res.cloudinary.com
In music, in painting, in poetry, in the design of the interiors of the nobility, elegance, lightness, and airiness were always present. Village life was simpler, but it could also boast of having a desire for perfection. There was uneven, rough plaster on the walls, wooden beams on the ceiling, rough boards on the floor. But the atmosphere was necessarily softened by textiles and old furniture inherited. It was made of natural wood, had simple shapes, without frills or additional decorations.
French village style Source prodezign.ru
Techniques for recreating the atmosphere of a French village
And today something similar is used to create an authentic environment. Sometimes new cabinets and chests of drawers, tables and chairs are artificially aged. To do this, first the paint and varnish are removed from their surface, then they are painted in deep shades of black, gray or brown. After they dry, white paint is applied over the first layer.
When it dries well, the master carefully sands the protruding elements with sandpaper, in this way the effect of slight abrasion is formed. Then the decoupage technique is applied. Provence - style of nature. Therefore, the interior must contain motifs of vegetation. The easiest way to paint furniture by hand is to choose a floral theme. When there are no drawing skills, appliqués are a lifesaver.
Applications and craquelure in Provence style Source cs2.livemaster.ru
See also: Catalog of Mediterranean-style house projects with a hip roof.
To create them, multi-layer paper napkins are used. They are glued to the surface of the furniture using PVC glue. The surface is varnished with acrylic composition. If you use a similar restoration technique and treat several pieces of furniture in the same way, you will get a set that will become the basis for recreating the atmosphere of everyday life in a French village.
Furniture restoration made using decoupage technique Source avatars.mds.yandex.net
Decoupage in Provence style is ideal for creating additional accessories. These can be photo frames, vases, lampshades, dishes, jars for storing bulk products. They look good on open shelves or on fireplace mantels.
You can pair them with metal objects made by forging. Designers like to place empty bird cages on the coffee table, convenient for storing written documentation, elegant flower bowls, and candlesticks. Such accessories add warmth and make the living environment more comfortable. Ready-made kits will help you decoupage furniture in the Provence style. They are sold in art stores.
Patination
You can get it dirty with bitumen varnish, as in this case. We take bitumen varnish onto a small piece of sponge, beat the sponge on a sheet of paper so that just a little bit of varnish remains. Otherwise, the varnish will apply a very rich brown color, and we only need to darken the frame slightly. We apply it as shown in the photo.
Bituminous varnish takes a little longer to dry than acrylic varnish; it will still remain sticky for about an hour.
If you overdo it, you can remove the excess from the surface with white spirit.
Brags
And voila, the frame is ready!
Another master class on decorating antique frames is coming very soon, stay tuned for the news.
And these are shots of what the girls and I once did at one of the events at the Bereginya school of handicrafts.
What kind of frames did you get? Good luck in your creativity, new ideas and inspiration! Thank you for stopping by, see you again.
DIY Provence style accessories: ideas in the photo
Craftsmen post a lot of photos of hand-made Provence style accessories.
The symbol of Provence style is lavender. So if you add things with these colors to your design, you can get the true mood of French Provence. These can be boxes, decorative bottles, pillows, artificial branches or just lavender shades.
Provence is a rustic style. Therefore, decorative items made from twigs, bouquets and all kinds of bundles, fastened with white or lilac ribbons, would look appropriate in a kitchen in this style.
Plates, watering cans, vases and buckets with images using the decoupage technique look very impressive. Making such a product by hand is very simple: you need to take rice paper, PVA glue, glue the picture to the surface and cover it with varnish.
Using the decoupage technique you can decorate napkin holders, photo frames and even furniture.
Well, the aerobatics are homemade interior linen dolls. These are planted in a corner of the living room, on the window, at the head of the bed or on the refrigerator. They are also very easy to sew, and they look very impressive.
DIY picture frame in Provence style
Natali
Planning April 19, 2020, 19:25 Add to bookmarks
Hello everyone, I finally got around to doing my favorite activity. I made a picture frame here, as I promised... I’ll show you... Well, I’ll tell you briefly, maybe someone will find it useful))
1. I needed: 3 jars of acrylic paint (it doesn’t smell, so you don’t have to be afraid of the indignant exclamations of your household) dark gray, light gray and white, to be honest, you can easily get by with 2 colors; You will also need different types of sandpaper (coarse and fine), a bristle brush (preferably two for each color, so as not to clean it every time), by the way, acrylic paint is diluted with water. Next, you will need a dry sponge for rubbing the paint and acrylic varnish.
2. Covered the wooden frame with the darkest color (the color of protruding future scratches and abrasions)
And the color turned out so beautiful, gray-blue, and it went well with everything, even if you leave it that way...
But I didn’t stop there)) and continued further, fortunately the paint dries almost instantly.
3. Next, I went over here and there with light gray paint and rubbed it with a dry sponge
4. Then covered with white paint
and here the most interesting part begins, the very process of getting scuffs and scratches, I rubbed it with coarse sandpaper, went over it with a dry sponge, applied more paint of the desired color with a dry brush and at the end covered it with acrylic varnish in 2 layers (the varnish also dried quickly)
. And this is what I got
And a closer look (upon closer inspection, I really really like it)
How to decorate a photo frame - step-by-step instructions for beginners (30 photo ideas)
Despite the development of technology and the transition of images to digital format, everyone enjoys admiring photos of their loved ones. To decorate it beautifully, you should choose a frame. It can be made in various styles, which will allow it to fit perfectly into the interior.
In stores you can find frames for every taste. But if you make such an item yourself, this will give it greater value, because a piece of the soul will be invested in it, which will evoke pleasant emotions.
There are various ways to decorate a photo frame with your own hands. After looking through the ideas proposed below, you will definitely be able to choose something for yourself.
What materials and tools will be needed to create the Provence technique?
The rural style of the south of France does not tolerate any artificiality: plastic, chrome, film, gloss, polishing or chipboard. Only natural fabrics, wood and glass are appropriate here.
IMPORTANT! The key point is the effect of “passed years”, as if the furniture had been in use by great-great-grandmothers.
To do this, it is not necessary to order designer cabinets or antique chests of drawers. You can create the aging effect yourself. For this use:
The effect of fire on wood. This creates the effect of areas darkened by time.
Mechanical creation of abrasions using sandpaper, scrapers and brushes.
Chemical exposure allows you to age the surface using acids or alkalis.
Furniture in the Provence style can be not only the natural color of wood, but it can also be painted in light colors, painted or decoupaged.
IMPORTANT! When creating a bedside table or shelf with your own hands, be attentive to details, because in this interior they play a key role. Brand new, shiny hinges or handles on an aged cabinet will ruin the entire composition.
Master class on decorating photo frames
For decoration, you can choose a variety of techniques, for example, quilling. A photo decorated in this way will look beautiful and unusual. To work with this technique, you need a frame that matches the size of the image. The materials you will need are the following: velvet paper for decoration and special paper for quilling in several sizes - 5 or 7mm, quilling tools, scissors and glue. It is worth considering that the colors for the composition are selected from matching shades.
First, preparatory elements are created: roses, leaves, fluffy flowers, curls. To create a composition you need 5 roses. To make one, take a 7 mm strip and fold it a couple of times. Thus, a center is formed, and then the petals are laid, bending the material spirally. The folds are the edge of the petals. The end of the strip is glued from the inside. The size of the flowers is up to 2 cm.
Lush flowers need 8 pieces. The same paper is used to make them. But you need to take into account a nuance - the fringe is cut with small scissors. The thinner, the fluffier the element will be. After this, the strip is rolled up and the edge is secured with glue. The fringe is fluffed only after drying.
Using a quilling tool, leaves are made in the amount of 10 pieces. Having rolled the strips into a roll shape with a diameter of 15 cm, flatten and move all the turns to one side. It won’t be difficult to make six curls after making more complex elements. To do this you will have to cut the strips into 3 parts. The edge of one is twisted like a spiral, and the other is bent with your fingers.
Once all the elements are ready, start decorating. A sheet of decorative paper is placed on the wrong side, where the frame is placed. Use a pencil to outline the area for the photograph. After this, cut out the allocated area, not forgetting to make a reserve, and cut the corners diagonally. Lubricate the prepared surface with glue, glue the paper on top, and fold the edges inside out. After the glue has dried, you can lay out all the prepared elements as intended, and only then glue them.
The photo will also look impressive when decorated using the quilling technique in the second version, although the elements for it are easier to make. In this case, you need to prepare: paper, a frame, an unnecessary magazine and a hot gun. It is best to degrease the surface of the base for plastic, and to clean it with sandpaper for wood.
Magazine sheets are cut into 2cm strips and rolled lengthwise. They also make circles of different diameters from 1 cm to 2.5 cm. Having made the required amount to cover the area of the frame, they are attached with a gun. They should be arranged in dense rows. A photo enhanced in this way will look unusual.
Shelf in Provencal style
Furniture and interior items in the Provence style are a fashion trend today.
Perhaps someone would like to decorate their home with an interesting detail in this style. In order to acquire such an interesting thing, it is not at all necessary to go to a special store. And such unique items are not cheap. The fashionable passion for Provence did not pass me by, and I decided to make a shelf myself. So, in order to get started, you will need: a small piece of plywood 4, 6 or 8 mm thick, several wooden slats 1 cm thick, small nails (or wood glue), acrylic paints and varnish for decoration, and a hand jigsaw for cutting out parts .
First you need to decide on the size of the product. My shelf will have dimensions of 38 cm by 22 cm. Having made the appropriate marks on the plywood and slats, I carefully cut out the necessary parts with a jigsaw. The end result was a set of four side pieces, one interior shelf piece, and one main plywood piece. I fastened the parts with nails. You can use glue or self-tapping screws. The base of my product will be figured, so the corresponding markings are made on the plywood base using a compass. Then I sanded the piece with fine sandpaper. The wooden blank is ready.
Now you can begin the most creative and exciting part of the process - decorating. I decided to decorate it in a slightly unusual color scheme for this style - gray and white. Through trial and error, I determined that it was the light gray shade applied to a wooden base that, when artificially aged, gave an interesting effect. And in order to give my shelf some personality, I applied the design using a homemade stencil made of thick paper. You can give the product the appearance of a well-worn item by lightly sanding some parts with fine sandpaper. That's what I did.
This is the result. The finishing touches were to cover it with matte varnish in several layers and make fastenings (I used regular ones for paintings). The Provence style shelf is ready. When starting work, we must not forget that imagination and courage work wonders. You just need to believe in yourself.
Step-by-step master class on photo design with your own hands
No less popular is the scrapbooking technique, which is ideal for creating panels and albums. Just find a photo of how to decorate a photo frame and choose the option you like. To create a panel of six photos depicting an important event in your life, you need to take a cardboard box, paper, some decorative elements, and glue.
As a basis for the panel, use a box lid, which is wrapped in paper. The partitions are cut out in cardboard according to the size of the photograph. This composition can be secured with a lace loop. Photos inside the box are placed in random order. Paper flowers, butterflies or other elements are attached to the free space.
For a gift, a framed photo is suitable for lovers. To create a touching frame, you can use a soft material, such as felt. First, make a flower pattern on paper that fits the size of the photo. Cut out the middle of any shape and then transfer it to the fabric. Having created the blank, you should sheathe the outer edge and decorate the inner hole with braid. Flowers can be made in any way or simply bought in a store and glued to the material.
Heart-shaped buttons are suitable for decorating the product. If you cut out the same ones, but in a larger size, from paper, you can write the names of lovers on them. All elements are placed on the base and then glued. For the back of the frame, use cardboard from which a smaller circle is cut out. Magnetic tape is pasted onto it. This will allow the product to be fixed to surfaces. Both parts are glued together, leaving space for a photo.
An inexpensive option is to decorate the frame with tubes from magazine sheets, which looks creative. For work, magazine pages are separated and square-shaped blanks are prepared from them. Their size and quantity are selected to match the frame. Each square is twisted into a tube with a knitting needle and secured with glue. They are arranged in a variety of ways, the main thing is that there are no gaps between them. For longer use it is worth covering with a layer of varnish.
This frame is also suitable as a New Year's gift. To make it, you will need a wooden base, which must be painted. After drying, glue the cones around the perimeter with a hot gun, and a couple of bells for decoration. If you attach the ribbon on the back side, you can hang it.
By choosing any of the options, you will get an excellent photo frame design.
Sources:
https://blog-handmade.ru/dekupazh-ramok-dlya-foto/ https://kakpostroit.su/aksessuary-v-stile-provans-svoimi-rukami/ https://mirdizajna.ru/kak-ukrasit- fotoramku/
Going beyond boundaries: creating volumetric frames in Provence and Art Deco styles
Perhaps the most original frames are obtained when three-dimensional elements are used in their creation. This decor, “convex” in every sense, is good for its versatility: decorative overlays will hide uneven joints and disguise transitions. However, three-dimensional frames have a dangerous property of competing with the image placed in them, drawing part of the attention to themselves. Therefore, most often, volumetric decor is used to decorate photographic portraits, paintings with laconic content (without an abundance of small details) or mirrors.
The frame, created from shells and other seafood, will organically fit into the decor of rooms decorated in Provence style. To create it you will need:
- decor: shells, sand (preferably white quartz), dried starfish (you can buy ready-made ones in aquarium departments), beads, coarse rope, decorative elements (anchors, acrylic pebbles) - whatever your imagination requires;
- auxiliary elements: masking tape, thick paper, degreaser, gloves, transparent, well-holding glue, waterproof clear varnish (or other protective coating), scissors, tweezers.
The process may differ in details, but the main stages are as follows: 1. Prepare the “raw materials”: thoroughly wash and, if possible, degrease the surfaces that will be covered with glue, shells and hard decorative parts; 2. Protect the parts of the frame that remain without decoration with tape. Cover the non-removable protective glass, if any, with thick paper; 3. Glue on the decorative elements, starting with the largest parts. The most noticeable parts of the decor should be distributed evenly over the plane without disturbing the harmony. We gradually fill the voids with ever smaller details. 4. Carefully apply glue between the decor with a thin brush. Roll up a small bag from thick paper, cut off the tip at an angle and, carefully moving it close to the surface of the frame, pour sand, grain or small beads between the elements. 5. After the frame has dried, turn it over, shaking off any loose particles, and then cover the resulting relief with tinting and/or varnish (optional).
Frames in the Art Deco style are created using the same principle. Here you can make an interesting move: make the original elements of the ornament yourself, casting them from plaster. The mold for casting is created quite simply: the sample element is made of clay, plasticine, modeling mass, covered with Vaseline or varnish and... filled with a thick layer of silicone sealant. Once dry - voila! The silicone mold for casting is ready.