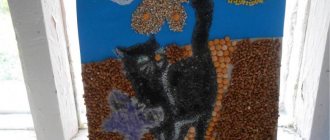
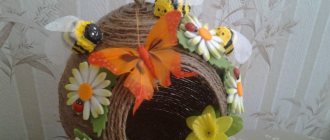
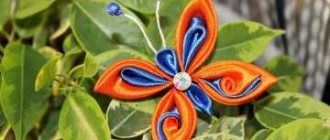
Collective works of children from fabric
Irina Voitenko
Collective works of children from fabric
The joy of working with fabric .
Children are always willing to do something. This is very useful, and therefore not only should it not be interfered with, but measures must be taken to ensure that they always have something to do.
Komensky Ya.
Children have a unique ability for activity. The main property of a child’s body is a tireless thirst for knowledge. The child is emotional, he is constantly searching, trying, exploring, and this activity is creative for him; Through trial and error he achieves results. And an adult helps him move in the right direction, that is, develop. Therefore, it is very important to help the child in his development. At the senior preschool age, manual labor becomes available to children. Its content is very diverse: this includes making homemade toys from various materials, working with fabric , wood, types of manual labor, the skills of which the child has mastered in the family (elements of weaving, sewing, embroidery)
.
Any type of manual labor contains the same opportunities for the development of moral and volitional qualities in children , application, and the desire for high-quality implementation of plans.
Result of work : each child not only sees and appreciates the result of his work, but also creates a completely individual, unique work , thanks to which the child asserts himself. Working with fabric and thread helps develop fine motor skills of fingers and hands, as well as attention, imagination, thinking, spatial orientation, perseverance, aesthetic perception, emotional responsiveness, and also develops control and self-control skills.
Therefore, I would like to dwell in more detail on the types of work with fabric and thread that older preschoolers can handle.
1. Working with cut thread:
For this work you will need : threads, scissors, glue, a sketch of a drawing, boxes for cut threads.
2. Thread writing:
This is laying out a thread along a contour coated with glue.
For a more vivid image, the drawing can be colored with wax crayons.
3.Embroidery on cardboard:
4. Isothread: this is thread painting. You will need: a needle with a large eye, “Iris”
, scissors, pattern with holes, awl, compass.
You can read more in the book “Drawing with a Thread”
by V. N. Torgashova.
5.Wrapping thread on cardboard:
You will need: Iris
, cardboard, scissors, winding diagram.
Glue the end of the thread on the wrong side with a piece of paper, the working thread to the front side and begin winding the thread, catching it by the teeth. The first thread is placed on the base so that its middle touches or slightly covers the edge of the photo. The thread is wound evenly, moving one clove each time.
6. Embroidery on fabric : the simplest types of seams.
Fabric applique :
8. There are several types of complexity:
• -Backed applique, when a design is cut out on cardboard and a piece of fabric ;
• -Applique of geometric shapes, the simplest. A pattern is made from cut out geometric shapes.
• -Applique from ready-made forms. The finished pattern is cut out of fabric and assembled into a composition;
• -Applique using templates. A paper template is glued onto the fabric and cut out along the contour. These templates are used to create a drawing, similar to how a puzzle is assembled. -Applique according to plan. The most difficult one. When cutting out the details of a future design by eye;
• -Volume applique, consists of three-dimensional figures made of fabric or thread .
There is not much that you can try to do with your child at home. In fact, you can find a lot more works fabric , it’s impossible to describe everything.
The main thing to remember is that by cooperating with a child, an adult shows how interested he is in working , how he wants to achieve success together with him. Interest, as a rule, brings the child into an emotional state in which he experiences pride and a sense of satisfaction. Success inspires, gives new strength, strengthens knowledge, it becomes beliefs. And you, working together with your child, will achieve many goals: your child will become closer to you, you will learn to understand him, and he will trust you, the child himself will be busy for some time, learn to help you, learn to please loved ones with gifts, a conscientious attitude towards business will be formed, thrifty attitude towards materials, the ability to complete the work started .
Practical tips:
• Use PVA M “Luch”
(errors in
work ) .
• It is best to take fabric (easier to glue)
.
• For applique from cut threads, use acrylic threads with volume (there are more colors and it sticks better, wool threads don’t stick)
.
• Scissors should cut fabric , so it is better to choose a German one rather than a Chinese one.
• Remind about safety rules when working with piercing and cutting objects.
Tips for parents:
•
Start getting acquainted with manual labor with the simplest crafts, inviting your child to repeat your actions.
•
Enjoy communicating with your child, do not demand too much from him.
•
Do not skimp on praise, find words of encouragement in case of failure, set your child up for the fact that next time everything will work out much better.
•
Use your artistic skills as a student and your little "teacher"
will be happy to help.
•
Remember that the lesson should not last more than 30 minutes.
•
When you show fatigue, use a nursery rhyme, accompanying it with finger exercises.
Good luck to you in your joint work and have a good time!
Easy felt applique - tree with apples
To create it you need to prepare: a sheet of cardboard, brown, green, red felt, glue, scissors, a pen or felt-tip pen.
Using a pen or felt-tip pen, cut out a tree trunk from brown felt, a crown from green felt, and small circles (apples) from red felt. Carefully, using glue, glue all the blanks onto a sheet of cardboard.
Potholder - Heart
Required materials: 2 scraps of fabric, braid, batting or drape for filling, scissors, thread, needle, pencil, sheet of cardboard.
First you need to create a template for the potholder - draw a heart of the desired shape and size on cardboard, cut it out. Using the finished template, cut out 2 hearts from the scraps. Cut out 1 copy of the blank from the filler according to the template. Place all the blanks on top of each other, right sides out, with filler in the center. Secure with a basting stitch. Sew the braid along the edges, while hiding all the ends. Make a loop from a piece of braid and sew it, if desired, into a convenient place on the potholder.
