The easiest way
No tools are required to quickly make a funnel. Just take a sheet of paper and fold it diagonally towards you so that the edge of the short side of the rectangle (and the sheet of paper is a rectangle, not a square) coincides with the edge of the long side. The result is a right triangle. We press down the diagonal at the bend so that our workpiece does not unfold, and continue the process.
Now you need to fold the resulting workpiece again in the same manner as before, only now we bend the upper side of the triangle towards ourselves, the one that represents the bend made the first time. Compare the edges from below again. The result is a sharp triangle, one of the short sides of which consists of unevenly protruding edges. It’s okay, this will not affect the manipulation of water or bulk materials that we will pour/pour through the future funnel.
But it turned out to be just some kind of incomprehensible cone, and we were interested in how to make a funnel out of paper with our own hands. Good news. This cone is already a potential funnel. All that remains is to tear off a small corner from the sharp end and, taking the cone in your hand, bend one side of it from single paper.
Squeezing the product a little and looking inside, you will see that this is a funnel with a hole at the narrow end. Yes, it is imperfect, one side is too thick, the other is too thin, but that’s okay. It is enough for one-time use. Although some may find it too narrow. For such there is the next section.
How to make a cone for a Christmas tree with your own hands?
To make such a spruce you will need cardboard, plain and colored paper, scissors and glue. And of course - more imagination. The best material for making a base cone for a Christmas tree is cardboard. Only for small, delicate and airy Christmas trees, a cone can be made from paper.
The cone can be rolled in two ways
- A sheet of cardboard is rolled up in the most elementary way, like a bag for seeds. The excess edges protruding from the wide part of the cone are cut off, and the cone itself is glued together. The bottom edge is cut so that the cone stands straight and does not slant to one side.
- An even circle is drawn on cardboard (preferably with a compass, but you can circle a plate or basin, although in this case it will be difficult to find the center) and divided into four equal parts. One of these parts is cut out, after which a cone of the required tapering is twisted from the remaining figure. The edges are secured with glue. The cone is balanced, similar to the first method.
After this, you can make “needles” or “branches” in any way you choose, and then decorate with garlands of light bulbs, small toys, etc. Such Christmas trees are suitable not only for home decoration, but also for New Year's gifts.
Video
Useful tips
A paper cone is usually made to make many interesting crafts. Making such a cone is quite simple.
In addition to paper you will need:
Compass
Glue, tape or stapler
Scissors.
* If you don't have a compass, you can replace it with a pencil and string. Measure the desired radius on the thread, tie it or simply press the pencil to the thread with your finger. Use the finger of your other hand as the center of the circle. Next, simply draw a circle around the center.
1. Cut out a circle of any diameter.
2.
You need to divide the circle into 4 parts. To do this, fold the circle in half horizontally and then also vertically. You have 4 folds.
3.
Cut one of the four pieces.
4.
Now your workpiece can be rolled into a cone and secured, for example, with tape, a stapler or glue.
Method using tape
Do you like seeds? Previously, grannies constantly sold seeds in glasses, and they had containers prepared for them - paper bags. These are potential funnels. And even in those days, when cellophane had not yet come into widespread use, in stores, sellers made paper bags in which they packed everything, from sugar and cereals to sweets and cookies. How to make a funnel of this type from paper?
Place a sheet of paper in front of you with the long side facing you. We position it so that its edge coincides with the edge of the tabletop. We glue a piece of tape to the right side of the long side of the sheet facing us so that half of the piece sticks out over the edge. We take hold of the protruding edge of the tape with our thumb and forefinger and begin to wrap the sheet around our hand. When we have a cone, we glue a piece of tape to its inside, which is held between our fingers. To do this most effectively, we press this part of the cone to the table.
All. All that remains is to glue the other end of the paper, which tends to unfold, to the outside of the bag. The cone is ready. We tear off its sharp tip - and the funnel is ready. It may be disposable, but you don’t need to hold it so that it doesn’t turn around.
Paper cone: step-by-step instructions
First of all, you need to choose good working material - it depends on the purpose for which you need such a craft. In any case, it must be able to bend and hold a given shape without being damaged. If you take regular soft paper, it should not tear, and the cardboard should not be too hard, otherwise it will be difficult to deform. To check the quality of the material, try twisting the sheet into a tube: if this does not cause you any difficulties and does not lead to rupture, you can work.
In order to make a cone out of cardboard or paper with your own hands, in addition to the main material you will need:
- ruler (length depends on the length of the product);
- pencil;
- compass;
- stationery knife or scissors;
- glue.
The principle of operation is very simple, the only thing where difficulties sometimes arise is preparing the template. Creating a cardboard pyramid takes no more than a quarter of an hour, excluding the time for drying the glue. If you are in a hurry, you can fix the shape with tape (for options when the cone is the base that is not visible) or with a stapler (for small crafts).
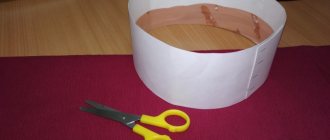
Since the issue of using a cardboard cone as a headdress (relevant for children's costumes) was raised, it is necessary to remember how to make the necessary calculations. Of course, if you have the required height of the product, which cannot be changed, you will simply have to set aside the length of the head circumference along an arc and cut out the resulting part. However, if you just need to prepare a sharp cone (when the angle of the template is 60 degrees), you will need to make calculations. The formula from the school curriculum is that the length of the arc of a circle with an angle of 60 degrees is equal to the product of the radius by 3.14, which is divided by 3. For an angle of 45 degrees, you need to divide the product by 4.
System calculation: home drainage planning
At the planning stage, markings are made - they mark the installation locations of horizontal (gutters) and vertical (gutters) lines. After determining the footage, calculate the number of additional parts that are needed to assemble the system: fasteners, plugs, connectors, funnels and adapters.
Meterage of gutters and number of funnels: how to calculate correctly
The number of horizontal lines depends on the roof structure and the length of the slopes. The simplest system of two gutters and two drainpipes is the best option for a gable roof with a total area of up to 100 square meters. m and the length of the slope not exceeding 10 m.
Scheme for calculating the number of drain lines
In this case, there is no need to double tilt from the center. And you can make a gutter for a drain from both ready-made and homemade parts. The length of the horizontal tray is equal to the length of the slope. Diameter - 10 - 12 cm. The slope of the drain is up to 2 - 3 mm per linear meter. Factory parts are produced in standard length - 3 m.
The number of funnels designed to drain water from the tray into the drainpipe is equal to the number of horizontal lines. If the length of the straight section is more than 10 - 12 meters, then 2 funnels and 2 drainpipes are installed along the edges.
Basic parameters for installing gutters
If the total number of funnels in the planned scheme is two, then calculating the length of the drainpipes is easy. The height of the building from the bottom edge of the roof to the ground level is multiplied by 2.
When planning more complex structures, calculations are performed for straight lines, drains and planning installation in difficult areas (on protrusions, in corners) with the selection of special products - corner connectors.
Additional parts: mounting hooks and connectors
To make a gutter for a drain, you will additionally need:
- 2 caps for each horizontal line.
- Connectors - every 3 m if finished parts are connected.
- Brackets – for 10 m – 20 pcs. The distance between the hooks should be within 50 - 60 cm.
Hooks are selected depending on the type of fastening. If a strong gable board is installed under the roof slope, not covered with clapboard, it is more convenient to install the box on short brackets.
When fixing to the rafter sheathing, choose ready-made adjustable or non-adjustable hooks with an extension. Such fastenings can be made independently from strips of thick steel 3–4 cm wide.
To connect the funnel to the pipe, you will need 2 elbows of 40 o to lead the drain to the pipe installation line. To attach the pipe to the walls, use special holders or clamps. The pipes are connected with couplings.
Which is cheaper: make gutters yourself or buy ready-made ones
After calculating the number of parts and the total length of the horizontal and vertical branches, you can choose what and how to make the gutter and drain funnels in order to both save money and install a system that will last at least 10 years.
Plastic PVC structures
The easiest way to make a gutter yourself is to assemble a line of ready-made PVC trays and connectors. Plastic systems are cheaper than metal-polymer ones. Processing and installation do not require special skills. The material is easy to cut with a hacksaw; the kit includes all the necessary connectors. No professional tools are needed for assembly.
The advantage of PVC gutters is aesthetics. It is possible to choose a system to match the roof covering or the color of the cladding of the under-roof space. The material does not fade in the sun and can withstand significant temperature changes.
Metal-polymer parts
Metal-plastic gutters are steel products in a polymer shell. The cost of metal parts is higher than plastic ones. The service life of the drain is from 30 years. The material has high strength - it can withstand loads during snow melting and melting, and does not crack in frost. Used in drainage systems without temperature restrictions.
Working with metal-polymer parts requires preparation. Cutting of molded products is carried out exclusively with special scissors or a hacksaw for metal. The use of cutting discs is not allowed - the material must not be overheated during processing.
Products are transported in protective film. During assembly, care must be taken to avoid damaging the polymer layer.
The only drawback of metal-polymer drainage is the noise of the gutters. If you plan to install a drain on a low house with an attic, preference is given to quiet polymer trays.
Materials for making gutter parts with your own hands
To make a drain funnel and gutter with your own hands, use galvanized steel and plastic pipes for external sewerage.
Factory drain made of steel
Galvanized steel is sold in sheet form. To make parts, you need some metalworking skills. A system assembled from homemade products will not be durable - during cutting, the thin zinc layer is damaged, and the edges at the cutting site are left without an anti-corrosion coating.
To work with steel you will need:
- A special bending machine or wooden blanks that will be used as the basis for forming the gutter.
Bending a sheet on a wooden base
- Scissors or grinder for cutting.
The sheets are cut to the planned dimensions, bent to shape and the edges are folded in the form of a fold for subsequent joining of the part.
The box parts are connected to each other in two ways: by hot soldering or by installing steel connectors, which are secured with screws.
It is not profitable to make gutters from steel sheets yourself. Flaws:
- Difficulties with connection due to inaccuracies in the geometry of parts.
Special machine for working with steel
- Short service life - it takes a maximum of 2 to 3 years before holes appear in a home-assembled box.
- The process is labor-intensive and time-consuming.
It is better to try to assemble a simple system from sewer pipes. Select parts intended for installation outside: pipes for external sewerage - orange. You will have to come to terms with the color - white or gray pipes are intended for indoor installation, the material of manufacture is not frost-resistant, ultraviolet-resistant or high-temperature resistant. Taking into account the fact that in summer the drain is exposed to direct sunlight at a temperature of 40 degrees, and in winter at 20 degrees below zero, pipes for interior work will not be able to last even 1 season.
Parts for making your own drain
To work you will need:
- Half of the planned footage of gutters in the form of orange sewer pipes with a diameter of 100 mm.
- Pipe couplings - according to the number of connection points on horizontal branches.
Coupling for gutter connection
- Pipes for drainage in a quantity equal to the calculated footage of drains.
- Adapters with outlet for making your own funnels for drainage.
Tee with 90° bend – for funnel
- Elbows: 2 for each funnel.
Elbows with different angles are used for installation when changing direction: in corners, under a funnel
- Sealant for plastic – frost-resistant and moisture-resistant, for outdoor use. You can use acrylic or silicone based adhesive.
For convenient operation and quick installation, you can select pipes of the same diameter for gutters and drains and thus save on waste.
How to make a gutter and secure a funnel with your own hands
To assemble and fasten horizontal sections of the drain, you will need simple tools:
- A ruler with a level, chalk or pencil, fishing line or thread.
- Screwdriver, self-tapping screws.
Installation of brackets: installation of ready-made and homemade mounts
First of all, it is necessary to secure brackets under the roof - hooks that hold the trays.
When using short non-adjustable brackets, mark on the gable board the extreme point where the first fastener will be fixed. The distance from the edge of the roof is up to 15 cm. A line with a slope is formed from this point. The distance to the last fastener in meters is multiplied by 2. The resulting value is the difference in height in millimeters between the first and last bracket.
Distance from hook to edge of joints
Example. If the distance between the hooks is 8 m, then the height difference is: 8 x 2 = 16 mm. This is the minimum acceptable slope value. Maximum – 8 x 3 = 24 mm.
Slope and calculation of the number of brackets
The installation points of the extreme elements are connected. The brackets are attached along the marked line in increments of 50 cm.
If hooks with extension strips are installed, then after fixing the first bracket to the flooring, measure the distance between the top edge of the board and the middle of the hook. From this point, a slope is formed towards the funnel.
An easy way to get the slope right
To make the process easier, you can mark the fold directly on the extension strips. Lay out a row of numbered hooks end to end. A straight line is drawn from the bend point of the first. On the extreme bracket, measure the required slope value and place a mark below the first line. Connect to the point on the first element. During installation, the hooks are attached to the line, and the extension is simply bent according to the markings.
Installation of fasteners with extensions
Assembly of plastic and metal-plastic structures
Plastic trays are connected to each other using special parts. Calculate the joint points so that the distance from the edge of the connector to the hook is at least 2 cm. If connectors with rubber seals are selected, then the gutter is installed so that there is a gap of 5 - 6 cm between the edges of the two connected trays. This distance is sufficient for free movement parts during thermal expansion.
The second method is glue. The connector is treated with an adhesive composition: 3 strips of sealant are applied. Two - on the edges and one in the center. Press the groove against the connector and remove any remaining adhesive.
Plastic plugs are installed along the edges of the line.
Plugs, funnel and brackets at the edge of the line
The funnel is mounted according to the connector principle. Make sure that the distance from the outer bracket to the edge of the funnel is up to 5 cm. If the factory funnel is equipped with a seal, then additional sealing is not carried out.
The connection is made on brackets or parts connected on the ground are installed if 2 craftsmen are working.
Instructions for the manufacture and assembly of drainage from PVC pipes
When selecting sewer pipes for a homemade drain, pay attention to 2 important points:
- Choose products in the mid-price category - preferably made from frost-resistant PVC for laying in the ground.
- Do not skimp on connectors - they must be made of the same material as the pipes (orange, for outdoor installation), from the same manufacturer.
How to make a gutter from a regular sewer pipe? Cut the pipe lengthwise exactly in the center: you will get two gutters 3 m long. For gutters, it is better to buy pipes without connecting sockets.
Slope of sewer pipe gutter
For cutting, use a hacksaw, jigsaw, or grinder with a disk (preferably with large teeth).
Tray with roof connector
The couplings are also cut in half - you get 2 gutter connectors. There is a seal inside the coupling - it is cut separately and placed into the part.
Marking for cutting pipes and joining parts
The joints must be sealed using acrylic or silicone construction sealant.
What to make the plug from? When purchasing tees for funnels, choose products with decorative covers. The lid must be cut into 2 halves and glued with sealant to the edges of the tray.
Tee with factory threaded cap
In the same way as the connector, the upper part of the tee is cut. The product is cut so that the outlet is located under the gutter. Fix the funnel with sealant or screws. The elbow is connected to the lower outlet with the socket facing up.
Artistic homemade funnel from a sewer tee
The pipe is assembled from pipes with connecting sockets. On the top pipe you need to install a bend at 40 - 90 o to connect the drain to the gutter. Measure the length of the segment between the knees. Cut a piece of pipe without sockets and connect the system.
In the lower part, install a branch - an elbow, cut the part so that the drain falls into the center of the rain inlet or into the ground, at a distance of 40 - 50 cm from the edge of the blind area.
Video: how to make a gutter from a sewer pipe
Is it worth saving on drainage? If the roof structure is simple, gable or hipped, you can save on installation work. Savings on material are highly questionable. If we consider that even expensive external sewer pipes are designed for installation in the ground and not in the open air, then it is impossible to predict how long a homemade system will last. In addition to fragility, there is another drawback: the very controversial appearance of the structure. Such gutters are suitable only for temporary outbuildings in the country.
Budget plastic gutters are designed for year-round use in all weather conditions. Special connectors, brackets and adapters will facilitate the installation process. And if you choose glueless connectors, you can assemble the system in a couple of hours.
Video instructions
1. Paper cone:
2. Cone-shaped cockerel:
Small Christmas trees made from scrap materials are very suitable for New Year's decoration of an apartment. One of the main advantages of such Christmas trees is the ease of production and a wide field for imagination when decorating them. In addition, you can make many of these Christmas trees at once - different in appearance and decoration - and place them throughout the apartment, thus decorating it in an original way. The easiest way is to make a Christmas tree-cone out of paper. On specialized websites there are many ideas for decorating such Christmas trees, to which you can always add your own creativity. With all the variety of models, all Christmas trees have the same base - a cone made of paper or cardboard.