What is needed for production (materials and tools)
Before you begin, you need to prepare the following:
- paper and cardboard material – colored and white;
- glue;
- pencils - simple and colored;
- ruler;
- glue brushes;
- scissors;
- scotch;
- stapler;
- stationery knife.
For decoration, you may also need different decor. elements.
What is a phone stand for?
Basically, a phone stand is used for reasons of convenience and safety and is relevant in the following situations:
- When searching for a phone. Most modern smartphones are small in size, and therefore can easily get lost in an apartment or even on a desktop. In this case, the stand allows you to constantly keep the device in sight.
- When driving a car. The stand allows you to answer calls and view directions without being distracted from driving, which ensures safe driving.
- In communication shops. Stands of this type allow you to position phones so that the buyer has the opportunity to view them from all sides. They effectively optimize the workspace, allowing you to accommodate many models.
- To watch the video. Smartphones are often used as media centers for watching videos, and it’s more convenient to do this when you don’t have to hold the phone in your hands. The stand maintains the optimal position of the screen, allowing the owner to sit comfortably.
Step-by-step description of different stands
Making a cardboard stand yourself is not difficult. If the material is not very dense, several sheets are glued together. Micro-corrugated cardboard is most suitable for such an accessory.
Corrugated cardboard is a packaging material consisting of glued layers of paper.
A special stationery knife is most convenient for cutting from cardboard. With such a tool, the workpiece is cut more accurately and much easier. Let's look at how this is done in each specific case.
For pencils
Such a stand is a useful and necessary item for a desk so that office supplies do not get lost or scattered around the table.
You can create an individual pencil holder to suit your taste in an exclusive version with your own hands.
"Penguin"
A small cardboard box is required (volumes and sizes are determined at will): you can take a suitable one for juice (it is washed and dried). Cardboard cylinders will also work.
Next, the package is covered with paper of the appropriate size (black color - this will be the penguin’s body).
Pencil holders are a necessary and useful item for a writing interior.
Then templates are cut out of paper:
- breast - white;
- wings - black;
- paws - yellow.
The eyes are also made from black paper and the beak from yellow paper.
All elements are sequentially glued to the appropriate places. The penguin pencil is ready.
Such beautiful products will decorate any surface and will keep your writing instruments in order.
From paper tubes
First they need to be prepared. For this purpose, newspaper or magazine sheets are taken. Using a regular knitting needle, twist the tubes. There should be a lot of them. Then the ends are secured with glue.
Next, the tubes are painted in the intended color and left to dry. The juice packaging is cut to the required height. The tubes are cut to the height of the future stand and glued along the perimeter of the blank box.
The stand for pens and pencils, which is shown in the photo, can be made in just a couple of hours.
Important! It is necessary to glue tightly, without gaps.
Allow the product to dry and then it is ready for use.
Pencil with flowers
A pencil stand can be made with flower decoration. To do this, you can take napkins (color - optional).
The napkin is folded in half twice. It is fastened in the center with a stapler. Using scissors, make the edges of the napkin wavy. Each layer must be lifted upward, while at the base you need to press a little.
A pencil stand will allow you to always keep writing objects at hand, rather than looking for them in the corners of bottomless desk drawers.
You can make several multi-colored flowers and decorate a ready-made paper pencil holder with them. Flowers are “planted” on glue, or secured on the bottom with tape.
For phone
It is not difficult to build such a stand. Such work will not take much time. This is a practical and easy option to make the device yourself. And, besides, do it - at any time.
The following is a step-by-step guide to the most interesting ideas.
Shell
No special instructions are needed in this case. The main thing is to get a suitable, large enough shell.
To work, you need glue, which, when hardened, turns into a plastic tight mass - the so-called. rubber or liquid nails. There's no such thing? Then acrylic plasticine is used, which does not stain anything.
A layer of glue is applied to the area where the phone will come into contact with the shell surface. If the “workpiece” is not stable, glue is also applied to the lower part for a stronger fixation.
The main thing is to find a suitable shell from which you will make a phone stand.
Additional Information! This hand-made gadget stand looks great and fits into any interior.
Wine corks
This is an excellent material for creativity. Therefore, you should not throw them away.
A smartphone stand made from this material will be environmentally friendly, comfortable, durable and very original: thanks to the unusual design itself and the decor.
If you have a few wine corks, a little glue, a knife and some free time, you can make a smartphone stand.
To work you need:
- twenty traffic jams;
- leg-split;
- lace;
- Super glue.
The corks are lined up and glued together.
First, the back wall of the gadget stand is made (the corks are glued together in a row, and the “second floor” is assembled in the same way). One “floor” is pasted onto the other. The back wall is ready.
Next, glue the front one. The bottom part of the stand is glued gradually. The plugs are placed one at a time against each other. Then the back wall is attached.
As a decoration, you can add thin twine or lace to the stand. Floss threads and other cute little things will also work.
You will get a unique stand for your mobile phone.
Bamboo chaise lounge
To make such a stand you need:
- bamboo sticks and mat;
- dye;
- six coffee sticks;
- wire cutters
How to make such a stand step by step can be found here:
Upon completion of the work, you get a stylish and unusual accessory that no one will have. The stand can be presented as a present or to decorate your desktop.
The stand is made of bamboo - a beautiful and pleasant to the touch material.
Easy way
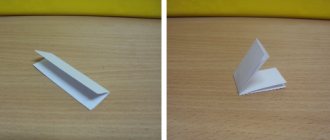
You will need a thick sheet of paper. Squares of 15x15 or 10x10 (cm) will fit a standard smartphone.
You must proceed as follows:
- The sheet is folded in half twice.
- Unfold and fold first the lower, then the upper halves in half.
- Now they make creases.
- Unfold the workpiece and make a bend on the other side.
- It is necessary to repeat all previously performed steps on the opposite half.
- The workpiece is unrolled. All folds must be clear.
- The paper is turned ninety degrees, one corner is lifted and placed inside. It looks like a pocket.
- The two corners are pressed against each other - the paper should curl naturally.
- The central part is tucked under the prepared pocket.
- All steps are duplicated on the opposite side. You need to start by forming a pocket.
- At the final stage, the central fold must be made clear: this will be the part of the stand that holds the main weight of the gadget.
A very simple phone stand made of paper using the origami technique.
Now the stand is ready.
For the Easter egg
Step by step work:
- Take colored paper. It should be a 15x15 cm square.
- Fold in half twice.
- Then you need to open the sheet and fold the lower and upper parts to the middle.
- Next, open the workpiece and position it so that the fold line is on top.
- A triangle is formed on both edges.
- Fold it back on both sides so that it turns out the same.
- Now on one side the bottom corner is turned up, on the other side they do the same. Unfold the workpiece and duplicate the previous steps.
- The upper triangle is folded down - everything is done on both sides.
- Now all that remains is to open the resulting “wallet”.
- Next, it is straightened so that the stand takes the desired shape.
Paper Easter egg coasters can be very original and interesting.
Now you can insert the Easter egg.
Classic model
To work you will need colored paper, scissors and glue.
- Fold a square sheet of paper in half diagonally.
- Fold again from a right angle.
- Unfold the piece and fold it in half lengthwise to form a rectangle.
- Fold the side triangles of the product inward along the marked lines.
- Connect the sharp corners of the triangle to mark the center line.
- Fold the side towards the middle.
- Repeat with the remaining corners.
- Spread the resulting shapes in both directions.
- Bend the protruding parts outward and then inward.
- Straighten the folds so they alternate.
- It should be a dome.
- Take a rectangle of a different color. Roll it into a tube and bend the bottom edge.
- Cut off the top of the dome.
- Coat the handle with glue and insert it into the umbrella.
Video instruction:
Other ideas
It's easy and simple to make a pencil holder from toilet paper cylinders.
The advantage of paper coasters is that they can be made at any time, if necessary.
In this case, you will also need corrugated colored paper.
You must proceed as follows:
- They take measurements of the bushings - they need diameter and length.
- Strips of colored paper are prepared according to the size of the cylinders.
- Then they paste the blanks with it.
Now you need to work on the “platform” for the stand:
- From a sheet of paper (it is better to take a different color from the one with which the bushings were pasted), cut out a cloud so that all the bushings are placed on it.
- Then glue them onto the cloud.
To decorate a stationery stand, you can cut out small flowers and glue them to a pencil holder.
You can make a phone stand out of paper and cardboard from any available materials.
Today in stores there is a huge selection of stands of different functionality: for paper, pens, pencils, phones, photos, etc. Of course, you can purchase them, but a more interesting option is to make a stand from paper, cardboard, other materials with your own hands and, thus way to express yourself creatively.
The manufacturing technique is simple, you just need to be careful and be patient.
Paper umbrella made from circles
To create an umbrella you will need 2 sheets of colored paper, a compass, a ruler, a pencil, scissors and glue.
Step-by-step instruction:
- Draw 12 identical circles with a diameter of 6 cm on colored paper.
- Cut out circles with scissors.
- Fold each circle in half.
- Fold in half again to make a quarter circle.
- Glue each part in the place indicated in the photo.
- Glue the parts together, you should get a kind of accordion.
- Do not close the workpiece in a circle.
- To create a handle, cut out a square with a side of 9 cm.
- Roll it into a tube from the corner and glue the tip with PVA glue.
- Trim the edges of the tube.
- To attach the handle to the base of the umbrella, cut out a 1x9 cm rectangle.
- Screw it onto one end of the handle.
- Glue the base to the tube.
- Glue the edges of the base.
- Bend the end of the handle.
- The paper umbrella is ready.
You can make such an umbrella from multi-colored circles, you will get a bright colorful craft. Several products can be assembled into an original garland.
Video instruction:
Happened?
Not really
Types of stands
Stands may vary in material used. The following options are available:
- Metal. This accessory is characterized by high strength, wear resistance and a long service life. At the same time, it is difficult to make it yourself, and the cost of finished products will be the highest.
- Tree. Quite popular and more accessible material. Bamboo and ash are most often used to make holders. They can be either painted and decorated, or have an accentuated natural wood texture.
- Ceramics. These stands have an elegant appearance, but are extremely fragile. They often have a bizarre and original shape, such as animals or geometric shapes.
- Textile. A convenient home option, which is a small pillow of a special shape or a soft toy.
- Plastic. This material is universal. Holders of any shapes and colors are made from it.
- Paper. The most accessible material for self-production, which does not have high performance indicators.
A necessary accessory will be a homemade and original phone stand.
Note! The stand does not have to look like a free-standing structure. Often it is attached directly to the phone or its case.
The following types of stands can be distinguished depending on their purpose:
- Tabletop. They fix devices of different sizes, which makes them universal. They usually take the form of a plate mounted on a table and a clamp that serves to hold the gadget.
- Universal. Such holders have a flexible mount that allows them to be installed on various surfaces. They can be used anywhere.
- Automotive. They can either take the form of a holder suitable for a smartphone of a certain size, or contain a magnetic mount. Its second part is glued to the phone body, providing reliable fixation while moving.
It is simply impossible to imagine a modern person without a smartphone or telephone.
Note! Stands can be made in different styles, so it is advisable to choose them based on the design features of the room where they will be located.
Often, an owner who wants to always have a phone at hand wants to position it in a convenient way.


