Coming from time immemorial, they are quite modern! Folding, solid, paper, fabric, wood, feather, knitted - regular and original - fans have been and remain a relevant and sought-after women's accessory! In this article you will find three master classes on making fans with your own hands.
We make the fan ourselves
If you are a creative person and want to show your imagination, make a wall fan with your own hands. To do this, stock up on the necessary materials:
- paper or fabric;
- wooden skewers;
- materials for decoration;
- threads, needles;
- glue.
If you have decided on the size and color of the fan, it's time to get to work. Cut out a blank from the base material, fold it like an accordion, smoothing the folds, and secure the edges with wooden skewers. Threads and needles are needed to connect the ends of the fan. With the help of decor, you can decorate the fan as you want; for this you need a glue gun and a variety of ribbons, rhinestones, beads, and braid. The handle can be made from cardboard, plywood and glued using super glue on both sides. Once your piece is ready, secure the fan with the fan facing up.
Fan card
Taking a paper fan as a basis, you can make an original souvenir postcard that can be placed on a shelf or desktop. You will need a double-sided sheet of green paper, cut out flower blanks (red tulips, daisies).
Performance:
- Fold the paper like an accordion.
- We bend the resulting part in half and glue it in the middle.
- Decorate with cut out flowers.
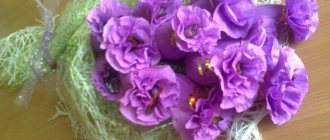
You can make mini bouquet fans in the same way. The process of work differs only in that the folded accordion bent in half is cut along the fold line. To prevent the fan bouquet from losing its shape, you should tie it at the bottom with a ribbon, then stick on tulip buds and give it to the recipient!
You can find on the Internet and in print publications a huge number of options for making this item from various materials and using a variety of techniques. We wish you inspiration and a creative approach in implementing all your ideas!
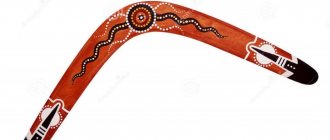
Chinese fan as an accessory
A fan on the wall is not the only purpose of this item. Fans are also used as a fashionable women's accessory. It folds easily, is small in size, looks feminine and impressive. The fan is used at fashion shows and for photo shoots; Designers and stars love them, making their image brighter. A feather fan complements the image of a bride in a fluffy dress, and this accessory is also appropriate at a ball, party, or theater. Chinese young ladies used fan gestures to express feelings and emotions towards their interlocutor.
In addition, a fan will save you from the heat in places where coolness is not available.
Chinese fans burst into our culture and fashion, becoming an indispensable thing. After all, they are not only an accessory, a piece of furniture, but also a symbol of happiness and prosperity.
In hot weather, a fan is an irreplaceable thing, but it can also be an excellent interior decoration or an original gift. Making a fan with your own hands is not difficult; the necessary materials for its manufacture can be found in almost every home. We offer interesting master classes on making fans with your own hands.
Paper circular fans for decoration
These decorations are associated with the east. In the culture of Japan and China, this element is part of the national tradition. That’s why you will always see a fan on the walls of minimalistic and restrained Japanese houses. Typically, it depicts scenes from books, beautiful landscapes and panoramic views. Paper fans completely replace the wall paintings we are used to. They stand out from other items, attract attention and create a romantic mood.
Mosaic of fans
Pink fans in the interior
It is especially beneficial to use this decor in a room that is not overloaded with furniture. Walls without a distinct pattern will look advantageous against the background of a fan. You have two options - make a composition from small circular fans, or make a classic large fan for the wall with your own hands. Quite often, such decorations are also used to decorate a holiday. This is a universal idea that will captivate you during your leisure time and allow you to acquire additional skills.
Round beautiful fan
To make fans we will need:
- colored corrugated paper of any size, scrap paper is suitable;
- scissors for shaping the workpiece;
- glue;
- satin fabric ribbon;
- small accessories (buttons, bows, sequins, tassels, beads, etc.);
- wooden skewers.
Prepare a wide table or any other place so that you can work comfortably. The process does not like to be rushed, so it is worth freeing up time in advance to implement your creative ideas.
Beautiful fan for the room
Hanging fans in room design
From plastic forks
Materials and tools:
- disposable forks - odd number (from 19 pieces);
- wide lace - 1 meter;
- decorative elements (rhinestones, feathers, satin ribbons);
- white cardboard;
- corrugated cardboard;
- CD;
- cup;
- Super glue;
- pencil;
- scissors.
Master Class:
- Trace a disk on a sheet of cardboard, cut it out, and divide it exactly in half.
- On a sheet of corrugated paper, outline the neck of the glass, cut out the resulting circle and divide it in half along the diameter.
- Glue a small one to the large semicircle, aligning them along the cut edges.
- Insert plastic forks into the holes of the corrugated paper until they stop, gluing them to the main semicircle, trying to ensure that the teeth of adjacent forks touch (only an odd number is required).
- Glue the second large semicircle on top of the corrugated cardboard on the workpiece.
- Glue a satin ribbon to one edge of the fan and weave it between the forks. Continue weaving until the teeth are reached, then secure the ribbon at the edge and glue.
- Glue a decorative feather to each fork.
- Cover the attachment point with openwork tape.
- Glue velvet and a ribbon flower onto a cardboard handle.
Several original ideas
So, how to make a fan with your own hands? We offer interesting options.
Option one
This is a beautiful and unusual fan made from ordinary plastic disposable forks. Here's what you'll need:
- 23-25 disposable plastic forks (an odd number will be required);
- 1 meter of lace (it’s better to take a wide one);
- artificial flower (you can use another decorative element, for example, a butterfly);
- rhinestones for decoration;
- thin satin ribbon;
- white thick cardboard;
- corrugated cardboard;
- old CD and glass (they will be used as stencils);
- transparent durable glue (you can use “Moment”);
- scissors;
- pencil.
Preparation method:
- First, let's prepare the base for the fan. To do this, trace a CD on thick cardboard, cut out the resulting circle, draw a line for the diameter and cut the figure into two equal parts.
- Trace the top of the glass on corrugated cardboard. Cut out the resulting circle and also cut it in half along the diameter line.
- Now take a larger cardboard semicircle, turn its back side towards you and glue the smaller one to its middle so that the bases coincide.
- Take your forks and glue and start forming the frame of the fan. Their handles should rest against the corrugated cardboard, but not go beyond its edge. Place the forks so that their tines touch each other. Immediately glue them to the base. The total number must be odd, remember this!
- Now take the second large cardboard semicircle and glue it to the base so that the front side is at the top. The pen is ready.
- Take a thin ribbon and start threading it between the fork handles. Start from the bottom and secure the tip with glue. Having made one row of weaves, start making the second (it will go in the other direction). Continue until you reach the cloves. Cut the tape and secure its edge with glue.
- Carefully thread the lace through the tines of the forks, bend the ends and secure.
- Decorate the ribbons and lace with rhinestones.
- Glue an artificial flower onto the handle. The original fan is ready!
Option two
You can make a folding fan out of paper. To do this you will need:
- 2-3 sheets of A4 paper (the quantity depends on the number of bends of the finished fan);
- thick cardboard;
- glue;
- paints, markers or pencils.
Preparation method:
- Everything is very, very simple. Take a piece of paper and color it. Use your imagination and draw flowers, butterflies and so on. You can invite your child to do the decorating.
- Now place the sheet horizontally and fold it like an accordion. Choose the width of the bends yourself, but the smaller it is, the more impressive the finished fan will look.
- Glue another sheet to the edge of the sheet and continue folding it like an accordion.
- Now coat the bottom edge of the accordion with glue and fold it, securing it at the same time. Instead of glue, you can use thread and a needle if desired.
- Start making handles. From cardboard, cut two strips with a width equal to the width of the bend. To calculate the optimal length of the strip, add 15-20 centimeters to the width of the sheet of paper. If the cardboard is not double-sided, then it is better to cut out 4 strips, gluing them in pairs with their reverse sides (this will look better).
- Now glue each strip to the edge of the accordion. The handles are ready.
Option three
Make a chic Japanese fabric fan. You will need:
- textile;
- thin plywood;
- awl;
- pencil;
- paper;
- thin ribbon;
- glue;
- lace;
- scissors and a stationery knife.
Preparation method:
- First you need to make the plates. To do this, cut out 10-15 strips of plywood, 40 centimeters long and 1-1.5 centimeters thick. If you wish, you can paint the plates with paint, so the fan will look even more attractive.
- Now stack all the plates and make a mark on the bottom edge of each one. Make holes using an awl.
- Pass the braid through the holes (you can push it through with a needle), simultaneously connecting all the plates. Tie the braid in a knot, then make a beautiful bow. Cut off the edges (to prevent them from fraying, you can trim them with hot scissors heated over a fire).
- Now lay out the frame on a sheet of paper so that you get a semicircle, and the plates are located at an equal distance from each other. Mark the top outline with a pencil on paper and draw a line below, connecting the edges of the outline.
- Below the top outline, draw a small semicircle so that you get a kind of rainbow. Cut it out.
- Attach the paper template to the fabric and cut out the piece. By the way, the fabric should not fray and not be very dense. It is also desirable to have themed Japanese designs and patterns on it.
- Now start gluing the fabric to the plates, starting with the one that is folded at the bottom. Place the last plate over the fabric and glue it to the front part. Otherwise the fan will not close. Make sure that the plates lie flat and are located at an equal distance from each other.
- You can decorate fabrics with beads, stones or rhinestones, but it is better to leave everything as is, because Japanese women prefer minimalism and modesty.
Option four
Make a creative feather fan. Here's what you'll need:
- cardboard;
- textile;
- lace;
- feathers;
- pencil;
- compass;
- scissors;
- glue.
Preparation method:
- First, take the feathers and measure their “bare” part, that is, the base. The resulting length will be the radius of the base semicircle.
- Using a compass, draw a semicircle on the cardboard with a radius equal to the length of the base of the feather. Cut out two of these pieces.
- Now cut out two half circles from the fabric using the cardboard bases as templates.
- Turn one cardboard semicircle over so the back side is facing up. Start gluing feathers to it, placing one next to the other and going in a circle.
- Glue the second cardboard semicircle on top so that the back side is inside.
- Glue the fabric parts to the cardboard bases.
- Now glue the lace to the top edge of the fabric. Ready!
Use your handmade fan with pleasure or give it to someone as a gift.
Handmade or handmade jewelry is gaining more and more popularity all over the world. Now you can easily purchase them in specialized craft stores or make them yourself. This article will present the last option, because hand-made accessories and jewelry will perfectly highlight a fashionable look, and will also fully meet the requirements of their owner. How to make a fan with your own hands is described in detail in our article.
From fabric
Materials and tools:
- a piece of fabric;
- thin plywood;
- thin ribbon;
- paper;
- lace ribbon;
- awl;
- pencil;
- compass;
- Super glue;
- scissors;
- stationery knife.
Master Class:
- Measure and cut 15 strips of plywood measuring 1 by 40 centimeters.
- Place the resulting strips together. Measure 1 centimeter from one edge and pierce all the strips with an awl through.
- Pull the braid through the holes in the strips and tie tightly. Trim the excess length of the ribbon.
- On a white sheet of paper, lay out the resulting workpiece in an even semicircle, keeping the same distance between the strips, and trace it with a pencil.
- In a large semicircle, use a compass to make a small semicircle (radius 10-15 centimeters) and cut it out.
- Apply the resulting template from a large semicircle to a piece of fabric and cut it out.
- Glue the fabric to the strips, starting with the one located at the bottom in the folded fan. Glue the fabric to the bottom of the last plate so that the fan closes comfortably.
From cardboard
A cardboard fan does not bend or fold, so its function is decorative. It can become a decoration for your home or an unusual gift.
To work you will need:
- thick cardboard (not colored);
- stationery knife;
- pencil and ruler;
- newspapers or sheets of thin paper.
- Prepare a solid fan frame. To do this, a sheet of cardboard must be placed on a horizontal surface and the middle must be marked along its lower edge. Measure 30–40 cm up and place a dot. Draw a large semicircle, the vertex of which should be at the marked point.
- Step back 5 cm from the point, place a second one and draw another semicircle. It must be symmetrical with respect to the first.
- From the second point, retreat 2 more times by 5 cm and draw 2 symmetrical semicircles.
- Draw the last semicircle at a height of 10 cm from the edge of the sheet.
- From the bottom of the workpiece, draw a line to the first semicircle 17 cm long and put a dot. Draw a diagonal line from it to the middle of the bottom edge of the sheet. Repeat the same steps on the opposite side.
- From the first diagonal line, measure 3 cm along each semicircle, except the top one, and place dots. Draw lines along them from the small semicircle to the fourth. Repeat the steps on the opposite side of the workpiece.
- Cut out the template with a utility knife. To make a fan you will need two similar blanks. To make the second one, you can simply trace the outline of the first one on a clean piece of cardboard and cut it out.
- Cut newspaper sheets into strips 8–10 cm wide. Using a thin wooden stick, twist them into tubes, periodically coating them with glue. You will need at least 30-40 such blanks.
- Glue 15 paper tubes to the cardboard blank. The lower ends of the latter should connect in the middle of the template, the upper ends should diverge at a distance of 1 cm.
- Trim the protruding ends and glue a second cardboard blank on the other side.
- Cover the edges of the blanks (where the corrugated part of the cardboard is visible) with paper strips.
- Make a weave of several tubes in the bottom open row of the template.
- Cover the finished product with the selected paint and clear varnish. Decorate as desired.
If you don’t have a large compass at hand, you can draw a blank for a solid frame using a pencil and string. To do this, you need to make a loop on the last one and insert a pencil into it. Then you need to attach the lower end of the rope to the middle of the sheet, and the upper end, with a pencil, to the marked point. All you have to do is hold the rope and draw two semicircular lines to the right and left of the point.
From feathers
Materials and tools:
- a piece of fabric;
- cardboard;
- lace;
- feathers;
- a simple pencil;
- compass;
- ruler;
- scissors;
- glue.
Master Class:
- Trim the feathers to the same length and measure the “bare” part of the feather.
- Draw a circle on the cardboard, the radius of which is the length of the bare part of the feather. Divide the circle in half.
- Cut 2 identical semicircles from the fabric using a cardboard blank.
- Glue the feathers one after another onto the back side of the cardboard blank. Glue the second cardboard semicircle on top with the back side inward.
- Glue pieces of fabric onto both cardboard pieces.
- Glue a strip of lace fabric along the top edge.
Decorative fan
A fan can act not only as an accessory to escape the heat and stuffiness, but also as an original element of home decor. This is exactly the kind of decorative item you can make with your own hands at home. The manufacturing work is not complicated, but painstaking, requiring accuracy and precision. But the result of such painstaking work will please you for a long time.
Before you start making crafts, you should take care of the materials and tools necessary for the work. You will need the following:
- thick cardboard (you can use a cardboard box);
- several newspapers or magazines;
- PVA glue or glue gun;
- scissors (a stationery knife will also work well);
- material for decoration (satin multi-colored ribbons, beads, braid, lace, artificial flowers, etc.).
Step-by-step progress of work:
- Let's draw a semicircular detail on the cardboard. Using a utility knife, make slits inside. You will need 2 such blanks.
- We twist at least 30 thin tubes from newspaper strips. To do this, twist a strip of newspaper paper in a spiral onto a thin knitting needle or wooden skewer. To prevent the tubes from unwinding, the ends of the newspaper must be glued with glue.
- When all the tubes are ready, distribute some of the blanks evenly on one of the cardboard parts and fix them with an adhesive gun.
- Glue the second base on top.
- Use the remaining tubes to make several rows of weave.
- Cover the fan with spray paint.
- After the paint has dried, we decorate the craft with prepared materials.
The photo shows an example of the design of a decorative fan.
From newspaper tubes
- sheet of cardboard;
- thin newspaper tubes;
- pencil;
- ruler;
- spray paint;
- glue;
- decorative elements (artificial flowers, lace, satin ribbons, beads, etc.).
Master Class:
- Cut 2 identical blanks from cardboard, as shown in the photo.
- Glue newspaper tubes to one of the blanks at the same distance from each other. Glue the second cardboard blank on top.
- Weave the bottom of the fan with newspaper tubes, passing them between the “rods” like a snake.
Master Class:
Do it with kids
It will be very interesting for kids to make a toy fan themselves, especially since they will need a very simple and affordable kit to make it:
- flat ice cream sticks (5 – 6 pieces);
- a sheet of white paper;
- scissors (prepare children's scissors with rounded ends for work);
- paints (felt-tip pens, gouache, colored pencils - everything that your baby likes to decorate with);
- a piece of wire and an awl;
- PVA glue.
Progress:
- First, make a small hole at the bottom of each stick (at the same distance so that the hole matches). You should not trust your child to do this on their own, since when drilling holes with an awl, the child may be injured by a sharp instrument.
- We fasten the sticks with wire or thick thread. To ensure that the fastening does not prevent the fan from fully opening, it should not be too tight.
- Then we open the shelves, apply them to the paper and draw a semicircle.
- We cut out the paper part and decorate one side with bright colors.
- After the paint has dried, glue the open sticks to the paper base on the back (white) side with PVA glue.
Silk Chinese
Materials and tools:
- a piece of silk fabric;
- ruler;
- scissors;
- bolt with nut or rivet (diameter 2-3 millimeters);
- fabric glue.
thin plywood or thick cardboard;
Master Class:
Floral
A fan is not only a stylish accessory, but also simply an irreplaceable thing in the warm season. I can’t even remember where and by whom it was invented. This accessory can be found among both European and Asian peoples. If you want to have such a necessary and very stylish item in your collection, you can make a fan with your own hands, and a master class on making it will help you with this.
Who said you can't cool down on hot days without air conditioning or a fan? An ordinary fan can cope with this task perfectly. At the height of summer, it can be purchased at any accessory store or even at a kiosk.
Despite the abundance of this summer accessory, it is a mistake to believe that they have the same structure, because their variety is simply amazing. This is an ordinary paper fan, an element of home decor, and a classic Japanese (Chinese) fan, which we are accustomed to seeing on store shelves, as well as a fan used in fiery dances, and even a fan.
Master class from A to Z
Do you think that making a fan with your own hands is labor-intensive? No matter how it is, thanks to a detailed master class you will be able to make this stylish accessory in a matter of hours. And as a result, you will receive an original product, unlike others.
Stylish paper accessory
A fan made of paper is very easy to make and no less beautiful than its more expensive counterparts. If you don’t know how to make a paper fan with your own hands, then pay attention to this simple master class on how to make it. To make a stylish accessory out of paper, you will need:
To begin, choose a base for the fan, such as light pink paper. Then cut out two strips of 6 and 3 cm wide from red paper. Glue the prepared strips to the base (a narrow strip at the top and a wider one at the bottom). Using a ruler and pencil, make marks on the paper for future folds, then carefully fold the paper like an accordion.
It’s time to stabilize the workpiece; to do this, cut out two strips of cardboard corresponding to the length and width of the folds of the product. Cover the prepared strips with red colored paper and glue them to the extreme folds of the future fan.
Fold the paper like an accordion and wrap tape around its base, and then use an awl to punch a small hole in it for the lace. Thread a decorative cord into the hole and tie it in a knot, and decorate the ends of the lace with large beads.
Traditional Japanese fan
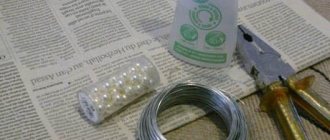
If you don’t know how to make a Japanese fan with your own hands, but want to have this stylish and equally useful accessory for your use, pay attention to this idea for making it. To do this you will need the following materials:
At the very beginning of production, stack wooden skewers or strips of cardboard. Using an awl, make a hole in the skewers and thread the wire through it, and then secure it with pliers.
Open the fan frame and place it on corrugated paper. Mark with a pencil the size of the required canvas, corresponding to the width of the fan, and then add 2 cm to each edge. Using a compass, draw 2 arcs on the marked paper so that the top arc is larger than the bottom. Cut out the blank and glue it to the frame with universal glue. Let the finished product dry and then use it for its intended purpose.
Veil "Fire Whirlwind"
Are you into fiery dancing? Then fan-veil is a must-have for you. Just don’t rush to the store for the accessory you need so much, because you can make it yourself at home. The vail can be made from the same fabric as the dance costume and then decorated with rhinestones or beads to make it a striking addition to your femme fatale look.
It is very easy to make, because it is based on the frame of an ordinary Japanese fan and a light flowing fabric, such as organza or chiffon.
So, to make a Veil yourself, you will need:
- The frame is from an old fan (if you don’t have one, make it from cardboard or wooden skewers).
- Light flowing chiffon fabric in 2 colors: black and orange, 30 cm each.
- Threads with a needle.
- Scissors.
- Sewing machine.
- Glue.
- Beads or rhinestones for decoration.
Making a veil should begin by cutting out a panel of two colors (black and orange). Take black fabric as a base, place the open frame of the fan on it and mark the cut points on the fabric with chalk. Do the same with the orange fabric. Connect both fabrics, forming a fiery flame, sew them together using a sewing machine. Glue the sewn fabric to the fan frame using universal glue and let it dry. Then decorate the vale with beads or rhinestones, gluing them onto the fabric in a random order or in a fancy pattern.
Be sure to stretch the panel when gluing the fabric to the frame, so the vale will turn out neat. If you doubt the strength of the glue, then sew the panel to the frame with threads. When decorating, do not use massive beads, this will make the product heavier. The most suitable decorative elements for Veil are considered to be beads or small crystals.
Fan for the Sultan
Those who participate in a costume masquerade and act as a sultan will probably need a bright, colorful fan. Making a fan is not difficult, even a child can do it, just take care of the necessary materials in advance, namely:
Draw a fan with a tail on the cardboard, and then carefully cut out the blank. Wind the tail of the fan onto a stick and secure with tape. Apply a generous amount of glue to the cardboard and stick feathers on it (larger feather first, and smaller ones on top). Glue rhinestones on top of the feathers in a random order. Let the product dry for at least 5-6 hours and only then use it for its intended purpose.
Wall decor element
Do you think that fans are used only to protect themselves from the heat? This popular accessory also has other functions, such as decorative ones. Making a beautiful fan to decorate a wall is not at all difficult; for this you will need:
To begin, stack 12 forks in a neat stack and make a hole in the base of the handle of each fork for fastening. Thread a decorative cord into the hole made and tie it into a tight knot, and then straighten the frame into a circle.
Weave a red satin ribbon through the teeth of the forks, then do the same with the white ribbon. Having finished weaving, start decorating the accessory. To do this, make small red and white bows from the remnants of ribbons of both colors, and then glue them onto the satin ribbons using a glue gun. Don't forget to glue rhinestones to the center of each bow. Decorate the ends of the decorative lace with the same bows.
Having finished making a round decorative fan, it’s time to attach a wire hook to it so that it can be hung on the wall. To do this, form a loop from the wire and glue it to the center of the back side of the fan.
Thanks to these simple master classes, you learned how to make a fan with your own hands from fabric, paper and feathers. Therefore, you can easily make a much-needed accessory for both yourself and your loved ones.
Recently I was cleaning out the costume room and came across some fans. Once upon a time, about ten years ago, I had a Chinese dance with fans. Accessories were very difficult back then. It’s not that we didn’t have the financial ability to buy them, although that too, but the main reason was that they simply weren’t available in stores.
Step 1
Take thick white paper or white cardboard. We will need 6 sheets of A4 paper or cardboard. For 1 fan with a diameter of 41 cm, you need whole sheets, for small fans with a diameter of 30 cm, 3 A4 sheets, cut in half (6 halves).
Step 2
We fold each sheet into an accordion (fan)
Step 3
Now for a little creativity. We take brushes, gouache and paint our sheets as your imagination tells you. I entrusted this procedure to my daughter. She was happy to help me. This is what happened.
Step 4
Now all our sheets need to be glued together, the edges strengthened by gluing additional paper. It should look like this.
Step 5
Now you need to cut out two wooden sticks. For a large fan, the length of the sticks is approximately 30 cm, for a small one 25 cm. The width of the sticks is approximately 1 cm. Drill holes in the sticks at a distance of 2 cm. For the width of the fan. Those. Where the handles will be, holes are not needed.
Step 6
Now we take our fan and a thick silk thread, fishing line or wire. I made a large fan using wire, a small one using thread. In general, we take what we have at hand. If it is a thread, then we thread it into a needle and, as it were, stitch the fan with stitches back and forth along the edge of the entire fan. If you have a fishing line, you will first have to make small holes and then insert the fishing line; you can also work with wire right away. Don't forget to leave the ends free on both sides. It should look like this.
Step 7
Now take a stick and thread the free end of the thread into the holes of the stick. As if sewing together the edge of the fan and the stick. Be sure to secure the end of the thread tightly and cut off any excess. Having done this on one side, adjust the tension of the fan. The fan should open freely, but not sag. After adjusting the tension, do the same on the other side.
Handmade or handmade jewelry is gaining more and more popularity all over the world. Now you can easily purchase them in specialized craft stores or make them yourself. This article will present the last option, because hand-made accessories and jewelry will perfectly highlight a fashionable look, and will also fully meet the requirements of their owner. How to make a fan with your own hands is described in detail in our article.
How to make a fan with your own hands: 10 original ideas
For many centuries, before fans or air conditioners, a cooling breeze was created using a fan and a fan, a small folding fan. To escape the heat, we suggest you make an original fan yourself with your own hands.
The fan came to Europe at the beginning of the 17th century with traders from China and turned from a utilitarian object into a work of art. The design of the fan has become more complex and interesting than the original blade with a handle. The fan was decorated with embroidery, precious stones, mother-of-pearl and lace.
This beautiful and useful accessory is still relevant today, in the summer heat; when folded, it easily fits in a purse. It is very easy to make it yourself, and we are sure that you will enjoy the process of creating a fashionable item.
For creativity, you will need a sheet of rectangular paper; even ordinary A4 office paper will do. Draw an ornament or floral and plant motifs with a felt-tip pen and watercolors. Fold the sheet like an accordion with fold increments of 1.5 centimeters, then fold the accordion in half again. Connect the inner folds with glue or a stapler. Attach a pen (pencil) to the bottom, refresh yourself.
A fan assembled from three accordions will be more durable and voluminous. It can be unfolded and folded using the side bars. Popsicle sticks work well for this task.
The simplest and most practical fan models, in our opinion: from two (three) accordions and two sticks, from an accordion with a handle, and also dense and flat in the shape of a circle or rectangle with rounded corners with a handle. To secure the accordion, use ribbon, braid, decorative elastic, buttons, and Velcro.
An openwork fan looks very romantic; you don’t have to use lace for this. Let's make an openwork using scissors, cut out holes like New Year's snowflakes.
The model on a wooden frame is a little more complicated. For a medium-sized fan you need 10-12 sticks 1 - 1.5 centimeters wide and 20 - 25 centimeters long. Drill a hole and fasten the parts with wire.
Unfold the structure on a flat, level surface with paper laid out in advance. Glue the paper to the guides, cut off the excess. Now you need to glue the second decorative layer so that the sticks remain inside.
When finished, tie a bright tassel to the bottom.
If you want to create an interior fan, make a circle sector of the required size from cardboard. Prepare paper tubes: 15 for the frame and an additional 10 or more to hide the cardboard sections and braid the frame. Glue the tubes to the base like rays, process the open sections. Then start weaving and decorating.
A great idea for those who are familiar with decoupage is a fan made from prefabricated elements. The base will be cardboard or thin plywood or fiberboard. Cover the parts with acrylic paint and stick on the decor.
Another option for making such a fan: print the finished pictures on thick cardboard in a printing house. Vintage pictures and flowers look very cute. Lovers of the fashionable boho style will appreciate this fan.
Using the pattern, cut out a fan, like the ancient Egyptians, and go on a summer vacation with it.
Do you like watermelons? Make a fan with a watermelon print and paint the wooden sticks with green acrylic paint. Use a plastic disposable plate for the watermelon fan. This is an excellent waterproof and durable material for creativity. If you decide to go to a football match, you need to make a fan with the colors of your favorite team's flag.
During the creative process, do not forget about your pets, because they can hardly stand the heat. The cat will love a fan with a cat theme; for the dog, choose the appropriate design.
Source: https://klubokidei.com/1754138659353266624/kak-sdelat-veer-svoimi-rukami-10-originalnyh-idej/
Light crochet openwork fan - diagram with detailed description
We invite you to make a delicate openwork fan, crocheted, which is perfect for going to the theater. You will learn how to make a fan with your own hands simply and easily from this master class with step-by-step photos and diagrams with descriptions.
To make such beauty we need:
- Mercerized cotton yarn in white or cream color;
- Hook No. 2.5 for knitting;
- Fan base;
- Such a fan is knitted from the bottom up, gradually adding loops in accordance with the pattern given above;
- When the knitted part of the fan is completed, it will be necessary to wet it and straighten it thoroughly so that the loops lie evenly and correctly;
- Next, the openwork part of the fan needs to be starched a little using regular potato starch, sugar syrup or PVA glue;
- After these steps, the fan part must be immediately pulled onto the base and left to dry;
That's all. Our exquisite openwork fan is completely ready.
DIY fan of twists: master class
Even preschool children can make a fan of disposable forks. Although this will require a little help from adults. Materials you need to create this craft:
We begin creating crafts and making a frame. We will glue plastic forks onto it. Cut the disk in half and decorate it with colored paper. Next you need to glue the forks halfway on the disk. It is also possible to create a fan of presentations. The step-by-step instructions remain the same. When all the forks are glued, then you should move on to the decor. For decoration we use satin ribbons: they need to be beautifully wrapped around the forks. You can take ribbons of two colors. They must be used to cover the beginning of the tines of the forks. A fan of plastic forks can be considered complete if lace is attached between the teeth. It must first be stitched, gathering folds on one side.
A charming lace fan for a bride for a photo shoot
Every bride dreams of beautiful wedding photos. And to make them unforgettable, you can make a fan with your own hands as an additional accessory. How to do this is described in detail in our master class.
You don’t need many items for such an interesting craft. The most difficult thing here is to choose the right lace and not to overdo it with decoration.
To create a fan for a wedding photo shoot we will need:
A fan purchased in a store must be disassembled into parts, separating the plastic base and the fabric. The next step is to gather the lace a little, place it on the fan and attach it with thread. You need to start from the top row, carefully securing them to the plastic base.
Next you need to apply a second layer of lace, securing it to the base with a glue gun and aligning the clamps along the way. When the product is ready, you can start decorating with rhinestones. To complete the look, you need to thread a thin satin ribbon in the middle and tie it on the wrong side.
A bed for a doll made of a fan. Detailed master class
Good day) I haven’t created topics for a very long time, and I simply haven’t been on the site. I really wanted to prepare something interesting. One day I came across a similar crib on the Internet, and I really wanted to make the same one. But the search for pictures did not yield any results, so I decided to make my own master class. Perhaps someone will want to make a similar crib for their dolls)) As it turned out, finding the right fan in April is an almost impossible mission. I wanted to use a classic wooden fan as a basis, and at home, at my mother’s, I found only black ones and decorated with fabric. I joined my friends in the search, and three days later, with great grief, my friend finally found the desired accessory. I will say that the quality and condition were, to put it mildly, deplorable. And my friend’s daughter tried to make the fan look even more creepy by biting off a piece))) But in general, here’s what I worked with:
A bed for a doll made of a fan. Detailed master class
The stamped under-drawing did not add optimism, but I still decided to try, so to speak, the first pancake should be lumpy)) Using scissors, I cut the fishing line between the wedges of the fan, and took it apart into its components
Now it was necessary to trim off all the excess. First, using a ruler, I measured the required length of the wedges
I trimmed off the excess with scissors. Well, I just cut off the rest of the parts, putting them next to each other
I received these piles:
Then the question arose: what should I make the bottom of my crib from? For some reason, finding the right box turned out to be almost as difficult as finding a fan))) But after wandering around the house for almost an hour, I finally found a box that had to be adjusted to the required size as little as possible. The color is not very optimistic, but at least that way)
I did a little magic and made the box in half below
I secured the result with my favorite tape, for reliability)))
And finally I covered the surface with several layers of masking tape.
While the crib was in this condition, I made a mattress. Because so far nothing prevents you from measuring the surface properly
To be honest, this is all I managed to do during the first evening, i.e. yesterday. And today I gathered my strength and continued working. Using moment-gel glue, I glued pieces of the fan around the perimeter. I put the mattress down to see what happens. The view is deplorable and depressing)
But this is just the beginning. Now we need to decorate and give the crib a suitable look) I decided not to bother with painting, since I initially wanted the crib to look like wood. My supplies of ribbons and lace came to the rescue.
After trying on a whole bunch of options, I decided to cover the bottom with colored Kitty ribbon, and glued a piece of lace on top
Then I glued a thick woven peach-colored ribbon to the bottom in a circle and to the very top from the outside; from the huge number of options, it looked more than normal
I decorated the remaining stripes with a thin zigzag ribbon.
But I still didn’t like these poor, half-crooked flowers. I thought for a long time about what to do with them and decided to just make daisies in their place. The flower is made of lace, and I painted the stick and leaf with acrylic paints (by the way, at the moment when I was painting the flowers, my mother came home and saw what her daughter was suffering from, she said “wow, how lovely!”, which made me more optimistic) The whole drawing process I won’t show flowers. But here's what I got.
In principle, the technical part is completed. Someday I’ll make bed linen and pillows, but for now I just chose the fabric
I sewed a bedspread and two pillows) and so far the crib is ready!) All that remains is to wait for the baby who will sleep in this crib (the bed is designed for the size of a pukifi, i.e. a doll 15-18 cm tall)) Thank you very much for your attention!) I apologize, if I'm tired of photos, but I hope that my master class will be useful to someone)
Chic DIY Japanese fabric fan
Required tools and materials:
- A piece of cloth;
- Thin plywood of small sizes;
- Awl, paper, pencil, glue, stationery knife;
- Thin ribbon;
- Strip of lace;
Stages of making a Japanese fan:
- The first step is to make the base of our fan. To do this, you need to cut ten to fifteen strips of plywood forty centimeters long and one and a half to two thick. Next they need to be painted and allowed to dry completely.
- Now you need to fold all the strips and make a hole on the bottom edge of each of them using an awl.
- Using a needle, push the braid into these holes, tie a tight knot, and then a beautiful bow.
- The base of the fan must be laid out on the sheet so that it forms a semicircle, and the plates must be spaced evenly from each other. With a pencil on paper you need to mark the upper outline, and draw a line below, connecting the edges of this outline.
- Under the top outline you need to draw a small semicircle to make an arc and cut it out.
- This paper template should be applied to the fabric and cut out. It is advisable to buy fabric with Japanese patterns.
- Now you can start gluing the fabric onto the plates. You need to start with the one that is folded at the very bottom of the product. The last plate is placed over the fabric and glued to its front part. Otherwise the fan will not close.
- Now you can decorate our accessory with stones, beads or rhinestones, but it is best to leave it as it is, because Japanese women prefer modesty and minimalism in everything.
Japanese uchiwa fan
Uchiwa is different from a regular fan. In shape it resembles a small fan. The main feature of the product is that it does not fold.
In Japan, uchiwa is made from silk and a single piece of polished wood. In other countries there are various variations of this product.
To make utiwa at home, you will need:
- a sheet of white paper;
- bamboo skewers;
- a sheet of paper for decoupage (with a Japanese pattern);
- sheet of thick plywood;
- transparent glue;
- scissors and nippers.
Step-by-step master class on making a Japanese uchiwa fan:
- Draw the outlines of the future product on a piece of paper. Its shape should be round and resemble an egg. Cut out two paper pieces. Fold them in half along the long side.
- Cut two similar pieces from a sheet of decoupage paper. If it is not available, you can use any other one with a suitable pattern. Three-ply napkins will also work.
- Take the first piece and place it on the table. Apply glue to its entire surface. Using the longitudinal fold as a guide, place bamboo sticks in the middle of the template. Their sharp ends should converge at the base of the workpiece, and their blunt ends should fan out in its wider part.
- Glue the second piece on top of the wooden skewers. Place the structure under the press for 25–30 minutes (any book that is slightly larger than the workpiece will do).
- Remove the part and, using wire cutters, remove the protruding ends of the sticks. Glue the colored blanks on top of the paper ones on both sides.
- On a sheet of plywood, draw the outline of the handle for the fan. It can be simple, rectangular or curly. Cut two identical pieces with a jigsaw or thin hacksaw and sand.
- Insert the fan between the two parts of the handle and glue them together. Cover the sides with narrow tape so as not to injure the skin of your hands on their rough surface.
- Place the assembled fan under the press for 12 hours. During this time the glue will dry.
Before assembling the fan, the handle can be painted with stain or wrapped with decorative cord.
The finished fan can be decorated with your own individual design. For this purpose, lace, paper flowers, artificial stones, rhinestones, feathers, and satin ribbons are used. A fabric fan can be painted with acrylic paints or use the batik technique.
Many people escape the summer heat and stuffiness indoors by using cross-ventilation and a fan, but this may not always be safe for health. Therefore, it is recommended to use an accessible and simple device - a fan. Since ancient times, fans (large fans) have been made from palm branches and huge lotus leaves. Then these accessories began to be made from feathers, fabrics, and decorated with lace and precious stones. All this spoke of the status of the owner, but the accessory was too heavy and cumbersome.
Modern fashionistas prefer to carry lightweight fans that are at the same time stylish and functional. You can buy a fan in a store or order it online. But all options purchased from the manufacturer will not be exclusive. You can easily solve this issue by making a useful accessory with your own hands.
By introducing children to making fans, you can not only develop the child’s creative potential, but also captivate him with interesting work.
Custom feather fan
To create such a creative and unusual accessory we need:
The first step is to measure the bare base of all the feathers. This will serve as the radius of the base. Next, using a compass, you should draw a semicircle that will be equal to the size of the base of the feathers. You need two such parts. Using cardboard semicircles as templates, you need to cut the same ones from fabric.
One semicircle of cardboard should be turned over with the back side up and all the feathers should be glued to it, placing them side by side. On top you need to attach another semicircle of cardboard with glue so that the reverse side is inside. You need to glue fabric parts to these paper bases, then attach the lace.
At the end of this article there is a small thematic selection of videos on various methods of making fans: from paper, cardboard, knitting.
This unusual accessory is perfect for any themed ball and will be a great activity for young children.
To protect against the summer heat or as a beautiful interior detail, sometimes you want to create a fan with your own hands. This is a very beautiful accessory. It has not lost its relevance over the centuries. And despite the apparent complexity of the design, it is quite simple to implement.
It is difficult to say when fans first appeared. They are known in different countries and cultures. A fan can be any object that is designed to fan oneself or others with wind currents.
In hot countries, slaves stood above their rulers and constantly waved huge structures on a long handle over them. In medieval Europe, every young lady had a whole collection of hand fans of different colors and configurations. Some of them were even decorated with precious stones.
But most of the varieties appeared in Japan, where there was no shortage of paper - the basis for the fan. Here we know both the beam designs that are familiar to us, and products made entirely of paper, on a handle, which when unfolded resemble a leaf of a tree, and when folded they are completely hidden in the handle.
There is also a non-folding fan made of paper and other dense materials. It is also attached to a handle, to which a strap is attached to make it more convenient to carry. Such a fan is decorated with paintings of scenes from everyday life, religion, or landscapes of Japanese nature, which have features characteristic of this culture.
Let's consider the simplest master class. How to create a simple paper fan? Many of us did it as children. But in fact, this is not such a children's toy. It was according to this scheme that it was made in China.
Take a rectangular sheet of paper. We divide its long side into equal parts, approximately 1-1.5 cm each. We fold the marked sheet like an accordion. At the same time, we make sure that every bend is clear and even.
When the workpiece is completely ready, we begin to create protective slats. They are made from thick cardboard. The length of the strip is equal to the length of the short side of the rectangle from which we make the fan, and the width is the width of the fold. Glue the slats on both sides of the workpiece.
We fix the lower part of the fan in assembled form using a strip of paper or tape. So our simplest fan is ready. Now we can decorate it with our own hands using any available technique.
The main thing is that such a fan does not require much time to make. At the same time, it does its job well and is quite compact when not needed.
Now let's see how to make a fan of a classic design, which we are used to seeing in movies, in pictures, and in everyday life.
It consists of three main elements: frame beams or knitting needles, a rivet securing them and the canvas itself. You can use wooden sticks or slats or plastic blanks as knitting needles. They are connected with a strong rivet, which leaves little room for the slats to move freely.
The fan canvas is made from any dense material. For decorative purposes, paper or thin cardboard is often used. For intended use, it is better to choose more durable materials: fabric, polyethylene, thin leather.
All the parts are usually assembled together using glue, but they can also be sewn on if the knitting needles allow it. When the entire structure is assembled, they move on to decorating it. There is no limit to the flight of imagination: painting, embroidery, feathers, lace, appliqués. The main thing is not to make this airy accessory heavier.
We all know that there is a special type of fan - Japanese. They are not only very beautiful, but also have their own design feature.
In Japanese tradition, it is customary to create fans from a large number of knitting needles. At the same time, the shape remains the same - a semicircle. This results in the spokes running very close to each other, which creates an interesting decorative effect. Although, most likely, this design feature was introduced in connection with the use of this accessory as a weapon, where strength plays an important role.
The second distinctive feature is its high artistic value. When making a fan with his own hands, the master puts his whole soul into it. This is clearly expressed in the traditional paintings that decorate Japanese fans. Here we meet famous dragons, beloved cranes, and sakura flowers.
Today, Japanese fans are real works of art that are used as interior details.
Paper fan
A fan is the most common paper craft. Making a paper fan is quite simple, but there are some subtleties.
Fold an ordinary sheet of double-sided colored A4 paper in half along the transverse line. Open the sheet, bend each edge to the center line. Open it again and there are three folds.
Fold the edge closest to you to the first marked line - another fold is formed. Unfold and fold the same edge to the far (upper) marked line. This is the next fold. Do all these steps with the opposite edge of the sheet.
Open the workpiece and turn it over with the folds facing up. Fold the edge of the sheet closest to you to the first convex fold.
Grab the first convex fold and fold it to the second. Continue folding the paper like an accordion, grabbing each convex fold and folding it to the next one. Fold the last convex fold to the edge of the sheet.
Now fold the resulting accordion in half, first bending one free edge. Bend the accordion so that the bent edge is inside the bent accordion (does not bend around it from above). Fold the corners of the bent edge - bend the upper corners together downwards, and the lower ones upwards.
Fold the bent edge with the folded corners into the middle of the accordion. Unfold the fan and hide the part with the bent corners inside. Use your fingers to press the folds well. To uncover. Your DIY paper fan is ready!
"Fork" fan
- A DIY fork fan is a completely unusual solution!
- You will need:
- An odd number of disposable plastic forks (23-25 pieces).
- Self-adhesive foam board. Can be replaced with regular one.
- A scrap of satin fabric in your favorite color.
- Decorative lace with scalloped edge 4 cm wide.
- Wide transparent lace to decorate the base.
- A compass (if you don’t have a compass in the house, an ordinary faceted glass and a CD will serve as a replacement), a simple pencil and scissors.
- Transparent strong glue (“Moment Crystal”) or a glue gun.
- Satin roses of different sizes and rhinestones for decoration.
- Two or three satin ribbons of different colors with a width of 1.5 to 3 cm (optional).
Fan base
Using a compass, draw a circle with a radius of 6 cm on the self-adhesive foam board, or outline a CD. Cut out a circle and cut in half.
Remove the backing protecting the adhesive side. Place each half with the adhesive side on a piece of satin, press, level, gluing the fabric well. Trim the fabric along the edge of the cardboard. Lightly melt the edges with a lighter.
Lay wide transparent lace, gluing it, on top of the satin with scallops down, releasing them beyond the straight edge of the semicircle. Fold the vertical edges of the lace inside out and glue.
Draw a circle of a smaller diameter on the cardboard - with a radius of 3.5 cm, or outline the top of the glass. Cut and cut in half too.
Turn the large semicircle with the wrong side facing you and stick a small semicircle on it, aligning the centers of the semicircles. The small semicircle will act as a limiter.
Frame
Glue the forks to the base, tines up, one after the other. The fork rods should rest against the border of the small semicircle. The tines of the forks should touch - the sides of the tines can be immediately glued to each other.
Advice! The fork stems can be completely wrapped in satin ribbon, gluing it along the way and fusing the ends.
- Glue the second cardboard semicircle face up, covering the structure.
Decor
Carefully thread a colored ribbon 1.1-3 cm wide between the fork rods. It’s better to start from the bottom, melting the end and securing it with glue. At the end, glue the edge of the tape. As the tape moves, also grab it with drops of glue.
Then place a second row of tape between the rods. Let each row go in the opposite direction. There can be two or more rows - right up to the beginning of the teeth.
Pass the wide lace between the tines of the forks, securing it with glue and directing the scallops upward. Melt the ends of the lace and glue them. To make the frame of the fan more romantic, you can glue another, more airy, transparent lace, laying it in folds.
It is good to glue an artificial rose into the base of each fork, for charm and to cover the folds. Rhinestones can be glued onto ribbons and lace, and the base of the fan can be decorated with roses.
As you can see in the photo, this fan is quite beautiful. Such models can even be used in wedding decorations.
Japanese fan
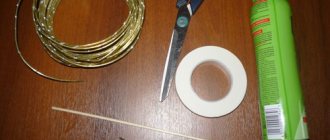
You will need:
- Paper with a patterned design, preferably Japanese themed - a sheet approximately 50-60 centimeters long. In principle, any paper will do, but a product made from special paper purchased at a craft store will look more professional.
- Moment Crystal glue or glue gun.
- Scissors, tape.
- Two flat sticks (you can use Eskimo ice cream).
- Step by step process
Carefully, slowly, fold the strip of patterned paper into a tight, uniform accordion pattern in increments of 1-1.5 cm. Wrap the lower part of the fan with tape. To be safe, it is better to make several turns. Glue flat sticks to the edges of the fan.
Important! The sticks must rest against the tape, and under no circumstances go over it, otherwise the fan will not be able to open.
- Unfold the finished product - your DIY Japanese fan is ready!
- After practicing on these simple models, you can move on to more complex options - made of fabric, feathers, using the fan principle, or wall masterpieces!
DIY fan photo
Source: https://tytmaster.ru/veer-svoimi-rukami/
Product made from scrap materials
If you want to know how to make a fan from ordinary plastic forks, we offer you an interesting method. To work, you will need disposable forks, cardboard, glue, and decorative elements.
Cut out a semicircle from cardboard and glue a fork to it in a tight row. We make sure that they form uniform rays, and all the heads lie with their teeth facing up. When the glue sets, cover the workpiece with the same semicircle of cardboard and wait until the entire structure is completely glued together.
Now you can start decorating. Since forks are a heterogeneous object, you cannot attach a classic linen to them, but you can decorate them with lace, ribbons and bows. The main thing is not to be afraid to use your imagination, so that this master class will give you a truly unique piece of jewelry for a variety of purposes.
Features of placing decorations
Handmade decor will look great on the wall above the sofa or bed. It is actively used as a decoration for a children's room. Cozy garlands or paper lampshades can decorate a terrace or balcony. It is especially beneficial to decorate areas for receiving guests or relaxing on a personal plot outside the city. Paper lanterns will be organically woven into the ambiance of a beach party. Such a light and original product can be used in any home. It looks stylish and is inexpensive.
Colored paper fan
When placing crafts in the apartment, try not to overload the space with them so that the room does not look like a school labor room. It is appropriate to place paper flowers in a large vase on a table in the living room or hallway. A large fan will decorate a bedroom or recreation area. You can also give your crafts to friends and relatives. Enjoy the process and involve each family member in such pleasant leisure time. The most important thing is that you can always do something new and please your eye with little things that create your mood.
Blanks for decoration
If the main thing for you is not to create a full-fledged fan from scratch, but only to decorate it, then many stores are at your service. They offer blanks that require additional decoration.
These fans are made of wood or plastic and covered with thick paper. This allows you to produce various paintings, thin appliqués, and decoupage with napkins on blanks.
These same blanks will come in handy if you need knitting needles but have nowhere to get them. Just buy a similar fan and change its fabric to the one you need. This is also a great way to make your own fan.
When starting manual work, you must always remember that no one knows the original plan except you. Therefore, there is no reason to be upset if something doesn’t work out. Let everyone think that this is your creative decision, and not a small mistake or failure!
How to make a fan with your own hands?
A fan can be made from a wide variety of materials. Experimenters are welcome here! You can even make a fan using ordinary plastic forks! And you definitely have forks at home. Therefore, to make such a beautiful thing, all you need is desire! Today we will make a very beautiful and elegant fan using paper.
To secure the fan you need to purchase tape.
Let's start creating!
2
. A beautifully painted sheet of paper will need to be folded like an accordion. The main thing here is not to rush, but to fold it neatly and beautifully. The width of the folds of the future fan should be approximately 1.5 - 2 centimeters. You will need to fold the fan like an accordion carefully along the fold lines. You will succeed!
3.
Now we will need the chopsticks that we put aside! You need to attach them on both sides so that they extend about 2 cm beyond the paper edges. And then glue it on.
4.
The bottom edge of the paper should be collected and wrapped with tape!
Your origami paper fan is ready! If you bring two sticks together, it will open!
In addition to popsicle sticks, you can also use coffee sticks. They will need to be purchased in quantities equal to the number of fold lines formed. Afterwards you just need to glue them, you should do this carefully and carefully. To make the future fan longer, you can place the sticks not at the very edge of the paper.
VIDEO. How to make a fan at home?
From paper
The easiest way is to make your own paper fan. You can try to do it with your child.
- a sheet of paper with a design or patterns;
- glue gun (you can replace it with regular glue);
- stapler or adhesive tape;
- scissors;
- wooden clothespin.
Manufacturing instructions:
- Fold a sheet of paper into an accordion shape with the edges tightly curled.
- Secure the lower part of the resulting “accordion” with a stapler or carefully cover it with tape. In this case, you need to ensure that it lies evenly and tightly. Its adhesive side should not peek out, otherwise dust and debris will stick to it.
- Clamp the bottom edge of the fan with a clothespin and secure with thread or tape.
You can also make a round Japanese fan from paper.
- A4 paper with Japanese pattern;
- wooden ice cream or coffee sticks;
- double-sided and regular tape;
- elastic band and beads.
- Prepare the necessary materials.
- Cut a sheet of paper into two equal parts.
- Fold each half like an accordion. Maintain a step of 1-1.5 cm.
- Glue the two strips together using double-sided tape.
- Wrap the lower part of the future fan with regular tape.
- Glue wooden sticks onto the sides of the accordion. They should not touch the part of the fan wrapped with tape.
- Decorate the rubber thread with beads.
- Use an elastic band to secure the fan in the open or closed position.