Bead box: master class for beginners with diagrams and videos
Beaded boxes always look very feminine and elegant. They come in different shapes (circle, triangle, square, heart, etc.) and will be a nice gift for every girl. It is in these boxes that you want to hide your most expensive little things. In this article we invite you to create such a small but very elegant box of beads; the master class will help you complete the task faster. This weaving method is suitable for everyone and even beginners.
Additional materials for work
It is not possible to create a brooch from one type of material - real craftsmen use auxiliary materials for their work:
- Rhinestones.
- Sequins.
- Decorative mesh.
Fur and satin ribbons are also used. The use of decorative elements allows you to make the appearance of the brooch more rich and elegant.
DIY bird feeder - step-by-step master class and ideas for beginners and schoolchildren (155 photos)Do-it-yourself beads: 120 photos and video description of how to weave beads
- Do-it-yourself dolls made of fabric - 145 photos and video description of how to sew a beautiful doll quickly and easily
Triangular box
The process of making a box from beads can be traced using the example of a master class for beginners who have at least a little experience working with beads.
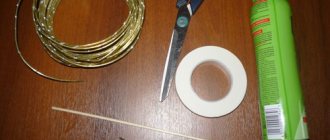
To create such a box you will need beads in the colors of the rainbow. If you take Chinese beads, then the size of the beads is tenth, and if you take Czech beads, then 6-8. We will also need scissors, needles, fishing line, wire, a diagram and tweezers.
This type of box has a double bottom, so according to the pattern below you need to weave a couple of triangles. One will consist of 15 rows, and add one bead to the other. It is also worth remembering that on a larger triangle you need to collect one bead at the corners.
These are the triangles we got:
Now we must connect them by weaving beads one by one. After we have connected the bottom, we begin weaving the inner wall. On the 13th row, which is indicated by red dots, start casting the first row, which is shown by white dots in the diagram.
We make the inner wall using the mosaic weaving technique, so you shouldn’t be surprised that the rows will move to the right. In the photo, small green dots show the first beads of the first and second row, and also indicate the correct path of the needle.
In total we need to weave about twenty-six rows. Next, you can make a small “bridge” between the walls of the box. It will add some rigidity. It is necessary to string white beads along the entire length of the inner and outer walls, and two pieces at the corners. This is how it should turn out:
After we have woven 26 rows, we need to make two more. And after them you need to make an external jumper. Then we finished weaving the inner wall, we begin to make the outer one. Its weaving begins not from the 13th, but from the 15th row on the bottom.
Next we weave 26 rows again, up to the inner bridge of white beads. Now look at the photo below. It shows the jumper itself, the 26th row of the outer wall and the 28th row of the inner wall. We need to connect the outer wall to the lintel. The location of the needle is also indicated in the photo in red.
We collect two more rows and connect the walls again.
The fourth step will be weaving the lid for the box. We need to weave two triangles again according to the pattern, but the number of their rows should be two more beads.
We sew them together, you can also glue a bead if you wish.
On the 9th row you need to weave a side.
On the 11th row we also weave 4 rows of beads for the side.
Next you need to connect them together.
You can sew three large beads on the bottom.
So our box is ready. By experimenting with bead colors, you can get original colors for the box.
And you can decorate a cute box not only with flowers and ribbons.
Cute hedgehog
You can also make figures of various animals from beads, for example, a hedgehog. We propose to consider weaving patterns for such a figurine.
How to do this kind of work? Looking at the first drawing, you need to weave a hedgehog belt, then according to Fig. 2 you need to make a tummy, and using the diagram in figure 3, you need to weave the back. Then fasten the ends of the belt and put it on the blank. Next, we begin to weave the second part indicated in figure 1. The weaving is exactly the same as the belt weaving pattern; we make decreases as necessary. The nose needs to be woven using the pattern in figure 4, making a smooth decrease. Now you need to sew the eyes and nose onto the hedgehog’s face.
How to make thorns? We string 9 black beads and 1 white, overtake the last bead and insert the thread into the black beads. It turns out a kind of thorn that needs to be attached to the back of the hedgehog. Using the brick stitch technique, make a leaf. And you will get such a cute hedgehog. It will be a wonderful decoration not only for the box, but also for the desktop.
Accessories for creating a brooch
To create a brooch, you need fittings - the basis for making the frame. Special forms play this role:
- Settings of various shapes and sizes. Metal cuts allow you to create stylish compositions from beads.
- Pendants. To create original brooches on a chain, you can use metal and plastic molds of various depths and shapes.
- Jewelry mesh. Made from a resilient and elastic base, which allows you to form a wide variety of brooches and jewelry.
- Special bases for laying beads - plates or wide clothes pins. There is an adhesive layer on the surface that allows you to securely attach the beads to the base blank.
Having ready-made diagrams and photos of a handmade bead brooch on hand, you can start creating jewelry.
Before you start, you should familiarize yourself with the video tutorials and detailed instructions on how to make a beaded brooch with your own hands.
Weaving pattern
Yes, that’s the whole pattern, we will weave according to the swirl + cross pattern.
First you need to braid the first ring with a square strand. It weaves easily - with a cross chain. To do this, string four beads onto a thread, collect them into a ring, then put a bead on each thread (woven into two threads) and connect it into a second ring with an additional bead. So weave three rows into a cross of the required length. The chain should be slightly shorter than your ring. Close the tourniquet on the ring and braid the missing section - you will end up with a fourth row of “cross” that will completely cover your ring.
The remaining rings are woven in a similar way - three rings are the frame for the box, the fourth is for the lid. All rings must be the same, otherwise the box will turn out uneven! You can choose the colors of the beads at your discretion, or you can follow the photo instructions - I have auxiliary “crosses” in white on a black background. Then it will be easier to sew rings to each other using them. You will get a kind of black and white pattern.
Now you need to connect the three rings of the box together. They are connected with strands in a cross along the entire ring - a gap of three crosses is maintained. To do this, come out of one cross of the ring upwards, as it were, and begin to weave a plait-cross upwards. I didn’t leave the gaps “empty”, but attached oval beads - you can also take some interesting beads that suit the size. This way you will fill the voids and the base of the box will become stronger. The rings will be connected to each other not only by strands, but also by additional beads.
The bottom of the box and the lid are made according to the swirl pattern. Everything is very simple here: you put six beads on a wire, alternating white and black colors, and connect them into a ring. Next comes the second row: one bead at a time, the third row already consists of three beads, the fourth - of five. Check the diagram - it clearly shows how to combine the colors of beads so that the end result is exactly swirls, and not just a set of beads of different colors. Depending on the size of your box, the size of the finished swirl will depend - you may need to add rows to the swirl or vice versa - make it smaller so that it fits your ring perfectly.
The resulting swirls must be attached to the bottom of the box and the lid. This is done with auxiliary beads. But our lid is not finished yet - we need to add a row of beads to its bottom so that it fits onto the lid itself. To do this, string four and two beads sequentially around the entire ring, connecting them to each other - in the photo you can see how this is done. There is nothing complicated here. The row will turn out flat - we don’t need a tourniquet, it kind of wraps around the box, lying on it.
If you wish, you can attach legs to the box - they can be made according to the principle of square strands with which you connected the rings to each other. Or you can leave it like that - the box stands perfectly without any legs!
This is the beaded box we made
– you can give it to your loved ones or leave it on your shelf so that it reminds you of the pleasant process of beading! Don't stop there, think about how you can improve this master class, come up with a unique box design!
The ability to see the unusual
For a person with a creative imagination and eyes that can see the unusual, there is always something to create a masterpiece. Material is everywhere.
A creative person usually finds it involuntarily, while doing other work. For example, when picking berries or mushrooms, you find interesting driftwood that resembles objects or creatures.
Brought home, these driftwood are improved and become unique souvenirs, which, depending on the size, can be placed on shelves, walls, on the floor, in a green corner between flowers, creating a natural, pleasant and lovely natural composition.
Selected branches of different thicknesses will make a unique hanger, wicker wall, or vases.
Craft materials are everywhere
What kind of craft to make with your own hands is often suggested by nature itself, by old things that are unnecessary or found in the attic, in the closet, by the desire to dream up and make something unique that surprises and delights your family, decorates, and makes your home unique.
Read here - How to make a toy out of paper: diagrams, templates for children. 80 photos of three-dimensional paper toys, paper car models, toys based on templates
How to make a notebook with your own hands - a step-by-step master class on how to make a stylish and beautiful notebook
Children are the first to enjoy anything unusual. They enjoy learning and are captivated by the creative process. Children enjoy creating small details of crafts and are proud of the results of their work.
Beaded boxes.
Zveryaka Evgenia Alexandrovna
The history of jewelry goes back many thousands of years. Bone, stone, tree bark, gold, silver, precious stones, pearls, ribbons, polymer clay, beads and much more served and serve to create a certain image and style for men and, of course, for women.
And when the number of rings, necklaces, pendants, pendants, earrings and bracelets of beauties and fashionistas began to multiply and grow almost two millennia ago, the question arose - where to store all this so that it would be in order and at the same time, it would always be at hand. This is how the box was born from the hands of the masters of the East. The first boxes were made of wood. The craftsmen decorated them with intricate carvings, trying to outdo one another in beauty and originality.
In the modern world, boxes are made of wood, plastic and metal. Now, as in former times, handmade work is valued. You can create an exclusive and original box with your own hands using beads. They braid ready-made containers of a suitable size or create boxes entirely from beads.
This article will present several master classes on creating original boxes in which you can store both jewelry and various little things needed by needlewomen, and such a box, like any thing created with your own hands, will be an excellent gift.
The first master class is dedicated to a very positive sunny yellow box made of beads.
- Orange and lemon transparent and orange and yellow opaque beads 10/0;
- Yellow and pearl beads 8/0;
- Wire of two colors;
- PVA glue;
- Acrylic paint (mother of pearl);
- Colored paper;
- Cardboard;
- Wide base made from tape;
- Plastic circle 5 mm wide;
- Flat button with 2 holes.
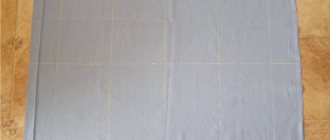
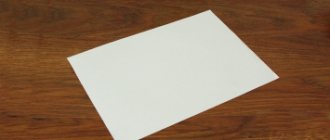
A cylinder of cardboard, on which tape was previously wound, will serve as the walls of the future box. You need to cut out two circles from cardboard using a cylinder as a stencil. This will be the bottom and lid of the box. A plastic circle (you can take a regular bracelet) will act as a limiter so that the lid holds well.
Cover all parts with a layer of PVA glue and let dry. Cut out 2 circles from colored paper for the inside of the bottom and lid. Cut a rectangle for the inside walls of the box. Glue the parts together. Paint the outside of all the parts of the box with acrylic paint, paint the bracelet and glue it to the inside of the lid.
Using transparent orange beads, weave a mesh according to the pattern so that it tightly clasps the workpiece.
Decorate the mesh cells with beads, as shown in the figure. Do not use the bottom cells. To decorate them, you need to string 2 small beads, 1 large and again 2 small. Secure the fishing line in the middle beads of the last row of cells at the bottom. Second circle. String 3 beads, pass the fishing line through the large bead of the previous row and string 3 beads again. So until the end.
Mesh is also used for its decoration. It must be partially bent inward and partially outward. This mesh will have 33 teeth on one side of the mesh. It is necessary to do exactly this amount, otherwise the mesh will bend when tightened.
On one side, 3 beads must be woven between the teeth of the mesh. Pass the needle to the other end of the mesh. It is necessary to tighten the fishing line tightly so that the edges of the mesh come together to the locking bracelet.
Weave 1 larger bead between the teeth of the second edge of the mesh. Tighten the line. In the next circle, string 3 small beads between these large beads. In the next circle, 1 large one.
The fishing line comes out of a large bead. String 7 small, 1 large and again 7 small beads. Count out 2 large beads from the last circle and pass the fishing line through the third, until the end of the circle. There are 11 such loops in total.
In the next circle, string 3 small beads between two large beads. Pull off the fishing line. In each subsequent circle, collect fewer beads, pulling the weaving towards the center until a hole 3 - 4 mm in diameter remains. Secure the fishing line and cut it.
Thread 10 pieces of wire 30 cm long into a small button.
Then thread the free ends of the wire through the central hole of the bead mesh on the lid. Curl it into spirals using the refill of a regular ballpoint pen or any other stick. Place beads on the ends of the wire springs and secure the ends of the wires with loops. Straighten the spirals around the perimeter and the box is ready.