Materials
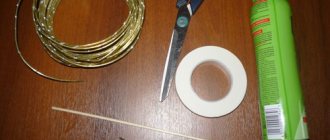
The materials you will need:
1. Fabric of different colors; 2. Pencil; 3. Glue stick; 4. Stationery knife; 5. Thick needle; 6. Styrofoam ball.
Manufacturing
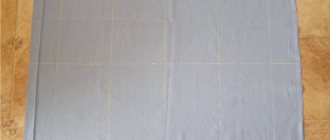
Initially, you need to find 2 opposite points on the ball; they will serve as “poles”. Next, you need to outline the equator, which should be between the “poles”. The equator must be divided into several equal parts, marking them with dots. Next, draw curved lines from the “poles” to the equator and the opposite “pole”.
Then you need to carefully cut the lines with a stationery knife. After this, cut the fabric into even pieces. Carefully coat the desired area on the ball with glue. Be careful, if you overdo it, the glue will show through the fabric.
Next, the fabric is simply glued onto the ball, and its excess is hidden in the slot between the elements. Do the same with the remaining segments.
When everything is pasted over, you need to punch a hole with a thick needle, it should pass from one “pole” to the other, through the entire ball. Through this hole you need to thread a ribbon on which the ball will hang.
Kimekomi eggs are made in the same way, with the exception of processing the foam ball at the initial stage, giving it the desired shape.
Do-it-yourself fly clatter photo
Results for the query: DIY clattering fly photo .
It's time for Mucha
-
go to the market with a clatter Templates for making
I would like to remind everyone of a fragment from the fairy tale “ The Fly
Tsokotukha
” (made
with my
own
hands The Fly
Tsokotukhaaaaa master class, craft.
Fly
-
clattering with your own hands
.
Crafts for the clicking
fly
.
Russian language lessons. Congratulations. Fly
—
the clicking sound with my own hands
I made the panel for almost three weeks, I wove a spider and thought that
Sew a fly
-
make a tinkling sound with your own hands
.
Fly
,
Tsokotukha
, poem, fairy tale, children's costume.
New Year's costume for girls Mukha
—
The clatter
is average in the service salon
ProstoDelkino.com - DIY
crafts
.
Fly
-
Tskotukha
- Goryukha. Glove puppet.
It's time for Mucha
-
go to the market with a clatter Templates for making
Fly
—
Tsokotukha
, Mosquito and Spider — GBDOU 111.
Fly
-
clattering with your own hands
.
fly
-
tskotuha
- Yulia Vladimirovna Shabai. Further.
Rysenkova Veronica. Fly
—
tinkling sound
(threads, polyethylene, fabrics
Handmade puppet theater. Fair of Masters - handmade Mukha
«Fly
—
Tsokotuha
” — complete the puzzle online.
Fly
—
Tsokotuha
.
… Toys_ by their own
_
hands
.
Fly
-
Tsokotukha
- tabletop theater PRINT
FLY
—
TSOKOTUHA
.
The
clattering fly
and its friends.
3.Fly
,
Fly
-
Cluttering
, Gilded belly!
Do-it
-yourself master class, crafts based on the fairy tales of KChukovsky.
Group Wet Lips Fly
Tskotukha
.
Carnival costumes – Mukha
—
Tsokotuha
.
To be honest, I really like her...(immodestly so, right?)2. Fly
4.Fly
The
fly walked across the field and found the money.
Fly
—
clattering
» Click to zoom.
... the cake I made for my manyuni’s birthday: “ Fly
Tso...
Fly
—
clatter
.
FLY
—
TSOKOTUHA
.
Theatrical tale The Fly
Tsokotukha
.
Carnival costume Mukha
—
Tsokotuha
(velor) — “Alice in Wonderland”
A couple more orders for the school performance “ Fly
Tsokotukha
” by Kate
...skirt, hat, cape/wings. Carnival costume Mukha
—
clatter
…
Fly
—
Tsokotuha
.
Fly
elephant - free pattern.
Fly
,
the fly
clicked
,
the fly
walked across the field,
the fly
found the money. This
Children's crafts – Fly
—
clatter
.
Old Kupavna, Mood, Musical Fly
Tsokotukha
- spider and
fly
, Ilyusha
The idea of tying it came spontaneously - I just liked the fly
on
Fly
-
Tsokotukha
, Yu. Dunaev. 03/05/14. Do you know who has gold plated
09/29/2019 Spider for “ Flies”
—
clattering
“(were wearing breeches))):puss in boots
Performance based on the fairy tale “ The Fly
Tsokotukha
”, in the older group. Photo.
Children's crafts – Fly
—
clatter
.
Masquerade costume for girls Mukha
—
clatter
in the service salon
Finger toys, fairy tale " fly
—
clatter
“, custom-made for
Sketch of the Spider's costume for the play " Fly"
-
Tsokotukha
", 2019. Production
The Tale of the Fly
“
All the children in our country know the tinkling sound Her parents
... a performance for children from 3 years old based on the fairy tales of K.I. Chukovsky " Fly
- Clack...
Fly
_
clatter
Quilling.
… Fly
,
Fly
-
Cluttering
, Gilded belly!...""...Suddenly it flies from somewhere
4.Fly
-
clatter
.
Suddenly a certain old spider flew into
our corner
You might also be interested in:
DIY spinner for pike photo (DIY spinner for pike)
DIY things for children photo (DIY things for children)
DIY metal flowers photo (DIY metal flowers)
Do-it-yourself perches for chickens photo (Do-it-yourself perches for chickens)
Do-it-yourself Ukrainian crafts photos (Do-it-yourself Ukrainian crafts)
Insulating the ceiling of a house with your own hands photo (Insulating the ceiling of a house with your own hands)
Materials
You will need:
1. Foam; 2. Vata; 3. Fabric; 4. Glue stick; 5. Thick needle; 6. Stationery knife; 7. Pencil.
Please note that in the case of making a toy using this technique, the thickness and shape of the foam is selected individually. In this case, thin foam plastic plates will be needed.
Photos of the most interesting crafts
Read here - Baba Yaga craft: ideas and a master class for making original crafts with your own hands (70 photos)
Did you like the article?
0
Manufacturing
There are a lot of photos of kimekomi toys on the Internet, but making one yourself is not so easy. Initially, you need to create a drawing so that you can return to it and check the forms.
In our case, a toy hare will be created. This is why foam plates will be needed. They will need to be further developed before being integrated into the overall design.
First you need to create a frame for the toy. For this purpose, a cone is created from foam plastic. You need to make several vertical cuts at the top to be able to narrow it down to a triangle shape. You can secure the edges in any convenient way; tape on the inside is recommended.
Note!
Kinusaiga technique - TOP-140 photos of the best ways to create crafts using the Kinusaiga technique with your own hands + instructions for beginners
- Do-it-yourself passe-partout - a master class with step-by-step do-it-yourself schemes. Making tips + photos of the best examples
Decoupage with napkins: TOP-150 photos of ways to decorate with napkins. Simple instructions for beginners at home
The inside of the figure is hollow; it must be filled with cotton wool or other soft filler. On the front part of the figure you need to apply markings with a pencil.
The contours of the hare's clothing will serve as markings. These are the outlines of the shirt and the buttons on it. Next, you need to cut the contours with a stationery knife, apply glue to individual places and apply fabric, tucking the excess into the slots.
The limbs of the soft toy will be made entirely of cotton wool, so they must immediately be sewn according to the image of the toy. In our case, the hare's front legs will be white, since he is wearing a white shirt.
As decoration, you can use a real children's butterfly, which you need to put on the hare. The head of the toy can be made using Japanese technology or be a completely sewn part.
It is recommended to use the kimekomi technique, this will add detail to the toy. The exception is the eyes; they need to be made of beads so that they have a three-dimensional shape.
Coffee crafts
Lovers of the aromatic drink enjoy creating various souvenirs from the beans. They fill the room with a pleasant smell. The most interesting crafts made from coffee can be found from experienced craftswomen. They create real masterpieces.
- Craft flag - how to make it with your own hands correctly? Master class on making for holidays and parades (105 photos)
- Eyes for crafts: how to make templates and a master class on making eyes from various materials (100 photos)
- Craft angel - 105 photo ideas on how to make your own angel quickly and easily from scrap materials
A coffee tree will fit harmoniously into the interior. For it you will need to prepare a foam ball, which is wrapped with threads. A hole is made in it for the tree trunk.
Then you can attach coffee beans to the ball. There should be two such layers.
After the workpiece has dried, a wooden stick is inserted into the hole. Then take a flower pot, pour plaster into it, and insert a ball on a stick. When the tree is dry, it can be decorated.
Manufacturing
First you need to connect two balls into one structure. To do this, you need to make a hole in both balls, which is relatively shallow, about half the size of the ball. Next, use a toothpick to assemble the structure, put balls on both ends, and coat them with glue in places where they come into contact with each other to give additional strength.
Next you need to apply markings. Depending on the original idea, the markings are applied in different ways, depending on the chosen ornament. The markings are applied with a pencil and then carefully cut with a stationery knife.
Please note, given the small size of the nesting doll and the large number of elements, it would be advisable not to cut out small details, but to draw them on the fabric at the final stage.
When all the markings have been cut, you need to cut out the required pieces from the fabric. Coat the figurine thoroughly and apply the cloth. Tuck excess fabric into the slits and, if necessary, trim the edges of the fabric.
If the ornament includes small elements, it is recommended to apply them with a gel pen on top of the fabric, such elements include eyes, etc. When the main part of the work is completed, you can evaluate the overall result and make adjustments if necessary. To prevent the fabric from coming out of the slots later, you need to securely fix it.
For this purpose, use a glue stick and a needle, or regular liquid glue. A small amount is applied to a needle, which is then applied to the joints of the fabrics. You need to coat it in such a way that the glue literally fills the joints. Transparent glue is best suited for these purposes.
If necessary, you can carefully lay decorative thread on top. This method is perfect as an instruction for beginners, a kind of kimekomi master class.
DIY insect craft
Adorable flies, dragonflies, beetles, snails and caterpillars made from dry leaves, acorns and sticks. Crafts made from natural materials for kindergarten are usually made in the autumn season, when it is easier to find a base for their manufacture.
However, some materials can be found both in spring and summer, or prepared in advance. Then such crafts will not lose their relevance throughout the year.
DIY insect craft
For example, they are well preserved in dried form:
- some berries - rowan, rose hip, hawthorn, barberry;
- maple seeds;
- physalis;
- branches of pine, spruce and other coniferous trees;
- chestnut;
- moss;
- acorns;
- boxes with castor bean fruits;
- different types of nuts;
- tree leaves, if dried under pressure;
- petals of large flowers;
- seeds of various plants and fruits.
They can be used to create bright and interesting images.
For example, from material prepared in advance you can get an original “Insect” craft, which every child can make with their own hands.
Natural materials for crafts
To fasten various parts together, it is convenient to use salt dough, plasticine or modeling clay.
By rolling several balls of salt dough and fixing them on a toothpick, we get the body of a small insect. While the dough has not hardened, we attach to it wings from maple seeds, eyes from rowan berries and thin legs from twigs or dry blades of grass. It turns out to be a charming fly.
Dragonfly made from natural materials
Fly made from dry leaves Insects made from natural materials
You can also use acorns, nuts, legume pods or sticks as bodies. The remaining parts are attached to them using plasticine or the same salt dough.
Acorn beetle
The number and location of wings can be changed at your own discretion. Beautiful wings are obtained from dried leaves or unfolded physalis boxes.
You can make a beautiful snail from a castor or chestnut box by sculpting a body out of plasticine and attaching rowan eyes to the head.
Beetles and snail
You can make more unusual insects - you just need to use your imagination.
Adorable insects
As a rule, children are involved in the creative process with interest and create the most unexpected images from the materials that are available to them. And in their work, they learn to carefully handle fragile parts, fastening them together, remember the structural features and appearance of insects, and improve their ability to invent new characters.
Paintings
Pictures are rarely embroidered using the kimekomi technique. However, this is one of the easiest ways to learn technique and gain basic skills.
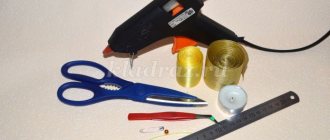
The materials you will need:
1. Foam sheet; 2. Pencil; 3. Stationery knife; 4. Glue stick; 5. Fabric; 6. Scissors.
Manufacturing
Any painting in minimalism is taken as a basis; this allows you not to invent it yourself, just draw the contours. As a rule, nature, waterfalls and rocks are embroidered. The number of details depends on experience; in the initial stages it is recommended to take the lightest possible paintings.
A sheet of foam plastic should be laid out on any flat surface, and all the contours of the picture taken as a basis should be carefully redrawn onto it. If you have enough skills and experience in drawing, you can come up with an image to apply yourself.
When all the details have been redrawn, you need to make neat cuts along all the lines. The cuts should be made approximately 1/3 of the total thickness of the foam sheet.
Next, depending on the part, you need to cut out pieces, squares, triangles, etc. from fabrics of appropriate sizes with a small allowance. An allowance in size is necessary in order to be able to tuck the fabric into pre-prepared slits.
A thin layer of glue stick is applied to the foam. Please note that in the case of a painting, the glue must be applied in an extremely thin layer, since it has no bends.
Next, a corresponding piece of fabric is applied to the lubricated area and carefully smoothed. For this purpose, you can use a regular pencil, ironing the areas to avoid unevenness and swollen areas.
When everything is ironed, the edges of the fabric are tucked into the slits, and the excess is trimmed with scissors. Do the same with all the remaining sections. In this way, collect the whole picture one by one.
In some places, for example, on a waterfall, you can imitate shadow. For this purpose, black or dark blue thread is suitable, depending on the depth of the shadow.
Please note that to do this, at the initial stage you need to lay down the appropriate markings, so that you will eventually be able to add shadows in this way.
Finishing touches
To highlight individual elements, such as mountain slopes, you can also use thread. It is laid along the entire perimeter of the object, highlighting it.
Glue is placed in the slot using a needle, and a thread is placed on top of it. After the work is ready, you need to leave it to dry for 25-30 minutes.
Original magnets as a gift
An old CD is given a second life. It is used to make a refrigerator magnet. It is given to friends or loved ones. Before work, the disk is prepared. Its surface is carefully leveled. This allows you to get a quality product. White paint is used for the primer.
The most interesting crafts are made with your own hands from simple things that are no longer used for their intended purpose. This option is an old CD.
You need to cover the holes in it with cardboard elements. White paint is also applied to the second side. To decorate the magnet, a postcard with a beautiful image is used.
A picture is pasted onto the disk. There should be no folds on the surface. After drying, it is varnished. There is a magnet attached to the back of the CD.
Application
Manufactured toys and decorative items will definitely find their place in the house. They will be a collective image of their owner, while reflecting his creativity and hard work.
In addition, such crafts can be an excellent gift for any holiday. To familiarize yourself with all the complexities of the technique, it is recommended to watch the training video.