Warm mittens for boys, knitted and crocheted
Long before winter, mothers need to think about warm children's clothing.
You can knit such a necessary thing as mittens yourself. Choose warm and non-spiking yarn of the desired color. It is better to use half-woolen threads with the addition of synthetics for knitting threads. Wool will provide warmth, and synthetics will prevent the mittens from rolling and shrinking. It is necessary that the yarn is dyed firmly and does not fade when washed. To check its quality, we recommend knitting a small sample, washing and ironing. Then, using the sample, it is easy to calculate the number of loops and the size of the product. Children love mittens with embroidery or knitted in the shape of their favorite cartoon characters. Having discussed with her son what kind of mittens he wants, the mother will be able to knit mittens to his order, warm and beautiful. For the first time, a knitting pattern and recommendations for knitting need to be found on the Internet .
We suggest knitting mittens in the shape of minions from the cartoon “Despicable Me”.
Contents of the material
Mittens for boys
What you need for knitting
:
- Yarn. For children's things, it is better to take Pekhorka threads, 225 m in 50 g. You need to knit in two threads. For minions you need blue and yellow, a little thread of black, white, gray and the remains of thread of any color.
- Set of double needles No. 3.5.
- Crochet hook.
- Pin for removing loops.
To knit double mittens for a three-year-old boy, cast on 36 stitches of any color on knitting needles using waste thread; this thread will be removed during the knitting process. We distribute 9 loops on 4 knitting needles, close the circle and knit the first row with waste thread.
We attach a blue thread and knit the cuff of the mitten with a 2x2 elastic band, 2 knit stitches - 2 purl stitches 20 rows, 5 cm. We continue the main part of the mitten with a blue thread in stitch stitch to the base of the thumb, 4 cm, 15 rows.
Switch to yellow and continue knitting in stockinette stitch. Now we begin to knit the thumb on the mitten of the right hand. It is knitted on the fourth needle. Its width is 2 loops less than the number of loops on one knitting needle - 7 loops. There are two ways to delay knitting the thumb - knit 7 stitches with waste yarn or slip them on a pin. On the fourth knitting needle we knit 1 yellow knit loop, 7 loops with waste thread and again one yellow knit loop, then knit with yellow threads in a circle. Or remove 7 loops onto a pin and continue knitting with yellow thread. In the next row, instead of the removed loops, we cast on 7 new ones. We knit 12 rows in a circle with yellow thread, then 4 rows with black thread. Again use yellow thread for 8 rows.
Now try the knitted part on your child’s arm or check it using your own measurements. Having knitted to the beginning of the little finger, we begin to decrease. To make the minion’s head round, we make them this way: we knit the entire row with knit stitches, 2 loops together. The next three rows are in stockinette stitch without decreases. Then a row of 2 loops together, then a row without decreases. Break the thread, leaving a large tip. Using a crochet hook, pull this thread through all the remaining loops, tighten them, secure the thread and remove the tip.
Let's go back to knitting the thumb, it's like a minion's handle. We remove the loops from the pin, cast on the loops from the top row onto the knitting needles, distribute them onto 4 knitting needles and knit 10 rows in yellow, then 5 rows in black, like a minion’s glove, then close. 16 row 2 loops together, 17 all knit, then again 2 loops together. Pull the thread through the remaining loops with a crochet hook and pull it off, strengthen the thread, and remove the tip.
We also recommend reading:
The mitten is ready. Let's return to the cuff, unravel the waste thread, immediately put the loops on the knitting needle, distributing them over four knitting needles. We knit the cuff in blue in the opposite direction. We knit the main part as described in one yellow color. Make sure that the thumb is tied in the correct place opposite the already tied one.
We knit the second mitten according to the pattern of the first, only the thumb is knitted on the opposite side.
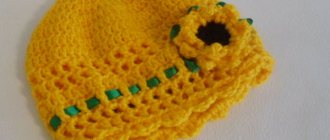
Then we design the minion’s face. We embroider the eyes. They can be knitted and sewn. We embroider the mouth with black thread to make it smile. Using black threads and large stitches we embroider the minion's forelock.
Cute warm mittens are ready. The boy will be pleased. These mittens can be knitted according to other measurements for a child under 10 years old. To make it easier to calculate the loops and sizes, trace the child’s hand on paper with a pencil, select yarn, knit a sample, wash, iron and start knitting mittens of any size. Girls can knit mittens in the shape of funny animals: cats, foxes. Teenage boys love discreet colors, knitted without embroidery or decoration, so that they look like adult knitted items, and not like children's ones.
Crochet mittens
It doesn’t matter whether the mittens are crocheted or knitted , their quality does not change depending on the manufacturing method. The appearance, how beautiful and comfortable they are, depends on the skill of the needlewoman. Some people like to crochet because this method is faster than knitting. It is good to crochet not winter mittens, but lighter ones, for spring and winter. Real craftswomen crochet very elegant gloves for weekend suits and wedding dresses.
Crochet mittens for newborns
Babies need baby gloves from the moment they are born . Babies up to one year old are knitted with them not only for warmth, but also to prevent them from scratching their cheeks, which is why they are called scratchy mittens. A distinctive feature of children's scratches is that they are knitted without a thumb .
Such scratches are more convenient for baby’s hands and their knitting pattern is very simple. For knitting you need :
- Yarn containing cotton. For boys blue and white, for girls pink and white.
- Hook 1.9.
- Satin ribbon.
We begin work by knitting an amigurumi ring from 6 S.B.N. Tighten tightly.
1P P.R.*6
2P(S.B.N., P.R.)*6
3P(2S.B.N., P.R.)*6
We finish knitting with blue and move on to white: 9P. S.B.N.
Let's go back to blue:
1R.S.B.N. Next R.2P.P., S.S.N., V.P., S.B.N. through 1P.* to the end of the row.
Closing S.P.
We tie the mitten beautifully with blue lace:
in 2P.5S.S.N., S.B.N., in 2P.5S.S.N. to the end.
We thread a narrow satin ribbon through the resulting holes and tie a beautiful bow. Let's try it on the handle. If all is well, knit a second mitten according to this description. We put it on the baby's arms.
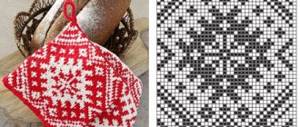
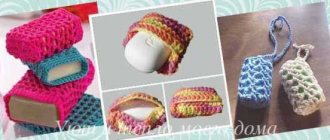
Mitten-washcloth
You can crochet a washcloth mitten .
For it you need to take polypropylene threads, white and pink. The knitting pattern is elementary. We knit with a simple pattern: 1R. S.B.N., 2R. V.P. (elongated loops). We cast on 56 loops in pink and knit to the thumb, with single crochets we knit a ring for the thumb and knit to the little finger, change the color.
We knit white until the end of the washcloth. We knit the thumb in the same color.
We tie the bottom of the washcloth with white, sew or knit a loop to the knitted washcloth for hanging.
Such washcloths can be knitted for all family members according to the size of handles of different colors, so as not to be confused.
Usually, for the winter, a schoolchild son needs more than one pair of mittens, because they will tear, get wet, or get dirty. Mom will knit a sufficient amount; she has already mastered the knitting pattern.
1igolka.com
Crochet mittens - patterns and descriptions of knitting mittens
It is always more pleasant to wear things that you have made yourself. Or receive such things as a gift. Especially if they are mittens . They will keep you warm and cozy in winter, they warm your hands perfectly, and you can get so many emotions when creating such an accessory! Today we invite you to knit beautiful mittens from wool yarn to save you from the winter cold.
Crochet mittens – a simple master class for beginners
We use two colors: white and gray , 3.5 mm hook.
Designations:
- V.P. - air loop
- ST. – column
- S.S.N. – double crochet
- S.B.N. – single crochet
- R.L.S.S.N. – embossed double crochet
- R.I.S.S.N. – embossed purl double crochet
In gray we make a ring from 1 P.
- 1 R.: 3 V.P. + 11 S.S.N. into a ring, close with S.S. white shade (introduce a hook in 3 V.P.).
- 2 R.: 2 V.P., in the same P.R.L.S.S.N. (embossed double crochet), (S.S.N. in S.S.N. of the previous R. and R.L.S.S.N., under the same S.S.N. of the previous R.) = to the end R., S.S. gray.
- 3 R.: 2 V.P., repeat all the steps from 2 R. Cover with white.
- 4 R.: 2 V.P., elastic band: R.L.S.S.N. and R.I.S.S.N., t.o. to the next P.R.L.S.S.N, to the next. P. – R.I.S.S.N., in gray S.S.
The rest of the R. - without P.R. like 4 R., alternate R.S.S.N., 2 V.P., R.L.S.S.N., R.L.S.S.N., R.I.S.N. N.N., S.S. white.
We continue knitting until the length of the thumb. Below is a diagram according to which we will knit the hole for the thumb.
2 V.P., R.L.S.S.N., S.B.N., 11 V.P., in 12 ST. – S.B.N., further according to the drawing, S.S. We continue to knit the “body” of the mitten in a white shade: alternate R.ST. according to the drawing, in S.B.N. prev R. – R.I.S.S.N., in each P.S.S.N. In S.B.N. prev R. – R.I.S.S.N., R.L.S.S.N., S.S.
We continue working as 4 R., alternating R.L. and R.I.S.S.N. Make the desired length of the mitten. The latest R. - with the “crawfish step” pattern.
To beautifully knit a “finger”: in a gray shade 2 V.P., 2 unknitted S.S.N. (We do not knit the stitch on the hook), carefully insert it with the hook to avoid holes .
3 P. together, 11 R.ST., change the thread to white - 11 R.ST., 2 V.P., R.ST. - according to the drawing. All traces. R. – similar to 4 R.
We knit to the required length, the last R. with U.B.: 2 V.P., 3 unknitted R.ST., 2 P. for which do not knit. The remaining 4 P. - one P. 3 untied R.ST. knitting, S.S. We finish the canvas. Sew up using a needle. Our mitten is ready!
Children's mittens crochet patterns and descriptions for 3 years
Beautiful mittens with cats made of wool and acrylic yarn (50/50). We also took some thread for the antennae, nose and a couple of beads for the eyes.
Description of work:
34 V.P. into the ring . From 1 to 13 R.: S.B.N. directly. 14 R.: 14 S.B.N., make a hole for the finger: 7 V.P., skip 7 P., continue knitting. From 15 to 25 R.: S.B.N. 26 and 27 R.: U.B. 2 P. From 28 to 34 R.: U.B. 2 P. each, pull all the P. that remain together. Next, fasten the thread from the finger hole and knit S.B.N. to the middle of the nail plate. Pull all P. together. Tie the bottom edge of the future mitten with 2 R.S.B.N. white tint.
Making ears: 18 V.P. in a ring, 5 R. with uniform U.B. We knit until the shape of a triangle is obtained. For the bow 15 V.P. pink color. 2 R. with P.R. 6 S.B.N. at every turn. 3 V.P. in the ring = 10 S.B.N. Sew the circle, which is smaller in diameter, onto the larger one, you can add a bead in the middle. To give the glove a finished look, you need to embroider the muzzle. Your child will be delighted!!!!
Topic: How to crochet socks with your own hands
We knit for children - mittens for children
Woolen mittens made of white and lilac colors are perfect for your child. If you replace lilac with blue, you get excellent crochet mittens for boys. Below is a diagram in the photo. If you find it difficult to read, then follow our description.
- 1 R.: 23 V.P.
- 2 R.: 3 V.P.P., S.S.N., in the last. P. 7 S.S.N., S.S.N. until the end of R.
- 3 R.: V.P.P., S.B.N. 2 S.B.N.*6 in ST. previous R.
- 4 R.: like 2 R., for rounding in ST., close to the top, 2 S.S.N.*6.
- 5 R.: as 3 R. 3 S.B.N. * 6 for rounding in ST. prev R. through 1 ST.
- 6 R.: like 4 R.
- 7 R.: like 5.
Knit two such parts so that you can knit them together afterwards. Next we move on to the part with the finger : 1 R.: 2 V.P., 2 S.B.N. 2 R.: turning over, knit 5 S.B.N. 3 R.: l. side – 7 S.B.N. 4 R.: 9 S.B.N., 5 R.: 12 S.B.N., join the mitten. 6 R.: 12 S.B.N. 7 R.: 15 S.B.N. into the ring. 8 – 12 R.: 15 S.B.N. 13 R.: 12 S.B.N. 14 R.: 6 S.B.N., all P. that remain - pull off.
Assembling: tie the two halves around the perimeter in lilac, tie a finger. Bottom of the mitten: S.B.N., according to A/H 2. Further along A/H 3. You can embroider a beautiful snowflake - the child will be delighted with such a pattern. A detailed master class will quickly teach you this technique, which you will soon master to perfection. Thus, you can knit mittens for a girl and for a boy.
Mittens for boys crocheted and knitted with diagrams and descriptions
Winter is the time when you want to keep warm, and first of all it should be your hands. After all, it is the hands and face that are most often the unprotected parts of the body. Therefore, in order to stay warm, you need to have gloves or mittens. I always want to have something interesting at hand for my child, so mothers often resort to knitting such clothes for their hands themselves. You can knit mittens for a boy with your own hands, in which case the baby will definitely have the most original new thing that no one else will have. After all, when knitting, you can make different patterns, use more than one color, even make your favorite cartoon character, which the child will really like.
Of course, mittens are not as comfortable as gloves, but they also provide good warmth. But it is mittens that are the very attribute that gives that very winter mood. Therefore, in order for such a thing to be in a child’s wardrobe, it is not necessary to go shopping in search of good, natural mittens, because you can knit them yourself. For those who are trying their hand at knitting for the first time, there is no need to hope that they will immediately create a masterpiece. But over time, you will be able to knit as a gift. In terms of time, you don’t need to suffer for a long time, just one or two evenings, and the mittens are ready. The main thing is to be patient and have a great desire to create.
Funny minions for hands
Nowadays the Minions cartoon is very popular, and many children love things that depict the main characters. In stores, such things are expensive, but to please your child, you can do them yourself. We will knit these mittens with knitting needles. The master class has detailed diagrams and descriptions, and if you follow it step by step, you can be sure that everything will work out. This model is knitted for a child, a boy 2-3 years old.
What you need to prepare:
- threads of yellow, blue and white, black, it is best to choose threads that contain wool, but not 100%, so that the baby feels comfortable in them. This lesson uses Pekhorka yarn “Children's whim” 225 m per 50 g;
- stocking needles, size 3.5;
- hook or special needle for knitting.
To start knitting, we will use a waste thread for the first row; the thread can be of any color, since it will be removed later. Now cast on 36 buttonholes on two knitting needles. Then we remove the knitting needle and place all the buttonholes evenly on 4 knitting needles, you should end up with 9 buttonholes on each knitting needle. Alternately transfer 9 buttonholes to each knitting needle. And to connect the resulting row, we knit the first buttonhole.
Then we will knit the next row again with waste thread. And in the next row we will start knitting with the main color. Let's start knitting the cuff.
Note! It is best to knit with a viscous elastic band, which will help keep the mitten on the baby’s hand.
In our case, we will knit two purl buttonholes and two knit buttonholes.
The cuff will be 5 cm high, and this will be 20 buttonholes. Now we begin to knit the main part of our product. It is knitted with blue thread and using knit stitches. In this way we knit up to the thumb, about 4 cm or 15 rows. Next, we replace the blue thread with a yellow one; to do this, you just need to break the blue thread. Using a yellow thread, we continue knitting with facial buttonholes. So we must knit only on two knitting needles, but on the third we mark the place where the finger will be - this will be our right mitten. And for the left hand we will mark the finger on the knitting needle number four. In children's mittens, the width of the finger is calculated to be 2 buttonholes less than what is on the knitting needle - this will be 7 buttonholes.
The first buttonhole should be knitted with a yellow thread. And in order to mark the place of the finger, we take a thread of a different color and knit 7 buttonholes for our finger.
Afterwards, we transfer these loops to the left knitting needle - each buttonhole in turn, very carefully. And then there should be one yellow buttonhole left on the working needle. We take the yellow thread and knit it with the front buttonholes above the threads that we used to mark the place of the finger. Now we knit the last yellow buttonhole on this knitting needle - the ninth, and we knit it this way around the entire circle. So we knit 12 rows with yellow thread.
Afterwards, we need to take a black thread and knit 4 rows with it. Then we go back to the yellow thread and knit 8 rows. If possible, you should try this mitten on your baby. We knit a yellow thread to the tip of the little finger and begin to decrease. In order to form the minion's head, we must decrease the buttonholes evenly. To do this, you need to knit two buttonholes together in one row. Afterwards, we knit three rows in regular stitch without decreasing. Then again, two buttonholes together the whole row, and then just stockinette stitch.
Now we break the thread and use a hook to pull it through all the buttonholes. We need to pull the thread and thereby close the mitten. We begin to knit the finger, to do this we pull out the thread with which we marked the place, and immediately insert the knitting needles into the loops. Afterwards, distribute all the loops between four knitting needles, and add broaches to them so that holes do not form.
The finger is the hand of our hero. Therefore, it is necessary to knit 10 rows with a yellow thread, and then with a black thread, and so on until the 15th row. When the length of the finger reaches the middle of the nail, we begin to decrease it. Now in the next row, which is 16, we must knit all the buttonholes in two. We simply knit the next row with knit stitches, and the 18th row is again with decreases. Next, we collect all the loops using a hook and pull the thread through all the loops and tighten.
And now our mitten is almost ready, because we have a double one. Now you need to knit the second part. Therefore, we return to the first typed row. We remove the thread and put the blue buttonholes on the knitting needles. In the same way we distribute it onto 4 knitting needles. We knit the second part in the other direction - the opposite. The first row must be purled to create a fold. Now we knit, as in the first part, 20 rows of rib stitch. And we knit the main part of the mitten with yellow thread. Attention, the finger is knitted opposite the other finger!
All that remains is to design the hero’s face. To do this, embroider the jackdaws using a stem stitch. Anyone who knows how to crochet can also knit using it. We embroider the mouth with black threads and a needle. And we will make the hair using large stitches. We put one mitten into another, and our product is ready!
Video on the topic of the article
This article provides a video selection with which you can learn how to knit a mitten for a boy.
Similar articles:
knittochka.ru
How to crochet mittens for beginners step by step
warm knitted mittens for babies, for newborns, for beginners and for experienced craftswomen only in our knitting section. It is very simple and easy to learn how to knit, based on clear patterns, detailed descriptions and video lessons.
Crochet mittens for beginners
The most difficult thing in this matter is to understand the correct sequence of actions that need to be performed. This will work out much better if you use thicker yarn for the first time. We chose 120 m/100 grams, the corresponding hook is number 6.
So let's get started:
We assemble a chain of V.P., which in length should correspond to the distance from the top of the longest phalanx of the fingers to the wrist. This chain is tied with S.S.N. (for round corner + 5 P. at the top).
Turn the canvas and continue S.B.N. Then turn it over again and S.S.N. Here for a round corner 2 S.T. in 1 P*3. It is better to do it through 11 S.T. So our half of the mitten is ready. We need two of these. We connect the resulting parts together and strap S.B.N. Important!!!! Don't forget the finger hole. We have it in sizes 5 P.
For the cuff: 1 R. S.B.N., 2 R.: S.S.N., 3 R.: curvy ST., 4 R.: “crawfish step”. Tie the finger slot with S.B.N. In ext. side: W.B. 1 P., int.: P.R. And so in every new R.
So, after you have reached the desired length, fasten and cut the thread. As shown in the photo below: you can sew a long chain of V.P. so that the mittens do not get lost. This is especially good for young children.
Another simple option for milky mittens with embroidered flowers .
This is an optional add-on and can be skipped. So, let's start with the elastic band, where its length is its height. First, let's dial a chain of V.P. In each R. we first cast on V.P.P., knit behind the back wall. The length of the elastic is the circumference of your wrist. When it is ready we sew it into a ring .
We continue knitting all the way to the thumb. If the arm is much thicker, it is necessary to do P.R. symmetrically. For the finger hole, make 7 v.p., skip 7 st. and continue K.R.
We knit before the beginning of the nails, then we stop and proceed to U.B. in each 3 P., then in each 2, pull everything together. We tie the finger in a circle S.B.N. to the nail, after which we will again proceed to U.B. in every 2 P., next. R. - in all P. We do the embroidery according to the drawing in the photo below.
How to crochet mittens for beginners video
How to make crochet baby mittens video tutorial:
On topic: Knitting a rug with knitting needles is creative and not difficult for beginners
Crochet mittens for newborns
Such mittens are needed not just to save you from the cold, but to help your baby sleep peacefully and not touch his fingers in his sleep. We chose thin cotton yarn, a 1.9 hook and a satin ribbon.
Description of work:
- Amigurumi ring made of 6 S.B.N. tighten it as tight as possible.
- 1 R.: P.R.*6
- 2 R.: (S.B.N., P.R.)*6
- 3 R.: (2 S.B.N., P.R.)*6
This is where we finish knitting with a pink tint. Let's move on to white: 9 R.S.B.N. We change the thread again: 1 R.S.B.N. Into the ice. R.: 2 P.P., S.S.N., V.P., S.B.N. after 1 P. * to the end of R. We close this whole case S.P.
We beautifully complete the perimeter of the future mitten: in 2 P. 5 S.S.N., S.B.N., in 2 P. 5 S.S.N. - to end. Now you will need a satin ribbon, which you need to thread through the resulting holes and tighten like a bag. Tie a nice bow and you're done!!!
Crochet mittens for men
Beautiful men's mittens are a great gift for your husband, brother or boyfriend. We took wool yarn, because... This is the best material for winter cold, which will provide your hands with good protection from the cold.
A man's hand will need about 175 grams of gray (primary color) and several grams of black (or any other of your choice). We will do the work with a crochet hook that corresponds to the thickness of the selected thread.
knitting them (from the first 34 VPs). The ring should be of such a size that it fits easily on the hand and can be removed just as easily. Thus, you need to calculate the required number of V.P. 1 R.: 34 S.S.N. Second R. and all subsequent ones: 1 S.S.N. convex, 1 S.S.N. concave/convex. Knit this way up to the big toe. After this step, turn the fabric over and knit in the opposite direction. This is done to create a smooth and beautiful hole for the finger. Then we continue knitting again as before. When your product reaches such a size that it reaches the wrist: 2 R.S.B.N. Thumb on the mitten: tie the hole for it along the edge 1 R.S.S.N. Last R.: 12 S.S.N, 6 S.S.N. As you have already noticed, we got beautiful mittens. You can leave it like this, or you can tie the top. For this, 1 R.: 6 S.B.N., 12, 18, 24.3o. The following 36 S.S.N. from 2 to 6 R. From 7 to 11: 36 S.S.N. in each R. The top can be sewn on or attached with a button.
How to crochet a washcloth mitten with elongated loops
So, we took polypropylene threads in pink and white colors and a hook of the appropriate size. A simple pattern will alternate here: 1 R.: S.B.N., 2 R.: V.P. (elongated loops).
We collect a chain of 56 P. in a ring.
2 R.S.B.N., one row V.P., row S.B.N., R.V.P. - up to the thumb. Making a hole: skip 12 P., 12 V.P.
We continue knitting to the top edge of the little finger. Let's switch to white . Let's start U.B. until all P. are closed. Thumb – 1 R. S.B.N., 2 R.: V.P. Tie along the bottom edge of the S.B.N., not forgetting to make a loop for hanging, using white
color.
https://mysekret.ru/vyazanie/varezhki-kryuchkom-sxe...ezhki-dlya-nachinayushhix.html
Mittens for boys: crocheted and knitted
Everyone knows how quickly mittens get dirty and wet while walking, and you need to urgently change them for a clean, dry pair. This is where the thought comes - should I take up knitting? Having mastered this simple craft, you can impose as many pairs on your baby as you need and give a gift to relatives and friends. Knitting mittens for a boy or a girl – technically there is no difference. You just need to take care of the appropriate color scheme of the yarn. But even here you can show your imagination. After all, gone are the days when brown and gray, or at least dark blue, were considered “boyish” colors. Nowadays, children are dressed in bright and interesting ways, and mittens and hats are often made in the shape of animals or popular cartoon or fairy tale characters.
Learning how to knit mittens is not difficult, because numerous patterns and descriptions of this process are now available. There are methods of crocheting and knitting. You can choose the technique with which you are at least somewhat familiar.
Knitting mittens
1). Using the table, based on the measurements, decide on the number of loops.
Pick them up and distribute them equally across four knitting needles. For example, 48=4*12 stitches on each needle. And with the fifth one, start knitting in the round. Usually, a mitten starts with a rib knit cuff - this is an alternation of knit and purl stitches. Let it be 2*2. Knit 5 cm in this way. If the child’s wrist is narrow, then you can cast on 4-8 loops less than needed and add them evenly to each knitting needle when moving to the main part of the mitten. Then the cuff will fit the handle more tightly.
2). We get 12+1=13 loops on each needle. Next, knit only with knit stitches (knit stitch) to the place where the thumb begins. Try it on your baby or check the diagram. There is no point in giving a description of the pattern that can be used to decorate a mitten. Choose the one you like. For example, a braid along the entire length of the product. The main thing to consider is that if you knit with a pattern, then mark the middle of the palm and the back side and carefully control the position during the knitting process.
3). It is necessary to leave loops for the thumb. To do this, take a small piece of other yarn and perform this operation. From the palm side on the second knitting needle, knit 4 loops, and then 7 loops with an additional thread. And then again all the loops with the main thread.
4). Knit again in stockinette stitch until the edge of the mitten is level with the tip of the little finger, and begin to “lower” the loops. That is, you make a corner - the edge of the mitten. You can make it smooth, and in this case - a house, a corner. Knit a row, taking 2 loops together. With each row there will be fewer loops and when there are 4 of them, pull the thread through them and tighten it. The left mitten is knitted similarly, but mirrored.
5). To make a thumb, simply pull out the extra thread and gather the stitches onto 2 or 4 needles (whichever is more convenient for you). To avoid holes on the sides, gather these places into 2-3 additional loops. In addition to our description, this can be seen better in the diagram.
Knit the length of the finger with facial loops and close as written above.
Crochet mittens
Often when choosing a method of knitting mittens for a boy, they abandon the crochet hook in favor of knitting needles precisely because even dense crochet knitting ends up looking more openwork and decorative. We invite you to make sure that these melange gray mittens are quite suitable for a boy.
This technique is not difficult with some experience. Usually, each pattern is accompanied by diagrams and descriptions, but in reality you can get by with just a diagram, having understood the symbols.
Also try knitting a little in the basic ways - chain stitch, double crochet, raised (convex) double crochet, raised purl (concave) double crochet, connecting stitch
The product is knitted in the round.
“Melange” is achieved by knitting with yarn of two colors across a row.
1). Start with gray yarn and a ring of 3 ch. tie with double crochets, and the next row with white yarn and a raised double crochet.
3rd row – gray also with embossed front stitch. s/n, and starting from the 4th row there is a so-called “elastic band” - alternating knit and purl stitches (double crochet). By this stage you should have 48 loops and then you need to knit exactly this number of loops, without increasing them, until the size of the product reaches the beginning of the thumb.
2). Knit the hole for the finger according to the pattern.
As in the photo.
Usually they are given for the right mitten, and the left one is knitted symmetrically.
3). So knit until the end of the product and close the loops in any way you like, for example, “crawfish step”.
4). For the thumb, start with gray thread from the inner side of the finger. 2 ch, 2 loose sts. s/n and knit three loops together and then 11 relief. Art. and 3 more unknitted sts. with a common top and another 11 loops relief st.
The loops are prepared in this way so that there are no holes at the beginning of the thumb.
Draw the next row with white thread, an elastic band and according to the general pattern of the mittens, and so on the entire length of the finger. The last row, knit all the loops in 2. Next, 3 under-knit. R. st., 4 loops together, etc. At the end, secure by threading a piece of the same yarn into a needle.
Video on the topic
You can knit mittens for a boy in a variety of patterns using a selection of videos
sdelala-sama.ru
crochet baby mittens
Hi all! I haven’t written in the BB for a long time; with the birth of my son, there was catastrophically little time for everything. I decided to take a few minutes now to share my experience in collecting things and a trousseau for a newborn. For a long time I was choosing a community where to register this, and I decided here, because mostly expectant mothers communicate and read here, and I hope this post will be useful to them and they will apply some things from their own experience. If it is not needed here, I ask the moderators to move it to the Baby’s Dowry section.
Why am I writing this?
1. In order to admit once again that I bought SOOOOO much unnecessary stuff and spent a lot of money in vain, a huge part of it was NOT useful to me, and accordingly, I want to warn someone else from repeating my financial mistakes (and we, expectant mothers , we want endless shopping for our kids, this makes us calmer and we are so attuned to the mood of motherhood, we are afraid of missing out on something, we want the best for them).
2. Perhaps this post will be useful to girls who, due to financial reasons, have certain difficulties and are afraid of the financial issue of having a baby; I would like to reassure them a little. In my experience, in fact, in the first months there are not many necessary things needed in caring for a child. The post will also describe points on which you can save and protect yourself from completely useless expenses.
So, if you are still reading this, the rest is under the cut..... 1. Immediately about cosmetics for a newborn. I purchased a very large amount before giving birth. The item “cosmetics” was listed as important, I studied a lot of information. I bought a lot of quality products. But, much was not needed. The baby was born allergic, the folds were wet, the bottom was red, and in the process of caring for him, I realized that I don’t use many jars at all! I didn’t find any use for wet wipes, powder, diaper cream (within a few hours, at the next diaper change, I found severe weeping diaper rash), or skin cream...
What did I use and actually use?
-Tsindol (the best mash for weeping diaper rash, which costs mere pennies and is 100% effective, turned our weeping diaper rash into healthy folds in a day)
-Bepanten is our lifesaver. It is with this that we save ourselves from a red bottom, from red flaky cheeks, we use it to prevent crusts behind the ears and periodically apply it to the armpits to prevent diaper rash.
- Emolium. Emulsion for bathing newborn babies with sensitive skin (I have not met babies NOT with sensitive skin. Conclusion - it is universal)
— Oval cotton pads. They are slightly larger in size than regular ones, which is very convenient for quickly washing/washing babies. Standard wheels are not convenient.
— Mustella body and scalp wash. Very profitable packaging. The product ran out by 7 months, using it every day has never disappointed. Convenient dispenser. DO NOT buy anything in tubes, it’s completely inconvenient, plus detergent constantly leaks out of them + it’s inconvenient to use on your own (if no one helps you and you do all the washing procedures yourself)
— Zelenka, hydrogen peroxide, manganese (no comments. Must have.)
— Baneocin powder. Thing! It's worth buying!!
— Nozzle ejector Otrivin-baby. I bought two others - complete crap. about 800 rubles down the drain. Buy the right one right away.
Below is a photo of the original purchase. Some were given to other pregnant friends. It was NOT useful to me! Instead of wasting unnecessary expenses, I had to buy something that was really needed later. Conclusion: don’t rush into purchasing cosmetics and first aid kits!
-this is only a small part.
2. I didn’t need my mobile until 3 months. The child simply did not see him. He generally spent little time in the crib for physiological reasons (and the mobile was permanently fixed to the crib). My son was not feeling well and was often either in my arms or in an improvised cradle, which I will talk about a little later in the subsection “Crib for a baby.” I bought a used mobile phone on Avito for 1500 (the price in the iphone store is about 3700). By the way, after 5 months, when my son began to catch toys and attract them to himself, I instantly sold the mobile phone on the same Avito, for the same amount.
3. Continuing the theme of toys. Up to three months, they give an atmosphere in the children's space.....to adults, but are not very interesting or important for the child. The child doesn’t care if it’s Tinilove or something homemade. You can save a lot of money at this point. Don't rush to buy toys and teethers. Buy this when the time comes and you know exactly what you need. What was your son interested in??? To develop his vision, we printed out ordinary black and white pictures and hung them where his gaze fell. From time to time he peered at these figures, and later began to smile at them. I believe this replaced a mobile phone for us in the first months of our son’s life. That's what I'm talking about.
When my son grew up and it was time for his first toy, I realized that he couldn’t pick up any of the ones I bought, they were too big for his palm. This period coincided with the maturity of the salivary glands, drool flowed like a river, and I offered him a tied “Kinder Surprise” egg with a handle-tail. They are machine washable and can be put in your mouth. Hygienic and practical, there are pea seeds inside, it makes noise and attracts attention. I glued the two halves of the egg together using sealant to prevent water from getting inside when washing. I tied it on top with cotton threads. My son grabbed this ponytail and felt comfortable. The toy is light weight! He was afraid and rejoiced, the first smiles came from the process of action. I think you have already estimated the cost of such a rattle. There can be many such toys and different colors and you can easily make them yourself... we have hares and cats and mice... Purchased toys for development, price about 300 rubles and more. I think the scale of savings is clear.
Also, at the moment, (we are 7 months old) he is most attracted to rustling transparent bags containing: cotton wool, cotton pads, other colored bags or candy wrappers. Containers with some kind of garbage (large, so that there is no risk of swallowing). Cheap, healthy and different every time. Voila.
-frog in a box))) It’s not that he’s not interested in expensive toys. No. He is interested, but these also suit him quite well and there are functions for development and attention. This means that such economical options can be used.
4. Bedding. A very expensive item. I was tormented by the question of how to cover the child?.. I bought a lot of blankets and rugs, beautiful and cute, but completely impractical. Firstly, the child slept little in the crib and you cannot cover him with large blankets in a cradle or stroller or while holding the baby in your arms. They make him sweat...and you, because they constantly slide off, stand up like a stake, and don't drape well. The child constantly dived under these bulky blankets, I could not sleep normally. It's inconvenient for anyone! Don't waste your money. The best blanket and blanket for a baby - A good terry bath towel! Ideal for covering. 100% cotton, hygienic and can be washed frequently (regurgitation, etc.), drape, tuck, keep warm due to mohair and do not overheat. Perfect! When my son grew up, I purchased a light and thin Ikea blanket (Linen), and I am very pleased with it. It's in a baby duvet cover, I'm completely satisfied. I am also pleased with the budget Ikea bed linen. There is no need for all these expensive kits with rhinestones and so on. This is not practical and expensive. Linen should be plain and 100% cotton. The price of a blanket is 599 rubles, sets of linen are about 700. They do not fade or lose their shape. I am very pleased.
..
There should be a lot of sheets, and yes, I bought different sateens for cutting, and stitched them on a machine, turning the fabric per linear meter into 5-10 sheets. And no one will convince me that buying ready-made sheets is cheaper. NO. Don't be lazy to do this. They will serve you for a very long time. On average, 1 piece of sheet in a children's store costs about 400-500 rubles. I bought 1,500 rubles worth of amazing quality sheets to the brim. I took plain colors. Stylish, bright, practical.
I also bought the mattress from IKEA. I realized that the best mattress is made of natural wool, it is cotton and the child does not sweat on it. If you haven’t found one, then all this bamboo bullshit is nothing more than marketing. We bought two mattresses, and my son sweated equally on both because they were both covered with polyester. The way out of the situation is to put a terry sheet on top directly on the mattress under the cotton sheet. This layer prevents the baby from sweating. Our mattress.
Vissa skent price approx 2tr. I recommend buying a water-repellent mattress cover from Ikea (Len RUR 349)
.
I also bought beautiful bumpers. I found out that they were not machine washable after purchase (my pregnant brain didn’t realize that the huge hard sides couldn’t be washed in a machine). Moreover, the sides around the entire perimeter interfered with my view; I couldn’t see my son behind them when we crawled to sleep in different cribs. Conclusion: you need one side for 1/2 of the crib and the sides do not have to be expensive and high. I recommend the same sides from IKEA. Kommissar 599 rub. Sold individually (1/2 cribs), machine washable, look awesome.
.
The crib itself was also purchased from Ikea. I don't regret it, but sometimes I miss the pendulum function. But, I don’t know how effective a pendulum is when the child is a little awake and needs to be pumped up a little sleepily without removing him from the crib. I believe it is effective. Therefore, if you buy a crib without a pendulum, screw onto it... wheels with stop latches! which are sold in any furniture store!. The savings relative to a crib with a pendulum are about 10 thousand. The crib cost me 4800 rubles. Our crib had expensive, impractical bumpers that were later removed! When the child grows up and no longer needs rocking, and begins to stand up against the side and rage in the crib, we will unscrew the wheels.
5. Swimming. Since I started the review on Ikea, I’ll end with it. The bathtub is amazing from Ikea, the price is ridiculous, it doesn’t slip (there are rubberized pads on the bottom), and I bought a hammock to go with it, because the slides and other things turned out to be inconvenient. Many thousands were thrown into the wind again before realizing that a better invention for swimming than a hammock has not been invented! Latsam bath RUR 349 Hammock approx 250 rub.
evaluate for yourself how comfortable the baby is in the hammock, even trying to sleep), no one is holding him... he’s just lying quietly.
For bathing, the Maman thermometer was indispensable and, in general, a convenient device that quickly determines the air temperature both in the crib and in the stroller during a walk and in the water. I recommend . Price 370 rub.
Finally, the topic of bathing. I didn't need corner towels. It was uncomfortable for me to put this corner on the baby's head. I do not know why. Everything was done very quickly, and it was about nothing. I used regular bath towels and placed a knitted calf with a corner folded on top of them, and covered my head with this corner. The water was instantly absorbed, and you could carefully remove excess water in the ears with the same diaper using your finger. Save on towels with corners)
6. Changing table. A very expensive thing... and it turned out to be absolutely inconvenient for me. The “book” table helped me out. If you have guests, you use it for its intended purpose. It takes up less space in the apartment and almost everyone has it. If you have nowhere to put a changing chest, don’t worry. It was absolutely useless to me. Wasted money. This is what the space for processing and changing the baby looked like in the end, after much organizational ordeal.
For swaddling, I used a completely unique thing. Washable inflatable mattress Ikea. It costs a penny, but it is irreplaceable!, you can take it with you on trips, on a visit (you can organize it hygienically), wash it, remove the cover (wash the cover), cover it with clean diapers and thus, you always have a dry and portable means for changing baby. Weightless! He is always with you... in the bathroom, on your bed, on the changing table and on the trip.
Sketsam (terry cover 100% cotton 249 rubles, mattress about 400 rubles).
7. Clothes. In a pregnant frenzy, I bought a lot of clothes in sizes 56 and 62, a lot of elegant and cute suits, vests, hats, etc.. I didn’t need vests at all... the child was half naked, for the cold season - the scope of their use was not clear..
We didn’t wear clothes, there were no photo shoots, because we were all red as fly agarics, we had colic and constipation and had no time for beauty and guests. A lot of diapers were not useful for changing, since it was still inconvenient and time-consuming, I saved myself with ergo diapers, a super thing! saved me. I had 2 pieces, when one dried out after washing, I used the second one. Price for a set of 2 pieces approx. 500 rub.
They are sold by size, I only used them for the first 1.5 months, then the baby was no longer comfortable in them... and it seemed to me that he was sweaty, etc.... stacks of diapers are not needed! I needed 4 knitted diapers, 3 cotton, 1 flannelette (never used). Don't buy in happy piles. Take 1-2 of everything, and if you used it during the day with a clear need and it was convenient for you, buy more! my supplies
I have found that the only bibs that are most effective are those that have an oilcloth on the inside, otherwise the clothes underneath will instantly become wet due to drool/water/food; they are sold in sets. Kurnosiki company. Approx 150 RUR 7 pcs.
In fact, I only needed 1 pair of mittens, because then I purchased bodysuits and sweaters immediately with mittens. I didn’t like the hats, my ears were bare, my head was sweating, and every now and then it was difficult to guess with the elastic band and its pressure on the head, most of all I used bonnets and hats with ties.
I recommend buying transparent storage containers. It’s always easy and convenient to store things in sections in them, they don’t get dirty, don’t get mixed up in a chest of drawers or closets, and you can always see what is where….the price of 1 container is about 120 rubles in Auchan.
I did NOT need bodysuits with clasps at the back!!! Be careful, the buttons and the bar on which they are punched dig into the back, and it’s uncomfortable for the child to lie on it all.
The most comfortable clothes for us are cotton slips without bells and whistles with flat seams, we adored and still adore them, so that the buttons can be unbuttoned along the entire length, it’s convenient to change diapers and quickly wash your butt in case of poop, and they are indispensable for sleep.
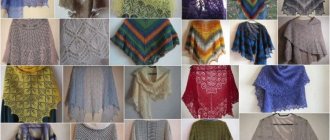
8. Baby photo sessions. We often see touching photos of babies, and we also want such a memory, but many questions arise? How to take such a baby to the studio? undress, wait for sleep, etc., etc....Plus these are financial costs. I recommend purchasing an average SLR camera, you can even use it, understand the settings honestly and enjoy photo shoots without leaving home. Saving money, health. Indescribable emotions. You can also save on props for photo shoots by mastering crocheting and knitting! My examples of photographs, with handmade props and taken with a regular camera.
I hope you take away something from this post. I will answer all your additional questions. I am attaching a survey on how useful this post is, because I spent a lot of time creating it. Thanks everyone! Have a wonderful motherhood!!!
Knitted mittens for boys
I knitted mittens for my 8-year-old son; of course, you can knit mittens for a girl using the same principle.
I must say that my boy is not large, so mittens according to this description are also suitable for children 6-7 years old.
Mitten sizes:
length 17 cm, width about 9 cm.
For the mittens we need:
Knitting needles 5 pcs.
Yarn, I have Nako tweed 100 g/260 m
Let's start knitting:
We cast on 40 loops on two knitting needles, you can cast on in any way convenient for you.
We take out one knitting needle, distribute the loops onto 4 knitting needles, 10 loops on each. We knit in the round with a 2x2 elastic band.
We knit 15 rows with a 2x2 elastic band.
Next, we continue to knit in the circle, but in stockinette stitch. We knit 10 rows up to the thumb.
Now we need to leave room for the finger. To do this, we knit all ten loops on a knitting needle, then remove the last 6 loops onto a pin and leave them alone for now. Yes, by the way, this will be the left mitten. (For the right mitten, remove the first 6 loops onto a pin).
In the next row we cast on the missing 6 loops and continue knitting in the round.
We knit the mitten further to the top of 25 rows. Be sure to try on the handle so that the mitten fits correctly.
To finish the mitten, we knit the last 2 loops together on the first knitting needle, the first 2 loops on the second knitting needle, the last 2 loops on the third knitting needle, and the first 2 loops on the fourth knitting needle. (For the right mitten, we change the order of the loops: on the first knitting needle we knit the first 2 loops together, on the second knitting needle - the last 2, on the third - the first 2, on the fourth 2 last). We knit in this way until there is 1 loop left on each knitting needle. Next, we knit 2 loops from the first and second needles together; and with the third and fourth together. Now we knit the 2 remaining loops together, cut the thread and pull it out.
We return to the finger: we cast on 4 knitting needles, 4 loops each. On the first knitting needle we take the middle 4 loops from the pin, the side loops from the pin go to the adjacent knitting needles, and we pick up the remaining loops from the edge of the knitted fabric.
We knit 13 rows in stockinette stitch in the round.
You can finish it like the top of the mitten, or you can simply knit together the first 2 loops from each knitting needle.
All that remains is to hide the threads; to do this, use a crochet hook to remove the threads inside the mittens and pass them through several loops. We cut off the excess threads.
These are the mittens I got. My son wears them with pleasure and says: Mom, these are the warmest mittens in the world!
Knit with pleasure!
All photos are in the source.
Did you like our site? Join or subscribe (you will receive notifications about new topics by email) to our channel in MirTesen!
iskusnitsa-tm.ru
Mittens for children 1 and 2 years old, crocheted and knitted, master class
Mittens are very easy to crochet, much easier than with 5 knitting needles. There is only one problem with this method of knitting - you can crochet to imitate an elastic band, but you cannot knit it elastic, and for children's mittens, elastic elastic is extremely important so that they fit well on the hand.
The easiest way to solve this problem is to combine two knitting methods: crochet hook and knitting needles. Therefore, we will knit the elastic band on two knitting needles and continue crocheting.
Below I will show you how to knit mittens for a child 1 year old or a little older.
To knit this model of mittens we will need:
- 20-30 g of yarn in two colors
- knitting needles
- hook
- needle
Selection of yarn For mittens, any warm yarn is suitable, except for prickly wool.
You can use soft merino wool or a mixture of wool and acrylic. As a last resort, you can use scratchy wool yarn on the main part of the mitten, and for the elastic you can take something softer, since the most sensitive skin is on the wrist. It is better to choose fluffy threads, thin or medium thickness, but smooth. Crocheting is tighter than knitting, and mittens knitted from thick yarn will restrict the movement of the fingers and slide off the palm.
To start knitting, measure the girth of the wrist, knit a sample with an elastic band to determine the knitting density and calculate the number of loops. When calculating the width of the elastic, we take 0.5 cm less than the measured wrist circumference.