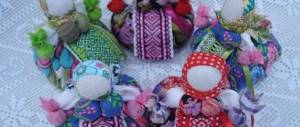
DIY polymer clay doll
Modeling dolls from polymer clay with your own hands is interesting because you always get a new image, and it requires your imagination in design. I suggest you familiarize yourself with this material so that you can make such a doll as a gift for your children. The work requires perseverance and perseverance, but anyone can master it if they want. It doesn't matter that it may not work out so well at first, the main thing is that you gain skills and over time you will have success.
What materials will we need for our work:
- Polymer baked clay is flesh-colored and a little colored for shoes.
- Modeling tools
- A piece of wire no more than 2 mm thick and approximately 8 cm long.
- The fabric is pink or white cotton or calico.
- Sintepon.
- Pastel
- Acrylic paints and a thin brush.
- Foam sponge
- Sewing machine
- Threads, scissors, needle.
- Fabric for clothing
- Adhesive gel transparent moment
- Hair material (wool, yarn)
- Toothpicks.
- Food foil.
The size of the doll is about 25 centimeters. The doll has a head, arms and legs partially made of polymer clay. The rest is made of matter. The doll has movable arms and legs that bend at the joints. Clothes are not removable.
Sequence of work
Head.
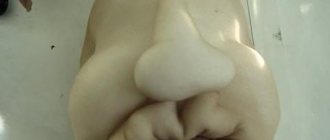
1. Form the base for the head from foil. Roll into an oval shape and make an indentation on the front. The head size is 3.5 cm.
2. Prepare the clay, knead it and make a plate approximately 5 mm thick.
3. Place it on a ball of foil and press it from bottom to top with your fingers, moving to the top of your head. We release the air and wrap the clay towards the back of the head. Let's smooth everything out here. If necessary, you can apply another layer and smooth it out again.
4. Form the parts of the face. We make the nose out of a carrot mold. We push the eye sockets deep into the face and insert oval-shaped balls. Working with the tool, we make a division into the upper and lower eyelids. We smooth everything out with a tool. Don’t forget to wipe your hands with a damp cloth to avoid contaminating the clay, which absorbs every speck of dust. If stuck dirt appears, carefully remove it with a napkin or tool.
5. We make cheeks from the halves of the ball, cutting them into 2 parts and flattening them into a flat cake. Smooth out the clay.
6. We form the upper lip by applying a piece of a flat shape and using a tool we make a lip, not forgetting to press the dimples in the corners of the mouth.
7. Next we make the chin and lower lip by applying the sausage and smoothing the clay. We make the mouth smile by spreading the lips with the tool.
8. Roll a small ball, divide it into 2 parts and insert it into the eye sockets. We form the eyes using tools.
9. When the head is completely made, we form the neck from a rectangular layer, after placing the head on a toothpick in the neck area.
9. Now bake the head in the oven, placing a toothpick on a sponge, at a temperature of 130 degrees for at least 45 minutes.
10. When completely cooled, we tint the doll’s face with dry pastel using a piece of foam rubber. We paint the eyes with acrylic paints. Of course, it is difficult because the work is small. You need a very thin brush, literally a few hairs. I'm not very good at it so far, to be honest.
11. Now you can do the hair. There are many options here and everyone can choose their own. I used wool, which I cut into strands and glued one by one with glue. To prevent her hair from becoming shaggy, I came up with the idea of putting a ribbon or thin braid on the doll, and also secured it with dotted glue.
Torso.
1. Calculate the proportions for the body. The diagram shows a calculation option. My doll's head fits almost 7 times in height. I make the usual natural proportions for the dolls. It’s better to have the diagram on hand so you don’t make a mistake later. Copy it for yourself. A4 format.
2. We sew the body from the fabric, taking into account the proportions. I suggest you do the cutting based on your preferences. It can be a straight body or a curly one. Arms up to the elbow and legs up to the knee joint. The doll turns out to be mobile, which is important when playing with it. We sew everything on a machine and stuff it tightly with padding polyester. We sew the arms and legs to the body. Sew the legs closer to the front so that the doll can sit.
3. We insert the wire inside and leave the tip to connect to the head. This way it will hold on more securely (this is an action with the head, we will perform it at the end).
Arms and legs.
1. We sculpt handles for the doll from clay that has been prepared and heated in our hands. To do this, cut off a piece of clay and, having rolled it into a sausage in your hands, divide it exactly in half.
2. From each piece we form an arm up to the elbow. Leaf-shaped palm. Using scissors, cut into fingers, starting with the thumb. Then we divide it into two parts and into two more. We look at our hand and compare the length of the fingers. Each finger has its own length. The total length of the palm is equal to the distance from the chin to the eyebrow line. If the fingers turn out to be thick, then we trim them at intervals with scissors.
We twist each finger individually with our fingers, giving them a natural shape. We make a depression in the palm with a tool in the middle part. If there is not enough material, it can be added and smoothed out again.
In the upper part, where the elbow is, we pierce a hole through with a toothpick. We try it on according to the diagram so as not to make a mistake with the proportions.
3. We also make legs from two identical sausages. We form the feet conditionally, because we will put on shoes. Don't forget to make holes at the top near the knee joint. Please note that I have a bevel under the knee to allow the leg to bend back freely and a small dimple at the junction.
4. Bake in the oven as usual.
5. Making shoes. You can make them from clay, and you can also sew them. I made it from a different clay to match the color of the dress. Roll out the clay in a thin layer and stick it on the foot. We make a heel and a bow.
6. Bake the legs again in the oven on a sponge for 15 - 20 minutes.
Connection of body parts.
We connect all the parts using a needle and thread through the holes in the arms and legs. Then glue the head to the body, smearing the lower part of the head with glue. If you have something that stands out strongly in the neck or shoulder area, then carefully trim it with a utility knife and sand these areas until smooth.
Cloth.
We sew clothes from any material that you have on hand. I used a baby dress. The fabric is beautiful and does not require much processing on the bottom of the product.
First, I made underwear from lace elastic. When sewing clothes for a doll, we take measurements. We cut the hem from the rectangle, having previously taken measurements from the doll, and sew the side seam. We also measure the bodice of the product according to the doll, determine the width and length of the product.
We connect the shoulder seams, then the side seams.
We put the bodice on the doll and attach the hem along the wrong side, having first gathered the top with a thread.
We also cut out the sleeves into a rectangle and cut off the top at an angle of 45 degrees. Don't forget to allow seam allowances everywhere!
We collect the bottom of the sleeve with thread, turn it inside out and put the assembled part on the arm up to the elbow. We tighten it tightly and hook it to the threads connecting the forearm to the shoulder part. Then we turn it to the front side and, over the edge, as carefully as possible, use the smallest seam to attach the sleeve to the bodice of the dress.
We decorate the dress with possible trims.
Our doll is ready and ready to please your child! I spent several evenings on this work, but I think it's worth it.
I wish you wonderful moments of creative inspiration and success in handicrafts!
Making designer shoes for dolls with Diana Effner
You are reading the issue of the Cdolls.ru newsletter “All about dolls.”
Shoes are probably the most difficult to find item in a doll's wardrobe. Clothes can be knitted or sewn, but not everyone can usually make beautiful shoes at home. Today we offer you a method for creating shoes that Diana Effner shared.
She studied human shoes for a long time and as a result developed her own mold for doll shoes, which is different from the factory ones and fits better on doll feet.
The master class is divided into three parts. We have provided the video with Russian subtitles so that you can better understand what Diana is doing. So don't forget to turn them on.
Here we will give a brief procedure.
The upper part of the shoe is made of fabric, the base and sole are made of polymer clay.
These are the shoes you can make for dolls after Diana Effner’s master class
To create shoes for a doll you will need:
materials: 2 types of self-hardening polymer clay, fabric (satin or any other), hard tracing paper, 2 fingertips, water, Wonder Under Web (fabric with adhesive surfaces), packaging film, PVA glue, acrylic paint.
tools: toothpicks, scissors, rolling pin or rolling machine for polymer clay, file, pins, pencil, marker, brush, extruder.
Part 1. Basic shape of shoes
- Make a pattern for the sole of the shoe. Its shape should resemble a shoe more than a leg.
- Cut out the pattern from mylar tracing paper.
- From clay of the same color as the fabric of the upper part of the shoe, cut out two soles.
- For safety, put finger caps on the doll's legs.
- Place both soles on the doll's legs. Place the legs on their toes (so that when the clay dries, it doesn’t curl in the direction we don’t need).
- Leave overnight to dry.
- In the morning, slightly correct the shape of the sole using a nail file. It is necessary that the soles are approximately the same.
- Use clay to form the toes of future shoes.
- Use clay to form the heel.
- Leave to dry for a day. After this time, sand the clay with a nail file until it becomes smooth.
Part 2. The upper part of the shoes
We use 3 layers of fabric: one for lining, the second for density and the top for beauty.
- On the fingertip placed on the doll’s foot, outline the upper part of the shoe. Make a pattern for the upper part of the shoe. It is convenient to use packaging film for this.
- Cut out the pattern for the upper part of the shoe for both feet on tracing paper.
- Apply the Wonder Under Web to the fabric, trace the patterns for both legs on the web and cut them out.
- Attach the web to the lining fabric and iron it. Thus, the fabrics stuck together.
- Pin the right sides of the interfacing fabric and the top fabric together. Then sew the fabric along the inner edge of the shoe. And cut out the middle.
- Turn the sewn parts inside out, iron the seams and cut out the outside of the parts.
- Connect the part from the heel side of the shoes, stitch, cut off excess fabric on the heel, turn the “shoe” inside out, iron the heel seam.
- Glue the lining fabric to the clay base of the shoes, starting at the heels, then the toes, then the sides. Wait for the glue to dry.
- Trim off excess lining fabric – anything that is not glued to the base.
- Trim off the excess outer fabric and glue the remaining fabric to the sole.
- Wait for the glue to dry completely.
Part 3. Shoe soles
- Cut out a sole from denser self-hardening polymer clay using the pattern we made in part 1.
- Glue the newly cut sole to the base of the shoe.
- Cut out another part of the sole from clay - the heel. Glue them to the sole. Adjust the shape. Check for stability.
- Leave to dry for a day.
- Use acrylic paint to paint the inner insole of each shoe (optional).
- Make flowers from polymer clay to decorate shoes (optional). To do this, mix clay of different colors using an extruder and give it the shape of flowers and leaves. Finish the modeling with a toothpick. Fasten together the desired composition of leaves and flowers, color (optional). Glue decorations to the shoes.
The shoes are ready!
Additional master class. How to decorate doll shoes
But that is not all! For those who are fascinated by the creative process, we offer another pleasant bonus from Diana: the secrets of decorating shoes for dolls. How to turn standard factory shoes into designer ones. And what materials will help you with this.
- The first way to repurpose factory shoes is to dye them. Diana recommends using Tumble Dye for fabric. It has a rich palette, and if you layer layers of different colors, you can get even more color options.
- The second way to change the shape of shoes, making them more like real ones, is to slightly change their model. And also, using a method already known to us, you can make a thicker and more textured sole. Shoes can also be painted, both outside and inside. Diana paints faux leather and suede shoes with Jo Sonja paint and Copic markers. Diana makes the sole from Hearty polymer clay.
- The third way to decorate your shoes is to add floral embellishments. Diana makes shapes of flowers and butterflies from Hearty polymer clay using an extruder. The second way to make flowers and leaves is to use shaped hole punches, cutting out the desired shapes either from paper or from a thinly rolled out and dried sheet of polymer clay. For the center of the flowers, Diana uses a new material called ultrasuede - something like artificial suede. And even small circles (from 1 to 4 mm) can be made using a screw hole punch. Then all decorative elements are glued to the shoes.
Factory sandals decorated by Diana Effner
We hope you find this little creative course helpful. And you can make a lot of designer shoes for your doll beauties.
To order any doll
Call us
Write to us:
In the “All about dolls” newsletter:
discounts and promotions, doll news
and interesting stories about dolls and authors.
The “All About Dolls” newsletter: discounts and promotions, new doll products and interesting stories about dolls!
LiveInternetLiveInternet
We have already written how to calculate the proportions of a face and prepare to work on a plastic doll. This article will tell you how to sculpt a head. Making the base of the head (skull) from foil . To make the doll's head, make a base in the shape of a skull from food foil. It is better to use thin foil; it is easier to form the necessary shapes from it.
Tear off a strip approximately 1-1.5 m long from a roll of foil (depending on the size of the doll). Roll it into a soft, loose ball.
Then shape the ball into an egg shape.
Using even, gentle pressure, compact the ball to the required size. For example, with an eye diameter of 8 mm, the width of the face is: 3 mm x 5 = 40 mm, respectively, the length of the face is 60 mm. But keep in mind that this is a calculation of the finished head size. Since the layer of plastic applied to the base is approximately 5 mm, the base must be made somewhat smaller, taking into account the thickness of the plastic.
From the side of the face, the head has a flat shape. Give the required shape to the head base blank, slightly flattening it on one side.
Using thumb pressure on the workpiece, express the temporal bone.
Determine the line of the eyes. Please note that at different ages the eye line is at different levels.
Using a tool, make indentations (eye sockets) along the line of the eyes.
Determine the middle of the width of the face along the line of the eyes and set aside segments equal to the diameter of one eye on both sides (right and left) of the middle. The resulting points are the center of each eye.
Insert the eyes into the sockets so that the distance between the eyes is equal to the diameter of one eye.
The eyes should be set deep enough into the base - half the diameter of the eye. If necessary, use a tool to deepen the eye socket.
Secure the position of the eyes with a piece of plastic.
For further work it is convenient to use a small tripod. It is easy to make from a wooden stand and a thin bamboo stick.
So, we made the base for the head - the skull, the eyes stood up. Look carefully at it from all sides, check the symmetry. A properly made base sets the correct shape of the head.
When starting to work with polymer materials, in addition to their technical characteristics, you need to know some of the features of working with them and their storage conditions.
One of the negative aspects when working with polymers is their contamination. At the same time, dirt from your hands, small hairs and dust interfere with the plastic. The result is dirty stains that are almost impossible to remove. Therefore, wash your hands often and wear lint-free clothes when working. Polymer plastics should be stored at room temperature, in a regular box or plastic wrap, in a closet, but not near a radiator, not in direct sunlight, and not in the refrigerator. If stored improperly, plastic loses its properties.
Head. Take a piece of plastic, about half the size of a chicken egg or slightly larger depending on the size of your head. Knead it well in your hands so that, as it gains the temperature of your hands, it becomes softer and more pliable. From this piece, mold a plate, 6 mm thick and a size that covers the base of the head by half.
Place this plate on the front side of the base.
Gently press the edges of the plate towards the back of the head.
In order to cover the back of the head, mold another plate of smaller size and thickness and cover the back of the head with it. Align the joints of the plates evenly so that no seams are visible, and you get a smooth, uniform surface.
Eyes. Use your thumbs to feel for the eyes and push the plastic slightly apart to open them.
Clean your eyes with the tool, smoothing out any sharp corners with your fingers. Sculpt the base of the bridge of the nose.
In order to sculpt eyelids, roll a thin flagellum out of plastic.
Apply it to the upper part of the eye, cut off the excess length and gently apply it.
From this allowance form the upper eyelid.
Lay out and shape the lower eyelid similarly to the upper.
The lower eyelid is less curved than the upper. The upper eyelid forms a wider arch around the eyeball. The upper and lower eyelids meet at the bridge of the nose, forming a tear duct.
Nose. Before you sculpt your nose, decide on its size and shape. Remember the proportions of your face. Divide the distance from the brow ridge to the chin in half - this is the line of the tip of the nose. You can also outline the line of the mouth.
From a small piece of plastic, mold a blank for the nose (in accordance with the intended size). Apply it to the location of the nose and apply it thoroughly.
Shape the bridge of the nose, the tip of the nose and the wings of the nose.
Make indentations for the nasal openings. Please note that the wings of the nose are located above the nasal septum.
Cheeks, mouth. Before each operation, always review the work in profile. Remember the “rule of steps” (more details in this article).
If necessary, increase the volume of the cheek. To do this, place teardrop-shaped plates on the cheekbones. Having carefully applied them, form a cheek.
Using the tool, separate the cheek area from the mouth area using an arched nasolabial fold that starts at the wings of the nose and ends at the corners of the mouth.
As you look through the profile, make sure to add volume to sculpt the mouth.
Use a tool to mark the cut of the lips. Separate the upper and lower lips.
The upper lip is wider than the lower lip, as if hanging over it. Both lips, upper and lower, have a special, unique shape. According to your plan, sculpt the doll's lips.
Chin, lower jaw.
Decide on the shape of the chin, sculpt it and shape the line of the lower jaw.
The lower jaw slopes towards the back of the head, divides the profile of the head in half and ends at the earlobe.
Neck. Make a rectangular plate 5-6 mm thick from plastic.
Roll it into a cylinder.
Stick and seal the neck to the head at the level of the curve of the back of the head and behind the lower jaw line.
Spread the lower part of the neck slightly to the sides in the form of a “skirt”. Make the edges of the “skirt” thinner. If necessary, adjust the head tilt. This will give the doll dynamics and liveliness.
The neck is hollow inside.
On the back of the neck, below the level of hair growth, a stamp (signature of the author) and the year the doll was made are placed.
I never sculpt a neck entirely out of plastic or use different bases for it. Firstly, it makes your head heavier; secondly, a very thick layer of plastic requires a certain firing, and this does not always work; thirdly, with a hollow neck, the attachment of the head to the stuffed body is much stronger.
Ears. Everyone's ears are different, but their structure is the same. The ear has the shape of a shell, consists of cartilage and ends with a soft lobe. The size of the ear is equal to the distance from the tip of the nose to the brow ridge. It is attached parallel to the nose in the middle of the profile part of the head, the back of the ear has an angle of inclination equal to the angle of inclination of the nose.
To sculpt the ears , roll a plastic ball with a diameter equal to half the size of the nose. Cut it in half and sculpt two ear blanks.
The ears can be sculpted quite schematically. They can be molded anatomically correctly or exaggerated. expressing the character and figurative affiliation of the doll. The main thing is that the ears are proportional and correctly attached to the head.
Stick the blanks to the head and sculpt the ears .
It is very important when working with polymer plastic that your hands are always clean . If your work does become dirty, I suggest you several ways to clean it:
1. Use regular wet wipes (not paper). Such napkins are impregnated, which, when lightly wiping the plastic, removes the thin top layer of dirt and small hairs. In this case, the surface is smoothed out well. Often I specifically use wet wipes to achieve a smooth finish.
2. If the dirt has become deeply embedded in the layer of plastic and cannot be erased by anything, then it can be removed by cutting off the outermost thin layer of the contaminated area with a tool.
The article uses materials from the book: “The Story of a Doll” by Nadezhda Gnesitskaya. To fully familiarize yourself with the materials in the book, we recommend purchasing it from distributors or the publisher.
Everything you wanted to know about needlework and DIY crafts - Trozo.ru