An excellent costume option for any occasion is a bat costume. It is quite simple to make and requires minimal time and effort.
For the base part of the costume you need black clothes
. These can be trousers, tights, leggings, a skirt, and a turtleneck or T-shirt is suitable for the top. You can select and combine different options from this list. But it’s also important to choose accessories or make them yourself.
To ensure that everything is at hand during the work, it is necessary to prepare in advance the materials that will be required.
- Black short zipper made of plastic.
- Black bias tape.
- A piece of fabric for the hood.
- Gouache.
- Cardboard.
- Scissors and a stationery knife.
- Water-based paint.
- Elastic band for clothes.
- Glue.
- Sewing machine and sewing accessories.
- Old black umbrella.
This list of materials may vary depending on the type of clothing planned. You can make a simple costume that will take very little time.
How to make a Bat costume for a girl
You can make a bat costume very quickly with your own hands. The main thing is to carry out all the actions step by step and show your imagination in the process of work.
The bat is a budget option for both boys and girls
.
The suit will require a dark T-shirt
. A T-shirt with three-quarter sleeves looks especially good.
Operating procedure
- We take measurements: sleeve length and T-shirt length.
- Bat wings are cut
out of fabric according to measurements.
Felt is an excellent fabric choice. - We measure the length of the wing from the corner to the tip.
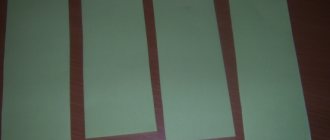
- We cut out several strips of thick cardboard and the same number of fabric strips.
- We apply cardboard strips to the back of the wing, and sew felt strips on top.
- Sew the wings to the T-shirt.
The suit is ready. Now you can complement it with a mask with a bat image
.
Advice
. It is better to cut the mask out of thick black cardboard and paint it with acrylic or regular markers. Rhinestones will also look impressive.
DIY bat costume: for girls and boys
A bat costume will be useful not only for Halloween, but also for New Year or just for a costume party. This is one of the simplest and most striking images. This is the one you should choose in any of the options, whether the holiday took you by surprise, or preparations for it began in advance. If you follow the advice from the master classes and look at the photo, you can quickly and easily sew a bat costume-dress.
How to make a Batman costume
Becoming Batman, as in Marvel films and comics, is quite simple. In addition, this outfit can be worn for any occasion, such as Halloween or other costume events.
The costume consists of two parts: a mask and a cloak
. Black tights and badlon can be found in everyone's wardrobe. Let's look at making a costume step by step.
- It’s better to make a cape using a black umbrella
, which you don’t mind throwing away. You need to remove the handle and knitting needles from it and cut off the top part. The hole should be “under the neck”. - Next, we make a cut at the neckline along the length of the zipper. Baste the zipper and stitch it. Then you need to trim the neckline with bias tape.
- The hat can be sewn based on the pattern of any hood
.
Advice.
If you have difficulties with sewing, you can make the task easier by purchasing a hood. The hood will be much easier to adjust to the required parameters.
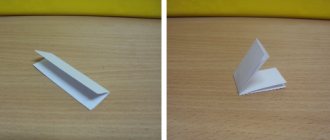
- We cut out a mask
. It is made of cardboard and is no different from other masquerade masks. - The ears can be made from thick black cardboard
or the cardboard can be painted. If the cardboard is not so dense, then you can make them in several layers. - We twist the mask into a tube so that it has a curved shape. We sew or glue the ears to the sides of the mask and attach an elastic band.
- We prime the mask with a water-based composition. We cover it with black gouache paint and then varnish. The mask will dry instantly if you use a hair dryer
. This way it won't lose its curve. - We make a Batman belt, a mandatory element of the costume that allows you to quickly recognize the character. The belt is made of golden fabric
. A rectangle is cut out and stitched. Then an elastic band is sewn to it. The belt can also be decorated with appliqué using sequins or black beads.
IMPORTANT!
If you don’t have a black T-shirt, you can quickly sew one by making a pattern from the finished product. Simply pin the t-shirt to the fabric, then trace and cut it out.
Step-by-step photo lesson:
On black paper we draw the silhouette of a bat with spread wings. To make all the lines clearly visible, you can use a white pencil. Then, using scissors, carefully cut out the mask along the pencil lines.
On each wing (near the body) we draw a silhouette for the eyes. You can depict them in the form of a silhouette of the eyes, in the form of geometric figures of a circle or oval.
Using small scissors or a utility knife, carefully cut out openings in the eye mask. Check that they are the same size and shape. Adjust as necessary.
Using a silver or white gel pen, draw the reflection of the fur from the moonlight on the bat. If there is no such material, then you can use regular gouache. For a thin application, take a brush with numbers from 0 to 3.
Then we measure the required length for tying the bandage. For this we take a black waxed cord or ribbon.
On the back of the mask we put the ends of the cord and seal them with small pieces of tape or apply glue.
Let the glue dry well and get a finished bat mask in literally a short period of time. This mask can be used both in games and for Halloween or New Year.
Useful tips for making costumes
Original prints
As an interesting attribute of a bat costume, you can use thick black tights
.
You can make prints
on them yourself . For example, in the form of black cats or bats themselves. To print on tights you will need the following materials.
- White adhesive tape.
- Acrylic paint.
- PVA glue.
- White paper for printing.
- Black marker.
With these tools you can quickly make any print on tights (both transparent and plain) or clothes. If you are using sheer tights, a marker in a contrasting color will do.
You need to print or make a stencil yourself and trace it along the contour. Don't forget to put some paper underneath so you don't get the marker on your feet.
Using the same method, you can apply a design to thick, plain tights. But instead of a marker, it is better to use a piece of chalk, which is then painted over with acrylic paints.
Drawings
ATTENTION!
You can glue any designs using PVA glue. The glue will dry quickly with a hairdryer.
In the same way, you can add variety to a regular T-shirt.
Of course, it's better to use clothes that you don't mind experimenting with. Just take scissors and cut out images on a T-shirt
. For example, in the form of a skeleton, cat or bats.
A more complex design for a T-shirt is a spider web. It is advisable to make a preliminary sketch on the fabric to make it easier to navigate. Acrylic paint can also help decorate a costume.
Instead of cutting out an image on a T-shirt, you can make a drawing on it. There are very simple drawings, such as the chest. No stencil is required here. And there are more advanced design solutions. The flight of fancy here can be limitless.
We hope these tips for making the costume will be useful for anyone who enjoys the mysterious image of the Bat and Batman.
The image of a fearsome bat crawling out in the dark is associated with Halloween costumes, the most mysterious holiday of the year. But you can transform into a bat for any costume event!
Dressing up a cute mouse is easy to do and won’t take much time. The clothes you will need are dark in color, and styling them will take a minimum of money.
Making a Bat Suit
The base for your DIY project will be trousers, a skirt or a dress. If you are making wings for a child, black leggings are also a great and practical option. You will need:
- Fabric or other material (for example, felt);
- Scissors;
- Hot glue (it is advisable to have a glue gun);
- Headband (to create ears);
- A small piece of wire;
- Sewing supplies.
Making bat wings
- Using a centimeter, measure the length from the middle of the back to the wrist - this is the length of one wing. You will need 2 times more fabric.
- Fold the fabric in half.
- Trim the bottom edge with zizzags. The wings should be long at the fold below, and short at the top, near the hands. When you turn around, you will see a triangle.
- At this stage we will need clothes: lay out the top of your outfit on a flat surface, place the wing blank on top so that the long side of the triangle aligns with the sleeves and shoulder line. Secure with pins;
- At the stage of fixing the wings, you can use glue if the top will not be used anymore. To do this, simply apply a small circle of glue to the fabric between the shoulder blades, then secure the wings and wait for the glue to dry. We do the same on both wrists. You can sew on the blank or simply apply a couple of stitches in the places where the glue should be.
- Let's move on to making the ears.
We complement the suit with accessories
We'll make it as decoration. Buy an interesting mask or make one yourself. Girls can wear tights with patterns in the form of cobwebs, as well as small fangs sold in carnival stores! For the ears, you can use not only a headband, but also any outfit that suits the look, to which you can attach homemade ears: a neat bowler hat or even hair clips.
- We cut out two pieces in the shape of a diamond; the edges of the diamond may be slightly rounded. We select sizes individually.
- Fold the pieces in half across the rim.
- We apply the wire according to the resulting shape and secure it to the rim.
- Apply glue along the edges and connect the two parts, holding your fingers for a few seconds so that the parts are secured.
Attach black feathers to create extra volume for the ears.
Examples of some masks, for the manufacture of which you only need glue, dark cardboard or fabric, scissors and a thin rubber band or tape:
From carnival shops, reminiscent of the famous superhero Batman or simply elegant accessories that will complement your outfit:
DIY Halloween at home: bloody candles
- food parchment (baking paper)
- white thick and thin candles
- 1 red candle
- pins and nails
1. To begin, cover your work surface with parchment paper and remove all stickers (if any) from the candles.
2. Light the red candle and get ready to drip red paraffin onto the thick white candle. You can insert pins and nails into the white candle in advance. Be careful, remember - paraffin is hot.
3. The same can be done with thin candles and then insert them into the candlestick.
Transforming into the image of a bat
For girls, an important element is makeup. In this image, he should be unusual and memorable. Apply the appropriate one:
- Cover your face with white paint to give the skin a pale effect.
- Draw gray circles around the eyes with shadows, and paint the lips with black or scarlet paint like blood.
- Apply mascara to your eyelashes, and draw a small spider web or fangs with black paint.
For complete immersion in the image, use colored lenses.
If the transformation into a bat is for a child, then use a funnier and lighter makeup:
You don't have to wear a mask, draw it or something similar on your face yourself, it won't take you much time:
You are completely ready if:
- The outfit is already on you;
- The costume is completed with accessories (mask, ears, fangs);
- The face is made up or there is graceful makeup.
Happy holidays to you!
As you can see in the photo, the bat costume
looks great on a baby.
If you also choose the rest of the details of the outfit, the child will look very stylish and colorful. A black sweater, trousers, gloves and a mask - why not Batman
?
How to make a big Halloween ghost with your own hands
- transparent garbage bags
- transparent wide and thin tape
- mannequin or volunteer
* you can use part of a mannequin (without the head) or something that has the shape of a torso, as well as a ball for the head.
- fishing line (for hanging).
1.1. Place a large clear bag over the mannequin. If you have a volunteer as a mannequin, make holes in the bag for the head and arms and then put it on it.
1.2. Start wrapping thick tape around the bag. Pay special attention to the most intricate parts of the torso. Wrap around your waist, neck and shoulders. Add some tape to connect all the already wrapped parts - a couple of pieces from the neck to the shoulders and a couple from the waist to the neck.
* For more difficult places, you can use thin tape.
In the picture you can see strips of blue tape - this is so that you can better understand what to do next.
1.3. Continue wrapping the tape, varying from horizontal to vertical strips. The main thing is that the entire torso is covered.
1.4. To make the shape stronger, add another layer of tape. You can add a couple more layers if desired, but the more tape, the less transparent the ghost will be.
1.5. Using scissors (preferably with rounded ends), cut the shape from the back from the neck to the waist in a straight line. The dark tape in the picture shows exactly where this needs to be done.
1.6. Carefully remove the form from the mannequin and set it aside.
If you don't have a head model, you can use a regular ball of the appropriate size.
*Under no circumstances use a real person for this.
7.1. Place a transparent bag over the mold.
7.2. Wrap thin tape around the neck to secure the bag at the bottom. And to secure the bag on top, wrap tape around it in the forehead area. If you are using balls, simply place some tape on the bottom and then start wrapping it around the entire ball.
You can make several layers to secure the tape structure.
7.3. Carefully cut the tape and remove it.
Place the pieces on top of each other and secure them with tape. You can first secure with a small amount of tape to determine the shape you like best. After that, simply wrap the figure in 2 layers.
9.
To make torn clothes for a ghost, take several transparent bags and cut off the bottom. Next, make a fringe from the bag. Secure the resulting part with tape.
* You can put a shawl or gauze on the ghost.
How to make a bat costume: three steps
First of all, you need to decide on the size of the piece of fabric that will be needed to sew the bat costume. To do this, you need to measure the baby's arm span, that is, the distance from the fingertips of one hand to the fingertips of the other. A small margin in the width of the wings can then be put into a fold on the back, which will allow you to use the wings next year, even if the child grows a lot: you just need to open the fold.
The height of the piece of fabric should be 20 cm greater than the distance from the base of the child’s neck to the tailbone.
It is better to choose a fairly dense fabric that drapes beautifully, does not fray when cut, and holds its shape well. It can be raincoat fabric, teak, nylon and other fabrics.
1. Fold a rectangular piece of fabric in half and cut out a neat segment - the neckline.
2. At the top of the piece of fabric, fold a strip inward, the width of which is equal (approximately) to the width of the sleeve of the child’s jacket. From the bottom edge of the fold to the middle of the piece of fabric, cut out semicircular notches that will become the edge of the wing. In photo No. 5 you can see what a piece of fabric should look like after this stage.
3. Figure 6 shows where the seam needs to be laid. It is better to fold the edge of the fabric before stitching so that the cut does not fray.
That's all, actually. You can wear a bat suit
and fly off to a fun Halloween party.
| See also: |
All children and teenagers love holidays, especially various costume events. Do not deny your son or daughter the pleasure of celebrating Halloween, because a themed outfit can be made in a matter of minutes without significant damage to your wallet. Don't believe me? Especially for you, the simplest instructions with a step-by-step description of how to make a bat costume with your own hands!
Where to begin
First you need to measure the distance from the fingertips of one hand to the fingertips of the other.
This is how the arm span is determined. If there is a small margin left, this volume can be stored in a fold on the back. Plus it's very convenient. When the child grows up, the fold can be opened. Thus, the suit can last for more than one year. In order to make such a costume, you will need the following:
- black fabric (preferably not frayed); - scissors; - tailor's meter; - black threads; - needles (if sewing by hand).
Basic clothing for the look
The basis of the costume will be a set of black clothes. Choose plain and simple things. It's best if it's also trousers/leggings. For a girl, you can choose a skirt. It is also better to choose shoes in dark shades, this also applies to other accessories. What are we going to make a bat costume out of? All you need is a piece of black fabric, preferably with frayed edges. If you have a broken umbrella of the desired color on hand, simply remove the fabric cover from the knitting needles and make a hole for the head - the wings are ready. However, it is not at all difficult to sew them yourself, even without being a professional seamstress.
Bat wings: first option
You don't have to make a pattern to create a costume. Measure out the required amount of fabric; to do this, ask the “model” to spread her arms to the sides and measure the distance from one wrist to the other. You have a “wingspan”. You can determine the maximum length by dividing the resulting value by 2. Next, all you have to do is symmetrically cut out the edge trim on the wings. The finished wings need to be sewn to the T-shirt. If you want to make a rigid frame, make two identical parts. After that, sew them together, inserting wire bones for rigidity.
Bat Wings: Second Option
For this option for making a spectacular accessory, it is better to take stretchy fabric. The bat costume using this pattern is sewn based on two measurements. The length of the fabric is, as in the first option, the distance from wrist to wrist (arms are spread out to the sides at shoulder level), and the width is from the back of the head to the waist, plus half the circumference of the widest part of the arm. Fold the fabric in half in the direction of length (this value has decreased). Cut a neck in the resulting corner. The Halloween bat costume is almost ready. All that remains is to put the sleeves on top - fold a strip equal to the half-circumference of the widest part of the arm. After this, cut out the edges. Finally, sew the intended sleeves - the wings are ready, you can try them on.