Making rockets with your own hands using scrap materials is a popular hobby among residents of Western countries. Although Russia is full of enthusiasts. Usually these are parents of young dreamers and little fidgets, students of technical universities and just people who like to do all sorts of unusual things with their own hands. Especially for such people, we will give several ways to make a rocket at home from paper and other scrap materials. Experience our master classes firsthand!
To give a new exciting toy to your child, it is not at all necessary to visit auctions and stores of expensive children's goods. Now you can make a rocket for virtual travel and an intergalactic rocket with your own hands, using our step-by-step master class.
What materials are needed for the rocket?
- colored terry sock;
- plastic bottle;
- thick foil;
- sheet of red felt;
- glue gun;
- cardboard;
- scissors;
- tube of paper towels;
- yellow and red yarn;
- thin lace.
How to create a space rocket from scrap materials? Step-by-step instruction
1. Take a plastic bottle, wash it and dry it. Place a colored sock over a clean, dry container. Then tie it with a thin cord under the bottom of a plastic bottle and cut off the tail.
2. Cut out 2 circles with a diameter of 5 cm from red felt. Next, glue the figures onto the base of the rocket - these will be the portholes. Using a glue gun, attach the same round foil parts to the red circles, but with a smaller diameter (3.5 cm).
3. Draw three “fins” on a piece of white cardstock. Cut out the shapes, then glue them to the rocket on 3 sides, point down.
4. Cut a ring from a cardboard tube (from paper towels or toilet paper), 5-6 cm wide. Take thick foil and wrap the part. Wind red woolen threads around your palm, then glue the resulting skein on one side to the previously prepared part.
5. Do the same with yellow yarn. This way you will make the bottom of the rocket with unusual decorative flames. Use a glue gun to secure the part to the bottom of the bottle. This completes the step-by-step master class for parents and children!
;
How to make a beautiful bright rocket out of paper and cardboard with your own hands? Models and diagrams
If preschool children are fascinated and delighted by a small toy rocket, the size of a bottle, then older children will definitely love a “full-length” spacecraft. Such an intergalactic ship will allow children to feel like real captains, and show courage, boldness and courage as the main traits of a man’s character.
Next, you will learn how to make a large model of a rocket out of cardboard and paper with your own hands and see step-by-step photos of this process, which will make the task easier.
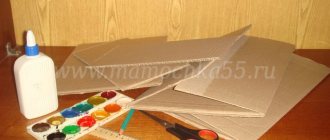
Prepare the following materials:
- colored paper;
- carton boxes;
- disposable plates;
- yoghurt cups;
- plastic buttons and covers;
- numbers and letters on an adhesive basis;
- flower pot;
- bobbins of thread;
- letter stencils;
- pieces of fabric and foam circle;
- scissors;
- markers;
- satin ribbons;
- pencil;
- glue gun;
- thick foil.
Precautions when firing flares
In severe frosts and when luminous stars fall to the ground, the firing angle of the cartridges increases significantly. It is advisable to ensure that the hand, pulling the cord, moves along the axis of the pressed cartridge simultaneously with the machine gun. Otherwise, when jerking, the cartridge in the upper part may become dislodged, as a result of which the rocket will simply stray from its intended course.
If you are shooting 40 mm cartridges, you need to take into account the direction of the wind. His presence will blow the parachute with the hot star aside. As a result, in the presence of a side wind, the direction of the shot is set, taking into account the direction of the wind. In strong headwinds, the use of lighting sockets is not recommended.
Obviously, you should not use flares close to buildings or towards people. In addition, when starting, it is important to take care of your own safety.
One of the main disadvantages of signal lighting in combat conditions is that the shooter declassifies his location, as a result of which he becomes accessible to the enemy. Therefore, the use of lighting cartridges in emergency situations should be carried out only when absolutely necessary.
Also useful for repairs:
- Exynos 7885 vs snapdragon 636
- How to make a patchwork mosaic
- Penoplex official website prices
Step-by-step instructions for making a model rocket from paper and cardboard
1. We recommend creating this rocket together with your child. Let him help you using his toy tools. The base of the rocket will be a large box from household appliances. It's best if it's from the refrigerator.
2. Make a top from a painted flower pot, plastic spools of sewing thread and disposable tableware. The details can be decorated with voluminous stars made of colored paper and pieces of satin ribbons.
3. Cut a round window in the front wall of the rocket. Wrap the foam circle with multi-colored satin ribbons, then glue them to the panel in place of the porthole. Glue a few bobbins a little higher and mark them with adhesive numbers. Thus, the little pilot will be able to more easily record the time before the start. Below the window, make another instrument panel to make the rocket even more interesting.
4. Attach the fuel tank cap using plastic buttons. Make it on the right side of the space rocket. For this purpose, spools of thread, bottle caps, and old buttons from various devices can be useful.
5. Take care of the arrangement of the front door. To do this, draw a large oblong rectangle on the back wall of the rocket and cut out 3 sides (right, top and bottom). The left side will act as a curtain. Decorate the captain's doors with decorative elements.
6. Draw two “legs” on thick cardboard, cut out the parts, and then cover them with foil. Fix the elements on the bottom of the left and right walls of the rocket. With this your spacecraft is ready. In the diagram you can clearly see how to do it correctly.
3D flying saucer
If you believe modern media, not only rockets and shuttles roam the expanses of space, but also UFOs. For Cosmonautics Day, you can make a three-dimensional model of an alien spaceship at school or a themed club. The craft can be used not only to decorate a stand for Cosmonautics Day, it can also be exhibited at other themed events, for example, at Halloween celebrations.
You will have to tinker a little with cutting out the base from wood. As an alternative to the wooden base of the plate, any round element of sufficient diameter will do, or you can take a ready-made one (for example, you can cut a circle out of foam plastic). In addition, we will need a tarpaulin (preferably with a reflective effect), several wooden blocks, a clear plastic breakfast cereal plate and a toy in the form of an alien.
In Figure 1-5 you can see what a three-dimensional flying saucer looks like at different stages of creation. If you surround it with electric garlands and alien figures, you will get a luxurious installation for Cosmonautics Day.
Today it is customary to make various kinds of crafts for almost all Russian holidays. Cosmonautics Day is no exception. It is worth noting that both schoolchildren and preschoolers take great pleasure in making their own crafts for this holiday. It is worth noting that making crafts for Cosmonautics Day today is very simple. You just need to pay attention to the ideas in this publication.
How to make a flying rocket with your own hands? Step-by-step instructions with photos
Using even the most primitive waste materials (cardboard napkin tubes, candy boxes, etc.), you can create an original rocket with your own hands that could fly. She may not be able to explore the vastness of the Universe, but she will definitely go on a journey through the children's room. Use our step-by-step photos to make your kids a nice and interesting toy.
Materials needed for a flying paper rocket:
- paper towel tube;
- glue;
- thick cardboard;
- pencil;
- scissors;
- gouache paints and brushes;
- yarn;
- permanent marker;
- straw for drinks.
Step-by-step instructions with photos for making a flying rocket with your own hands
1. Prepare the cardboard parts needed for the future product. Divide the long tube into two parts (short and long - 1 to 3). Make 3 cuts in both parts, as you see in the photo. Cut out the wings, pillars and other elements from a flat piece of cardboard.
2. Assemble all the parts into a mock-up rocket. If they do not fit well, adjust or remove the cuts.
3. If the elements fit together normally, disassemble the construction set again and you can paint them with white gouache. Leave characteristic inscriptions and drawings with a black pigment marker.
4. Fold the paper rackets, then glue the parts together with PVA glue or a silicone glue gun. Attach the straw to the spacecraft along the body and secure it with tape.
5. Pull a thick thread through the straw and stretch it from wall to wall. That's all the manipulations to create a paper rocket that flies. To make the spaceship fly through the room, you just need to push it a little.
Signal cartridge going to a hunting rifle
Hunters take a signal cartridge with them to indicate their location in case of leaving the route, disaster, or loss of other types of communication. Often, even with high-quality radio communications, it is impossible to indicate your location to other hunters. First of all, this is relevant for a forest in which there are no landmarks. Even in this case, a signal cartridge may be needed. Just in case, it makes sense to take several signal cartridges with you. They can be purchased in hunting stores if you have a hunting license. In addition, they are widely used by the military, since purchase is possible at military stores.
Instructions for making a rocket from a bottle with a launcher so that it takes off
If the children have grown up a long time ago and are not interested in toy models made of cardboard, you can invite them to make a simple rocket with a satellite mechanism that would fly impressively and high. Have no doubt, the stunt with a spaceship taking off will delight even an adult, not to mention teenagers.
Materials for making a simple bottle rocket with a launcher
- two types of cardboard: thin and thick;
- plastic bottle;
- scotch;
- pencil;
- wine stopper;
- plasticine;
- Bicycle Pump;
- scissors.
Instructions for making a simple rocket with a trigger mechanism
1. Take a sheet of thin cardboard and roll it into a cone. Then trim the edge so you have an even shape.
2. Cover the finished cone with colored tape, which will increase its water resistance.
3. Wash and dry the plastic bottle. Paint it any color, you can make an inscription or draw an emblem.
4. Glue the cone (the main part of the rocket) to the bottom of the bottle with liquid silicone. Make the structure as smooth as possible.
5. Cut three or four right triangles from thicker cardboard. Glue all the parts to the bottle. Thus, the rocket will have tail fins. It’s good if the “legs” end at the level of the extreme point of the bottle neck.
6. Weight the bottom of the rocket. For this purpose, wrap a piece of plasticine around the neck of the container and disguise the load with adhesive tape.
7. Pour 1 liter of water into the bottle.
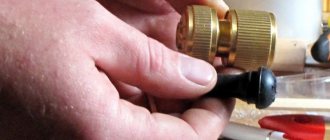
8. Make a thin hole in the wine cork using a needle. The size of the hole should in no case exceed the diameter of the needle from the bicycle pump.
9. Insert the cork into the neck of the bottle. Then insert the bicycle pump needle firmly so that it does not pop out.
10. Hold your rocket upside down, then connect it to the pump. Turn the spaceship over and position it so that it does not fly towards you.
11. Inflate the rocket with air, holding it with your hand. Release the craft and continue pumping air. A simple rocket with a plastic mechanism will take off when the plug can no longer hold the pressure.
Here are some simple options for creating a paper rocket with your own hands. Good luck!
Plasticine planets
In order to create planets of the solar system from plasticine with your own hands, use the following instructions for creating crafts on the theme of space.
Here is a detailed algorithm for creating planets:
- Combine yellow, white and orange in one large plasticine ball. The ball must be one color and not contain streaks of extraneous colors.
- Glue the sun to the center of the dark blue sheet. You can first draw small stars and iridescent patterns on the sheet.
- Mix grey, brown and white in one small ball. Using a match or toothpick, make holes on the ball; they will serve as craters. The small ball will represent Mercury, which is the smallest planet in the solar system.
- Make Venus using brown, black and gray. One should be 2-3 times larger than Mercury. Use wire to draw the texture of the planet.
- Make our planet out of green, blue and white.
- Make Mars using orange, red and black colors.
- Jupiter should be made of beige, brown and orange. The planet is quite large, so do not skimp on material.
- Make a beautiful Saturn. Don't forget to make the famous planet ring.
- From blue and light blue make Uranus, which also has a ring.
- Roll a ball from blue plasticine to represent Neptune.
- Roll the white and gray into a small ball, symbolizing Pluto.
Once you've finished creating the planet, attach the planets to the orbit in the correct order. In order to familiarize yourself with the correct order of the planets and original ideas for the background of a craft, we recommend that you familiarize yourself with photos of space crafts on the Internet