Applications
Paper is a material that is easy to cut, bend, and glue. A master class video will help you make an applique of an original paper cat.
Another option is appliqué using pieces of fabric.
For work you will need the following materials and tools:
- foam base 3 cm thick, size 50x80 cm;
- multi-colored pieces of fabric;
- marker;
- scissors, manicure file, stationery knife.
A cat is drawn on the base sheet; you can use a stencil. All details are cut with a stationery knife.
A piece of fabric is cut out a little larger in size than the applique piece, placed on top of the design and carefully tucked into the slots with a nail file. The edges are secured with glue.
Plastic cat
All you need for this method is a couple of plastic plates, which are usually left over from outdoor picnics or various celebrations, cardboard, writing utensils, scissors, glue and working pens.
Initially, you need to cut out a small part from one saucer so that the rest looks like the body of a cat. From the second you will need to cut a small tail.
We recommend reading:
After this, using cardboard and felt-tip pens or pencils, you need to create a cute face along with ears. Now glue all the parts together, and now, you can admire the fact that for such meager efforts you were able to get such a cutie!
Volumetric figures
It’s not difficult to make a three-dimensional cat craft with your own hands. There are options that will interest children of different ages.
Option 1
For this craft you need 2 cardboard tubes, paints and glue.
- Fold the ends of one tube inward on one side and cut off the corners. This is the torso.
- The second tube is a cat's head. Diagonal cuts are made on the sides to create triangular ears.
- Both bushings are glued together.
- The background is tinted, eyes, nose, and mustache are drawn or pasted on.
- The tail is attached to the lower part of the body.
Option 2
A cat on springs is a toy that will interest older children. The work requires a little paper and patience.
Option 3
For the cat figurine you will need:
- white and orange paper;
- pencil, ruler, scissors;
- glue;
- markers.
Cut out the cat details:
- From orange paper:
- rectangles 6x13 cm and 7x14 cm are the torso and head;
- paws 4 parts 2x6 cm;
- oval tail 2x8 cm;
- 2 ear parts.
- From white paper:
- stripes on the body (3 elements 1x14 cm);
- stripes for the tail (6 parts 1x2 cm);
- oval muzzle 4x6 cm;
- ears (2 parts).
Glue the strips onto the body, roll them into a tube, and glue them together.
On the muzzle, draw or glue eyes, nose, mouth, glue the muzzle to the head, roll the part into a tube and fasten the ends with glue.
Glue white parts onto the orange parts of the ears and attach the ears to the head.
Connect the head and body.
Fold the paw parts, glue the edges, and glue them to the body.
Glue strips on both sides of the tail, the tail to the body.
Option 4
Their regular packaging cardboard is cut out with a cat's silhouette. Make 2 cuts at the bottom so that the figure can stand.
Glue on a muzzle made of colored paper and a mustache made from skewers.
The body is wrapped with colored woolen threads.
This cat will be warm even in the winter cold!
Origami is an interesting way to make a “Cat” craft with your own hands. This technique develops thinking, logic, and accuracy.
The master class will help you cope with this task. A three-dimensional figurine of a pet will delight a child.
Cardboard cat
A cat made of cardboard and paper can be either an original creation or glued and cut out according to a certain pattern. In this case, all the child needs to do is find a template according to which he will work. Cut according to the schematic drawing. And finally glue the edges together.
We recommend reading:
If you decide to create something yourself, then absolutely any cardboard or paper will do, for example, you can use velvet sheets, then your kitten’s fur will be really soft.
Simple options include simply cutting out the silhouette of a cat from thick material and decorating it with decorative elements and missing features.
And for those who have been familiar with creativity for several years, we advise you to try making a pet in a slightly different way. To begin, fold a regular sheet into a cone, coloring it in advance in the color of the desired wool. Next, draw a small muzzle on white paper, the size of the body.
Color it, add the necessary elements, seal it with cardboard and glue it to the body. The last step is to cut out the tail and connect it to the body. And now, the new toy is ready.
Chenille wire
- 2 foam balls with a diameter of 2 cm and 4 cm;
- wire white, brown, pink;
- heat gun.
A hole is made in the ball on one side, glue is applied, and a brown wire is inserted. The ball is wrapped around her. The same actions are performed with the second ball. Then the parts are glued together - these are the body and the head.
For the paws, take white wire and twist it in the shape of a trefoil. One part is glued to the body.
The white wire for the ears is twisted into a spiral, and pieces of pink wire are inserted into the middle.
The ears are attached to the head.
The muzzle is formed from white wire, the tail is made from brown, the parts are glued, the mustache is secured - and the cat is ready!
You can make a cat from plasticine or plastic mass. To create a more complex craft you will need:
- Draw the outlines of a cat on a beautiful background, drawing all the details in color.
- Make a lot of balls with a diameter of 2-3 mm from plasticine of different colors.
- Attach plasticine parts to the drawing of the cat.
Soft cats
Handsome cats are made from felt or felt.
If a child knows how to sew, then using the template he can make a phone case, an anti-stress cat or a bookmark.
Felting wool is also useful. For the craft you will need wool of 1-2 colors, 2 foam balls, beads, and tools - a needle for felting.
The balls are wrapped in wool and carefully pierced with a needle, creating an even soft layer on the surface.
Ears and paws are laid separately.
The parts are connected to each other by placing pieces of wool or gluing them together. The cat is decorated with a ribbon, beads are glued instead of eyes. The DIY “Cat” craft is ready! Patterned cats
The quilling technique allows you to create original panels.
- strips 5 mm wide;
- scissors, tweezers;
- quilling stick;
- glue;
- basis for work (designer cardboard, beautiful printed background).
A contour drawing is made on the base.
5 turns are formed for the head, 6-7 for the body, several parts in the form of a drop.
Ears (in the shape of drops) and paws are glued on, and whiskers are attached - wound on a stick and straightened strips.
Available materials
To create a “Cat” craft with your own hands, you will need everything you can find at home.
Option 1
A disposable plastic plate quickly turns into a cat's face. The complexity of the work is low, production time is 20-30 minutes.
The plate is the head, the eyes and nose can be drawn with paints, but it’s more interesting to do it in volume:
- For the nose, take a black or pink pompom. It can be wound from threads. A triangle cut out of paper looks beautiful.
- Chenille wire is used for mustaches.
- You can use ready-made eyes or draw them with paints or a marker.
- All that remains is to glue the triangular ears - and the cat is ready.
Option 2
The cat silhouette template is transferred to the cardboard base and pins are inserted along the contour. Then the child weaves the threads, hooking them onto the heads of the pins, filling the inside of the outline.
Option 3
There are always a couple of empty plastic bottles in the house. They will come in handy to make a bright and cheerful cat that will fit perfectly into your country house design.
To help the young master - a master class in video format.
Option 4
The vegetable cat is easy to make. You will need 2 potatoes, carrots and a little plasticine:
- The potatoes are connected to each other with skewers.
- 4 legs, a tail and ears are cut out of carrots and secured with skewers.
- Make a nose, eyes and mustache from plasticine.
Important! You can make your own “Cat” craft from other vegetables, chestnuts and nuts.
Option 5
Cotton pads will make a funny cat applique.
A video with a master class will help you create an interesting craft.
Another option is to use not only cotton pads, but also disposable spoons.
Crafts for Beginners
Let's present a list of cat craft ideas for your children that they can easily handle. Since creativity occupies a very important place in the development of children, these crafts are clearly suitable for them; they develop thinking and imagination.
CD cat
The first option for our furry friend is a portrait on DVD. To make it, prepare a disk, a marker, glue and double-sided tape, corrugated and colored paper, and scissors.
Creation instructions:
First, make a black circle out of paper, its size will be slightly larger than the circle of the disk. It will replace the cat's nose; stick it in the center of the disk. We cut out the eyes and ears from beautiful paper; the shape and color will depend on you. You can make it up, or you can compare it with a photograph or picture.
Use glue to connect the disk to the eyes and ears; you can also make a beautiful butterfly with ribbon or paper. The cat will turn out funny and respectable.
Picture of puff pastry
The craft will delight you with its presence on the wall of your home; it is a way to complement the interior. The creative process cannot but delight a person, especially when the result of the work exceeds all expectations. You will need a stationery knife, a cat figure template, foil, a frame, beads and ribbons, acrylic paints and puff pastry (water, salt, flour).
Step by step creation.
We take a ready-made cat template, you can draw it yourself, or you can take a ready-made one from the Internet. The dough must be kneaded from salt, flour and water in a ratio of 1:1:1. Water is added to ensure that the dough is not too sticky. This consistency will make the mixture suitable for use and creation of a work.
Roll out the dough into a flat cake, apply a stencil, and use a knife to cut out a shape. To prevent the dough from sticking to the table or fabric, it is best to use foil as a mat.
Three to four hours are enough for the test composition to dry, after which it becomes hard and the edges of the figure must be sanded with sandpaper. Using a thin marker, draw a picture of the desired cat, and then use any paint to paint the craft. While painting, your mood will only improve, and the process will bring pleasure.
The background can be drawn on cardboard and made absolutely anything you want. Glue the dough craft on top of the cardboard, and place the frame over the entire picture.
You can add decoration using beads or ribbons, tie bows and knots. For the best effect, it is necessary to coat the work with varnish and dry it.
Felt cat
To make felt crafts, you need to prepare felt, glue, padding polyester, pencil and paper, beads and threads, and scissors. Using a template or your own efforts, draw the outline of the future work onto felt from paper. It will be most convenient to use needles or pins to connect paper and fabric.
The parts of the cat need to be made separately, as well as its two sides: front and back. Using a knife or scissors, cut out the parts along the contour. We decorate the muzzle with button eyes, the nose and mouth with multi-colored threads.
We connect the parts to each other, sew the tail, head and paws into place. During sewing, we fill the parts with padding polyester, adding volume and airiness. You need to use an overcast seam, it will look beautiful. At your request, you can add decoration details: scarves, ribbons, bows, butterflies, ties.
Paper cat
Well, what about paper art, an excellent material for creating your four-legged friend. You can easily find a use for such a miracle, for example, a desktop or a bedside table. To make it, prepare cardboard (black, green), yellow paper, marker, glue and scissors.
And now the actual process of creating a cat. Take black cardboard and fold it in half, and cut along the fold line with a knife. We bend one of the parts in half again and cut out a semicircle, we get the body of a cat.
LiveInternetLiveInternet
—Categories
- ANNOUNCEMENTS (82)
- MY MK on dolls (86)
- MK “Doll for good luck” (2)
- DIY MK needle threader (1)
- speech at the seminar: MK Metla Metelkina (1)
- MY DOLLS (1)
- How to fix makeup mistakes (1)
- MK "Exclusive Christmas tree toys" (1)
- MK on sheep (1)
- Exclusive Christmas decorations (performance at the conference (1)
- MK on a rat, an umbrella and a chocolate (1)
- DIY magnetic curtain clip (1)
- Speech at a conference with MK on Oduvan and Obere (1)
- Performance with MK on rat, zantik, chocolate, butterfly (1)
- MK "Glafira Goat" (1)
- MK front sight with a penny (1)
- MK on creating a frame doll: girl with a loaf of bread (1)
- Master class on creating a doll “House Witch (1)
- Master class on creating wonderful cats (1)
- speech at the seminar: MK on brownie and front sight (2)
- My tutorial on making a doll for good luck (11)
- MY MASTER CLASS on making a hamster doll (9)
- My MK on the frame doll “Dasha” (12)
- MK baby in a bag (4)
- Snail tutorial (1)
- MK on the apple caterpillar (1)
- MK hands for dolls (1)
- MK flower fairies (4)
- My MK on the “sun” (3)
- My Mk for making stumps (1)
- MK eyes for a doll (1)
- Glasses for dolls (1)
- How to sign photos of your works (1)
- how to download my MK to your computer (1)
- MEET MY DOLLS. (129)
- MY PICTURES (1)
- DOLLS (1177)
- Roosters and hens (1)
- MK for dolls made of nylon (stocking technique) (209)
- MK on sewing dolls (161)
- Ritual dolls and little houses (49)
- thread dolls (6)
- reborn (1)
- MK paper dolls (2)
- eyes, eyelashes (66)
- hair (89)
- wings (21)
- clothes for dolls (71)
- shoes (85)
- hats (29)
- accessories for dolls (178)
- doll stands (10)
- tool (37)
- photos of different dolls (91)
- certificates and labels (20)
- Links (36)
- Books and magazines on textile dolls and toys. (43)
- miscellaneous (17)
- TOYS (452)
- coffee toys (56)
- Horses for 2014 (19)
- socks toys (14)
- Goats by 2020 (11)
- felt (7)
- Dogs (3)
- nesting dolls (2)
- Cows, bulls (1)
- sewing toys + patterns (202)
- fur toys (8)
- felting toys MK (96)
- reels (18)
- knitted toys (9)
- from yarn (2)
- photo of toys (17)
- PLASTIC MOLDING (212)
- ABOUT PLASTIC, etc. (8)
- plastic jewelry (2)
- babies made of plastic MK (25)
- MK plastic dolls (50)
- modeling dolls (28)
- modeling of miniatures and toys (39)
- plastic crafts (54)
- hands (8)
- plastic surgery recipe (10)
- flowers (4)
- magazines and books on modeling (16)
- CRAFTS (495)
- crafts with coffee beans (11)
- from threads (6)
- Valentine's Day (5)
- MY CRAFTS (18)
- plastic crafts (44)
- felt crafts (1)
- from paper and newspapers (107)
- trinkets for the home (150)
- various crafts (114)
- new year (102)
- photo frames (6)
- HANDCRAFTS (884)
- Foamiran (43)
- different flowers MK (42)
- Shibori (13)
- creative material (12)
- Imitations (10)
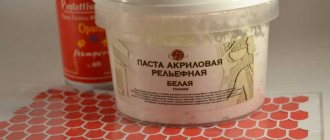
- structural pastes, different masses (10)
- For birthday (7)
- leather (5)
- Encaustic (4)
- beads (3)
- stencils (3)
- gift ideas (2)
- epoxy (2)
- books and magazines (2)
- Easter (1)
- Clay (1)
- Diamond technology (mosaic) (1)
- wedding (1)
- salt dough (129)
- cold porcelain (174)
- jars (79)
- bonsai (15)
- decoupage and decoration (46)
- stained glass painting (8)
- making butterflies (8)
- felting (1)
- embroidery (2)
- drawing MK (26)
- quilling (16)
- flowers and crafts from nylon (28)
- sewing (66)
- Kanzashi (7)
- candles (4)
- stone painting (10)
- various master classes (31)
- candy bouquets (29)
- plastic bottles (21)
- butterflies (17)
- Lamps (11)
- handmade cards (10)
- leaf skeletonization (8)
- fusing (2)
- eggshells (3)
- bows (7)
- straw (1)
- paintings (9)
- crystal (1)
- books, magazines (1)
- BOXES AND PACKAGINGS DIFFERENT (22)
- TEMPLATES, Stencils (10)
- USEFUL TIPS FOR YOUR HOME (71)
- NOTES FOR COMMENTS (31)
- "thank you" (5)
- "please" (2)
- comments (9)
- flowers (5)
- emoticons (1)
- different (2)
- DIY GOODIES (99)
- useful tips (14)
- multicooker recipes (4)
- BEAUTY AND HEALTH (41)
- Women's things (7)
- Fashion (6)
- COMPUTER and everything connected with it (161)
- computer educational program (51)
- programs, software, etc. (24)
- photoshop (71)
- useful links (16)
- MISCELLANEOUS (192)
- interesting (13)
- Li Ru questions and answers (100)
- pictures (36)
- Evernote + LiveInternet (11)
- frames, buttons (17)
- video (11)
- prayers and spells (3)
- humor (36)
- funny congratulations (7)
- Catmatrix (1)
- download (2)