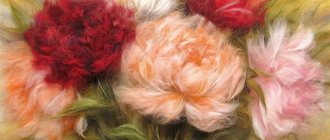
Autumn BOUQUET - 50 photos of compositions of leaves and flowers.
Good afternoon – today I’m starting a series of articles on decorating your home in the fall. In this article I will show you how to make autumn bouquets. I’ll show you how to choose the material... and what rules to use to design a bouquet arrangement. We will see vivid examples of autumn floristry from juicy flowers and dry bouquets of leaves... How to make low bouquets from autumn material. I'll tell you what original vases can be made from simple pumpkins, zucchini and cabbage... In short, there will be a lot of interesting things.
The Scarlet Flower
A very simple idea to create a DIY card for your mom for Mother's Day. The finished craft will look very impressive.
You will need glue, scissors, colored paper, a cap (mold) for cutting even circles and cardboard.
On colored paper of different colors, draw circles using a cutter and cut them out.
Article on the topic: Crochet washcloth for beginners from twine: diagrams with photos
Fold all the circles of the workpiece in half. Now take a piece of cardboard in the color you like and fold it in half to make a card. Start gluing the petals to the front part, lubricating only one part of them, and leaving the second free.
Note. Don't forget to make not only a bud, but also a stem. It will take about three to four circles.
You can decorate as you wish. As you can see, the technique for making a postcard is very simple; your child can do everything on his own in kindergarten.
Composition from autumn material
Autumn is rich in natural material in the form of leaves painted in different colors. You can use them to make an amazingly beautiful rose. You need to prepare fresh leaves with a long stalk. Dry leaves will bend and break, so they are not suitable for crafts.
Required material: 5-7 leaves of different sizes, threads.
Mom's peonies
This master class will be dedicated to flowers. The card will be voluminous and very delicate.
So, to get started, you will need glue, circle shape caps, a wooden skewer, a stapler, plasticine, a pencil and cardboard. We can start.
On multi-colored napkins, draw and cut out many circles of any diameter; for convenience, you can use caps.
Take pastel colored cardboard and fold it in half, this will be the base of our card. Glue plasticine circles onto it.
Now let's move on to the main thing - volumetric peonies. Stack the cut out circles and secure them in the middle with a stapler. There are two ways to form lush petals. Either use a wooden stick to shape the bud and glue it to plasticine, or secure it with a stapler and straighten it with your fingers; children's fingers will cope with this task very well.
Glue the resulting lush peonies onto a cardboard base. You can further decorate the card or leave it in its original cute style.
DIY craft for Mother's Day in the senior group of kindergarten
DIY gift. "Heart for Mom." Master class with step-by-step photos.
Making a heart from napkins on a cardboard base. "Heart for Mom." Master class with step-by-step photos.
Author: Andronova Marina Aleksandrovna, teacher of MKDOU Gavrilovo Posad kindergarten No. 1, Ivanovo region Description of work: This master class is intended for children 5-6 years old. It will be useful for additional education teachers and parents; for everyone who wants to please their loved ones with a handmade gift. Purpose: gift, interior decoration. Goal: creating a composition using the technique of planar trimming and rolling napkins. Objectives: - consolidate the ability to use the technique of planar trimming, rolling napkins; — consolidate the ability to create compositions using these techniques; - develop fine motor skills, imagination, artistic taste, the ability to beautifully present a gift; In November, the whole country celebrates Mother's Day. Mom is the most important person in a child’s life. Mom is the first word a baby says. On this day, all mothers hear the warmest words addressed to them and, of course, receive gifts. So my students wanted to give their mothers gifts. The children offered different options, but most of all they liked the hearts that Alina suggested. We decided to decorate them using napkin balls. And to make our hearts even more beautiful, we added flowers. The children really wanted to please their mothers. Materials and tools: - red and white napkins; - glue, glue plate; - glue brush; - marker; - scissors; - colored cardboard; - stapler; - heart template;
Step-by-step work:
Take a sheet of cardboard of any color. The most important thing is that the color matches the color of the napkins beautifully. My color is grey. On the reverse side, using a template, draw a heart.
Then, using scissors, cut it out.
Let's start decorating the heart. Take a white napkin and cut it into three strips with scissors.
We divide each strip into small squares.
Now, we crush each square with our fingers, we get balls.
Along the edge of the heart, gradually apply glue and carefully place our balls. This is the contour we got from balls.
Now let's do the flowers. Take a red napkin and fold it in half.
Then cut in half again. We got a square.
Using a stapler, fasten it in the middle.
Then we cut off the corners of the square with scissors, making a circle.
We carefully lift each layer of napkin towards the middle with our fingers.
When all the layers of the napkin rise, you will get such a miracle - a flower. We will glue it to our heart.
Look how beautiful it turned out.
And these are hearts made by my students.
The mothers were very pleased. Thank you for your attention!
We recommend watching:
DIY autumn applique made from natural material for children 4-5 years old. DIY applique made from natural material for Mother’s Day. Crafts for Mother’s Day in the middle group. Card for mom DIY card for mom for Mother's Day with templates. Senior group
Similar articles:
Photo frame using scrapbooking technique for Mother's Day
