We invite you to watch several MKs, which reveal the theme of the symbolism of the Russian Federation and the beauty of its open spaces using such an unusual technique as quilling.
Postcard for Russia Day using quilling technique
One of the most recognizable symbols of our country is the logo of the United Russia party. It depicts the Russian tricolor fluttering over a polar bear. Even a novice master can make a small panel with such an image with his own hands.
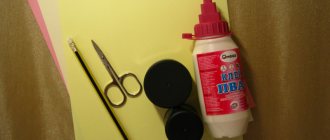
To work on the Russian flag you will need:
• Paper tapes for quilling in white, blue, red and black colors;
• A white piece of paper;
• Pencil, scissors, glue for paper;
• Base for the postcard (you can take any beautiful thick cardboard);
• Toothpick or awl for quilling.
Before starting work, you need to prepare templates with the image of a bear and a flag. They can easily be found on the Internet, printed or transferred through a computer screen onto a piece of paper, and then cut out.
A step-by-step description of how to make your own symbols of the Russian Federation for a patriotic postcard:
1. Glue the cut out images onto the base.
2. Prepare white roundels of different sizes to fill the upper part of the flag.
3. We give the resulting rounds an arbitrary shape, but take into account that the outer blanks should ultimately repeat the contour of the template. We fill the resulting voids with small quilling parts. We do the same with the blue part of the flag and the red one.
6. To create the effect of the waving Russian flag, add a few more curved details at the end.
7. Along the outer contour we fill in the bear figurine in the same way.
8. The last step is to fill the inner part. The image for the postcard is ready!
This craft can be given to family or friends on Russia Day, or sent to a patriotic competition - the jury will definitely appreciate it!
Flag layout
The craft can be designed as a layout for the Russian Flag Day. A group of children, for example, in a kindergarten, can be involved in making flag crafts.
For the layout you will need children's palms cut out of colored paper. Each child will feel their importance in life by looking at the end result.
To work you will need to prepare the following material:
- 2 types of corrugated cardboard. One is A4 sheet size. The second one has side parameters of 6x12 cm. There should be two such sheets.
- Paper in three colors: white, blue, red. Paper size A4.
- Paint brush, red gouache.
- PVA glue.
- Pencil.
The base for the flag is made of corrugated cardboard. A rectangular shape with sides 25x35 cm is cut out. To attach the base, you need to make slits 3 cm deep.
From the corners below it is 5 cm apart towards the center. A photo of step-by-step instructions for making a Russian flag model will help you clearly understand the work process.
Next you need to prepare stands for the flag. Prepared rectangles with sides 6x12 cm are cut so that one of the corners becomes semicircular. The slots for fastening are made identical to the slots in the base.
Two important elements are connected: the stand with the base. The part of the stand that is visible in front of the base is covered with red color on the front side.
Palms are cut out, 8 pieces of each color. Palms are glued to the base from top to bottom in rows. First the white palms are glued on. The parts are placed overlapping.
It is necessary to place your palms so that the base is not visible between them. It is recommended to apply the adhesive base to the wrist area. Your fingers should be free of glue.
The craft will be ready when three stripes imitating a flag are glued.
Both works can be exhibited at an exhibition of children's crafts dedicated to Russia Day and Flag Day. Some ideas in the design of two crafts can be used in a wall newspaper.
Craft for young children
If the baby is only 4 years old, this does not mean that he cannot please his mother with something interesting that he can make with his own hands. They make a lot of paper crafts. It’s time for a child to learn how to handle scissors and glue; besides, creativity develops fine motor skills and perseverance.
Advice! DIY crafts for Mother's Day can come in many different forms. For example, a postcard with a bouquet of flowers would be an excellent gift. To make it you will need a landscape sheet, a set of colored paper, scissors and glue.
The white sheet must be folded in half to make a postcard-book. Now you need to cut out a blank from green paper, which should be shaped like an hourglass, but only one part will be smaller than the other. Next, it is pasted onto the cover of the postcard. The top should be larger than the bottom. This will be the green part of the bouquet. It is necessary to cut a bow for it, which is glued to the narrowest point of the green blank.
Now you need to cut out the flowers from paper of one color, and the centers of another. All this is glued and the result is simply an excellent postcard. Inside, with the help of adults, the baby can write a wish for his mother.
This is the easiest holiday craft for Mother's Day. Even a four-year-old child can handle such a postcard. For older children, you can choose a more complex version of the product in the form of a three-dimensional postcard. For it you will need paper, including colored paper, scissors, pencil and glue.
A bouquet of voluminous flowers will be placed inside the card, so the A4 sheet needs to be folded in half. On the front part you can stick a flower made of colored paper or make an interesting thematic design that your mother will be very happy about.
Next we move on to working on volumetric flowers. To do this, 7 small identical squares are cut out of colored paper. It is best to take double-sided material so that the flowers look beautiful and colorful from all sides.
The squares must be gathered into a corner, as is usually done when cutting out snowflakes. That is, first the paper is folded in half, then into a triangle, and then into a sharp triangle. The upper part should be carefully trimmed in a semicircle. If you unfold the flower, you will get a blank with 8 petals. Next, you need to make a cut about one petal to the center and fold the flower so that you get only 7 petals. The result will be a cone. There should be 7 of them in total.
All flowers should be carefully glued together by the upper petals so that they form a semicircle. If everything is done carefully and correctly, the workpiece will easily fold into a flat picture and arrange into a large and lush bouquet. It needs to be secured in the center of the postcard spread. Thus, when the craft is opened, the flowers will “bloom”. When closed, the postcard will be quite compact.
You can decorate the front part of the product in any way, put a congratulatory inscription from small flowers, or simply decorate the postcard with a design. Very original options are obtained when decorating a product using openwork napkins.
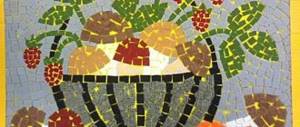
Application on the theme “Russian flag”
This version of the application can be developed for both small and older children. The background will be the outlines of the Russian borders on the map.
The territory is divided into three lanes. Flowers of the desired shades are glued to each strip. For kids, it is better to prepare templates of simple flowers.
Older children can use a template to cut out flowers that grow in Russia. For example, daisies are cut out for a white stripe. For blue - cornflowers. Poppies are suitable for the red stripe.
The flowers are cut out the same way. They differ from each other only in the design of the middle. For chamomile it is a yellow circle, for cornflower it is blue “snowflakes”, for poppy it is a black circle and an even smaller green circle is glued to it. The map of Russia can be cut out of colored paper, or drawn with pencils or paints.
It will be fun for kids to do a job using spaghetti. The basis is a colored sheet of paper. A flag is drawn with a pencil on the entire sheet.
Glue is spread on the canvas and spaghetti is laid out carefully, close to each other. Next comes the paints. They cover spaghetti in three colors: white, blue and red.
The wooden handle is finished with brown paints. Children will be able to do this kind of work and will be interested in learning about the symbols of the country.
Every year, on public holidays, exhibitions of children's work are organized, where interesting crafts are exhibited. The number of participants is not limited. The priority is given to the originality of the craft.
Mother's Day Crafts
Children's crafts for Mother's Day will be a wonderful surprise for all mothers. Older children will be able to make them on their own, and little ones with the participation of adult sisters, brothers, dads or even their teachers.
Paper slipper
High-heeled shoes are a purely feminine thing, so for the main day of all mothers, a craft in the form of them, and even filled with sweets, will come in very handy.
You will need:
- beads;
- colored paper;
- ribbons;
- glue;
- marmalade, dragees or colored caramels;
- scissors.
Instructions for creating a shoe are presented below.
- Print or draw a template for the shoe and decorations for it.
- Bend the parts along the dotted lines and glue them together.
- After the shoe is dry, decorate it with a flower, beads or any other decor. After this, wrap the sweets in a piece of organza or any other transparent fabric and place them inside the craft.
Such crafts for Mother's Day can be made with your own hands from plain paper, but they will look much more interesting if they are made from paper with a pattern.
Basket with flowers
This is a simple, but at the same time very cute craft. She will certainly please many mothers.
You will need:
- three wooden skewers;
- green corrugated paper;
- a couple of paper plates;
- scissors;
- colored paper;
- paints;
- glue.
Your actions:
- Cut one of the plates in half; for greater decorativeness, you can do this with curly scissors. Paint half and a whole plate with regular or pearlescent gouache; you can also use acrylic paints. After the paint has dried, glue the plates together with the middle facing inward.
- Paint the skewers with green paint; they will act as stems. Next, cut the colored paper into equal strips and make loops out of them, gluing the ends together.
- Cut out three circles from colored paper or cardboard and glue four petal loops to each of them.
- Glue the skewers to the back of the flower heads, then cut out three more circles and glue them onto the ends of the skewers, thereby hiding the gluing area. Cut out leaves from corrugated paper (you can also use regular paper) and glue them to the stems.
- Place the resulting flowers into the basket and decorate as you wish.
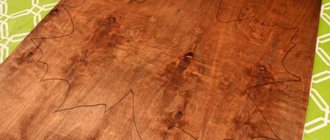
Stages of making a three-dimensional postcard for Russia Day:
Thick cardboard will become the basis of the postcard application. You can take any color; the surface of the cardboard will in any case be hidden under the spools of corrugated paper. The soft paper itself will be needed to imitate the Russian flag. We have selected the appropriate shades. Additionally, we will decorate the craft with a paper dove and flowers to match the flag.
Cut out a rectangle from cardboard. Cut rolls of soft corrugated paper into small squares. You will need three separate portions of red, blue and white paper.
Roll many balls of soft paper to cover the surface of the cardboard. This technique is called clumping because the process involves creating many small lumps.
Generously coat the surface of the cardboard with thick glue and begin pressing the prepared lumps on top, collecting them by color. You need to form three stripes of red, blue and white. You can pre-apply pencil borders for more accurate work. Attach the balls tightly, pressing each subsequent one to the previous one.
Fill the entire surface of the canvas with balls. Now the famous banner is ready. The surface of the applique is rough, the craft looks like a three-dimensional postcard.
To add some extra festive elements, also make some paper flowers to match the overall composition. Cut the paper into squares. Fold each square several times and trim the top edge with a birdie. You will get a blank for a flower.
Glue white and blue flowers from two layers of paper. Glue the red center - a simple spool of corrugated paper - into the center.
Glue flowers at the bottom of the applique.
Cut out a dove figurine from white paper. Glue to the center of the applique.
Mother's Day Gifts
Every child dreams of giving their mother the best gift in the world. For a mother, nothing, even the most valuable thing, can compare with what her child made with her own hands. A DIY gift for Mother's Day can be anything - vases, paintings, appliqués, photo frames, boxes, organizers, decorative items, jewelry. Let's look at some interesting ideas.
Vase from a jar
Even a child can handle making such a vase. To make it you only need a suitable jar, paint, double-sided and regular tape, a photo of the mother or child.
- From cardboard, cut out a fragment equal in size to the photograph; it is better to make its edges wavy. Using double-sided tape, glue the piece to the center of the jar.
- After this, coat the jar with several layers of paint. When the paint dries, remove the cardboard piece - you will have a window.
- Opposite the window from the inside of the jar, stick the selected photo with tape.
- If your jar has a raised inscription, you can add additional decoration. To do this, simply scrape the paint off the bumps with a utility knife.
Photo frame for mom
A good gift for Mother's Day is a photo frame. You can put your mother’s favorite photo in it, this will make the gift even more beautiful and valuable. To make a photo frame, you can use different materials - buttons, shells, cereals, pencils, beads, artificial flowers, coffee beans and even pasta.
- To create a frame, you can use any ready-made base or make it yourself from cardboard. To do this you will need cardboard from the box, scissors, pencil, ruler and glue.
- First you need to decide what size photo you will make the frame for. After that, add 8 cm to each side. For example, if the photo is 13 by 18, our frame will be 21 by 26 in size. Now draw and then cut out two rectangles equal to the size of the frame.
- In one of the rectangles, draw a rectangle the size of the photo, and then cut it a millimeter closer to the middle of the marked lines.
Master class “A heart for your beloved mother”
The master class was prepared by: Nadezhda Vyacheslavovna Chetverikova, teacher of the National Preschool Educational Institution “Kindergarten No. 82 of JSC Russian Railways”, Kostroma region, the city of Bui.
The master class is intended for teachers to work with children of senior preschool age.
Purpose of the master class:
making gifts for mothers on March 8, for Mother's Day, for teachers on March 8.
Target:
Give an idea of unconventional ways of working with paper napkins.
Tasks:
Teach children to make three-dimensional crafts from napkins.
Continue to introduce the various properties of paper.
Develop fine motor skills of hands
Cultivate patience, perseverance, and accuracy in work.
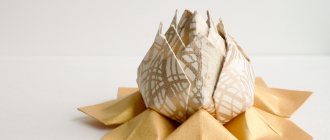
I would like to offer you ordinary paper napkins as a material for making hearts. Paper napkins are a very pleasant material for creativity. It is a pleasure to work with this material. By twisting a lot of napkin balls you can make many beautiful, bright, original things. These incredible things are made from material that can be found in every home, and are inexpensive in the store.
Panel with the coat of arms of the Russian Federation
A good option for various competitions would be to create the Russian coat of arms in quilling style. Beginning needleworkers will first need to practice forming the basic shapes of this technique from quilling strips. But in general, this master class is quite simple to complete.
The tools you will need are the same, from materials - quilling strips of yellow and orange colors, a base of red cardboard, a printed or drawn image of the coat of arms, a printed image of St. George the Victorious with a dragon.
Detailed instructions on how to make quilling the coat of arms of our country:
1. We wind paper ribbons onto a toothpick or quilling tool and form them into round shapes.
2. For dimensional accuracy, it is recommended to use a stencil ruler with circles of different diameters.
3. Move the center of the round to the edge and form a drop out of it.
5. We pin pins along the contour of the image of the coat of arms of Russia. To do this, you need to put soft material (foam, foam rubber, etc.) under the base.
6. Wrap the pins with an orange paper strip, following the outline of the image.
7. This is what the wings of an eagle should look like.
8. Fill the outline with yellow drops and fix them with glue.
9. In the end, the wings should look like this. If necessary, the shape of the drops should be slightly adjusted depending on the shape of the outline of the coat of arms.
10. Next, fill in the rest of the wings and tail of the eagle in the same way.
12. Now let's move on to the head.
13. After this we form the crown.
14. The outline for it is made from such an accordion, consisting of two colors.
15. Place the accordion in the same way as in the picture.
16. Make details to fill the outline of the crowns and form all three crowns.
18. In the same way - the paws of an eagle, in a mirror image.
19. All parts of the coat of arms are carefully lubricated with glue. After it dries, they are turned over and connected together according to the pattern, and then glued to the base.
20. In the center of the composition we glue the image of the shield with St. George the Victorious and decorate the work with a frame.
This step-by-step tutorial will help you create other similar quilling projects. For example, you can make a coat of arms of a region, region or city.
Patriotic themes provide enormous scope for imagination, not only in terms of state symbols. A good idea would be to create a panel with a landscape to show off your beautiful region, or to depict some Russian craft on it. For inspiration, you can view various sketches and works of other masters.
DIY crafts for 1st grade for Mother’s Day – “Loving Heart” postcard made of paper step by step
In 1st grade, you can make very beautiful and original greeting cards from paper with your own hands for Mother’s Day. Children will cope with such work without any difficulties, and mothers will receive bright, spectacular and memorable gifts from their children on their wonderful holiday.
Necessary materials for making a DIY Mother's Day card
- thick tinted paper A5 size
- scissors (stationery and curly)
- simple pencil
- corrugated paper
- stapler
- set of colored paper
- set of colored viscose napkins
- PVA glue
Step-by-step instructions on how to make a DIY paper card for Mother's Day in 1st grade
Crafts competition on the theme of state symbols
The 4th city competition for the best knowledge of official and state symbols among students of educational institutions was held at the Young Technicians Station.
The competition is held in accordance with the state program “Patriotic Education of Citizens of the Russian Federation”.
The exhibition featured works from all schools in the city. This year PU-15 and school No. 7 took part for the first time. A total of 77 works were presented, which is almost twice as many as last year. About a thousand people came to see the exhibition.
At the competition, in addition to quality, creativity, aesthetics, complexity and originality, one of the evaluation criteria was novelty. And if in the first year all the works were new and original, then in subsequent years we had to apply more imagination. This time, the exhibition combined all the accumulated ideas from previous competitions, plus new and interesting things were added.
For example, the coat of arms of the Kurgan region made from baked dough. Moreover, it was prepared in several stages: first, what should be darker was baked, and then a “light” layer was added, everything was neatly laid out and went back into the oven.
various cereals were used. Millet... Sumina Elizaveta. 4th grade. "Coat of Arms of Russia"
rice... V. Tyulubaeva. 5th grade. “Coat of arms of the city on Iset”
There was even room for spaghetti. Everything was carefully glued and then painted. N. Chechkina. 2nd grade. “Flag of the Russian Federation”
maple “helicopters” Nikita Tereshchenko. 4th grade. “Coat of arms and flag of Russia”
Sculptures “Shadrin Martens” performed by Nabiullin Rail.
True, they later told us that the crafts were not made by a schoolboy, but this did not make the work less high-quality and less detailed.
Martens were made from salted dough. Ingredients: flour, salt, a little oil and water. The dough is made like dumplings, but a little tighter and molded like plasticine, dried for several days (so that the dough does not rise in the oven), and then put into the oven. The difficulty of the work lies in the fact that the dough is dough - try to make something out of it yourself.
Conventionally, it was possible to single out one more part of the crafts - made from paper and foil. These were flat and voluminous products.
It is immediately clear that the student made the work herself “from start to finish” by Valya Pokazanieva. 3rd grade school No. 10
Volumetric works
We take many strips of paper, twist them, crumple them as necessary and lay out the picture. Do you think it will be nonsense?
let's look at the result. Impressive, isn't it? Alena Domracheva. 8″B” class of school No. 8. Coat of arms of Russia
Or here’s something else presented by Anastasia Buzmakova, Ksenia Shupletsova (3rd grade), Daria Mikhailova, Polina Zlodeeva, (2nd grade)
It was also possible to conditionally highlight the creative works of handicraftsmen - beads, embroidery, modeling.
The most authentic necklace and earrings. At matches of the national team, such crafts would sell like hot cakes.
Well, our children don’t care about Faberge. They'll do even better. Anastasia Vazhenina. 11th grade of school No. 8. “Orthodox Russia”
Anna Lantseva (1st grade) and Alina Shevchenko (7th grade) presented embroidery with pads.
Artem Tabuev’s other figurine works were also interesting. 7″B” class Lyceum No. 1 presented to everyone the largest cities of the Kurgan region
Egor Savin (10th grade) had a wooden craft. He called his work “Shadrinskaya Bowl”
To make such a bowl, you need to make several segments so that they fit tightly together and glue them together.
Part of the exposition was occupied by technical exhibits. A large-scale working model of the seaworthy gunboat “Koreets” was made by tenth-graders of school No. 2 Alexander Selin and Alexander Volkov.
On February 9, 1904, the cruiser “Varyag” and the gunboat “Koreets” entered into battle with a superior Japanese squadron. To prevent the Japanese from capturing the ship, the Korean was blown up.
Egor Markov (11″A” class) also presented a working model of the steamship “Lena”. The steamship is better known to everyone under its second name - “Chelyuchkin”. The guys study in the children's association “Ship Modeling”.
In our opinion, the most labor-intensive work was the “Shadrinsky prison” stand.
Each part of the building has its own historical name. And not every one of us can easily remember... and not every one of us even knows what a “block house” and a “tynom wall” are. This stand is interesting in that it has not only an informational, but also an educational purpose. This was realized using the electrification method. It works like this. From the panel on which the parts of the prison are written there are wires - probes. For example, we need to find the Coat of Arms of Shadrinsk from 1781. We place one probe on the inscription, with the second wire - with a pointer we touch the contact on the part of the prison (the bolts stick out there). And if we indicated correctly, then a melody sounds.
The work was assessed in three age categories: grades 1-4, 5-8, 9-11. I'll add the results a little later.
photo album Competition for crafts of state symbols
Stanislav Fiskov September 30, 2011, 15:24
needlework
← The heating season 2011-2012 has started in Shadrinsk Shadrinsk tourist rally – 2011 →
TweetShare with friends
Articles on similar topics
Russia Day | Country of Masters
| Dream catchers… Master class, Amulet | For you, my Russia! Master class, Craft, product, Flash mob | Watch “Flowers of Russia”. Craft, product | My brooches for May 9 and June 12 Master class, Decoration |
| Twist doll “Russian girl” Doll, Master class, Craft, product | Muffin “Besik”. Happy holiday... Kusudama, Master class | Russia is my homeland! Master class, Postcard, Flash mob | Pop-up postcard “Russia” Master class, Postcard, Flash mob |
| February 23 (window decoration with protrusions) Interior | Promised brochures Decoration | Russian flag... and other striped flags Master class, Craft, product | Happy Russia Day! Craft, product, Flash mob |
| Tank (origami without glue). MK Layout, model, Master class | Flowers of Russia Painting, panel, drawing, Flash mob | Flag (origami without glue). MK. Master Class | Russia Day Master class, Craft, product |
| Master class Kanzashi. Kanzashi Brooches -… Master class, Decoration, Flash mob | Russia is our favorite country! Master class, Postcard, Flash mob | My brooches for May 9 and June 12 (ideas taken... Craft, product | Russian flag Painting, panel, drawing |
| I remember! I'm proud! Decoration | HAPPY RUSSIA DAY! Master class, Postcard, Flash mob | Happy holiday, Russia! Postcard, Flash mob | Brooches for the great holiday - Victory Day... Decoration |
Symbol of Russia | Country of Masters
A rider on a horse is embroidery on satin with a straight stitch, it took 2 hours, I had to constantly turn the hand wheel on an electric sewing machine (very small work). Then the embroidery on the reverse side was smeared with glue; when it had dried, it was cut out and glued onto red satin. Rhinestones are glued along the edge.
We found two plastic bottles. The bottom one is made of sunflower oil, the top one is made of water. We cut them as needed and glued the necks together with hot glue. Two pieces of wire were wrapped in padding polyester and inserted into a cut bottle. The plastic from the bottles itself was wrapped with adhesive tape to make the fabric stick better. We made legs out of wire, wrapped them in yarn so that the yarn wouldn’t fly off, and smeared the wrapped surface with a little glue.
Kanzashki have been prepared. Anyone who does it knows how to do it; there is a manual for making various kanzashkas on the Internet. They started gluing it from the tail, then the legs, and brought it to the place of the wings. We got busy with the wings.
Wings. We found something from the packaging. We cut out the shape of the wings, covered them with kanzashki and glued them to the body of the eagle.
Of course, to do something you always need an idea or a picture, which is what we had before our eyes.
My student is a beauty. For this work she took 2nd place in the All-Russian competition “Knowledge of State Symbols”
Thank you all for stopping by, I hope this is useful to someone.