, genuine leather and other improvised materials for making crafts, from which we learned to make beautiful artificial flowers. Autumn has long come into its own and painted the world around us with bright, colorful colors. Autumn gave us wonderful natural materials for making unique crafts with our own hands - fallen from trees
autumn leaves of different sizes and with fancy shapes, as well as numerous flowers and inflorescences, which we will use to make beautiful flowers, pretty lamps, elegant bouquets with artificial roses, original compositions of vegetables and fruits for interior decoration.
And children will be happy to help their parents create amazing crafts from improvised, absolutely waste natural materials. Such joint leisure is very useful for the development of imagination, fine motor skills, and sensory abilities of young children and primary schoolchildren.
From autumn natural materials you can make not only simple crafts, children's educational toys, applications and herbariums. Interior designers have long adopted the unique beauty and indescribable sophistication of autumn gifts. The walls of the rooms can be decorated with exquisite panels and paintings with compositions in the form of flowers from autumn fallen leaves (maple, oak, chestnut), folded with your own hands in a special way. In order to use fallen tree leaves and dried flowers to make crafts, bouquets and compositions with your own hands, it is important to properly prepare these natural materials before work. You probably already know that autumn leaves can be placed between the sheets of albums (books, magazines, newspapers) and a load can be placed on top. This harvesting method is suitable for forming a herbarium, children's applique or collage of dried leaves.
But this method is not suitable for making voluminous crafts and bouquets of flowers from autumn leaves that have fallen from trees. Before you start twisting such flowers from leaves that have fallen from trees (for example, roses from red maple leaves), it is important to properly process them so that the crafts retain their original appearance for a long time. We will tell you about this in detail later in this article. In addition to tips and useful ideas for creating bouquets and compositions from natural materials, you will find here video lessons, as well as master classes with which you can quickly make simple compositions with your own hands (children’s crafts from leaves, appliques, figurines, collages), as well as complex bouquets and objects for interior decoration in the form of bouquets with flowers from autumn leaves (topiary) or compositions of dried flowers (see photo). You will learn how to properly process and preserve maple leaves and autumn flowers so that the beautiful crafts made from them do not turn into brittle, shapeless and curled objects. And from these natural autumn gifts of a wide variety of colors and with surprisingly different fancy shapes, you can make any artificial flowers - large roses, small cornflowers, graceful chrysanthemums, cute daisies, chic water lilies. The color of these homemade flowers can be very different (not just yellow or red) - after all, dried autumn leaves can be painted with an acrylic primer with the addition of a tint of the desired color (and then covered with colorless varnish). Using gel pens, you can apply different designs and geometric shapes on the surface of artificial autumn-themed flowers.
Ideas for creativity:
- Application.
A great idea for spending leisure time with your child! Have you already collected a lot of beautiful fallen leaves and autumn flowers from your yard, dried them, and made a colorful herbarium? Let's not stop there! Spread a large sheet of thick paper or cardboard on the table, lay out our “harvest” on it and create an original composition, combining colors and different forms of natural materials. You can glue the details of the autumn composition to the base with PVA glue (but it is better to use photo glue or gum arabic);
— Collage.
You and your child can put together a multi-layered bright collage under a frame. The bottom layer is large dark and brown leaves, then greenish, the upper layers are small bright contrasting leaves of red and yellow. We add dried autumn flowers to the collage, adding different shapes from them and getting a beautiful three-dimensional composition. Or you can add letters or words (as well as shapes) to the collage - tightly press a sheet of cardboard with cut out letters to the glued composition and carefully cut out the letters according to the letter template with a stationery knife (of course, with the hands of the parents, not the child);
— Educational game for children.
A great idea that your preschool child will love! Glue half of a fallen leaf onto a paper sheet (first cut the sheet vertically). The child’s task is to draw the missing half of the sheet with a pencil (felt-tip pen). Advise your child to choose the appropriate color of the pencil and carefully look at the shape of the half in order to accurately reproduce the mirror part of the composition. The most difficult option is a maple leaf, leave it for later and help your child draw a little;
— Painted autumn leaves.
You can decorate both flat and three-dimensional crafts made from leaves with painting. For this work, use gel pens and felt-tip pens (with silver, gold, white and other colors). Bouquets with decorated artificial flowers will look great in other interior objects;
— A bouquet of autumn leaves and dried flowers.
You will find information below on how to make flowers from maple leaves with your own hands and assemble a bouquet from them. If you decorate such a bouquet with dried flowers and place it in a small wide vase, you will get an excellent compositional center for your room;
— A tree or topiary made from autumn materials.
Another great option for interior decoration. You can make a small tree from fallen twigs and decorate it with homemade flowers made from leaves. Or make a topiary with your own hands (see photo), attaching many of these flowers to a floral ball (option: to a foam ball);
Tree (photo):
— Three-dimensional picture of the gifts of autumn.
You can use a large photo frame or a wooden picture frame as a base. The background can be made of cardboard, painted in a suitable color. We make interesting compositions with our own hands from maple leaves, dried flowers, fallen pine needles and other natural materials, attaching them to the base using wire.
Helpful Tips:
How to prepare autumn leaves for making crafts and applications at home.
- for voluminous crafts in the form of flowers and bouquets.
We won’t be able to make voluminous crafts from dried leaves, as they are too brittle.
Therefore, we will specially process the collected leaves. Divide the solution - 200 ml. glycerin per 400 ml. clean water. Carefully place the leaves that have fallen from the trees into a thick plastic bag and level them, then fill them with the prepared solution. The bag with the contents must be hermetically sealed (with a heated knife) or sealed with adhesive tape. Leave this bag in a dark closet for 3-4 days, and then spread the leaves on a paper towel to dry. From these flexible leaves that retain their original appearance for a long time, you can make a variety of flowers (below - MK: how to make beautiful roses from maple leaves with your own hands); - for flat autumn compositions (appliqués, collages).
Leaves and flowers collected in autumn are best dried in massive magazines and reference books. The collected natural materials must be thoroughly pressed with a heavy weight placed on top of the directory.
How to properly dry autumn flowers for crafts and compositions:
- iron drying.
Autumn leaves and many small flowers can be dried with an iron. To do this, lay natural materials on thick cardboard, cover with a thin paper sheet on top and iron with a not very hot iron until all the moisture has evaporated;
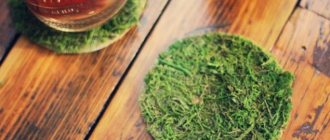
- natural drying.
An excellent option for drying autumn flowers. Stretch the rope in a dry room with good air circulation. We put the collected flowers in bunches and hang them on a rope with the inflorescences down;
- drying in the oven.
A wonderful way to dry large single flowers (roses, tulips, peonies) for making compositions.
The temperature in the oven should not be very high - approximately 50-60°C. Carefully monitor the process so that the flowers do not turn brown or lose their shape during drying; - volumetric drying of flowers.
According to many experienced florists, this method of drying autumn flowers allows you to preserve their natural shape and color. The cut flower is placed in calcined dry sand for 4 weeks. As a container, you can use a box with a fine mesh at the bottom and a retractable bottom. Flowers with double and voluminous inflorescences (lilies, dahlias, roses) are placed in the sand with the stems down, and with flat inflorescences-baskets (buttercups, daisies, asters, forget-me-nots) - with the stems up.
What tools and materials may be useful for making autumn crafts:
- Scissors.
Small scissors with blunt ends for a child and sharp, long ones for an adult;
Stationery knife and stacks. Using a stationery knife is convenient for cutting multi-layered parts of a craft. Plastic stacks are great tools for a child to use to cut individual leaves for appliqué;
- Shiloh.
For convenience, choose a tool with a wide wooden handle (length - 5-6 cm) and a not very thick piercing part;
— Long tweezers and tweezers.
Tweezers are convenient for moving small parts of crafts. Nippers with a folded, twisted front part can be borrowed from a manicure set. These tweezers are very convenient for twisting individual parts of the product and wire;
- Thin wire.
Often used to form the frame of crafts and toys from natural materials. To fasten individual parts, it is advisable to use flexible and durable copper wire with a diameter of 0.35 mm;
— Foil and foil paper.
For decorating autumn crafts, for appliques and collages;
— Sewing needle and thread.
For connecting individual parts of crafts, for forming bouquets of leaves and dried flowers;
- Paper.
The more different types of paper (differing in color, density, thickness), the better. To make crafts, appliqués, bouquets, panels and wall compositions from natural materials, you can use corrugated, wallpaper, velvet, parchment, landscape, wrapping, copying and other types of paper;
— Plasticine and plastic (polymer clay).
For fastening, as well as for sculpting individual parts that complement products made from leaves and dried flowers. Your child can work with plasticine and polymer clay;
- Glue.
A variety of brands of glue can be useful in your work. PVA, BF, and “Mars” are often used. The safest options for children to use are PVA and glue sticks. For gluing individual parts of a craft, brushes with hard bristles are useful;
— Paints and brushes.
To create applications and collages - watercolor and gouache paints. Use acrylic paints to paint voluminous crafts made from autumn leaves and dried flowers. It is most convenient to paint with soft squirrel brushes.
2. HOW TO MAKE A BEAUTIFUL ROSE FROM FALLEN AUTUMN LEAVES WITH YOUR OWN HANDS
It is very easy to make such an artificial flower with your own hands! For work, prepare autumn maple leaves, strong threads, golden paints and sunflower oil. You can treat the leaves with a glycerin solution (see recipe above) for the durability of the assembled craft.
To make a separate flower, it is best to choose plain maple leaves. The rosettes from the leaves will be quite large. 5-7 of these crafts are enough to put together a beautiful bouquet. You can use the same maple leaves as leaves for this bouquet with artificial homemade flowers. Make the roses red and yellow.
So, let's get to work:
— take a maple leaf and bend it in half (front side facing out);
Bend the very tip and roll the leaf into a roll;
We take a second maple leaf of the same color and place the already twisted bud at its base (see photo);
We form a maple rose petal by bending the leaf and wrapping it tightly around the bud;
We wrap the third maple leaf in the same way. The more rose petals there are, the more voluminous and larger the rose will be. Move each subsequent row down a little to make the flower look blooming;
Just above the leaf petioles we secure the craft with thread;
Similarly, we will make another 5-7 of the same roses (yellow, red, greenish);
Lubricate maple roses with sunflower oil so that the bouquet retains its original appearance for a long time. Now you can cover the crafts with golden paint;
All that remains is to drop a few maple leaves into a small vase, and then form a beautiful bouquet of artificial roses.
3. MASTER CLASSES. LEARNING TO MAKE CRAFTS IN THE FORM OF FLOWERS FROM AUTUMN LEAVES AND COMPOSITIONS FROM DRIED FLOWERS
Master class No. 1:
STEPS OF STEP-BY-STEP PRODUCTION OF GORGEOUS VOLUMEROUS ROSES FROM RED MAPLE LEAVES FALLEN FROM TREES (PHOTO).
Master class No. 2:
HOW TO MAKE A FLOWER FROM AUTUMN LEAVES. ANOTHER OPTION FOR FOLDING A LARGE ROSE FROM MAPLE LEAVES WITH YOUR OWN HANDS. STEP-BY-STEP PHOTO MK.
Master class No. 3:
WE MAKE CRAFTS FROM LEAVES WITH YOUR OWN HANDS. WE FOLD THE CORE AND PETALS FROM CORN LEAVES, GLUE THEM AND GET A WONDERFUL WHITE FLOWER FOR DECORATING GIFT WRAPPING.
Master class No. 4:
ANOTHER STEP-BY-STEP PHOTO LESSON FOR BEGINNERS. HOW TO MAKE A ROSE FROM FALLEN AUTUMN MAPLE LEAVES.
Master class No. 5:
Topiary is a decorative composition reminiscent of a growing tree, which is used to decorate any interior. This artificially created sculpture is also called the “Tree of Happiness” or “European Tree”. The first topiaries were gardens made from originally trimmed shrubs, which prompted designers to make artificial trees with their own hands.
Autumn is rich in all kinds of natural materials, using which it is so easy to embody the most daring creative ideas. By using your imagination, you can create unique autumn crafts that will delight and delight the eye. Autumn crafts made from leaves always bring the aroma of autumn into the house, and autumn topiary will look original and bright. And if you've ever dreamed of trying to create a topiary, now is the time.
Autumn topiary can be made from leaves, chestnuts, acorns, rowan branches, fruits, autumn flowers and other materials at your discretion. Often such a decorative tree has a round shape, but there are also cone-shaped or bouquet-shaped topiaries. The main element is the crown, which can be decorated with anything: decorative ribbons or bows, acorns, fruits or roses made from autumn leaves. This craft will be a great decor for your home or a decoration for the kindergarten for the autumn holiday.
To make your own autumn topiary, you will need:
- any autumn material: leaves, chestnuts, flowers, berries, branches;
- wooden stick for the trunk or thick wire;
- glue;
- foam ball;
- base container: empty flowerpot or flower pot;
- sand, stones, plaster, alabaster.
DIY autumn wreaths quickly
The holiday atmosphere will come into your home with beautiful autumn compositions that you can make yourself. You've probably already placed it in a vase; you can also borrow it to form original elements for home decor.
There is probably no family that would not decorate their home with a Christmas wreath on New Year's Eve: Christmas tree branches with bright toys will decorate the front door. But when the New Year holidays are still far away, but you want to create a festive atmosphere right now, then it’s time to see what natural materials are at hand.
Autumn gives us a lot of bright colors, which are especially noticeable during walks in the park or trips to the forest. The leaves can be found in the most spectacular colors: dark red, purple, yellow, mixed colors. They will become the main elements of the future.
DIY autumn wreaths quick
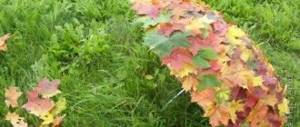
You can create it from maple leaves, it will turn out very original and unusual. In addition to the main material, you also need thin willow branches and bright ribbons.
First, you need to form a ring from willow branches, since they are very elastic, you can do this without any problems. The resulting ring, which will be the basis for a future craft, how to make autumn wreaths with your own hands
, you need to secure it with a thin wire.
Next, you can proceed to the actual formation of the wreath. The first sheet must be secured by going around the spine in a circle (starting behind the back wall, bringing it to the front). Using the same principle, all other leaves must be secured; this is reminiscent of traditional weaving of flower wreaths; with this method there is no need to use threads or other materials for fastening. All the elements will be held firmly, and even your children, who carefully studied the composition, will not be able to figure out how you secured all the parts so firmly.
The main thing is to fasten the elements closely to each other so that there are no gaps or free space. DIY autumn wreaths made from leaves
should look lush. The weaving will be very clearly visible from the reverse side.
Only at the end you need to fix the resulting result with thread or wire. The ribbon is needed to make a loop, from which you can then hang the craft. Now it will take its rightful place in your home and will delight the eyes of your family and friends.
DIY autumn wreaths
Of course, autumn gives us not only colorful leaves, but also other fruits: chestnuts, acorns, and others. Prepare the following materials:
Chestnuts
Oak leaves
pine needles
If in the previous case the base was also created from natural material, then here we chose cardboard, which is quite durable and all the elements are easy to attach to it. You need to cut a circle out of cardboard, but choose the dimensions at your discretion.
First, you need to attach cones and oak leaves to the base. They can be fixed with glue or with a heat gun. Then we begin to add chestnuts to the composition, distributing them evenly, but there is no need to attach a lot of them. Nuts and acorns come next. Thus, we have a basis for further crafts, where you can now attach anything you want. For example, acorn caps, pine needles.
This method will take quite a lot of time, because each element must be securely glued, however, in the end you will receive an incredibly beautiful wreath, decorated with the gifts of nature. And you didn’t spend a single extra ruble on its creation, which is very important.
When all the details of the craft take their place, you need to leave the composition alone for the whole night so that the glue hardens, this is the case if you used Moment glue. The next day you need to check how tightly all the parts fit, and after that you can hang it on the door. You will agree that this is a simple master class on how to make autumn wreaths with your own hands
. It can also be used as a table decoration, you can place a fruit plate inside or place candles in an elegant candle holder.
More and more often you can notice the tradition of decorating the front door with a decorative wreath. As a rule, this custom is widespread for the New Year and Christmas holidays, for Easter, on March 8, and in the fall it can be done for Halloween or just so that the autumn depression goes away and a good mood reigns.
Funny pictures of leaves
Using the appliqué technique, you can make many interesting works from autumn leaves. This step-by-step instruction will show you how to make a cute centipede. To implement it you will need some dry yellow and green leaves, cardboard, scissors and glue.
- On a cardboard base we reproduce our drawing, which we will paste over;
- Now we arm ourselves with scissors and cut and glue them along the resulting contour;
- Upon completion, add sharpness and draw a face with a felt-tip pen;
- In this way you can create any image you like.
Video gallery of beautiful DIY leaf crafts
To hold the long-awaited autumn ball, you need to have time to make not only beautiful outfits and prepare a concert, but also take care of the appropriate decoration of the main hall. To make such original garlands we will need:
- Leaves from different trees and the more varied they are, the more interesting the decoration will be;
- Paper PVA;
- Paints and brush;
- Preferably a yellow plastic mayonnaise lid;
- Scissors;
- White table napkins;
- Knitting;
- The paper is self-adhesive.
Manufacturing process:
- Draw autumn leaves on colored paper and cut them out;
- We tear off the protective film;
- Glue threads in the form of veins onto a piece of paper;
- Place a napkin on top and trim off the excess edges;
- We decorate them by adding a little glue and leave them to dry;
- Take our mayonnaise lid and cut it into a spiral;
- We hang leaves on the resulting garland. Our wonderful DIY craft is ready.
Continuing the theme of the autumn ball, let's dwell on an interesting craft made from wedge leaves, which will decorate the head of the young ruler of the upcoming celebration. It is interesting for children because it is very easy to do and looks very impressive. To create such a miracle you will need:
- Beautiful maple leaves of the same size, approximately 7 pcs.;
- Thermal glue gun;
- Small berry bunches;
- Scissors.
Manufacturing process:
- Cut off the rough ends of all leaves;
- Take two maple petals and bend them at the base;
- We insert one into the other and secure it;
- Thus, we carry out consolidation;
- When the crown is ready, we start decorating;
- Using liquid glue we decorate the product;
- It won’t be difficult to make such a tiara for your little princess or prince during a walk. Our craft is ready!
To create such a small and beautiful masterpiece, you will need, in addition to patience and accuracy, a glue gun and a lot of beautiful aspen leaves. They are ideal for rose petals, as they exactly repeat their shape and color. It is better if they are collected dry. Otherwise, when drying, they become deformed and lose their crimson color.
Manufacturing process:
- We start making a rose by rolling the first leaf into a tube;
- We take the second one and wrap it in the first one, but glue the edges together with liquid glue;
- Thus, we systematically form a rose, the more leaves, the more freely they stick together;
- It took about 50 pieces to create this craft. aspen leaves.
You can bring natural charm into your everyday routine with the help of a bright craft made from autumn leaves in the form of a wall wreath. To make it you will need:
- Many leaves of the same tree and of different sizes;
- Thick cardboard;
- Glue gun.
Manufacturing process:
- Having collected dry leaves, you need to sort them by size;
- We cut out the base for our wreath from cardboard;
- Now we glue them row by row, first the largest ones, then the smaller ones, and so on;
- Follow the direction, it is important that the angle of inclination is the same, and each row remains at the same level, this is the only way you will get a truly beautiful product.
You can capture the short-term beauty of bright leaves using salted dough, which will preserve the autumn mood in its pristine beauty for a long time. For this craft you will need:
- Water (200 ml), salt (200 g) and flour (500 g) for the dough. Instead, you can take hardening clay for modeling;
- Leaves with thick veins;
- Rolling pin;
- Paints and varnish.
Manufacturing process:
- More accurate and delicate works are made from modeling clay. For those who decide to make a homemade craft 100% first, you need to make salt dough.
- To do this, mix all the ingredients and knead the mass thoroughly;
- When it's ready, make small cakes;
- We print leaves on them using a rolling pin and bake them. If you purchased clay, there is no need for this;
- We paint the resulting blanks and varnish them.
Such a wonderful tree would be an excellent craft for an exhibition. The more different leaves you collect, the more unusual the work will turn out. Nuts, acorns and, of course, the beautiful rowan are suitable for decoration. For the base it is better to take maple leaves.
An ordinary straight stick will do as a trunk. You will also need a small flowerpot, a glue gun, newspaper and thread;
Manufacturing process:
- We collect the collected leaves into small bunches. You will immediately need to include berries and acorns in them, secure them with threads;
- If necessary, decorate your pot and secure a stick in it;
- Roll a small ball from newspaper, wrap it with thread and place it on the “trunk”;
- Now carefully and systematically glue small bouquets so that you get a beautiful crown;
- When the craft is ready, spray it with varnish, this will make it sparkle with new colors.
The delicate beauty of these homemade flowers enchants and makes you fall in love at first sight. It's hard to believe that they were made from ordinary coarse ears of corn. To make them we need:
- Corn leaves;
- Wire;
- Threads;
- Floral tape and tape;
- Artificial leaves from plastic flowers.
Manufacturing process:
- We cut the leaves into equal rectangles;
- Take the wire, bend it in half and twist it so that there is a loop at the end;
- Bend the corn rectangle in half and twist it onto the wire;
- We fasten the second leaf on top of it and tie it with thread several times;
- Thus, we form the entire bud;
- We hide the sloppy ends of the rose petals and the wire under floral tape, which we secure at the end with tape;
- We put on artificial leaves and our wonderful craft is ready.
Finally
It is not necessary to use natural materials for crafts only for exhibitions in kindergartens and schools. The process of assembling, preparing and directly manufacturing them will bring a lot of interesting impressions and useful experience to you and your child.
Autumn is an excellent time for a child to become more familiar with natural materials. Parents can invite him to create crafts with his own hands from dry leaves.
Young children will be interested in collecting fallen leaves of various sizes, colors and shapes from the ground. This will contribute to the development of the concept of geometric shapes and color perception. Making crafts from leaves also helps develop imagination and patience.
What can be made from leaves?
Dry autumn leaves are suitable as the material used. Often, after collecting them outside, they are still wet. In this case, they can be smoothed using an iron. If time is of the essence, then it is better to use the old method - place the leaves among the pages of a thick book and close it tightly.
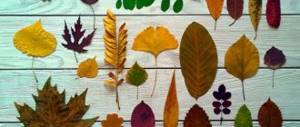
The range of uses of dry autumn leaves in a child’s creative activity is varied: appliqués, frames, paintings, a herbarium of leaves. Leaves can be used to create animals or cut out figures from the leaf itself.
Along with leaves, you can use berries and flower petals as available material.
Leaf frames
To add variety to your own photographs, you and your child can create a frame of autumn leaves. A child over 4 years old can create such a craft. To create a frame you will need:
- glue;
- leaves of various sizes and shapes;
- thick cardboard;
- Matt lacquer.
Paintings of flowers and leaves
With older children (from 5 years old), you can create more complex crafts using dry leaves. For example, making whole paintings.
- To create a picture, you must first make a sketch of the future design so that you can select the right number, size and color of leaves. This will clearly show what kind of painting you want to get in the end.
- After applying the sample, glue dry leaves of the desired color on top.
- Let it dry for a while.
To create modular paintings, a more careful selection of leaves of the desired size and color is required.
The technique used is the method of laying leaves on top of each other.
Additionally, you can use branches, sticks, and small dry leaves.
This kind of work is not difficult to do, but it is quite labor-intensive and requires perseverance. Therefore, you should choose whether this way of working is right for your child.
Application of dry leaves
The simplest and easiest form of creative activity to perform is appliqué. It can be created together with the youngest children, using templates on which dry leaves are glued.
To create a simple application you need to prepare in advance:
- small dry leaves of various colors;
- glue;
- scissors;
- white sheets of paper.
1. Take a landscape sheet of paper and redraw a sample of a lion or fish.
2. Then invite your child to create a lion:
- first you need to take a small number of yellow leaves of approximately the same size and chaotically stick them on a blank sheet of paper, creating a circle. This will create the lion’s “mane”;
- then you need to glue the lion head blank on top;
- After gluing it, it must be colored with colored pencils or felt-tip pens.
3. Let's start creating the fish:
- Initially, we place the existing template on the table and color the face and eye with felt-tip pens;
- then we take yellow small leaves and one by one create “scales” - we glue the leaves onto the body of the fish;
- From dark brown leaves we make a fin and a tail on top.
At the same time, as the child grows up, you can complicate the tasks and use more complex figures.
By creating crafts from autumn leaves with your child, you not only form an emotional and trusting relationship with the child, but also develop his creative abilities.
Golden autumn is the most touching time of the year; it leaves no one indifferent!
This is real magic when the leaves, at the behest of an invisible artist, turn from soft green to various shades of orange, yellow, red and brown! Don't waste time, run outside and collect all this beauty! Choose the most beautiful, most unusual leaves and take them home! And now I’ll tell you what crafts you can make from autumn leaves!
I suggest starting with the simplest autumn crafts that even a child can handle, so:
1. Autumn applique. Prepare a photo of the child in advance where he is trying to depict the wind, print it and cut it out along the contour of the body. Invite your child to create a composition himself from several leaves and his own image. This autumn craft is ideal for a kindergarten or early development center.
2.Simple drawings-prints. You can use paints or pencils, print with leaves or draw along the contour, just use your imagination...
3. Interesting on the theme “autumn”: Hedgehog with leaves instead of needles.
4. Autumn wreath. As a base, you can use a circle of paper or a disposable cardboard plate.
5. Owls with leaves instead of wings. Interesting autumn craft.
6. Oh! This, it seems to me, is a very interesting experiment, making prints with a figured hole punch for scrapbooking. You can make many of these stamps, dry them and use them for crafts all winter.
7. Here’s an unusual autumn craft - children lay out a pattern on the path. It is important to collect many leaves of approximately the same color, shape and size and draw a design with them. For good fixation, use PVA glue.
8. You can make such an autumn craft for kindergarten and imagine that you are the king or ruler of the autumn season. Create a little magic. Making crowns is very welcome in kindergartens, where children's creative abilities are especially encouraged.
9. A little more experimentation:
10. Remember, in childhood, everyone knew how to make faces out of leaves, scratching out eyes, nose, and mouth with their nails?! It was so great! Be sure to teach your child this fun fall game. And in this craft, the leaf brought the kitten to life!
11. These autumn leaves also come to life in the hands of a skilled artist! Unusual idea!
12. And this autumn craft can safely be called educational. It would be great to also sign the name of the trees from which these leaves fell.
The long-awaited autumn season has arrived. A time of dreams and new achievements. Right now, nature delights us more than ever with its beauty, a riot of colors, a refreshing but still warm breeze, rustling leaves under our feet. And I really want to preserve the feeling of complete harmony and warmth for as long as possible, not only in my memories, but also in my home! Autumn foliage will come in handy, and flowers made from tree leaves with your own hands will be a wonderful interior decoration or an unusual gift for a loved one.
This work will not require you to spend a lot of money or time, but in its originality and beauty it is in no way inferior to other crafts made from scrap materials.
Autumn decorative wreaths for the door (ideas)
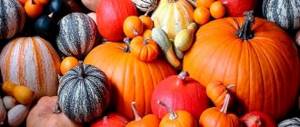
Decorating a fall wreath with different fruits is a great idea! Any autumn fruit will do - artichokes, apples, pears. The most important thing to consider is how to attach these items to the base of the wreath. If the frame of your wreath is made of dense material (for example, foam), you can attach it with toothpicks. For these purposes, you can use toothpicks or double-sided tape or a heat gun.
Autumn wreaths look especially beautiful when they have a lot of different elements on them. Create such a multi-layered masterpiece. To do this, make the back layer from small branches, leaves or spikelets. The inner layer can be made from fesalis, acorns and cones. For accents, add a few bright rowan branches and a couple of decorative pumpkins and apples.
Decorative door wreaths made from autumn leaves are a spectacular decoration. This is also one of the easiest ways to decorate a wreath on your door. Both a wreath of the same type of leaves and a combined version look great. To make the wreath even more original, add pine cones, chestnuts, acorns, and artichokes to the leaves.
An original wreath with pheasant feathers, complemented with nuts, cones, and spikelets - a contender for the most interesting wreath in the area. To complete the look, you can attach a satin bow between the bird's feathers.
Spikelets of wheat are a symbol of harvest and fertility. Gather a small bouquet of leaves and weave them into a wreath. You can complete the original wreath with small yellow Canadian maple leaves or a “Welcome!” sign.
A wreath of just a few components, decorated with a bow. A similar bow made of satin or velvet will look very beautiful.
You can use ripe pumpkins to decorate an autumn wreath on your door, but their main drawback is their fragility. It is much more convenient to use artificial pumpkins, which are lighter and do not deteriorate.
Owl made of leaves. Manufacturing instructions
Children really like to make crafts using the amazingly beautiful autumn foliage.
It is glued onto the template in such a way that the top row slightly covers the bottom, imitating the feathers of a bird.
- To make the leaf owl stable, use half a cardboard toilet paper cylinder as a template.
- If you seal the bottom and leave the top open, you can get a pencil holder.
- The bird's legs can be sculpted from plasticine and attached to the bottom - this will make the craft more stable.
- Owl eyes can be made from metal caps from glass bottles, plastic caps from jars for gouache or yogurt, and juices.
- In the middle of the lids, reinforced with the flat side inward, black buttons or beads are glued. Although coffee beans or dried berries of the appropriate color may also work.
- The owl's beak can be sculpted from plasticine or glued from cardboard.
- In some cases, instead of a cardboard cylinder, a chicken egg shell is used.
Decorating the wreath
To make an autumn wreath for the door, we will need tree branches (or vines), pieces of fabric in brown, gray, deciduous colors (you can use any autumn shades)/autumn tree leaves, glue, pins, scissors, thread, paper.
In handmade stores you can often find a ready-made base for a decorative wreath.
If you look around and see how generous nature is with gifts, you can understand that you don’t need to buy anything, you just have to not be lazy, come up with an idea and create!
The process of making a wreath for a door is very simple: first we twist tree branches into a ring, then in several places we secure the ends of the branches with tape and wire.
Attention! The size of the wreath should be proportionate to your door: a wreath that is too large will look awkward, and a small one will get lost.
The next step is that you need to decide what kind of door wreath you will make - one-sided or double-sided. In the first option, all decorative elements will be attached to both the “back” and the front side; undoubtedly, such a wreath will look more magnificent and beautiful. In the second option, only the front side is decorated, but given that this wreath will be attached to the door in a vertical position, the “wrong” side will not be visible. Single-sided wreaths are perfect for decorating tables and doors.
When the type of wreath is chosen, you need to make elements to decorate it. It should be remembered that there should be a lot of decor; the remaining elements can be used to make other decorations for the home. Materials for decorating a wreath should be selected based on how long you plan to use the wreath. If you want the wreath to decorate the door for a long time, you can cut out autumn leaves from multi-colored pieces of fabric. If we are talking about seasonal decor, it will be enough to use natural leaves from trees.
Fabric leaves can be used to make the following decorative wreaths:
Remember! It is recommended to dry leaves and other natural materials before use, but not until completely dry, which will allow them to retain their shape in the finished decoration. If the leaves are too dry, they will crumble during the wreath making process.
Before starting to assemble a decorative wreath, it is recommended to secure acorns, apples, pears, and pine cones on a wire or using a special stick; this is necessary so that they look advantageous in the overall composition.
Leaves, dried flowers, spikelets, grass are woven in single elements or small bunches.
We decorate the wreath on the door using hot glue or wire. You can use natural materials (stems of grass and flowers) as fastening elements. But in this case it is recommended to test them for strength. If you decide to use glue, you need to do it carefully so that the remaining glue is not visible.
Attach the wreath to the door and enjoy the result!
A beautiful fall wreath can be made in just a couple of hours. What's not a good way to entertain yourself on a gloomy autumn evening? Moreover, as a result of this activity you will get a stylish decoration for the front door, mantel, console in the hallway or dining table. Read on to learn how to make an autumn wreath with your own hands from natural materials, paper, felt, knitting threads and other improvised means!
Owl from an egg shell
To work, the master will need an ordinary raw egg. Its interior can be used for its intended purpose by carefully blowing it out. This procedure is performed by an adult. Before blowing, the egg is pierced with a needle on both sides and blowing begins into one of the holes. Empty shells must be dried before use.
Next, the work algorithm repeats the described option with an owl made of leaves. Although they can be replaced with pieces of brown paper and buckwheat. Or you can simply paint the shell in the desired color by gluing eyes, a nose and triangular ears cut out of cardboard onto the shell.
For stability (if this owl is not a Christmas tree toy), plasticine feet are used as a stand.
How to make an autumn wreath with your own hands
After looking at some of the photos of beautiful fall wreaths in this article, you may decide that they require a lot of time to create or, at a minimum, good weaving skills. However, it is not. Decorative wreaths from leaves and other natural materials are quite easy to make today:
- Weave into a base of grapevine or willow branches;
- Glue it onto a circle made of polystyrene foam, cardboard or other available material.
Below we invite you to take a look at 30+ DIY fall door wreath ideas with step-by-step instructions on how to make them.
Leaf craft “Golden Owl”
The work submitted for our competition “Crafts from natural materials” is an owl made from leaves. Author: Glukhov Valery Alekseevich, student of grade 3B at Beregovskaya secondary school
To work you will need:
- newspaper,
- dry birch leaves,
- hot glue,
- scissors,
- plasticine,
- colored paper,
- twig.
Using newspaper we glue the base of our future owl according to the papier mache principle.
As soon as our base is dry, we begin to paste it with birch leaves in a circle in rows.
Next: glue on the wings from newspaper tubes covered with leaves. We make a beak and legs from plasticine and sit it on a branch.
We cut out eyes from colored paper, glue on ears from leaves, and now our magical golden owl is ready!!!!!
In order not to forget the page address and share with friends, add to your social networks:
More interesting:
See also:
Discussion: 4 comments Latest entries Headings
HeadingsSelect a headingDo-it-yourself dolls (101)News (93)Do-it-yourself crafts (1,230) Weaving from rubber bands (25) Crafts from beads and beads (35) Paper crafts (281) Crafts from candies (28) Crafts from threads and wool (46) Crafts from plasticine, clay, dough (85) Crafts from scrap materials (294) Crafts from natural materials (126) Crafts from birch bark (16) Crafts from fabric (194) Drawings - pictures (42) Useful tips (4) Holidays (283) DIY gifts (154) Congratulations and poems (30) Recipes and serving (49) What to give (18) Publications of teachers (110) Handicrafts (631) Beading (29) Felting ( 31) Embroidery (18) Knitting (252) Crochet (200) Accessories (crochet) (69) Toys (crochet) (66) Clothes (crochet) (59) Knitting (48) Accessories (crochet) ( 3) Toys (knitting) (10) Clothing (knitting) (34) Decoupage (43) Kanzashi (31) Quilling (19) Foamiran crafts (18) Polymer clay and plastic (11) Woodworking (10) Painting on fabric (2) Suite design (30) Scrapbooking (13) Sewing (115) Accessories and items for the home (37) Toys (44) Clothes (31) Scripts (83) Birthday (18) New Year (23) Wedding ( 5) Thematic (28) School and kindergarten (26) Handicraft techniques (26) This is interesting (73)
podelki-doma.ru
DIY wreath of autumn leaves
First of all, you should decide on the design of the future wreath. Do you want it to be lush and colorful in keeping with rustic decor, or do you want it to look more sophisticated and elegant to suit the style of your modern apartment? Depending on the leaves you choose, an autumn wreath can look completely different, as evidenced by the following photos:
As you can see, in most cases, to make a wreath of autumn leaves with your own hands, craftsmen use a circle of vines, tied in several places with strong thread.
The photo below shows you simplified instructions on how to make a wreath of autumn leaves with your own hands step by step:
Panel technology
To make a beautiful panel of leaves (photo above), you need to work like this:
- Use a cardboard base or colored paper if part of the background remains uncovered by the dried material.
- To make objects of complex unnatural shapes (vases, houses), cut out substrates (blank parts) from thin paper.
- Apply glue to one side of the paper backing and place dry leaves on top.
- Wait for the element to dry and trim along the edge contour. Throw away small leaf scraps and use large ones for other parts.
- When all the components are ready, apply glue to the base and glue the blanks. If necessary, lay out a background of leaves or petals first.
- After the painting has dried, frame it under glass. This way the panel will be better preserved.
Panels of dry leaves can be made in the form of relief using twigs, spikelets, cones, grains and seeds. This option is perfect for children's creativity.
So, making a panel of autumn leaves with your own hands is not difficult. This creative activity can be a fun and rewarding way to spend time with your child. Prepare quality material and explain the technology. Even small children can make a simple composition of leaves and flowers.
Oshibana or osibana is a type of floristry, the art of creating pictures from press-dried natural materials: flower petals, green and yellow leaves, stems and grass seeds.
The material for creating a picture must be prepared, i.e. collected and dried. Flowers, leaves, grass, seeds, and fluff are collected and dried under a press or in a herbarium folder so that they become flat. Leaves and flowers often change color. To obtain the desired shade, heat treatment or other methods of preserving natural beauty are sometimes used. It is important to know which plant is best to collect at what time of year. In addition, you need to collect plants in clear weather so that the plants are not wet.
How to dry plants?
1. In paper under pressure
You can dry flowers and leaves in a thick book, between pieces of tracing paper. If you need a voluminous flower - in a box with sand (daisies can be dried this way by carefully sprinkling the flower with sand), the dandelion is dried in the opening stage, head down, as soon as the white fluffy head opens, sprinkle with hairspray.
If you do not want to preserve the natural color of the plants, you can dry them with an iron, placing them between two sheets of paper. Just make sure the iron is not too hot, otherwise the leaves will become very brittle. It is better to iron them with a barely warm iron 3-4 times at intervals of several hours so as not to dry them out.
3. Microwave
The herbarium can be dried in the microwave, but the leaves do not always remain even and smooth, so it will be difficult to glue them.
4. In glycerin
Plants dried in glycerin will retain their shape well, but will acquire a greenish-brown tint; however, they can be painted for a decorative panel.
Dilute glycerin (sold in pharmacies) in hot water in a ratio of 1:3. Pour the resulting solution into a container at least 6-10 cm deep, lower the plants vertically, leave for several days until they darken, then dry.
Little tricks for drying herbarium:
1. When properly dried, the top of the whole plant with stem and leaves should not bend down.
2. To make the leaves denser, dip them in a solution of 20% PVA glue and water.
3. Flower buds can be dried in sand poured into a cardboard box. Of the flowers, dried red dahlias or delphinium retain their color better than others.
4. To ensure that dove-blue or bluish leaves retain their hue when dried, dip them in denatured alcohol for 1 minute.
Store plant material in sealed containers, protecting from direct sunlight, moisture and moths. Finished oshibana paintings can also fade and change color over time, so it is advisable to place them in a frame under glass and not keep them in the sun.
Artists attach (glue) dried plant material to a base (cardboard, fabric, wood), and the author creates a work of art using plants. That is, oshibana is painting with flowers and plants.
The art of oshibana originated in Japan approximately six hundred years ago. In Europe, this type of decorative and applied art was widespread during the Victorian era. In recent decades, oshibana has experienced a rebirth.
Floral artists perform using the oshibana
not only ornaments, landscapes, still lifes, but also portraits and subject paintings.
Despite its apparent simplicity, the oshibana technique allows you to create simply stunning paintings. We invite you to admire them with us.
Beautiful autumn wreaths made from natural material
Branches, cones, feathers, spikelets, even vegetables and fruits - almost any natural materials can be used to make an autumn wreath to decorate your home. How about a stunning feather wreath?
Like the autumn leaf wreath, it is created using a special base and glue.
Some more interesting options:
An autumn wreath made of branches can look especially impressive, particularly in a composition with large flowers or fruits, even if they are artificial or made with your own hands from fabric or paper.
Master class - how to make a craft from leaves in the form of a stunning maple leaf!
To make original decor for kitchen walls in autumn style you need:
- the basis for crafts made from leaves on the theme of Autumn - this can be a large board or thick packaging cardboard;
- jigsaw;
- glue, or better yet, a glue gun;
- many autumn maple leaves.
On a wooden board or large sheet of cardboard, draw the shape of the largest possible maple leaf. Let's cut it out.
Maple leaves need to be ironed to dry or dry them a little. Remove the branch from the leaf.
We glue the leaves to the base, starting from the tips of the leaf silhouette to the base, placing autumn leaves on top of each other so that there are no gaps and the craft looks alive and lush. Dry and spray with hairspray on top to prevent dry leaves from falling off and crumbling.
We install an original panel on the theme of Autumn in the kitchen and decorate the autumn composition with pumpkins.
How to make an autumn wreath from paper
If you don't feel like going out to collect leaves and other natural bounty, then why not try making an autumn wreath out of paper? We offer some interesting ideas for this in the photo!
An interesting craft - an autumn wreath made of felt
Soft felt is one of the best materials for fall crafts. It is available in all sorts of colors, is easy to work with and has a pleasant pile, thanks to which it seems to radiate coziness and warmth into the interior. The best photos with examples of how to make an autumn wreath from felt:
If felt is not your thing, then pay attention to the last photos in this article with autumn wreaths made of simple fabric and thread. Share with us in the comments: which option did you like best? Also read:
30 ideas on how to make an autumn wreath with your own hands - from leaves, cones and other materials updated: October 17, 2020 by: Margarita Glushko
More and more often you can notice the tradition of decorating the front door with a decorative wreath. As a rule, this custom is widespread for the New Year and Christmas holidays, for Easter, on March 8, and in the fall it can be done for Halloween or just so that the autumn depression goes away and a good mood reigns.
Crafts for 4th grade students
Many 4th grade children can already come up with an idea for a craft and implement it, surprising adults with their creative approach.
Option 1. Paintings and panels
You can't live without leaves in autumn! Using dried flowers, ash seeds, dried herbs and moss, kids can make:
- firebird;
- portrait of the beautiful Autumn;
- scenery;
- House in the village;
- basket with autumn gifts.
The missing elements can be painted with watercolors, gouache, or sculpted from plasticine.
How to make a portrait of Autumn
- Draw a sketchy sketch on cardboard with a pencil.
- Draw the face, adding brightness with pencils or paints.
- We make a hairstyle out of the leaves by gluing the leaves overlapping each other. Curls and bangs can be decorated with dried flowers.
- Glue dried flowers or berries onto your neck to create beads.
- The dress can be drawn, sculpted from plasticine, or leaves can be reused.
Option 2
Natural materials just beg to be picked up in the fall, so you can make a funny gnome out of pine cones. It is necessary to prepare the following materials:
- fir cone;
- plastic eyes;
- plasticine;
- a piece of padding polyester;
- felt or fleece;
- glue;
- chenille wire.
The head is made of plasticine, do not forget to form the nose and attach the eyes.
Attach legs and arms made of chenille wire to the cone body. The handles can be bent inward. Decorate your feet with felt boots. To do this, just bend a piece of fabric in the shape of a trapezoid and sew it with a seam “through the top”. Secure the put on felt boots with 1-2 seams.
The head will hold on well if you drop some glue on the body.
You need a hat on your head. It is sewn from fleece or felt by folding a square of fabric in half and stitching it diagonally. To make the gnome look more authentic, a synthetic beard is attached to the head, and hair can peek out from under the cap at the back.
Option 3
Stones make interesting crafts. After all, stones can be glued together to create three-dimensional compositions, painted with acrylic paints, and combined with feathers, plasticine, fabric and other materials.
It’s easy to make a landscape panel if you paint the stones in the shape of a house and stick them on the base, not forgetting to add green stones - trees. The “Sea Bottom” panel is placed on blue cardboard, adding fish, algae, starfish, and crabs. A panel on the theme “How I spent my summer” will be interesting for a child to make together with his parents.
The stones are used to make figurines of animals, birds, cartoon and fairy-tale characters.
Option 4
Apple crafts for school are a great option! After all, apples can be found in almost every home, even in the evening, when the child remembers the need to bring work to the competition tomorrow.
The simplest option is a caterpillar. To do this, several apples are connected to each other using toothpicks. Cut out the eyes and mouth from paper and glue on. It is worth adding paws - they are made from halves of carrot circles strung on toothpicks.
It's quick and easy to create a ladybug. It requires:
- Red Apple;
- plum;
- several blueberries or chokeberries.
Cut the apple in half. Cut one half in the center into 2 halves again - these are the wings.
The head is formed from a plum, the front part of which must be cut off. The head and wings are connected with a toothpick.
The cut berries are attached to the wings - these are spots.
If you do not use toothpicks in your work, then such a ladybug can be eaten immediately.
How to make an apple turkey
You will need an apple, a few pieces of colored marmalade, toothpicks, and mastic.
The head is made of mastic. To do this, form a sausage and bend it in half. We attach the eyes and nose to the top part.
We string marmalade onto toothpicks - these are tail feathers. We stick them into the apple.
The wings are two oval jelly beans.
The turkey is ready!
Option 5
Using ash seeds, you can make a magnificent panel.
How to make an owl:
- A sketch on a sheet is required. The body will be oblong, the head will be round.
- Then “helicopters” are glued onto the body. This must be done sequentially from bottom to top, so that the wing of the next ash tree covers the seed pod of the previous one.
- The head is glued in a circular pattern, from the center to the edges. At the end of the work, you can glue an acorn cap and ready-made large eyes into the middle.
- The owl should be planted on a branch, adding pine cones and leaves to add volume and completeness to the composition.
Autumn decorative wreaths for the door (ideas)
Decorating a fall wreath with different fruits is a great idea! Any autumn fruit will do - artichokes, apples, pears. The most important thing to consider is how to attach these items to the base of the wreath. If the frame of your wreath is made of dense material (for example, foam), you can attach it with toothpicks. For these purposes, you can use toothpicks or double-sided tape or a heat gun.
Autumn wreaths look especially beautiful when they have a lot of different elements on them. Create such a multi-layered masterpiece. To do this, make the back layer from small branches, leaves or spikelets. The inner layer can be made from fesalis, acorns and cones. For accents, add a few bright rowan branches and a couple of decorative pumpkins and apples.
Decorative door wreaths made from autumn leaves are a spectacular decoration. This is also one of the easiest ways to decorate a wreath on your door. Both a wreath of the same type of leaves and a combined version look great. To make the wreath even more original, add pine cones, chestnuts, acorns, and artichokes to the leaves.
An original wreath with pheasant feathers, complemented with nuts, cones, and spikelets - a contender for the most interesting wreath in the area. To complete the look, you can attach a satin bow between the bird's feathers.
Spikelets of wheat are a symbol of harvest and fertility. Gather a small bouquet of leaves and weave them into a wreath. You can complete the original wreath with small yellow Canadian maple leaves or a “Welcome!” sign.
A wreath of just a few components, decorated with a bow. A similar bow made of satin or velvet will look very beautiful.
You can use ripe pumpkins to decorate an autumn wreath on your door, but their main drawback is their fragility. It is much more convenient to use artificial pumpkins, which are lighter and do not deteriorate.
Owl carved from wood
Wood is a rather difficult material to process. Therefore, crafts made from it are usually available only to adults who are fluent in tools. The simplest option would be a craft made in the style of symbolism. A wooden owl can be made of two parts: a head and a body.
The head is carved into the shape of an ellipsoid—a three-dimensional figure that is an oval in cross-section. The head will be attached horizontally with an elongated part. At the bottom of the ellipsoid, where its connection with the body is intended, a rounded dent should be machined, equal in diameter to the upper part of the body.
You can also make recesses on the head for the eyes. They can also be spherical in shape.
The body is made in the shape of a cone, with the top cut off. Moreover, the widest part of it looks up. The base of this figure is made spherical. The drawing presented here clearly shows what such a figure looks like.
The finished parts are either firmly connected or left loose so that the figure can be assembled and disassembled. The eyes are painted black. If desired, the owl can be coated with clear varnish.
Probably all people in autumn love to wander through the park or forest and collect bright autumn leaves. But did you know that you can make interesting crafts from autumn leaves? Therefore, in this publication we decided to tell you about what crafts you can make from autumn leaves with your own hands.
Crafts from autumn leaves. Only interesting ideas
Butterfly made from bright autumn leaves.
It is worth saying that every child will enjoy making crafts from dry leaves. And all because they are very easy to make. And to make such a butterfly you should prepare: the leaves themselves, glue and cardboard. You can also use other natural materials to decorate your crafts.
You can make other figures from autumn leaves. Just use your imagination and you will succeed.
Owl made of autumn leaves.
To make such an owl from dry leaves, you must take durable cardboard on which you must depict the silhouette of an owl. Then, you must cut out the silhouette of the owl. You should also prepare separate parts for the eyes, legs and beak.
Progress:
- Now on the outline of the owl, starting from the bottom, you must glue dry leaves. In this case, it is recommended to alternate the range of leaves.
- Once the owl's plumage is completed, you need to glue the legs on top of these leaves.
- First, you should glue yellow circles for the eyes, and on top of these circles you should glue more black circles.
- Next, glue the ears to the owl. For this job, you need to take elongated leaves and glue them to the top of the owl's head.
- You should end up with a triangle for the beak, which you should cut out in advance. It should be glued in the middle below the eyes.
That's it, your wonderful craft made from leaves is ready.
An original craft made from leaves - an owl toy.
In this article we will tell you what crafts you can make from autumn leaves with your own hands. And in addition to compositions from fallen leaves, you will be able to make a toy that will remind you of a wonderful autumn in winter. So, to create such a toy, simply take a transparent bag and fill it with leaves. And glue eyes and paws onto the bag on top.
Decoration for glass.
If you like to decorate your home, then you should take a closer look at the following interesting idea. To create such original leaves, you must prepare a large piece of white paper on which to stick a variety of autumn leaves. Decorate the glass in your home with these leaves. Surely, this decor will help transform your home.
Crown of autumn leaves.
In summer, girls decorate their heads with wreaths of flowers. But in autumn, bright autumn leaves can be used instead of flowers. And to create such a crown, you must cut out a triangle from cardboard that will have 2 elongated ends. You must connect these two ends into a circle, and then glue autumn leaves to the blank. In this case, it is best to use leaves:
- maple,
- ash,
- oak
Wings made of yellowed leaves.
Today, social networks have gained enormous popularity, where people post hundreds of photos every day. And every person wants to stand out in something. For example, in autumn you can take wonderful photographs with props - wings made of autumn leaves.
In order to make wings, you must use durable cardboard as a base. You can attach the leaves to the blank using glue or a construction stapler. However, it is better to use a stapler. With its help, you can speed up the work, and the wings will look stronger. Upon completion of all work, you must attach the straps to the wings.
Leaf masks.
If you decide to thoroughly prepare for photography, then in addition to wings, also make masks using this autumn material.
To create an autumn mask you will also need a cardboard blank. After which you simply glue autumn leaves to it.
Autumn leaves as home decor.
Leaves that fall under your feet in the fall are perfect for room decor. And here you can choose the perfect decor for your home.
The simplest decoration option is branches with yellow leaves, which you simply need to break in the park and place at home.
To decorate your home, you can also make wreaths from bright leaves.
The leaves that decorate your home along with a glowing garland also look interesting.
Glass candlesticks decorated with bright leaves will look original and interesting in the decor.
In general, if you decide to make your home original, then take a closer look at some ideas that you will certainly like.
Finally
Autumn will be here soon enough, which means many people will be spending a lot of time indoors. And if you don’t want to get bored on autumn evenings, then start creating interesting crafts. Remember that with this activity you will get a lot of positive emotions.
Autumn is the time for fallen leaves and wonderful autumn crafts. Our material contains interesting master classes on creating DIY crafts from scrap and natural materials.
Option 1. Volume applique umbrella
To make a volumetric applique you will need:
- sheet of cardboard;
- 5 squares of colored double-sided paper with a side of 8 cm;
- 1 white strip of paper 3x20 cm;
- 2 blue strips of paper 3x20 cm;
- cocktail straw;
- scissors;
- double-sided tape;
- a simple pencil;
- glue stick.
1. Using double-sided tape, glue the cocktail tube to the cardboard, moving 3-4 cm from the bottom.
2. Roll the squares of colored paper one by one into a cone and glue them with glue.
3. One by one, glue the cones together with their side parts.
4. Glue the resulting piece of cones to the top of the tube.
5. Fold pieces of white and blue paper into an accordion shape 2 cm long. Draw a drop on the top of it and cut it out.
6. Fold each of the droplets in half. Take a blue droplet and glue the side of a white droplet to its side, and then glue the blue one to the white droplet in the same way. The result should be one voluminous drop.
7. Make several of these droplets at once and glue them above the umbrella. The craft is ready.
Option 2. Volumetric flower craft
Option 3 Craft voluminous autumn leaf
For the next craft, prepare 5 squares of colored paper with a side of 15 cm, a strip of paper 3x15 cm, a stapler, double-sided tape and scissors.
Alternately fold the squares in half, and then in half again. Take the first square in your hand by the center of the workpiece so that the connecting side is on the left.
Make 3 cuts at equal distances from each other, not reaching the connecting line. Do the same manipulation with the remaining squares.
Expand the first square. Place it in front of you like a diamond.
Glue the opposite sides of the middle of the workpiece together with double-sided tape, and secure it with a stapler for reliability. Turn the workpiece over and glue the following sides. Then repeat the process until all sides are secured. Make the same blanks from the remaining squares.
Roll the strip into a tube. First glue 2 blanks opposite each other to the top. Staple.
Insert another blank in the center and fasten it with a stapler on the sides with the previous ones.
Glue the remaining 2 blanks.
The volumetric sheet is ready.