A potter's wheel is a special pleasure for a beginner. The most ordinary circle from a foreign company costs about five hundred dollars. It is because of this that our craftsmen were given the task of creating a pottery wheel from a washing machine so that the project could then be done with their own hands at home. As a base, you can take either an activator-type or a drum-type machine. But now we will sort it all out in order. ...
Materials and tools for work
at creating a potter's wheel with our own hands using the example of a special washing machine. You can even purchase an activator machine, and if you have an old and working machine, you can save about 1,500 rubles.
Remember! The activator in the washing machine must be located on the bottom strictly horizontally, without tilting.
In addition to the washing machine , we will need a dozen more specific parts, without which we will not be able to create a pottery circle with our own hands. Namely, we will need the following:
- A piece of moisture-resistant plywood.
- A regular microcircuit that controls the speed of the engine and switch.
- High quality varnish and paint.
- White Spirit.
- A wheel made to measure.
- A plastic bottle of some medicine.
- Simple switch.
- Scotch.
- Silicone sealant.
- Tin for soldering.
- Bolts, washers, nuts and screws.
In addition to materials, you will also need tools, which should also be taken in advance. Nothing expensive just:
- Marker.
- Wooden ruler.
- A hacksaw with small teeth, suitable for metal.
- Sharp knife.
- Set of screwdrivers and wrenches.
- Pliers.
- Multimeter.
- Good soldering iron.
Types of pottery machine
The first pottery mechanisms were used in Ancient Egypt 2 thousand years BC. The modern type of device has remained virtually unchanged since those times. The only thing that makes the machines different is the drive.
Varieties:
- Foot. The rotation of the shaft is ensured by a person who presses the pedal and rotates the circle clockwise. The device was popular due to its simple design. But its operation is inconvenient: you have to simultaneously concentrate on the pedals and on working with the product.
- Mechanical. The principle of operation is similar to the first option. The difference is that the shaft is driven by the return rotation of the pedal.
- Electrical. Such models are common in modern times. The mechanism is driven by an electric drive. So the user can adjust the desired speed and dive into work.
How does a pottery wheel from a washing machine work?
The “Malyutka” activator type machine is suitable for us..
Even if you don’t have it in your bins, you can buy used equipment. This will cost several times less than buying a new machine.
What parts does the washing machine (SM) include:
- Switch and speed controller;
- Working wheel.
What is needed to make a device from SM “Malyutka”:
- A piece of plywood;
- Plastic bottle (you can take it from a medicine bottle);
- White spirit and waterproof varnish;
- Insulating tape;
- Hacksaw, bolts, nuts, knife, screwdrivers and keys, pliers;
- Soldering iron.
It is also possible to make a machine based on a welded frame and an engine from an automatic washing machine (AWM).
What it will include:
- The bed is a stable welded structure that will serve as the basis;
- Motor for rotating the shaft;
- Two pulleys that, using a belt, transmit rotation from the motor to the circle;
- Switch, speed controller;
- Drive shaft with bearings;
- A bowl that will hold the circle. Its walls will protect the room from clay splashes.
Choose the option whose components are easier for you to assemble. If you decide to assemble a machine from a “Malyutka” type machine, then you will not need drawings. Its design is most suitable for work.
Instructions for making a pottery wheel
Let's start with a simpler option.
How to assemble a mechanism from an activator machine
There is already a horizontally placed circle at the bottom of the case. You need to disassemble the case:
- Turn the CM upside down;
- Unscrew the screws securing the upper part;
- At the bottom you will find a motor and a pulley that are connected by a belt. There is also a timer set there. It will not be useful for work, so remove it by disconnecting the wires;
- Now remove the pulley. To do this, release it from the belt, twist the fastening nut;
- Behind the pulley there is a ribbed impeller. A wheel with a flat surface is suitable for the job, so you can make it yourself, or contact a turner;
- Measure the dimensions of the axle and sketch out a diagram of the components. The holder is made of steel, and the upper part is made of moisture-resistant plywood;
- After manufacturing, wipe the plywood disc with white spirit and coat it with moisture-resistant varnish. The holder must be primed and painted;
- It's time to build the impeller. Secure the holder to the plywood using bolts.
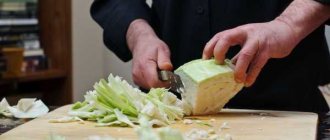
Take the prepared medicine bottle. Trim the top and bottom and place in the center as shown in the photo.
It will serve as protection against moisture. Then mount the prepared wheel. Secure the product with a plastic bolt.
Let's move on to the body. Make a mark along the cut line with a marker. It should be at least 1 cm away from the disc. Trim the top with a hacksaw. The base is ready, all that remains is to connect the engine.
How to connect the motor
You need to determine where the wire is located that goes to the motor windings, stator and brushes. To do this, it is better to use a multimeter. In one of the articles we wrote “How to connect a motor from an old washing machine”, the stages of work are described in detail.
A switch must be connected to the power wire. On the body, select a place where it will be convenient to place the switch.
After installation, secure all wires with clamps and insulate them from moisture.
If you want to install a speed controller (500 W), the connection will be similar to the method with a switch, or the latter can be completely eliminated in this case.
Homemade pottery machine
Here you will need a drawing with precise calculations, as shown below.
Prepare components and tools:
- A profile pipe measuring 80x40 mm is suitable for the frame;
- The motor is from a machine with a speed of no more than 1500 per minute;
- The drive and driven pulleys are also taken from the CM housing;
- The circle/faceplate is ordered in advance or made from steel 10 mm thick. Please note that the diameter of the internal hole must correspond to the size of the shaft;
- Bearings and shaft;
- Welding apparatus;
- Grinder with different attachments;
- Drill.
Progress:
- Make a frame using welding. You should get a rectangular frame with legs. Fasten the profile at an angle of 45 degrees.
- Attach a crossbar from the same profile to the middle, closer to the edge. It will serve as the basis for the shaft.
- Now you need to make a base for the motor. To do this, a transverse pipe is welded to opposite profiles. Two longitudinal pipes are fixed perpendicular to the transverse one.
- Attach the runners and guide to the longitudinal bases.
- Attach the motor stand.
- Install the engine. Use bolts as fastenings.
- Attach the bearing cup.
- Install the shaft with the pulley and center it.
- Put protection on top. This could be a plastic container.
- Mount the faceplate.
- Connect the electrical part: motor, switch.
The video shows the stages of making a pottery machine.
Create a circle and protection
Let's start remaking a simple and primitive washing machine ourselves. The alteration is complicated, but there will be savings of a couple of tens of thousands of rubles. We start by partially disassembling the body of the activator item in order to determine the location of the most important elements - the motor, electrics and drive mechanism. We remove the drive belt, pulley and other parts ourselves to open the shaft.
- At this stage we have the first difficulty, namely: we have a shaft and one drive mechanism, as well as a motor, but we do not have a normal wheel on which the rotating circle will be fixed. What to do? We will have to take the dimensions of the shaft and order a good wheel from a turner. The turner must produce something similar to a strong element.
- We will not indicate the dimensions, since they are completely individual and will depend on the dimensions and type of washing machine that will be selected for remodeling. We slowly paint the turned part, and then put it aside for a while.
- Before painting the element, you need to sand it well yourself, removing traces of rust and dirty spots.
- Now we need to cut a circle from a piece of moisture-resistant plywood.
- We will saturate the circle with varnish, which we immediately mix with white spirit; on this circle we will have a clay blank.
- Let's assemble the two parts of our wheel, quickly put the wheel on the shaft, thus preparing the part for installation on the drive mechanism. The working part of the circle, which will hold the moving workpiece, must be completely centered. Otherwise, the workpiece will rotate incorrectly, which will lead to difficulties when creating clay objects.
- Then we need to protect the drive mechanism from water ingress and serious corrosion. To do this, take a simple plastic bubble and put it on the shaft, after which we secure the created part well with a nut. With this, we can complete the assembly of the working part of our product; let’s move on to the body of the product.
- We don’t need a huge part of the washing tank, so let’s take a hacksaw and cut the tank completely, leaving only the bottom with the activator and small sides around the edges. With the potter's wheel body and fast mechanism done, now the hardest part is connecting the motor and working with the electronics.
Instructions for making a pottery wheel
We will tell you how to make a pottery machine with your own hands using the example of an activator-type machine. The “Malyutka” washing machine will do.
Since the rotating element in it is located horizontally, you only need to slightly modify the design by installing a disk.
What you need for work
Accessories and parts:
- washing machine;
- a piece of plywood;
- yacht or waterproof varnish, paint, white alcohol;
- plastic jar (for example, for medicine);
- switch;
- Working wheel;
- insulating tape;
- bolts with nuts.
Tools:
- self-tapping screws;
- ruler;
- hacksaw for metal;
- felt-tip pen;
- soldering iron;
- screwdrivers and keys.
Step-by-step execution of work
How to make a pottery wheel yourself at home? To do this, you need to disassemble the washing machine. Proceed sequentially:
Now you need to make a homemade impeller. Since there is no wheel between the shaft and the pottery wheel, you can do it yourself or order it from a turner - to do this, measure the dimensions of the shaft. You can prepare a drawing of the finished structure in advance:
In the future, the finished wheel must be cleaned of dirt and painted.
Prepare the body
A circle is cut out of a piece of moisture-resistant plywood. It can also be ordered from a turner along with the wheel. If you make the parts yourself, check them in the assembly to ensure accurate alignment.
When the circle is ready, treat it with impregnation by mixing varnish and white alcohol. Then apply a layer of waterproof (yacht) varnish on top.
Assembly and design of the impeller
Screw the impeller to the plywood pottery wheel. Then install the axle, secure it in place with the bolt.
Accurate, level installation is very important. If the wheel rotates unevenly, problems will arise when working with clay.
After you have put the structure on the shaft, you need to make sure that no water enters the drive mechanism. To do this, use a plastic bottle: cut off the bottom of the bottle and place it on the shaft, securing it with a nut.
Working with the body
For ease of operation, the machine body must be cut off. Mark with a felt-tip pen a place 1-2 cm above the impeller and cut with a knife or hacksaw. You should still have a bottom with an activator and small sides.
Motor connection
In one of the articles we described in detail the process of connecting the washing machine motor. To make the correct connection, you definitely need an electrical diagram of the motor. From it you can determine:
- which wires lead to the tachometer, which regulates engine speed;
- which lead to the stator and rotor;
- which lead to electric brushes.
After making the connection, cut a hole in the housing for the switch. It is advisable that it be protected from moisture. After installing the switch, connect the power wire to it. The ends of the wires can be secured with a clamp and insulated with electrical tape.
You need to install a speed regulator on the motor housing, since a speed of 500-700 revolutions per minute will not allow it to work normally.
Now you know how a pottery wheel from a washing machine works. You can safely get to work and create.
Watching a potter make a piece on a potter's wheel is a magical experience. This article will tell you how to make a pottery wheel with your own hands and start creating things. If your goal as an artist is to create unique pieces, then this type of pottery wheel is perfect for you.
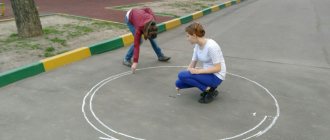
Just find a 360 degree rotating bucket, use a few items from around the house and you'll be ready in 10 minutes. The project is inexpensive and works as efficiently as any pottery wheel. With a little practice I can center, twist and turn this pottery wheel well. After correcting the vibrations, centering is now automatic thanks to the concentric circles on the potting tray.
The foot potter's wheel is inexpensive, lightweight, portable and takes up little space. What's great is that there's no soldering, no heavy machinery, and it works on your feet. The best part is that it doesn't require electricity.
Here's a quick compilation of all my videos after I learned how to throw mop buckets on a potter's wheel after 50 throws in 14 days.
Connecting the engine
First, we need to find out the identity of each wiring that is visible from the engine of our activator-type product. It is better to perform this action , guided by the correct electrical diagram, but if you do not have one, you need to work at random. We need to find the wires:
- the wires that control engine speed (if any) will go to the stator winding;
- two wires will go to the brushes.
Let's disconnect the supply wire and install a switch on it. Let's cut a groove for the switch in a comfortable place on the body. All wiring is completely insulated. If possible, you should put a rubber cambric on each wire or simply wrap each wire with tape . After this, we will mount and connect the device that regulates the engine speed.
We connect this device to the power supply and two wires that control the speed of the motor. After this, we will put the pulley in place, put on a special belt, insert and secure the shaft with the impeller. Then we will assemble the body and go through the groove with sealant so that water does not accidentally get into it and that’s it, now we have finished assembling the electric potter’s wheel.
Carrying out work
First, it is necessary to carry out in order to clarify the location of its main components. To free the shaft, you need to disconnect the pulley and drive shaft. Some of the units that were used here will not be needed to operate the potter's wheel. An example here is, for example, the timer on the Indesit washing machine. Under the washing tub in some machine models there is a plastic disk that protects the motor from getting ingress. It also needs to be removed.
When making a potter's wheel, it must be taken into account that, although there is a motor along with a drive mechanism, there is nevertheless no base on which the potter's wheel will later be attached in the machine.
This part should consist of a small section of pipe and a small disk perpendicular to it with holes for attaching a circle.
The easiest way to get the part you need is to order it to be made by a professional turner. However, if you have the necessary equipment and the appropriate skills, you can make a unit for the machine yourself.
The already made part is cleaned of dirt and rust, and then primed and painted with waterproof paint. After this, it is put aside.
Now you will need to cut a circle of the required size for the machine from thick, moisture-resistant plywood. It must be treated with white spirit and then coated with waterproof varnish. It will be better if this wooden part is pre-impregnated. The composition for it can be prepared by making a mixture of white spirit and this varnish. Double processing will make the wooden disk more protected from moisture and dirt. It is necessary to drill holes in the disk that correspond to those that were on the previously manufactured part.
Now you need to attach these parts to each other using self-tapping screws.
It is important to consider that the working part of the circle is now being made, which will rotate at high speed. Therefore, it must be precisely centered in order for the machine to work efficiently.
The next step is to protect the shaft and motor of the machine from moisture and dirt. To do this, you need to use a plastic medicine bottle prepared in advance. Its upper part is cut off and put on the shaft. Using a nut, the plastic protection is securely fastened.
When making the rotating part in this machine, two parts were used. However, it is permissible to make this unit in the form of one part, making a circle from PCB.
Motor connection
Before you do it yourself, you need to figure out which wires come from the motor. If you have documentation for the washing machine, this will not be difficult. However, if we are talking about an old one, the usual situation is when no circuit diagrams can be found. In this case, you need to remember that the following types of wires come from the motor:
- Those that are connected to the brushes.
- Connected to the stator winding.
- Perhaps the design of the engine provides that there are those that provide regulation of the rotation speed.
The purpose of the wires can be determined experimentally.
It is necessary to install a switch for the machine on the wire through which electrical energy is supplied to operate the motor.
All protruding wires must be securely wrapped with electrical tape. If rubber casings are available, they can be placed on the free ends of the wires.
Now you need to mount and connect the board that controls the rotation speed of the machine’s motor. You don’t have to do it yourself, but you can order it in a workshop or buy it in a specialized store. It needs to be connected to a power supply wire and two wires that control the rotation of the motor.
It is important to ensure that the switch and device for adjusting the rotation speed of the machine motor after completion of assembly are located on the outside of the washing machine.
Now you need to reinstall the pulley and drive belt. Next, you need to connect the shaft to the working pottery wheel.
After the machine is assembled, the grooves through which water can leak into the motor are sealed with silicone sealant.
Now the pottery wheel is ready for use.