How to make a rose from foil?
Flowers are the most beautiful of the miracles that nature has given us, and our hand-made crafts are only a modest imitation of it. But you can also make very beautiful flowers from improvised materials. We offer you a master class on how to make a rose from foil with your own hands.
How to make a rose flower from foil?
- To do this you will need a roll of regular food foil, a ruler, wire and glue. Using a long ruler, carefully tear off strips of foil 50-60 cm long from the roll. Then wrap each of them as follows. First, bend the bottom of the strip to the middle. In this case, the matte side will remain on the inside, and the shiny side on the outside.
- Then we form a narrow, 1-2 centimeter side fold.
- And wrap the top part to the middle.
- We roll each strip of foil in a spiral, forming a pink bud. From the remaining part at the bottom we make a flower stem. Foil is a very soft and flexible material; it can take any shape. Therefore, flowers from foil can be made completely different, not similar to each other. Form the curves of the petals by gently squeezing or stretching them depending on the desired flower shape.
- Make as many buds as you need to create a beautiful flower arrangement.
- The foil can be left as is or painted. The buds look very beautiful and unusual, golden on the outside and silver on the inside. This can be achieved by spray painting roses with metallic gold paint, but without affecting the inner petals.
- An original bouquet of homemade roses can be made using dried flowers. The lower part of the bouquet also needs to be properly decorated, beautifully tying the flower stems with foil flagella or placing them in an appropriate vase.
You can make other beautiful crafts from foil.
DIY foil roses. Master Class
Master class on handicrafts (from foil using modeling techniques)
Crafts for children 5-6-7 years old
Author: Novotnaya Vera Sergeevna, teacher of the State budgetary preschool educational institution kindergarten No. 100 Kalininsky district of St. Petersburg
Audience: for children (children) 5-7 years old.
Topic: “Bouquet for Mom”
Purpose: interior decoration, holiday gift. Goal: development of children's creativity Objectives: Educational: To consolidate ideas about the structure of a flower;
introduce the legend of the flower. Expand your understanding of foil. Developmental: Develop fine motor skills; develop mental processes: memory, thinking; develop fantasy and imagination. Promote the development of interest in the world around us. Develop the ability to convey in creativity the characteristic features of real objects. Educational: To cultivate accuracy, perseverance, and the ability to work collectively. Cultivate a friendly attitude towards nature and the surrounding world. Required materials: silver foil, scissors; ruler; simple pencil. Progress:
Give the children (child) a riddle, introduce the children/child to the legend of the rose and read the poem: Proud sister, She is the queen of all flowers. She is afraid of the coming of frost. And the name of the queen is... (rose) People have sung the queen of flowers - the rose - since ancient times. They created many legends and myths about this magnificent flower. In ancient culture, the rose was a symbol of the goddess of love and beauty Aphrodite. According to ancient Greek legend, Aphrodite was born from the sea off the southern coast of Cyprus. At this moment, the perfect body of the goddess was covered with snow-white foam. It was from this that the first rose with dazzling white petals arose. The gods, seeing a beautiful flower, sprinkled it with nectar, which gave the rose a delightful aroma. The rose flower remained white until Aphrodite learned that her lover Adonis was mortally wounded. The goddess ran headlong to her beloved, not noticing anything around. Aphrodite didn't notice how she stepped on the sharp thorns of roses. Drops of her blood sprinkled the snow-white petals of these flowers, turning them red. Knights once compared the ladies of their hearts to roses. They seemed as beautiful and impregnable as this flower. Many of the knights had a rose engraved on their shields as an emblem. Rose bush Mishka brought this bush of wild roses from the forest. So that you wake up in the morning, see and smile. So that from dawn to dawn the nightingales sing songs. They sang songs, built nests and raised their chicks
Making roses:
Step 1: prepare the necessary material.
Step 2: Cut 9 strips of silver foil, 3 cm wide and 28 cm long.
Step 3: twist 8 strips of strips into flagella, which we will call “wires”. Step 4: Wrap 5 “wires” around a pencil and carefully remove them to form “springs”.
Step 5: prepare 3 strips of silver foil, 10 cm wide and 28 cm long, from which we will make flowers.
Step 6: Fold the wide strips in half without ironing the fold. Step 7: Lightly gather the bottom of the pieces.
Step 8: Attach the wire to the edge of the workpiece and wind the workpiece around the wire, pressing lightly with your fingers.
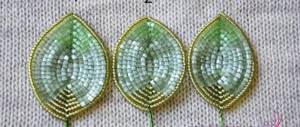
Step 9: prepare 2 strips of silver foil, 5 cm wide and 15 cm long; Cut each strip into 3 squares, from which we will make leaves.
Step 10: Turn the square at an angle towards you and bend the sides of the top part towards the middle diagonally. Then slightly crumple the bottom of the square and twist it into a “wire” to form a leg. Step 11: Attach the finished leaves to the flower, 2 pieces at a time, twisting the stem of the leaf around the stem.
Step 12: attach “springs” to the finished flower, twisting it around the stem.
Step 13: collect the finished roses into a bouquet, twist the stems. Step 14: Wind the remaining strip onto the stem of the bouquet. As a continuation of this master class, I suggest you visit an exhibition of works made from foil so that you can be convinced that not only beautiful roses can be made from it, but many more beautiful and interesting crafts.
Works made from foil
We recommend watching:
Shell roses. Master class with step-by-step photos Flowers made of foil. Master class with step-by-step photos DIY Christmas wreath made of foil. Step-by-step instructions with photos Do-it-yourself bouquet of lilies from foil. Master class with step-by-step photos
Similar articles:
DIY birthday gift for grandma
DIY roses for mom
DIY thread roses
Paper rose. Master Class
Citrus roses. Master Class
How to make flowers from foil with your own hands - weaving techniques and step-by-step master class
Fragile silver flowers always look elegant. Especially when they stand in transparent crystal vases. It’s even surprising that craftsmen make such flowers from thin foil with their own hands. It seems so difficult.
In fact, the technique used to make silver bouquets is quite simple. It is taught to schoolchildren in creativity classes. Now you will learn this. Be patient, you will need it, because creating flowers requires a lot of perseverance.
Mastering the weaving technique - step-by-step instructions
The technique of weaving silver branches is based on the principle of imparting rigidity to the material by squeezing. To make a stick you will need:
- food foil in a roll, it can be found in every kitchen;
- scissors or a thin metal ruler for tearing off strips.
We straighten the foil on a flat surface, then tear off a strip 2-2.5 centimeters wide from it. We press it with our hands, then twist it like a rope. The foil gradually thickens and turns into a thin but rather hard stick.
Rose from a mold - master class
To make a rose flower from foil, you can use aluminum baking pans. They are much stronger than food foil, they are convenient to work with - they are easy to cut with scissors. The corrugated texture of the mold gives the petals additional rigidity.
So let's get started. Take a mold and cut off the hard edge. Then on the side surface we make 6 symmetrically located cuts to the very bottom. We unfold the workpiece, we get a circle with blades. Each of them is given the shape of a petal. One row of petals is ready. Let's do at least 4 more.
We form a dense ball, half the diameter of the bottom, this is a bud of unopened petals of a future rose. We take one of the blanks, continue each cut by ¼ of the diameter of the bottom. We place the ball on this blank, knead it, and correct the shape of the leaves. Let's do the next row.
They are glued together with heat-shrinkable glue. The flower is ready. It is attached to the stem with a spiral-shaped cone woven from sticks. The diameter of the cone should be slightly larger than the bottom. Insert the finished flower into the cone, having previously smeared the edge with glue.
Now you know what silver flowers are made from and in what ways. But there are other methods: buds are formed from wide ribbons and loose twisted spirals. Perhaps you will invent your own special method for making such fragile-looking products. They are always beautiful and are not afraid of high humidity. They are very environmentally friendly and practical to use. Happy creativity!
"Ice Flower" Master class on foil weaving
Elena Shvetsova
"Ice Flower" Master class on foil weaving
Ice flower . Master class on foil weaving .
Dear colleagues!
I am pleased to present to you the master class “ Ice Flower ”
on
foil weaving .
For work you will need Sayanskaya foil
and scissors.
The foil itself is beautiful and shiny, but not very durable. Therefore, we will begin our work by making an aluminum “straw”
.
Take scissors and cut 20-30 strips of foil, each 2-3 cm wide, from the roll by eye. To prevent the foil from tearing , make long cuts (the entire length of the blade, and after each, spread the tips of the scissors wide. Try to ensure that there are no burrs or cuts on the edge of the strip. Because of them, the strip may tear when twisted. Also, do not try to fold the foil before cutting in several layers, otherwise you will not be able to separate the cut strips from each other without tearing them.
Now take one strip and, using grasping movements of both hands, mercilessly crumple it across its entire length.
Clamp the “sausage”
between the thumb and forefinger of both hands, and as if
“spinning”
it, slowly moving from beginning to end. If there are any uneven spots, go over them again.
For elasticity and strength of the flower, insert a thin copper wire into each strip of foil .
Secure the straw in the middle of another straw with a double twist, and press the twist tightly with your fingers.
Secure the five straws to the sixth with a double twist close to each other.
Twist all the ends of the straws together at the base of the petal.
The petal is ready!
There can be from three to five or six such petals, according to your desire.
Now we will make the middle of the flower .
Place a wad of napkin or a ball of foil on a rectangular piece of foil , hide it inside and twist the core of the flower together with the stem .
flowers inside the future stem for strength .
Now screw pieces of straws onto a pencil; these will be the stamens of the flower .
Assemble all the parts together using wire.
The flower is ready!
the leaves for the flower in the simplest way - put six straws together and twist them with a simple twist at the beginning and at the end.
If you are completely involved in the creative process, “spinning”
using aluminum straws has begun to bring you joy and does not interfere with watching your favorite TV shows, make
a flower according to a simplified scheme , where the petals are folded from aluminum straws from smallest to largest.
For patient, creative people, there are a huge number of variations of weaving flowers from foil !
Enjoy your creative process!
Thanks to everyone who visited my page!
Question answer
No, the balls are formed from a stick, that is, the stamen itself. The foil is rolled with your fingers to a spherical state quite simply. Now about the balls. Sometimes they use peas, select the right size, wrap them in foil, and glue them into the middle of some types of flowers.
It is more convenient to use food foil for sticks. It is thin and wrinkles well. For petals, a more rigid foil is used - technical or sheet. It is often used for packaging products.
How to make a rose from foil: master class
Flowers are, of course, wonderful; a charming bouquet of roses is especially mesmerizing. But fresh flowers are not as durable as we would like; they dry out quickly, losing their presentable appearance. You can decorate your home with a beautiful, sophisticated bouquet of foil roses. A well-designed composition will delight the owner for a long time. This is an incredibly beautiful piece of home decor and a nice gift that will never fade.
We will be happy to share with you a master class on how to make a rose from foil. Foil is a material with a pleasant silver color. Flower buds are guaranteed to turn out beautiful.
How to make a rosette from foil
Flowers are the most beautiful of the miracles that nature has given us, and our hand-made crafts are only a modest imitation of it. But you can also make very beautiful flowers from improvised materials. We offer you a master class on how to make a rose from foil with your own hands.
How to make a rose flower from foil?
- To do this you will need a roll of regular food foil, a ruler, wire and glue. Using a long ruler, carefully tear off strips of foil 50-60 cm long from the roll. Then wrap each of them as follows. First, bend the bottom of the strip to the middle. In this case, the matte side will remain on the inside, and the shiny side on the outside.
- Then we form a narrow, 1-2 centimeter side fold.
- And wrap the top part to the middle.
- We roll each strip of foil in a spiral, forming a pink bud. From the remaining part at the bottom we make a flower stem. Foil is a very soft and flexible material; it can take any shape. Therefore, flowers from foil can be made completely different, not similar to each other. Form the curves of the petals by gently squeezing or stretching them depending on the desired flower shape.
- Make as many buds as you need to create a beautiful flower arrangement.
- The foil can be left as is or painted. The buds look very beautiful and unusual, golden on the outside and silver on the inside. This can be achieved by spray painting roses with metallic gold paint, but without affecting the inner petals.
- An original bouquet of homemade roses can be made using dried flowers. The lower part of the bouquet also needs to be properly decorated, beautifully tying the flower stems with foil flagella or placing them in an appropriate vase.
You can make other beautiful crafts from foil.
Material
Before making a rose from foil, prepare the material and place to work. Foil is a fragile material, it must be cut very carefully, so it is better to use a blade or a sharp stationery knife, a ruler, and protect the work area with thick cardboard or chipboard.
Foil already has a beautiful color, but some craftswomen prefer to paint ready-made roses to give them a matte appearance. Prepare a can of the desired color if desired. You can diversify the roses with suitable sparkles, beads, and beads.
How to make a flower - a rose - from foil
Let's get started creating these wonderful flowers. First, let's prepare the foil strips. Measure 50-60 cm from the roll. Applying the ruler to the mark, draw the blade along it.
Fold the piece like this: place the foil with the shiny side down, fold the bottom part so that the end of the piece is in the middle. On the sides of a sheet of foil, make side folds inward about 1-2 cm. Then fold the top part to the middle.
Now let's start forming the flower. How to make a rose from foil? Roll each strip of foil into a spiral, forming a flower bud. Since foil is a soft, plastic and pliable material, it can take any shape. Therefore, in the process of forming a spiral, bend the segment inward and outward, forming light waves.
Make a flower stem from the remnants of the cut by twisting the foil tightly. If you want to make a stable bouquet, then place a thin stick or thick wire under the bud.
To create a composition, form several flowers. The finished ones can be decorated, as already mentioned, with paints, spray cans, various sparkles and beads.
Here's how to make a rose out of foil in just a few minutes. The creation process is so fast that in a short time you can create a whole bouquet of these attractive flowers.
Foil flowers + MK
Author: Tatyana Prudnikova
source: https://stranamasterov.ru/node/337400
I saw flowers like these in the “Test Purchase” program in 2010. Then the guys and I tried to make the first flower. The flowers in the photo were prepared for the fair. The process is very exciting. What’s also important for me is that even children 5-6 years old take part in it; they are quite capable of making flagella from foil.
This is what food foil looks like. The front side is glossy, the inside is matte.
We cut transverse strips approximately 5-6 cm wide. Foil is a very soft material and breaks easily, so you need to work carefully.
You can take 5 petals for one flower, or more, according to your desire.
We fold the strip lengthwise with the matte side inward, then again and again. There is no need to smooth it perfectly, it will be better for the foil to crumple.
Then, using our fingers, we gradually crumple and compress the workpiece. You will get such a flagellum.
We prepared 5 flagella for one petal.
We take one flagellum as a basis, and in its middle part we place a second one, folded in half.
10.
Twist, pressing tightly to the main flagellum.
11.
We do the same with the remaining flagella. Here the girl has a large distance between them, so you can wind everything side by side.
12.
The petal is ready.
13.
Depending on how many flagella you take - 2, 3 or 5 - you will get petals of different widths.
14.
The narrow petals also make the flower look pretty.
15.
Now we make the stem. We make it entirely out of foil, but you can wrap the foil around something, for example, on a wire or a branch. We usually first fold a piece of about 30 cm 5-6 times. Then we fold it lengthwise several times in a row until we get a small piece that can also be crumpled.
16.
The basic elements of the flower were obtained. This time the girl decided to make a flower of 8 petals.
17.
We apply 4 petals to the stem so that the tip of the stem peeks out a little, and fix it very, very tightly (otherwise the flagella will fall out in the finished flower) with a narrow strip of tape.
18.
Then we apply the second row, 4 more petals, and also fix them with tape. We wrap a strip of foil over the tape, pressing it firmly against the stem.
19.
Now we smoothly bend each petal, straighten all the flagella-strips. If you want, you can make a leaf from 2 flagella and fix it on the stem in the same way. We did it, but we didn’t really like it, because in a vase the leaf would only get in the way. When photographed, the flower is slightly tilted forward, so the stem seems very short, but using the “poke” method we settled on this length.
20.
This is the inflorescence itself, viewed from above.
21.
And this happened without a flash.
For the first time I took up MK, something didn’t work out very well for me. Probably a very long, long time. And the photos are of poor quality, sorry, the girl and I were in a hurry to get everything done in a quiet hour, while the younger ones were sleeping. If you did watch to the end, I am very grateful! And if you correct me where I explained something wrong, I will be doubly grateful. Good luck to everyone!
Master class on making flowers from foil.
The author writes:
source: https://www.maaam.ru/detskijsad/izjaschnye-cvety-iz-folgi-master-klas.html
As promised, I invite you to make an elegant foil flower with me.
Need to:
thin food foil, narrow tape (if you find it, tape “under the foil”), stick for the balloon, scissors.
For a flower of 3 petals, you need to cut 27 strips 3cm wide. I will tell and show you how to make one petal. 1. Cut 9 strips 3cm wide.
2. Fold the strip in half lengthwise and carefully begin to roll it into a thin flagellum from the bottom.
3. So we get 9 flagella.
4. We bend all 9 flagella in half: one of them is the base, we bend it a little differently (look at the photo below).
5. We string 4 flagella on each side of the main flagellum,
folded in half.
6. We connect all the ends and wrap them with the outermost flagellum. We get one petal.
7. In the same way, we make 2 more petals and stamens, combine them into one flower and attach them to the stick using foil tape.
Forming a bouquet
Ready-made buds can be used as you wish: they decorate gift boxes, complement compositions, and we suggest you assemble a bouquet. As mentioned above, to make the flowers more stable, use thick wire or a stick. Use the remaining foil on the buds to connect the wire and roses. Cut off some more foil and decorate the stem. Gather the bouquet in a pile, add more elements, these can be various twigs for decoration, coated with silver, dry twigs and flowers.
Tie the bouquet with a bow or place it in a suitable vase. Here's how to make your own foil rose.
Sources:
https://womanadvice.ru/kak-sdelat-rozu-iz-folgi https://tvojdizajn.ru/cvety-iz-folgi https://sdelaisam.mirtesen.ru/comments/42916231864/page https://fb .ru/article/452864/kak-sdelat-rozu-iz-folgi-master-klass
DIY foil rose
In this photo master class I want to show you how to make a foil rose with your own hands.
The rose is made from food foil. Using a ruler (plastic or metal), we tear off strips of the required width from a roll of foil: 3 cm for weaving and 18 cm for the rose stem. Tearing off strips with a ruler is easier than cutting with scissors, which become dull after cutting the foil. Press the ruler tightly against the foil and carefully tear off the free edge.
We crumple the foil strips in width until a sausage is formed, 5-6 mm wide for the rose and 10-12 mm wide for the stem.
Then, using rotational movements, we form tubes. I would like to warn you right away that you need to be very careful when working with foil: the material is fragile and breaks easily with sudden movements.
Take the tube and fold it into loops, as shown in the photo.
We form a third loop and place it between the first two. The height of the loop is 3-3.5 cm.
Secure all three loops together with one turn of the tube.
To continue weaving, lengthen the tube.
We connect the ends of the tube by twisting it in a spiral. The bottom photo shows the connection.
We begin to braid vertical tubes.
The photo clearly shows that the tubes inside the petal are intertwined two at a time, and the outer ones one at a time.
We continue weaving, pressing the turns tightly against each other. But be careful, if you pull too hard, the foil will tear.
We complete the weaving of the petal. Carefully cut the tube at a distance of 1 cm from the edge of the petal. We tuck the tip inward (between the turns) and press.
The rose petal (inner part) is shown upside down in the photo. Fold the top wide edge slightly. We tuck the tip of the tube at the bottom edge of the petal inward and flatten the edge of the workpiece with pliers.
The photo clearly shows the thin flattened edge of the petal. You need to make 7 such petals: 3 internal and 4 external.
We make 3 holes on the outer petals with thick wire.
We insert the wire into the holes as follows: We insert a tube into the outermost hole, form a loop 3-4 cm long, and return the tube to the other outermost hole. Then we return the tube to the loop, but in the middle hole.
We insert the long end of the tube into the middle hole.
We begin to braid the vertical tubes with the long end of the tube, as shown in the photo.