Making a homemade plow for a walk-behind tractor
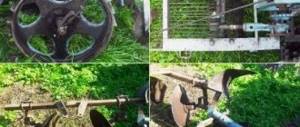
With the help of a walk-behind tractor, a wide variety of agricultural work is performed, such as: plowing, mowing, planting various crops, hilling, transporting goods, etc. But for each type of work you will need special attachments. In this material, we will talk about a plow, and the question arises of what to do: buy a plow, or make a plow for a walk-behind tractor with your own hands.
Plows are divided into several types, differing from each other in design. Today, single-body plows, reversible, and rotary plows are used for plowing with walk-behind tractors.
Single body plow
This plow is structurally very simple, and finding its drawings and diagrams is not a problem. Because of this simplicity, making such a plow yourself will be optimal, especially for those owners of walk-behind tractors who do not have special skills.
Making a homemade single-body plow for a walk-behind tractor will not be difficult. After all, almost everyone in their household has unnecessary pieces of metal and improvised tools.
DIY plow: instructions and 70 photos of optimal models
Making a homemade plow is not as simple a task as it might seem at first glance. Despite the seemingly simple design, for proper operation it is necessary to maintain the geometry of the plow correctly, otherwise all efforts will be in vain.
Preparing tools and materials for work
Designing a plow with your own hands requires a clear plan of action and selection of the necessary tools and materials. It is advisable to familiarize yourself with the finished product drawings in advance. In addition, a homemade product for cultivating land should be simple in design and efficient in use.
To make a standard version of a hand-made plow you will need the following:
- ploughshare or steel billet;
- perforator;
- steel material for the manufacture of blades and field boards;
- welding inverter;
- angle grinder;
- fasteners, in the form of a set of bolts and nuts;
- metal stand for making a plow base.
When gripping a layer of soil over 25 cm, the surface and material of the plow are subjected to heavy loads, which can result in rapid wear of the product. It is best to choose carbon steel 9ХС or hardened steel 45 with a thickness of 4-5 mm as the workpiece material.
The plow (shown in the photo below) is one of the main parts of the plow. For ease of use, it is better to make it removable; it will be easier to sharpen.
Next, we begin manufacturing the working part of the plow body, which is responsible for lifting the soil and turning it into the furrow. There are several ways to make the dump part. The contact surface of the dump side has the shape of a cylinder. Using bending equipment, producing such a workpiece will not be very difficult.
If you don’t have the equipment, metal shears or electric gas welding devices will do. On a bending machine, the workpiece is fed onto the shafts at an angle of 20-23 degrees, and a selected punch is used to give the desired radius.
Another option involves the presence of a finished pipe with a diameter of 0.55-0.6 m and a wall thickness of 3-5 mm. A template is made from ordinary cardboard to cover the required area of the pipe, along the contour of which the required shape is cut out using electric gas welding equipment.
To eliminate bulges and burrs, use a hammer and file. The most difficult method of manufacturing a plow is considered to be the production of a blank in a metallurgical furnace, followed by straightening with the finished matrix (sometimes a tractor plow blade is used).
The blank for the product body is a sheet of steel with a carbon content of 0.03 to 0.1%, with a thickness of at least 3 mm. To maintain the dimensions, it is recommended to first assemble the model from cardboard, and then take on the metal base.
Assembling a homemade product
After all the elements of the future plow are ready, to complete the work you will need a 0.5 x 0.5 m metal sheet and a welding inverter. The plow parts are welded to the workpiece with certain angular dimensions: the plow and the side shield. The moldboard part is applied to the surface of the ploughshare.
If the angles are calculated incorrectly, the plow blade is brought to the correct shape using a hammer, and then it is attached to the back of the ploughshare and to the side shield by welding.
Afterwards, an expansion bar and a base in the form of a plate are installed on the shield, on which the corners for the ploughshare are attached.
The assembled home-made product for tillage is carefully inspected for all welded joints and, if there are no defects, all seams are finally welded.
Upon completion of the assembly and welding work, the auxiliary sheet is removed using an angle grinder or available metalworking tools. Places of welded joints require mandatory cleaning, and the blade and ploughshare are treated with sandpaper for standard roughness.
To set the product in motion, it must be attached to a walk-behind tractor. A similar design can be used when constructing a plow for mini tractors. The difference will only be in overall and geometric dimensions, depending on what type of mini tractor the product is designed for.
Building a plow with your own hands, in addition to acquiring certain skills, will significantly help reduce the labor intensity when working on your site.
Drawings of a plow for a walk-behind tractor
Using the experience of craftsmen who made a plow for a walk-behind tractor with their own hands and left drawings, the ploughshare should be made in such a way that it can be removed, this will make it easier to sharpen it before plowing.
Alloy steel 9ХС, from which I make blades for hand saws, is considered an ideal material for the cutting part of a plow.
Suitable steel grade 45, when hardened, brought to a hardness of HRC 50-55. If you only have ordinary steel on hand, say carbon St5ps, which is not subject to heat treatment, then by beating the cutting edge on an anvil and sharpening it, it is quite suitable for cultivating the soil.
Plow blade for walk-behind tractor
The moldboard of the plow is the part that takes the earth to the side.
The first method of making a blade:
The working surface of the blade must be given a curved shape. If you have a metal bending machine or sheet bending rollers, then giving the workpiece the desired shape will not be difficult.
A metal blank with a thickness of 3-5 mm is required, the rollers are directed at an angle of 20-22 degrees, as shown in the drawing, and the desired bend is given.
Second way:
Here, prepared. A pipe with a diameter of 600-650 mm can serve (this is the diameter that will require less labor, since the bend of the pipe will maximally repeat the desired bend of the future dump) and a thickness of 3-5 mm. We make a template from cardboard and apply it to the pipe, not forgetting the angle of 20-22 degrees, as shown in the drawing below.
We outline the template with a pencil or chalk and cut it out using gas. welding, if necessary, grind the workpiece and bring it to the desired condition.
Third way:
Probably the most difficult method of making a moldboard is when the workpiece is heated and, using a matrix, given the desired shape, which can be a moldboard from another plow.
The material of the plow body is steel sheet grade St3 - St10 with a thickness of 3 mm.
Drawing of plow parts for walk-behind tractor
a — ploughshare made of alloy steel;
b — side shield of the rack, St3;
c — spacer plate, St3;
g — plow base plate, St3;
d - field board, corner 30x30 mm;
e - stand, pipe with a diameter of 42 mm
We advise you to first make the plow parts from cardboard and attach them to each other at the required angles. Thus, the values of the angle α on different parts of the plow body will be from 25° to 130°, the values of the angle γ - from 42° to 50°. If the homemade model of a cardboard plow suits you in all respects, you can move on to working with metal.
When the metal parts of the plow are ready, you need to find an additional sheet of steel 3 mm thick, 600x600 mm in size, it will be needed to assemble the plow, and a welding machine (preferably an inverter). On this sheet we retreat 40 mm from the edges and measure the angle γ0.
Plow assembly
1 - ploughshare;
2 — side shield of the rack;
3 - additional sheet 2-3 mm
Using wedges with an angle α0=25 degrees and an angle γ0=42 degrees, a ploughshare is installed on the additional sheet and tacked to the sheet by welding, pointwise on both sides.
The side shield of the rack is connected to the ploughshare vertically so that its edge extends beyond the ploughshare by 4-7 mm, while the raised shield should be higher than the blade of the ploughshare (that is, higher than the additional sheet) by 6-8 mm, so as not to interfere with the ploughshare, cut the ground. The shield is also attached to the ploughshare and to the additional sheet.
Next, the blade is attached to the ploughshare very tightly, without leaving a gap, so that their surfaces are one whole. The angle between the upper edge of the blade and the ploughshare blade is equal to (γmax − γ0) = 6-8°.
Mounting the plow share
- ploughshare;
— countersunk head screw M8;
- dump;
— base plate;
— corner 30x30x90 mm;
- M8 nut
If it is found that the corners and/or surfaces do not correspond, the blade is adjusted using a hammer. After fitting the blade to the ploughshare, it is welded from the back to the ploughshare and to the side shield. Then the side shield is welded to the spacer bar and the base plate; the thrust corners for the ploughshare are attached to the latter by welding.
Followed by. Inspect the finished plow again, and if everything is clearly welded completely. Add. the sheet is separated from the body with a chisel or LNA. All welds are ground.
Do-it-yourself plow for a motorcycle – Special equipment
Cultivation of land is the most labor-intensive task for rural residents and summer residents. Preparing the soil for sowing and cultivating the land after harvesting are the most difficult types of manual work. A plow can greatly facilitate the performance of these works.
A plow is an agricultural tool with a wide metal blade that is used to plow the ground. In addition to tillage, plows are used for underwater work, for laying cables, and when searching for oil.
At the first stages of using the plow as an agricultural tool, people dragged it behind them , a little later they began to use livestock (oxen, horses) for this, today this hard physical work has been transferred to agricultural machinery - the tractor.
The main task of this tool is to turn over the top layer of soil. This procedure (ploughing) largely frees the soil from weeds. During the plowing process, the root system of weeds that have already begun to grow, but are not yet strong enough, is damaged.
In addition, along with the overturned layer of earth, the seeds of weeds that have not yet germinated are moved deep into the soil, which, of course, complicates their further germination. Many weed seeds are completely destroyed during the plowing process.
During the plowing process the soil loosens , becomes softer and more pliable, which subsequently makes sowing more effective and has a good effect on the germination of cultivated plants.
Modern agriculture uses different types of plows to cultivate the soil. These agricultural implements differ according to two characteristics:
- by aggregation method;
- according to the method of plowing.
According to the method of aggregation, plows are trailed, mounted and semi-mounted. Each type has its own advantages and disadvantages.
The trailed plow can only be driven using transport wheels. It is rarely used in modern agriculture, because the majority of tractors are equipped with a mounted system with a built-in hydraulic cylinder.
The advantages include the fact that, according to agronomists, after cultivating the soil with a trailed plow, the arable land is smoother and more uniform.
The disadvantage of such a tool is the rather large rotation angle, which prevents the use of this plow along with mounted and semi-mounted ones in the same paddock.
The mounted plow can only be lifted using the tractor linkage. The number of bodies varies depending on the traction class of the tractor.
The advantages of this model include the low weight of the entire structure, a small turning radius, and there are fewer structural parts.
The disadvantages include the fact that a minitractor will not be able to lift and transport a plow with many bodies.
The semi-mounted plow is brought into transport position using a tractor linkage and the transport wheels of the plow itself.
The number of bodies is no more than 6 for a tractor with a traction class of 3 tons, and no more than 12 for a tractor with a traction class of 5 tons. The advantages include a fairly large number of cases.
Disadvantages: large turning radius and a fairly large number of structural parts and elements.
According to the method of plowing, a distinction is made between non-reversible plows (driven method of movement) and reversible plows (for smooth plowing).
Plow design, principle of operation
The plow structurally consists of a frame, working parts, transport support wheels and a mounted or trailed device necessary for connection with the tractor.
The working parts of the plow include bodies, plowshare-moldboard mechanism, skimmers (angle skimmers), knives, and subsoilers.
The geometric shape of the body is critical when assessing the quality of plowing. Structurally, the housings are of the following types:
- moldboard (for plowing with rotation and loosening of the formation);
- non-mouldboard (designed for loosening soil in arid and wind-eroded areas);
- cut-out (for dump plowing of soil with a thin fertile layer and simultaneous deepening of the plowing level to 5 cm);
- with subsoilers (for dump plowing of thin, chestnut and podzolic chernozems and soils with simultaneous deepening of the plowing level by 6−15 cm);
- with an overhead chisel (for plowing hard soils clogged with stones);
- disc (for plowing heavy and hard lands clogged with tree roots, as well as for cultivating soils oversaturated with water (rice is usually cultivated on such soils));
- combined (for plowing heavy soils with simultaneous intensive loosening).
General purpose plows are usually equipped with bodies with a working width in the range from 25 to 40 cm. Special purpose plows are usually equipped with bodies with a working width in the range from 45 to 100 cm.
The main purpose of the plowshare is to cut the soil layer and direct it to the dump. The ploughshare is subject to rapid wear, which results in loss of shape and dullness.
The result of this may be a deviation from the technological process, an increase in traction resistance and an increase in fuel consumption of the tractor.
You can restore the structure of the ploughshare using a forge hammer, after preheating the ploughshare in the forge.
The blade cuts off a layer of soil from the wall of the furrow, deforms it, slightly moves it to the side and lays it with the top layer down.
The plowshare and the blade must fit tightly to each other along the joint line (the permissible gap is no more than 1 mm).
The purpose of the skimmer is to cut off the top sod layer of soil and throw it to the bottom of the furrow. Excessive deepening of this element will increase the traction resistance of the plow itself, and the layer of turfy soil will be worse to seal.
The knife cuts the soil in a vertical direction along the line of separation of the formation from the general earth mass and qualitatively improves the process of formation turnover and embedding of plant residues. In addition, a stable plow run and a level bottom and wall of the furrow are ensured. In most cases, the knives in the plow are hung in front of its last body.
The principle of operation of this agricultural implement is that, moving in the ground, the plow cuts off a layer of soil, lifts it up, deforms it, crumbles it, wraps it and places it on a previously laid layer.
DIY plow
In order to yourself , you need to know several nuances.
Raising a layer of soil up to 25 cm high, the plow body experiences serious loads, and its surface is subject to abrasive wear. In view of this, it is better to choose steel with a thickness of 3-5 mm for the working parts of a homemade plow.
It is best to make the ploughshare The preferred materials are 9XC steel (circular saw blades are made from it) or hardened steel 45.
Having taken into account all of the above, you can begin to manufacture the blade. It can be done in 3 ways.
- The working surface of the blade has a cylindrical shape. If you have any sheet-bending equipment available (for example, rollers), then it will not take much labor to obtain the workpiece of the desired shape. The steel blank of the dump (can be cut with metal shears or gas-electric welding) is fed at an angle of 20-23° to a sheet bending machine or rollers, bent and adjusted according to the template.
- To make a dump, a pipe (wall thickness 4-5 mm) with a diameter of 55 to 60 cm is suitable. A template is cut out of cardboard, placed on the pipe, outlined with chalk and cut out using gas welding. If necessary, finish it with a hammer and sand it down.
- The most labor-intensive method is one in which the moldboard blank is preheated in a forge or in any other way and bent along a matrix (you can use a moldboard from a plow designed for a tractor).
The plow body is made of steel sheet (Art. 3-Art. 10) of at least 3 mm in thickness.
Experts recommend first cutting out all the parts of the plow from cardboard and gluing them together, maintaining the required angles. If the resulting cardboard model satisfies the “newly minted Kulibin,” you can begin working on metal.
How to make a plow with your own hands according to drawings
A horse-drawn, tractor-mounted or walk-behind plow is an indispensable thing in a homestead. The plow plows the ground, turning over the top layer of soil, which reduces the number of weeds and makes the soil softer and more pliable. You can not only buy a plow, but also make it yourself. To do this, in addition to tools and materials, you need to have an understanding of the structure of the plow and its geometry.
Plow device
It is possible to make a plow correctly only when you have an idea of the plowing process, as well as the purpose of each of the plow parts.
When plowing, the plow wedge cuts into the ground at a certain angle, depending on the softness and moisture of the soil. The wedge separates the layer, lifts and compresses it, while simultaneously dividing the layer into several parts. The angle of entry determines how many parts the earth layer will be split into: the larger the angle, the larger the split.
But if the angle of entry is more than forty-five degrees, then the soil stops sliding along the working surface of the arable device and begins to accumulate in front of it, making further work difficult. A vertical plow, that is, with a sharper leading angle, separates the soil from the edge of the plow furrow and compresses it horizontally.
A plow with a horizontal leading angle works differently: it deflects and turns over the soil layer.
A typical working plow consists of:
- The ploughshare that cuts the soil,
- dump,
- Knife,
- Field boards,
- Racks,
- Skimmer.
Additionally, the plow can be equipped with:
- More durable metal frame,
- With wheels,
- A mechanism that corrects the operation of the plow relative to the tractor,
- hydraulic mechanisms,
- Pneumatic hydraulic system.
Source: https://st-logistika.com/plug-na-mototsikl-svoimi-rukami/
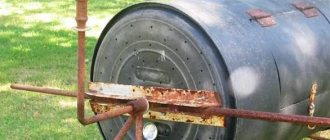
Homemade rotary plow for walk-behind tractor
The rotary plow is versatile. As you know, when plowing the soil with a single-furrow plow, in one pass the soil layer is turned over by the plowshare in one direction. To turn the earth in the same direction during a second pass, you have to return to the beginning of the previous row and start from the same side of the site.
A rotating plow will allow you to plow much faster - at the end of the row, after turning the walk-behind tractor, simply turn the ploughshare in the other direction and continue tilling the soil.
How to install a plow on a walk-behind tractor
Before you begin setting up and installing the plow, you need to prepare the walk-behind tractor itself. The installation begins with the installation of the walk-behind tractor at the work site, the wheels are dismantled and the lugs are installed. (See Do-it-yourself lug lugs for a walk-behind tractor). The lugs give the walk-behind tractor better grip on the soil, eliminating slipping.
Next, we begin the installation; it is recommended not to tighten the nuts too much, for further adjustment if necessary. Then he fixes the hitch to the mounting system of the walk-behind tractor with two steel pins. After completing these manipulations, you can begin adjusting the plow.
Adjusting the plow on a walk-behind tractor
Adjustment of the plow on the walk-behind tractor is carried out with maximum adherence to the instructions, because the quality of further work depends on this. This is done in stages:
To balance, place the walk-behind tractor on wheels on a flat surface. Adjusting the stands determines the depth of penetration of the plow into the ground, so you need to plow frozen soil no deeper than 15-20 mm, and spring soil, 20-23 mm.
Next, the angle of attack of the plow is set with bolts so that its “sole” is parallel to the surface of the ground.
After adjusting and securing the plow, the walk-behind tractor is removed from the platform and placed on the ground.
To check the correct adjustment of the plow, test plowing is carried out, measuring the depth of the furrows and the correctness of the soil dump to the side; if necessary, adjustments are made.
Video of plow adjustment on a walk-behind tractor
Tips for setting up your plow for use
How to make a hiller for a walk-behind tractor with your own hands - step-by-step instructions and video
Every owner of a piece of land strives to simplify its cultivation as much as possible, and at the same time not spend too much on mechanization equipment. Therefore, walk-behind tractors in most cases are purchased without attachments.
The logic is simple - it will be cheaper, and if you need something in the future, you can either buy it or make it yourself. In this article we will figure out how to make one of these very necessary devices for a walk-behind tractor with your own hands - a hiller.
Still, a home-made device is preferable. Why? The author believes that several arguments will dispel the reader’s last doubts about whether it is worthwhile to independently assemble a hiller.
- Cheap products don't last long. As a rule, their iron is not too thick, and after a short period of use you have to think about eliminating any defects that have appeared. Verified. And the quality of welding often leaves much to be desired.
- The simplest hillers have a fixed working width.
Sliding models are more convenient in this regard (albeit more expensive), but they will not satisfy all the owner’s needs. The reason is that the site has to cultivate segments with different crops, and each has its own planting characteristics. Including row spacing parameters. - Anything made with your own hands can be remade, modernized, or repaired much easier than a model made in production.
Lister hiller
The simplest option is a non-adjustable model. The figure shows its shape and the recommended metal thickness.
Despite the fact that this hiller will not be able to make a “clean” excavation between the rows in one go (the earth will partially fall into the furrow), it is precisely such devices that are in greatest demand among private owners.
Manufacturing Features
As already noted, it is necessary to select sheet metal with a thickness within 2.5 mm. Less - there is a risk of deformation during operation. If you take thicker iron, the hiller will turn out to be quite heavy. And it’s difficult to work with, and the walk-behind tractor (depending on the power) may not be able to handle it.
A metal sample is marked for the manufacture of structural elements of the hiller. When assembling it with your own hands, the following parameters for the “halves” are recommended:
The resulting parts are welded together and the seam is processed.
Making a stand is also not difficult. To attach such a hiller, a 12 piece pipe is enough.
The model is adjustable and universal. By spreading (moving) the wings, you can use such a hiller to cultivate areas with different row spacing parameters. The difficulty of operation is that such devices are attached only to walk-behind tractors with a power of at least 4 “horses”. It will not be possible to work with “weaker” models.
Disc hiller
This option is considered more successful. It is generally accepted that the hiller is needed only for processing plots with planted potatoes. This is not entirely true. The disk mechanism is excellent for hilling a number of other plantings, so when used in a small area where various crops are planted, it is advisable to make just such a hiller with your own hands.
- Working with such devices is much easier, and the load on the walk-behind tractor is significantly reduced. Disc models can be used with smaller units, which are most common in the private sector.
- The ability to adjust the distance between working elements allows you to process areas with any plantings.