Despite the fact that receiving correspondence recently is not as popular as it was several years ago, a mailbox is still needed. And this applies not only to city apartments, where a person spends most of his time, but also to a summer cottage or a country house.
As a rule, the entrances of city apartments are equipped with standard boxes for receiving newspapers or letters, but owners of private households have the opportunity to stand out and make a mailbox with their own hands, guided by their own ideas and developments. We will look at how to do this in our article.
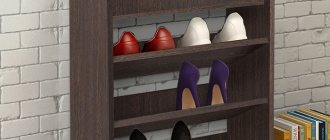
Types of mailboxes
First, let's decide for what purpose you need this box. If it is intended only for landscape decoration of a site that does not have a postal address, then its design should be such that it fully matches the appearance of the house. It does not have to be functional, and made of materials for long-term use, but does not have to stand out stylistically. Sometimes creative ideas are used for decorative boxes that are sure to attract the eyes of passersby and make them smile.
If this is a fully functioning box, then several requirements are put forward for its manufacture and design.
- First of all, we are talking about spaciousness, so that any correspondence can easily fit inside as intact as possible, without bending or deforming. In addition, you need to take into account the fact that in addition to the ordered correspondence, other correspondence can be supplied, which is sent free of charge. Most often, its volume exceeds what we expect, but there is no escape from it, so the capacity of the internal space must be calculated for this case as well.
- Secondly, you need to be careful about installing the mailbox so that received letters or newspapers do not get damaged if raindrops accidentally get inside. To do this, special canopies are often made over mailboxes to prevent precipitation from getting inside.
The next thing to consider is the styles and varieties of mailboxes.
In essence, the design is the same, but the design is different. There are 4 main directions for design:
Standard designs , which look like a rectangular container, do not have a sophisticated design.
English models that look like a fire hydrant or a miniature mushroom house. As a rule, metal pipes or bricks are used for their manufacture, and in both versions these devices for receiving letters look very impressive.
American models have an interesting design, in the form of a suitcase on a leg. All correspondence is laid horizontally, and larger newspapers or letters must be folded to fit inside. Nevertheless, this unusual form has become widespread, not only in the United States, but also here.
Original designs , as is clear from the name itself, can be very diverse, and this applies not only to the shape of the box, but also to the style of its design. Here everything depends on the imagination of the home owner and his capabilities in terms of purchasing materials for crafts. It’s a huge plus if you know how to be creative, using the most unusual objects or things to make and combining them. For example, install such a structure near a wicker fence.
Attachment options
We have already mentioned that these products have different types, which are characterized by different fastenings. But let us highlight the main methods using the example of ordinary ones that are well known to us.
They can be installed on a fence, attached to a gate or to the wall of a house. We advise you to look at the photo of the mailbox, which is attached in various ways. This will help you understand which method will be more beautiful and convenient.
As you can see, if you have free time, you can make this product yourself. Unlike the serial model from the store, it will look unusual and delight your eye.
Tips for novice builders before work
We are getting closer and closer to the question of making a mailbox with our own hands, and as usual, we need to eliminate possible errors in the manufacturing process. And how to do it? Of course, strictly follow the instructions and read the advice of those who have already been in your place.
So, what subtleties of making a mailbox need to be taken into account:
- If you are planning a wooden craft that will be installed outdoors, then you need to take care in advance of treating all elements with special compounds for a long service life. These can be antiseptics, drying oil or paint.
- To ensure the strength of the joints of wooden parts, it is best to use metal corners secured on the inside. This will not only strengthen the product, but also facilitate repair work if necessary.
- When installing a slot for receiving letters, think in advance where it will be located. The most convenient option is a slot located on the top of the box, but in this case you need to immediately think about protecting newspapers and letters from precipitation. The visor can be folding, which is more optimal, or fixed, which is not always good protection against getting the contents wet.
- The next point is the door for receiving letters and newspapers. Please note that it can be located at the bottom of the drawer, or be its front side, opening like a door. In any case, its dimensions should be such that they do not interfere with the removal of letters from the box without deforming them.
- When making a box from metal, choose those types of materials that are not subject to rust. Remember that the mailbox will be installed outdoors, which means rain and snow will definitely fall on it.
- If your mailbox will be installed as a free-standing structure, think about its stability in advance. Ideally, the holder will be a metal profile or pipe immersed in the ground to a level below freezing of the soil. This will prevent the structure from warping after winter.
- And the last thing we will talk about is a security lock, which should protect received correspondence from nosy neighbors. Naturally, it must be reliable, but that's not all. Any mechanism that is exposed to precipitation can fail, so when choosing it, think in advance about how to protect it from undesirable factors.
Algorithm of actions
According to the prepared diagram, the necessary elements are cut out of cardboard using a stationery knife. When producing a fragment with a window, do not make the cut all the way through - this will protect the structure from tearing. Where bending is required, paper tape is used.
Then all the elements are glued together with PVA glue and left to dry.
The next step is to create the decor, for which you can cover it with napkins and paint it.
At the end, a lock is mounted and lace is attached to the door.
Materials suitable for making a mailbox
What can you take as the main material for a mailbox? Whatever is at your fingertips. Don't believe me? Let's check:
- Let's say it could be remnants of boards or pieces of plywood left over from home renovations. Quite a suitable material, after treatment with antiseptics, drying oil or varnish, it is quite suitable for outdoor use. All you need is a diagram with developed drawings.
- Metal sheets are also an excellent option, especially considering that any products made from it will have a long service life. The only thing you need to take into account is that working with metal is somewhat labor-intensive. In addition to preparing the parts, you may also need a welding machine, which not everyone has.
- Metal cans or any containers that can be converted into a mail container. Of course, this idea is more suitable for decorative items, but if you wish, you can try and make a completely functional thing.
- Wooden barrels and plastic containers will also work as materials. Here again, you need to put in a little effort, and an unnecessary thing turns into a useful item for letters and landscaping decoration.
As you can see, there are many options, but the most popular ones are wood and metal. Whichever of the above is closer and more accessible to you, you can start making a mailbox from, and we will consider the simplest option, which even a beginner can do.
How to make a box
Let us present to your attention several common options that anyone can do.
Remember that this is to a certain extent a creative process and the decor of the mailbox depends entirely on your imagination and sense of style. Therefore, it wouldn’t hurt to get inspired in advance by looking at examples of ready-made solutions.
Plywood mailbox
Any manufacturing process begins with the development of a drawing. As mentioned above, it is necessary to consider the permissible dimensions of the box so as not to damage the received mail in poor condition.
In addition, you need to think about the shape of the box itself, whether it is a standard rectangular model, or made in the form of Baba Yaga’s house.
Drawings and design
We start designing a box with measurements and roughly draw the design we like on a piece of paper. If your imagination fails you and it’s difficult to come up with a future model on your own, you can look for ideas on the Internet and use them to create something similar.
As for the drawings, you can develop them yourself, or, as in the previous case, again turn to the World Wide Web. We will present the most interesting options for drawings, perhaps one of them will just suit your liking.
Mailbox made of metal with forged elements. All dimensions are written down, all that remains is to transfer them to a sheet of stainless steel and you can begin preparing the parts.
Model made of wooden boards that have undergone special treatment to protect against the negative influence of precipitation. Please note that the hole for storing correspondence is located in the upper part of the box and is under a small visor, and the door is equipped with glass, through which you can see the presence of letters or newspapers inside the box.
Another interesting model, in the form of a house, with a sloping roof. The material used is the same wood, which has undergone special treatment and varnish. As in the previous version, the door equipped with glass makes it easier to check correspondence.
Standard model, for the manufacture of which you can use plywood or a wooden board. Approximate dimensions are shown immediately in the figure, but this does not mean that they are universal, they can always be adapted to your needs.
A model presented for craftsmen who are fluent in the art of forging and know how to handle a welding machine. Please note that any elements can be used to decorate the box, and the shape itself is a standard, rectangular box, with a slot for letters in the upper part of the front panel.
Preparing parts
When you have decided on the sizes and shapes and prepared a drawing of the future product, you can begin preparing the main parts. In this case, it is a box made of plywood, which acts as a lining.
What you need to prepare:
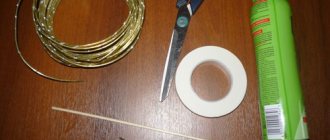
- Slats for making a frame
- Plywood blanks for walls, bottom and roof
Manufacturing process
Making a box begins with making a frame, for which you need to prepare 4 elongated beams that will act as the side ribs of the box and 8 short beams that will mark the bottom and top of the product.
The next step will be the preparation of plywood blanks. Mark the required dimensions on a sheet of plywood and cut it into pieces, each of which must be processed to prevent splinters from getting splintered during work and further use.
Please note that the letter hole must be made before assembling the structure. Therefore, on the front part, or the top, depending on the chosen model, make a mark for the future slot and do it using a jigsaw.
If you intend to have a door on the front panel for removing letters, then attach canopies for opening and closing to two parts of the structure, align them and check how accurately you have prepared the parts.
The lock can be installed on the finished product, or you can think about attaching it now.
When the frame is ready, you can begin assembling the product.
Gradually sheathe all the edges of the box, and the last piece should be the top cover, which is usually installed at an angle, but in your case it can be anything.
When the product is ready, all that remains is to install fasteners for hanging the box on the back wall, and cover the finished product with any paint and varnish material for beauty and long-term functionality.
After the decorative finish has dried, all that remains is to hang the box in the prepared place and wait for the postman to bring the long-awaited letter!
Simple design
Convenient designs for letters are made from 5 liter eggplants, and most importantly, quickly. Here you don’t have to do creative work and paint the surface. The street mailbox is assembled according to plan:
- A round hole with a diameter of 10 cm is cut out of plastic material in the bottom with scissors.
- From another 5 liter square bottle, a round piece with a cross section of 12-13 cm is cut out in the sidewall. A hole is made at the edge. The container itself will no longer be needed.
- On the back of the first workpiece above the cut out window, retreating from the border of the circle, a hole is punched with a nail.
- They insert a bolt into a small hole, put on a round element, put on a nut and tighten it, but not too much, since this mechanism must rotate.
- Prepare a wooden stand on which to place the container. A piece of plywood 7x7 cm is attached to the end of the support. Screw it into the end with two self-tapping screws. The plastic product is placed in the center of the platform.
- You can secure the bottle to the platform with quick-drying glue or use a screwdriver with a special long attachment and screw 4 screws into the plywood. The protruding screws from under the bottom of the platform are removed with pliers.
At the end, the support is dug into the ground 30-40 cm deep. The postman will open the round door to the side and place letters inside, then close it back.