Easy DIY paper crafts
Making crafts is a great activity that will be enjoyed not only by children, but also by adults. You can have fun and usefully spend time.
Chamomile
Easy paper crafts for children will help you teach your child how to make beautiful souvenirs and introduce him to applique. And this is an important stage in its development. It’s as easy as shelling pears to make a daisy from colored paper.
Necessary materials for work:
- A sheet of yellow paper;
- A sheet of white paper;
- Glue;
- Pencil;
- Scissors;
- Compass.
Progress:
- Take a sheet of white paper and cut strips of the same length and thickness;
- Using a compass, draw two identical circles on yellow paper. Cut them out;
- Glue the petals from the white strips. To do this, bend the strip in half;
- Take a yellow circle and glue petals on it;
- Cover the chamomile with another circle.
What is needed for production (materials and tools)
Before you begin, you need to prepare the following:
- paper and cardboard material – colored and white;
- glue;
- pencils - simple and colored;
- ruler;
- glue brushes;
- scissors;
- scotch;
- stapler;
- stationery knife.
For decoration, you may also need different decor. elements.
Ladybug
Even a 3-year-old child can make such a craft. And photos of easy paper crafts will help you quickly create a beautiful applique.
You will need colored paper in red and black, a sheet of green paper, a regular white A4 sheet, scissors and glue.
First of all, cut out the head and antennae of a ladybug from black paper. Sketches can be found on the Internet and taken as a basis. You should also cut out small circles from black paper.
You need to cut out 3 circles of the same size from red paper. We bend them in the middle and glue them together.
While the ladybug is drying, cut out blades of grass from green paper. Glue blades of grass and the head of a ladybug onto a white sheet of paper; at the very last moment it is worth gluing the bulky piece.
You need to glue small black rounds onto the red wings.
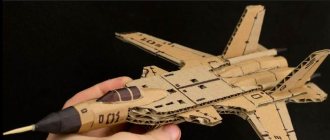
How to make a paper cone?
Have you noticed that the cone looks like a flower on top and in cross section? So our cone will consist of many flowers of different sizes. Use a template or draw 4 flowers, from large to small. For the craft we will need:
- 8 large flowers - A size (look at the photo);
- 6 colors – size B;
- 4 flowers – size C;
- 5 flowers – size D.
Preparation of components
Redraw according to the template and cut out all these flowers. One sheet of paper may be enough for a cone, but this is only if you carefully save space, draw each flower and cut out each one. But you can significantly shorten the whole process - fold the paper several times and cut out several flowers at once. But in this case there will be more paper.
Cut a rectangle out of paper, slightly smaller than the narrow side of the paper; it is better to cut off the excess later, otherwise the length will not be enough.
Fold the piece into a very thin tube. The work here is quite delicate, since the tube must be dense; the layers of the pine cone will adhere to it. If there are problems with this, it is better to use a kebab stick for this purpose.
Now you need to make a small hole in the center of each flower (children will need adult help) and fold the petals of all the flowers in half to give the flowers volume.
Assembling the pine cone
All the components of the paper cone are ready, it’s time to put them together. To do this, cut the tip of the tube, bend it to the sides, apply PVA glue at the very bottom and thread the tube into the hole of the flower. Lower it down and press down so that the area with the glue adheres well. If you use a kebab stick instead of a paper tube, you can glue paper to the tip, or tie a wire there, or apply good glue, for example, with a glue gun. This is all done to ensure that the flowers do not slip off the tube or skewer.
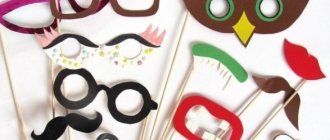
Volumetric flower
To create a three-dimensional flower, you will first need to prepare hearts of the same size. There should be approximately 16-18 of them.
Cut out a small circle from red paper. Glue hearts to it. We put a bead in the middle. We make leaves from green paper.
To do this, cut out the petals and collect them into a fan. We open the fan and glue it to a white sheet. We plant our flower on them. There may be several such flowers.
Such flowers made from hearts can decorate a postcard, or can act as an independent craft. You decide!
Step-by-step description of different stands
Making a cardboard stand yourself is not difficult. If the material is not very dense, several sheets are glued together. Micro-corrugated cardboard is most suitable for such an accessory.
Corrugated cardboard is a packaging material consisting of glued layers of paper.
A special stationery knife is most convenient for cutting from cardboard. With such a tool, the workpiece is cut more accurately and much easier. Let's look at how this is done in each specific case.
For pencils
Such a stand is a useful and necessary item for a desk so that office supplies do not get lost or scattered around the table.
You can create an individual pencil holder to suit your taste in an exclusive version with your own hands.
"Penguin"
A small cardboard box is required (volumes and sizes are determined at will): you can take a suitable one for juice (it is washed and dried). Cardboard cylinders will also work.
Next, the package is covered with paper of the appropriate size (black color - this will be the penguin’s body).
Pencil holders are a necessary and useful item for a writing interior.
Then templates are cut out of paper:
- breast - white;
- wings - black;
- paws - yellow.
The eyes are also made from black paper and the beak from yellow paper.
All elements are sequentially glued to the appropriate places. The penguin pencil is ready.
Such beautiful products will decorate any surface and will keep your writing instruments in order.
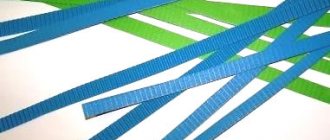
From paper tubes
First they need to be prepared. For this purpose, newspaper or magazine sheets are taken. Using a regular knitting needle, twist the tubes. There should be a lot of them. Then the ends are secured with glue.
Next, the tubes are painted in the intended color and left to dry. The juice packaging is cut to the required height. The tubes are cut to the height of the future stand and glued along the perimeter of the blank box.
The stand for pens and pencils, which is shown in the photo, can be made in just a couple of hours.
Important! It is necessary to glue tightly, without gaps.
Allow the product to dry and then it is ready for use.
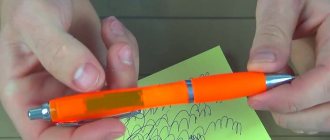
Pencil with flowers
A pencil stand can be made with flower decoration. To do this, you can take napkins (color - optional).
The napkin is folded in half twice. It is fastened in the center with a stapler. Using scissors, make the edges of the napkin wavy. Each layer must be lifted upward, while at the base you need to press a little.
A pencil stand will allow you to always keep writing objects at hand, rather than looking for them in the corners of bottomless desk drawers.
You can make several multi-colored flowers and decorate a ready-made paper pencil holder with them. Flowers are “planted” on glue, or secured on the bottom with tape.
For phone
It is not difficult to build such a stand. Such work will not take much time. This is a practical and easy option to make the device yourself. And, besides, do it - at any time.
The following is a step-by-step guide to the most interesting ideas.
Shell
No special instructions are needed in this case. The main thing is to get a suitable, large enough shell.
To work, you need glue, which, when hardened, turns into a plastic tight mass - the so-called. rubber or liquid nails. There's no such thing? Then acrylic plasticine is used, which does not stain anything.
A layer of glue is applied to the area where the phone will come into contact with the shell surface. If the “workpiece” is not stable, glue is also applied to the lower part for a stronger fixation.
The main thing is to find a suitable shell from which you will make a phone stand.
Additional Information! This hand-made gadget stand looks great and fits into any interior.
Wine corks
This is an excellent material for creativity. Therefore, you should not throw them away.
A smartphone stand made from this material will be environmentally friendly, comfortable, durable and very original: thanks to the unusual design itself and the decor.
If you have a few wine corks, a little glue, a knife and some free time, you can make a smartphone stand.
To work you need:
- twenty traffic jams;
- leg-split;
- lace;
- Super glue.
The corks are lined up and glued together.
First, the back wall of the gadget stand is made (the corks are glued together in a row, and the “second floor” is assembled in the same way). One “floor” is pasted onto the other. The back wall is ready.
Next, glue the front one. The bottom part of the stand is glued gradually. The plugs are placed one at a time against each other. Then the back wall is attached.
As a decoration, you can add thin twine or lace to the stand. Floss threads and other cute little things will also work.
You will get a unique stand for your mobile phone.
Bamboo chaise lounge
To make such a stand you need:
- bamboo sticks and mat;
- dye;
- six coffee sticks;
- wire cutters
How to make such a stand step by step can be found here:
Upon completion of the work, you get a stylish and unusual accessory that no one will have. The stand can be presented as a present or to decorate your desktop.
The stand is made of bamboo - a beautiful and pleasant to the touch material.
Easy way
You will need a thick sheet of paper. Squares of 15x15 or 10x10 (cm) will fit a standard smartphone.
You must proceed as follows:
- The sheet is folded in half twice.
- Unfold and fold first the lower, then the upper halves in half.
- Now they make creases.
- Unfold the workpiece and make a bend on the other side.
- It is necessary to repeat all previously performed steps on the opposite half.
- The workpiece is unrolled. All folds must be clear.
- The paper is turned ninety degrees, one corner is lifted and placed inside. It looks like a pocket.
- The two corners are pressed against each other - the paper should curl naturally.
- The central part is tucked under the prepared pocket.
- All steps are duplicated on the opposite side. You need to start by forming a pocket.
- At the final stage, the central fold must be made clear: this will be the part of the stand that holds the main weight of the gadget.
A very simple phone stand made of paper using the origami technique.
Now the stand is ready.
For the Easter egg
Step by step work:
- Take colored paper. It should be a 15x15 cm square.
- Fold in half twice.
- Then you need to open the sheet and fold the lower and upper parts to the middle.
- Next, open the workpiece and position it so that the fold line is on top.
- A triangle is formed on both edges.
- Fold it back on both sides so that it turns out the same.
- Now on one side the bottom corner is turned up, on the other side they do the same. Unfold the workpiece and duplicate the previous steps.
- The upper triangle is folded down - everything is done on both sides.
- Now all that remains is to open the resulting “wallet”.
- Next, it is straightened so that the stand takes the desired shape.
Paper Easter egg coasters can be very original and interesting.
Now you can insert the Easter egg.
Photos of paper crafts
0
0