Men's greeting box "Happy Birthday"
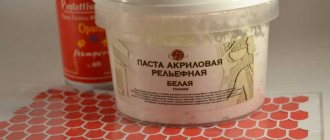
No one ever really thinks about what to choose a gift for a man until they are faced with this problem. It would seem that this is special and is it really impossible to come up with something to congratulate a man on his birthday, February 23, Anniversary or professional holiday; as it turned out, there are enough reasons for congratulations, and for each of them you need to carefully prepare. So, let's look and think a little about men's gifts. This could be a diary, a collectible alcoholic drink, perfume deodorant, an elegant tie or a beautiful shirt, or some rare souvenir. It seems that, at first glance, it seems that the choice of gifts is large and you can easily pick something up, but you also need to take into account the fact whom you want to congratulate, your husband, son, brother, colleague, boss, teacher, doctor, or generally a person you barely know, for example, a newcomer to a team at work. As for collective congratulations, as a rule, mostly money is collected here and presented in an envelope or postcard. In order for your gift to be remembered somehow, you need to put a little effort into it and, for example, make that very interesting envelope, postcard or something more interesting with your own hands. Envelopes and postcards are somehow predictable, but you can make an interesting transforming box for a monetary gift. You can do it using a technique called scrapbooking, and that’s what we’ll do right now. For the box we need to take: • Kraft cardboard 15*15 cm and light brown pastel paper 20*20 cm; • Template diagram for the box; • Paper for scrapbooking in masculine colors; • Men's pictures; • The inscription stamped in black ink “Happy Birthday”; • Cutting down brown and beige flowers: machine, feather, frame, sprig of leaves, feather; • Figured hole punch; • Colored tape; • Brown satin ribbon with polka dots; • Wooden button; • Double-sided tape; • Pencil, ruler, scissors; • PVA glue; • Glue gun.
First of all, using templates, we cut out the base of the lid and the box itself from pastel paper and craft paper.
We make creases (bending lines) using scissors under a ruler.
We cut out these different shapes from scrap paper.
We make some strips into shapes using a hole punch.
We glue the pictures onto the scrap blanks with double-sided tape. We glue the car from the cutting with PVA glue.
We glue the openwork strips onto paper using PVA glue. We sew the pictures on a typewriter. We tint the inscription along the edge with an ink pad. Now we glue all the scrap pieces to the base of the box and the lid with pieces of double-sided tape.
We sew the lid on the sides separately and in the center, we sew everything along the edge. We sew the very base of the box from the inside. We also make an openwork strip on both sides for investing money; we glue it inside the box with PVA glue.
Now we glue the paper cut-outs, as in the photo, also using PVA glue and a glue gun.
This is how the box is assembled and folded and covered with a lid. Done, put the money inside and congratulate the man.
Toothbrush case
Are you going on a trip and your toothbrushes don't have caps? Then make them yourself! Take a Kinder capsule and cut a hole in it to fit the size of the brush.
Make a cut so that the brush can be inserted into the capsule. Close it and the case is ready. Now you can put the brush in your suitcase or anywhere – it won’t get dirty. Place it in a glass directly in the case to prevent germs from getting on the brush.
Fashionable DIY postcard: magic box or box with a surprise
How to make an original card and spectacular gift wrapping at the same time? Nothing could be easier! You just need to cut them out correctly, decorate them tastefully and turn them into a surprise box with your own hands! This small box, also called a magic box, reveals its secrets as soon as you remove the lid. The inner walls of such a postcard are decorated with photographs or simply good wishes for the addressee. How they can be decorated for different holidays, how to fill them and how to decorate them, is more detailed in this article. And also a step-by-step master class on how you can make a surprise box with your own hands, having 2 sheets of scrapbooking paper, some decor and one free evening.
Filling ideas
Magic box is an unusual postcard and, oddly enough, absolutely universal! It is ideal for small gifts. Here are some suitable ideas. 1. The most ordinary money, which is so often given to everyone around, will look much more interesting if it is rolled up in the form of a scroll, tied with a satin ribbon and placed inside such a postcard, surrounded by a variety of three-dimensional decor - flowers, butterflies, rhinestones, and inside, on the walls , write your wishes and leave signatures as a keepsake. In the master class at the end of the article you will find a description of how you can quickly and beautifully make a mount for money inside.
2. This packaging is ideal for gift certificates for various salons and stores. You can attach it to the bottom in exactly the same way as money. If the card is hard, then you can make an envelope-pocket for it at the bottom or on one of the side walls. 3. Jewelry or other jewelry will look great in the magic box and will certainly be a real surprise for the recipient of the gift. You can attach a paper cake with a removable lid to the bottom, or simply build a small pillow covered in velvet with your own hands. 4. It’s also nice to place a CD or flash drive in such a beautiful postcard. For discs, a pocket is most often made on the side wall using scrapbooking paper. In the future, in such packaging it will be convenient not only to give, but also to store any important and memorable little things.
Toothpick stand
Make holes in the container using a hot needle and place toothpicks in them. It’s convenient to take out and always at hand. You can make a hedgehog's face out of plasticine, then the toothpicks on top will be its needles. These funny hedgehog coasters will appeal to your children and will amuse adult guests as well.
He prescribed magnets to patients and used them himself: how the chief physician of the 18th century treated
5 things that can be a source of unpleasant odor in the apartment
Soviet film “Shield and Sword”: how the intelligence officer Belov became our answer to Bond
Decor of themed boxes for different holidays
Magic box can be made for any holiday and even without it. You can make such a thing with your own hands and give it as a small token of attention without any reason at all, but just for a good mood. For example, decorate the inside of the sides with bags of different tea or coffee, place a cupcake in the center and present it to a friend or work colleague before the start of the working day. If another important date is approaching, and you are painfully looking for a suitable gift, then here are some thematic ideas for different holidays that may inspire you to make a holiday box with your own hands.
For a birthday
The most traditional holiday for such gifts. Even if you are giving just money inside, you can play with the idea itself in these simple ways: - place a photo of the birthday person in the center, and write wishes as a keepsake on the side walls; - make the box “multi-walled”, that is, glue more walls inside, only 5mm. narrower, and on each side stick photographs united by one idea (for example, “the smiles of all friends” or “the best photos of this year”), you will get a real mini-album;
- if there are no photographs, you can simply place inside a decorative composition of butterflies or flowers on springs that will jump out when opened.
New Year's
Paper in winter colors, Christmas pictures, blue or red stamp paint, tinsel decor, confetti and small Christmas tree decorations - all this will look cute and harmonious. Another idea is to make a small box (in the master class a diagram is given for the 10x10 format, but here you will need to take a size of 5x5cm, no larger), place a candy inside, tie a satin ribbon on the outside and hang it on the Christmas tree as a toy. Any child will be sincerely delighted to find their favorite treat inside the surprise. Also, a magic box can be an excellent packaging for a handmade Christmas tree decoration, for example, a painted glass ball or a bell, hidden under the lid inside the box.
Wedding
Ideal and always appropriate packaging for a wedding gift if you decide to give money. Wedding magic box will help you add a hand-made element to your usual gift and stand out in the crowd of guests. To complete it according to the master class below, take cardboard with delicate decor, pastel colors, prepare lace and paper or fabric flowers in light shades. All this fits perfectly with the theme of the holiday.
Easter
Magic box will be a suitable packaging for any Easter souvenir. In order to place a painted egg inside, you can line the bottom with sisal or paper shavings. If you want to put the cake inside, you need to line the bottom and walls with baking paper. You can decorate the walls with decorative stickers, pictures with painted chickens, and thematic inscriptions. There is a whole collection of images of pre-revolutionary Easter cards that are perfect for such decor.
Pencil sharpener
Drill a hole in the plastic capsule the size of a pencil. Then place a regular sharpener inside and “seat” it on the glue so that through the hole the pencil falls directly into the sharpener.
Bulldogs rescued an abandoned kitten: a touching story of friendship
June 21 is a special day for everyone: make a wish and make plans for your 18th birthday
Lyubov Polishchuk considered women stronger than men: interesting facts from the life of the actress
You now have a trash container to avoid littering around. Very convenient: sharpen a pencil, open the capsule, throw out the trash.
Manufacturing instructions
Materials for the master class. 1. Cardboard with a density of at least 180g: - sheet 30x30cm. – for the main template, a sheet of 15x15cm. - for the lid. 2. Paper for scrapbooking 30x30cm. – at least 2 sheets (needed for decoration) 3. Decorative materials – voluminous flowers, ribbons, beads, etc. 4. Tools for scrap – edge and corner hole punches, if available, acrylic paint in gold or bronze color or a stamp pad for tinting paper sections. 5. Scissors, glue stick, pencil with ruler and eraser.
The box can be made of any size, it is only important to draw up the pattern correctly. In this master class we will take a size of 10x10x10 cm. 1. Draw a sheet of 30x30cm. for 9 squares with a side of 10 cm. We press lightly with a pencil, then all the lines will be erased. 2. Cut off four corner squares from the workpiece. We draw along the remaining pencil lines with a scoring stick or any other convenient tool (I use a knitting needle).
3. Remove all traces of the pencil and glue the four remaining squares onto the side walls of the box inside, retreating 1-2 mm. away from the fold lines so as not to touch them. The walls are now reinforced and will look stronger than regular thin cardboard. Advice. It is better to glue all the parts together with a glue stick; PVA may warp the cardboard. 4. Take scrapbooking paper and cut out 4 squares with a side of 9 cm to decorate the outside of the side walls and 4 more squares to decorate the inside. If the paper is double-sided, then it is most convenient to take 4 squares on one side and 4 on the other. 5. We tint each side of each square with a stamp pad or acrylic paint. In each square, we cut out one shaped corner using a Martha Stewart shaped corner punch and glue all the squares in their places on the front and inside sides of the box.
6. At the bottom of our postcard we will build a mount for a monetary gift using paper lace. Cut out a strip of scrapbooking paper using an edge punch on both sides and glue the ends to the bottom of the card. Now you can place rolled banknotes there. 7. Let’s move on to the second part of our master class – making the lid. For it you will need a square of cardboard measuring 14.2x14.2 cm. 2 mm. are needed for reserve so that the card closes neatly and evenly. Take a ruler and draw lines at a distance of 2cm. from each side.
8. Cut 2 cm on both sides along the marked lines as shown in the photo. This will be needed to glue the sides of the lid. All fold lines must be punched so that they bend evenly. 9. To decorate the lid, cut out 2 squares from scrapbooking paper 9x9 cm: glue one inside, the other on the top of the lid. Additionally, we cut out 4 rectangles from the same paper 9x1.5 cm. and glue them to the sides of our lid. Of course, don’t forget to tint the edges of all parts before gluing. This will add depth and texture to the details.
10. Glue the sides of the lid. After drying, put the lid on the box and try on how it fits. Everything is fine. 11. All that remains is to decorate our card with voluminous decor and you can give it away! Flowers can be made from any suitable cardboard: cut them according to the template with a stationery knife and cut them out using a hole punch. To make them look voluminous, the edges of all petals need to be twisted outward with a knitting needle or a toothpick. Using pens you can draw veins on leaves or stamens. Tinting the edges of the petals in the chosen color scheme will enhance the volume effect and make the decor a single part of the overall composition. Flowers for cards can also be made using fabric or ribbons. The master class on making a surprise box with your own hands is completed. Now you can enjoy the result of your work and look forward to the pleasant moment of receiving such an original gift.
Try making a magic box with your own hands, and you will have a lot of fun not only when presenting it, but also during making it! Do yourself a favor and immerse yourself in the wonderful world of creativity, where beauty and harmony reign. With this simple master class, you can learn how to make a simple and elegant gift that will remain in your memory for a long time and will always bring joy!
Garlic pendant
Make a few holes in the container, thread a string, then put a couple of cloves of garlic inside. Wear such a pendant around your neck and you will not be afraid of colds. This life hack is very useful for children. Let them wear the garlic pendant all day and be healthy.
In some schools, students wear such pendants from the beginning of the school year until mid-winter. They say the number of sick children has decreased markedly. Garlic does its job perfectly, and the kinder pendants are very convenient, small and don’t get in the way at all.
All these life hacks are very convenient and simple, and every parent has plenty of material for them. Don't rush to throw away empty containers. You can make a lot more useful things out of them. Even just using them to store all sorts of little things is very convenient. Beads, small buttons, beads will no longer lie around and get tangled in bulky boxes. Kinder containers will become your universal material for useful crafts.
Found a violation? Report content
DIY Magic Box
A surprise box (Magic Box) is a unique gift that is suitable for all holidays. Birthday, New Year, Valentine's Day, March 8, February 23, wedding, teacher's day and other celebrations... The main gift is a surprise - it can be candy, a flash drive, money, a photo and anything else that you want to put in a box. However, the design of the box itself evokes joyful emotions and emphasizes the theme of the celebration. In this article we will look at how to make a surprise box with your own hands.
Small box
You will need: thick white paper, pink scrap paper, pencil, scissors, ruler, non-writing pen, moment glue, distress ink, decorative elements - lace, shabby ribbon, stickers, flowers, berries and a surprise gift of your choice .
Master Class
- Box size 7 cm: make a cross of 5 squares, the sides of which are 7 cm.
- Draw the folds with a non-writing pen and lift the squares up, forming a box.
- Cut 4 6.8cm squares from scrap paper.
- Tint the edges of the squares with ink and glue lace onto each square.
- Cover the front side of the box with squares.
- Prepare 4 6.8 cm squares from other scrap paper.
- Tint the edges of the squares, decorate with stickers and cover the inner walls of the box.
- Make the lid in this way: prepare a square with a side of 10.1 cm. Draw out the sides of the lid 7.1 cm and the height of the lid - 1.5 cm, then cut it out as shown in the image.
- Draw the folds with a non-writing pen, fold and glue the lid.
- Cut out the parts for the lid from scrap paper of the following sizes: ends of the lid - 6.9x1.3 cm; three squares - 6.9 cm.
- Shade the parts and set them aside.
- Prepare a square and 2 pieces of shabby ribbon, glue the ribbons to the back of the square, then glue it to the bottom of the box and tie a bow.
- Cover the lid of the box with scrap paper parts.
- Decorate the lid to your liking and place the surprise inside the box.
The small box is ready!
Box with a secret
You will need: thick white A4 paper, scrapbooking paper, glue, ruler, scissors, 4 paper clips, crochet hook or non-writing pen, decorative elements - twine, pendant, figurines...
Master Class
- Prepare a square of thick white paper measuring 18x18 cm. The size of the box will be 6 cm.
- Draw the workpiece into 9 squares of the same size using a hook and a ruler.
- Cut the corner squares to create a cross.
- Lift the squares up to form a box.
- Prepare 10 squares of scrap paper measuring 5.8 cm.
- Cover the outside and inside of the box with squares.
- Make the lid this way: cut out a square of thick paper measuring 8.2 cm and 2 squares of scrap paper of the same size.
- Step back 1 cm from the edges of the square and make a crease (draw lines with a crochet hook).
- Make diagonal cuts at the corners, then cut the cut pieces in half as shown in the image.
- Fold and glue the corners, then secure with paper clips and wait until dry.
- Make a small bundle of paper, tie it with twine and attach it to the bottom of the box, also don’t forget to put or write a secret.
- Decorate the box to your taste by attaching various decorative elements.
Shoe freshener
Fill an empty tea bag with baking soda using a small funnel. Secure it with a stapler so that the soda does not spill out. Place the bag of soda inside the Kinder container and make several holes in it.
This miracle freshener should be placed directly inside your shoes at night. Baking soda will absorb and eliminate unpleasant odors, so your shoes will always be fresh. Remember to place the container inside every night to combat unpleasant odors.
New Year's surprise box
You will need: a scoring board, fantasy knives, scissors, a ruler, moment glue “Crystal”, PVA glue, scrapbooking paper, watercolor paper, acrylic plastic, Raffaello sweets, decorative elements - a snowman, a pom-pom and other decorations...
Master Class
- Prepare a sheet of white scrap paper measuring 21x26 cm. The size of the finished box is 5x10x4 cm.
- Make a scoring (draw lines with a non-writing object) along a side equal to 21 cm at a distance of 4;4;5;4;4; and on the side 26 cm – 4;4;10;4;4;
- Cut off the excess and assemble the box.
- Make the lid of the box in this way: take watercolor paper, make a crease by adding 1 mm to each side - 5.1; 4.1; 5.1; 4.1; + 2 cm for gluing (see photo).
- Cover the outside with scrap paper, glue it and try it on the box.
- Glue a strip of acrylic plastic to the back of the snowman and wait until it dries.
- Glue the snowman by the strip to the inside of the box and wait until it dries.
- Decorate the box to your liking, glue on a pompom and place the candies inside the box.
The New Year's surprise box is ready!
Men's box
You will need: black cardboard, gray leatherette, scrap paper, hat elastic and black eyelets, ruler, creasing tool (not a writing pen, crochet hook), chipboard (cardboard cutouts for decoration), sewing machine, black threads, glue, decorative an inscription, a gift set - a bottle of alcohol, a screwdriver, a pack of cigarettes, a morning-after pill or other...
Master Class
- Cut a rectangle from black cardboard for a box measuring 37x27 cm. Box height - 8 cm, bottom length - 23 cm, width - 13 cm.
- Cut a rectangle from cardboard for the lid measuring 27.2x17.2 cm. Height of the lid is 3 cm, length is 23.2 cm, width is 13.2 cm.
- Cut out the corners (8x8 cm squares) from a large rectangle.
- Punch and bend along the marked lines.
- Punch the lid of the box as shown in the image.
- Cut triangles near the corners of the lid and fold along the marked lines.
- Measure each side of the box and lid, then prepare pieces of leatherette according to the resulting dimensions. Prepare parts from scrap paper in the same way, just make them slightly smaller than the leatherette parts.
- Sew the leatherette and scrap paper parts together.
- Sew one of the rectangles to the front side of the lid.
- Glue one rectangle to the bottom of the box.
- Install the eyelets and attach the elastic as shown in the image.
- Cover the inside of the box with rectangles of scrap paper.
- Install holders from grommets and elastic bands for other gift elements.
- Glue the lid of the box and cover the outside of the box and lid with stitched rectangles.
- Fill and decorate the box with lettering and a chipboard.
The men's box is ready! I recommend watching this video!
Box with photos
You will need: a cutting mat, a stationery knife, scissors, glue, a ruler, a pencil, a crochet hook for creasing, scrapbooking paper, distress ink for tinting the edges, 8x9 photographs, decorative elements - ribbons, pom-poms, figurines...
Master Class
- The size of the finished box is 10x10x10cm.
- Prepare 3 squares of thick paper measuring 30x30cm, 29x29cm and 28x28cm.
- Make a crease by dividing each sheet into 9 squares. For the first sheet, step back 10cm from the edge; for the second 9.6 cm; and for the third 9.3 cm.
- Trim the corner squares of each sheet to create crosses.
- Cover the blanks with scrap paper, round and tint the edges.
- Glue three pieces together in the center.
- Make the lid this way: take a square of scrap paper measuring 20.3cm; retreat 2.5 cm 2 times on each side, make a crease as shown in the image, then make cuts along the dotted lines and assemble the lid.
- Glue the photos and assemble the box.
- Decorate the box to your liking and tie with ribbon.
The box with photos is ready!
Christmas tree garland
From containers you can make a beautiful and original garland for the Christmas tree. Drill holes in the containers and thread the wire with the LED. Close it inside the container. String several containers with diodes onto the wire to make a garland.
If you take multi-colored containers, it will turn out even more beautiful. There are yellow, blue, transparent and red containers. Turn on the garland and enjoy the original decoration on your Christmas tree. The diodes will not melt the plastic, don’t be afraid. This garland will surprise your guests and amuse them, highlighting your design skills.