Another version of the screw top jar opener I made for my dad.
Greetings to all DIYers!
Taking this opportunity, I would like to present another version of a jar opener with screw caps, which I made for my father a month and a half ago.
This summer, my father made quite a lot of home canned food in glass jars and some of these jars he closed with screw lids. When the time came for consumption of these canned foods in the fall, it turned out that it was quite difficult to open these cans, and even the father could not always open the screw cap with his strong hands. Previously, he opened such lids with his bare hands, but now he is no longer strong enough.
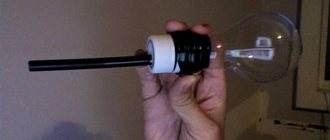
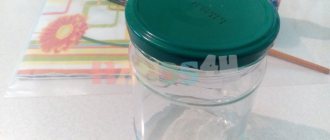
So I quickly made him a fairly simple opener for such cans. This is what the opener looks like.
Although I was not able to take a photo while making this opener, I will, nevertheless, try to describe the entire process of making it step by step, especially since making such an opener is quite simple.
Making a bottle opener
In fact, we already have almost everything we need to make a bottle opener.
The only thing we're missing is two rubber washers to prevent damage to the lid when opening, and also to make the lid's grip on the opener better and more reliable. Therefore, we will make two rubber washers. To begin with, I cut out two squares of rubber suitable for the size of the washers.
Then, in the center of each square, I used scissors to cut out holes for the bolt.
Moreover, these holes do not have to be made even. The main thing is that the bolt fits freely into the holes of the rubber washers, but the holes themselves may be uneven and crooked.
Now all that remains is to cut the rubber washers to the diameter of the steel washers, making them more or less round.
Well, now, we can finally assemble our opener by placing the washers on the bolt and then screwing the nut onto it.
To prevent the tip of the bolt, which will serve as a handle, from cutting your hands when opening the lids, you can wrap it with electrical tape.
And now our opener is ready!
Opener tests
Now let's check our opener in action.
First, open a jar with a small diameter screw cap. To do this, we place our opener on top of the lid and compress it with washers, tightly tightening the nut.
After this, applying some force to the handle of our opener, we turn the lid and remove it.
In this case, the lid can be removed quite easily and remains sandwiched between the opener washers.
By the way, it should be noted here that when you clamp the lid before opening it, the washers on the bolt are slightly distorted, but this does not affect the result at all.
Similarly, I opened the larger diameter lids on the other two jars. The lids also opened without any problems.
Disadvantages of the opener and how to fix them
In general, this opener turned out to be quite functional, however, during the testing process, two small shortcomings emerged, which, however, can be easily corrected.
Little hand
Firstly, the handle of this opener turned out to be too short, which especially affects when opening lids of large diameter.
But this drawback can be easily corrected if you take a longer bolt or even use a piece of threaded rod approximately 200 mm long.
Using the correct nut
Secondly, when clamping the lid before opening it, it is quite inconvenient to use a hex nut, since the clamping force created by your fingers is clearly not enough.
This problem can also be easily corrected by using a wing nut instead of a hex nut. I simply didn’t have one on hand, although you can easily buy it at a hardware store (or you can try making your own).
Well, in general, such an opener can be used. Its great advantage is that it can be made very easily and quickly. In addition, if this opener is no longer needed, it can be quickly disassembled, and the bolt with nut and washers can be used for another purpose (in other homemade products or in construction work in an apartment or country house).
Well, that's all for me! Bye everyone and good luck with your homemade crafts!
Quote: Nruter
Absolutely right! The lid is very difficult to open because there is a vacuum in the jar - pressure below atmospheric pressure. You just need to pry the lid with the handle of a spoon or the blade of a knife and equalize the pressure, and then the lid opens with two fingers. Is it really so difficult for the author of this “homemade product” to understand?
Apparently, your hostess does not close the jam...)))) But mine really likes to do this...)))) ... I wrote this in an article about my similar design... Read... There I explained why I had to make such a design... I will repeat Here. This is needed ONLY for preserves, jams and other things... Everything else, as both you and Pokhmelev quite rightly noted, easily opens after air is “put in”... But with jam this trick doesn’t always work... The thing is, that she pours it into the jar hot and thick. That is, it often happens that the jar is filled to the very top (After pouring, the “hump” blurred)))). And in this case, the plastisol seal is firmly glued to the rim of the can. Moreover, the jam inside also seals the lid and does not let air in when folded slightly. You have to use a knife or other “lever” to bend the lid very hard until the plastisol “falls off”! And after this, the lid is already thrown away! .. To be fair, I will say that even with my device, my housewives can handle such a jar of jam only together! One holds the can with both hands, the other twists it! …. Well, I don’t have enough of a woman’s hand to grasp and hold the jar!!!)))) (This summer my daughter is getting married and will live separately... Well, I’ll have to make the same lever in order to hold the jar!)) ))).. And this is more complicated - and the radii of the cans are different... And the stop with the belt needs to be made wider so that the glass is not pressed through))))). Well, oh well... We will solve problems as they arise!))). So far there are two of them... They are coping))))) But still, this is better than constantly tugging at me!! And, by the way, this device, from this article, is unlikely to unscrew such “powerful” lids... (Mine has a larger lever and it itself is much stronger). And, most likely, it will bend the edge of the lid. (Most likely, it was made for the sake of a video on YouTube, and not for practical use) ... I set mine up for a very long time, changing the radius of the belt and precisely adjusting the curvature of the stop lever, until I achieved that the 82 mm lid stopped deforming even with very strong jerks. P.S. I answer only to you and Pokhmelev... I have no desire to talk with the “cool kid”...))) ... This is not a rewarding task There youthful maximalism just rushes... Most likely - either a green kid, or one of those who will never grow up and will be an eternal admirer “unrealistically cool homemade products”….
Every home has at least a few glass jars with screw caps. They appear in a variety of ways. Most often we bring them from the store, buying different products. This could be: pickled cucumbers and tomatoes, various jams and preserves, green peas and much more. Also, many of us make preparations at home. We prepare homemade juice, make jam, pickle vegetables, and various salads. We, of course, put all this in jars and close the lid tightly so that it does not spoil.
The eternal question: how to open a jar without much difficulty?
Every housewife, and every person, at least once in their life, has encountered the problem of opening cans. It happens that you really want to try pickles, made with your own hands and with love, but the jar is so tightly closed
which is very difficult to open. As a rule, if a woman is faced with this problem, she turns to a man for help. And if there is no one male at home, or if there is a child or an elderly person in this situation, what should you do? Naturally, the method of opening with a kitchen towel or other fabric immediately comes to mind. Many, sometimes with the help of a knife, try to open it. But these methods have long been outdated and are not effective, and a situation with a knife can generally lead to you getting hurt or breaking the knife itself or the lid on the jar. There are also various old iron openers. Not only are they not safe, but some of them are very bulky.
With a set of lid openers, you can open jars with different lid diameters, which is very convenient. We live in the modern 21st century, where modern methods of opening cans
.
One of these methods is the method of opening using special
lid openers. There is nothing complicated in their use. You just need to bring one of the openers to the required lid and secure it to it, squeeze the handles and turn. And that’s it, the cover you need can be easily removed. You can also use the openers included in the set not only to open lids, but also to close them tightly while preparing canned food for the winter, or after opening a jar of juice or preserved food and not fully using its contents. These openers are so easy to use that absolutely everyone can handle them: from children to the elderly. There is no need to spend extra money and time on buying a large number of openers; just two openers included in the set will replace all the devices for removing lids from cans of different diameters.
The main advantages of a set of openers:
- Opens jars
with different lid diameters, namely 66mm, 82mm, 89mm and 100mm; - The set includes one opener;
- Does not require much effort to use;
- It can be used by both children and adults;
- Doesn't take up much space in the kitchen;
- You can not only open, but also close the lids securely;
- Durable.
Easy and simple to open
How many screw caps have I damaged! I opened it as best I could, if my husband was not at home, until he bought me a special opener. Now there are no problems with opening jars, and I use the lids for re-preservation.
Yulia Titova
My opener
Problems constantly arise in opening jars without strong male hands. I constantly had to ruin the lids. And because of this, banks remained unnecessary. And thanks to this device, now a weak, vulnerable woman like me can easily open any cans. I tear off the lids even of those that have been on jars for 5 years
Volchkova Katerina
Convenient opener!
We had many different openers at home, but when opening the lids were always deformed and bent. We saw an unusual opener on the Internet and decided to purchase it. The diameter of the jar is not even important, since it opens any lids without spoiling them. You can even reuse the lids. We recommend!
Alexandra Ignatievna
Opening jars with ease
With the purchase of an opener, I can now easily and simply open jars of different sizes. The opener is very convenient and original in design. Very satisfied!!
Alina Alekseevna
Screw-on canning jars have become very popular these days. They are very convenient, easy to use, and save time and effort compared to seaming machines. But here’s the problem: screwing such a jar is as easy as shelling pears, but opening it is often very difficult. Why this happens and how to cope with such a nuisance - we’ll talk about this in today’s article.
Devices for unscrewing lids on jars
This device is very useful in cases when the tin lid on the can does not unscrew. To make such a tool, you will need very affordable materials that we usually throw away. Despite the ease of manufacture, this tool is in no way inferior in functionality to a similar one made at the factory, and by making it yourself, you will have fun and save your money!
To make such a tool we will need:
- Five liter plastic bottle
- Piece of lath
Making homemade goods
To begin, we clamp the rail in a vice and saw off the excess part from it, leaving a piece 15-20 cm long in the vice.
Then use a marker or pencil to mark an oblique line as shown in the photo below.
Next, armed with a hacksaw for metal, we cut off the end of the rail obliquely, along the mark.
Then we treat the sawn surface well, removing roughness.
Next, release the workpiece and turn it over to the opposite side and clamp it in a vice again.
Then we again make markings in the form of a line, exactly the same as on the other side. The mark needs to be made a little further than the one on the other side.
Next, using a hacksaw for metal, we make a cut along the mark to the middle of the rail, as shown in the photo below.
Then we cut off the ring from the five-liter bottle.
Fold it in half and cut off a little more than half with scissors.
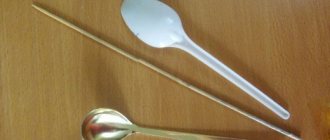
Now you will need an ice cream stick or something similar, the main thing is that it is thin, about the thickness of a metal sheet.
We fold the cut strip from the bottle, apply the end to the slot and press it out from there, hammering it into a thin stick, as in the photo below.
Then you need to make two holes with a drill to fix the plastic strip.
Well, screw two screws in there. The holes must be made, because if you tighten the screws without them, the rail may split and all the work will be in vain.
Well, our tool for unscrewing the lids is ready. It is very simple to use, just put the plastic ring on the lid and unscrew the lid with a lever. The tool is very convenient and takes up little space in the kitchen, but at the same time it is incredibly effective.
As you noticed, the plastic strip needs to be installed so that the resulting ring fits easily onto the lid. That's all, thanks for your attention! ))
Video of the device:
Source
Become the author of the site, publish your own articles, descriptions of homemade products and pay for the text. Read more here.
Why don't they open?
Reusable twist-off screw lids for canning are very convenient. The principle of their operation is quite simple: when heated with hot water or steam, the polymer coating on the inside of the lid becomes softer, due to which the jar closes tightly. After this, the lid begins to cool, its top retracts, creating a vacuum effect. In this case, a strip of polymer acts as a sealing gasket.
Glass jars with screw-on lids are the most popular today for storing a variety of pickles and preserves.
To reuse the cap, you need to unscrew it carefully. To do this, you can use a special key or open the jar with your hands very carefully, if, of course, you have enough strength. But more often than not, it is precisely these strengths that the hostess lacks, and a strong, muscular man is not always nearby. The reasons why the jar is difficult to open may be the following:
- slippery hands or jar surface;
- the lid fits tightly to the neck of the jar, simply sticking to it; this problem usually happens with jars of honey or jam;
- The pressure in the jar is below atmospheric, causing the lid to retract more than necessary.
Note! It is very important to know correctly which way to turn the lid. It closes clockwise and unscrews in the opposite direction.
Before you start unscrewing the lid, take a closer look at the entire jar: maybe you shouldn’t open it to serve the contents? If the lid is swollen, it means that the canned food has already spoiled.
When unscrewed, the lid may even fly off the jar and hit you in the face, followed by the entire contents.
If you find a crack on the surface of the jar, then you should not open it either. Air may have gotten inside, spoiling the food; even worse - micro-shards of glass.
Choosing a technique
A glass jar can be safely decorated in any way, depending on the availability of material:
- if you have colored, corrugated, embossed, textured or shiny and metallic paper, then you can try techniques such as quilling, appliqué, collage, decoupage;
- depending on the type of paint that attracted attention, the jars are painted with watercolors or aerosol graffiti;
- when natural materials are at hand, one cannot miss the opportunity to dream up wickerwork or such art as ochicana;
- threads are an interesting opportunity to decorate a container using jarnbombing, patchwork or felting techniques.
We use paint
You can create an original decorative item using paints. Even simple coffee jars, decorated with artistic painting, will become a sophisticated and stylish element of the interior.
For painting you will need brushes of different sizes, waterproof paint, for example, stained glass.
With paint and a thin brush you can create motifs of varying complexity: from simple patterns and ornaments to plot or dot painting. Stencils will be an excellent help for a novice artist. To work with them, you need to fix it on the surface of the glass and sketch the part that remains open. Once the paper is dry, you can remove it and correct any unevenness with a thin brush.
The drawing made with aerosol paint looks unusual. You can paint over the entire surface with it, or you can create a gradient effect.
Paper to help
As stated above, the paper is suitable for many techniques:
- Applique is a method of creating an image by gluing paper elements onto the surface to be decorated. For this method you will need various types of paper, glue, scissors, and a pencil.
- Quilling is a technique of twisting strips of paper using a special stick to create a flat or three-dimensional composition.
- Collage is the creation of picturesque scenes by combining dissimilar elements, for example, photographs, color clippings or stickers.
- Decoupage is the art of decoration based on gluing an element (cut pattern) to the surface of an object.
We use natural materials
For an interior decorated in eco-style, decor made from natural materials is ideal. So, you can use a herbarium to decorate a jar. It is preferable to use round-shaped objects or those that bend easily. This will allow you to go around the can without breaking the material.
Fabric motifs
Fabric motifs.
A scrap of fabric, twine and braid are all you need to create an elegant decoration. In addition to the above, you can use the following types of fabric:
- sackcloth;
- felt;
- wool;
- linen.
Other types of fabrics are also suitable for finishing, but these are the most resistant to external influences and will retain an attractive appearance for a long time.
Twine or thread
Using twine or thread, it is possible to create a fancy pattern or a symbolic inscription and make it into a romantic piece of furniture.
Another option for decorating a container is to wrap it with thick, textured thread. The product can be left in its natural form or painted. Place flowers, beads or other decorative elements in an intricate composition
How to easily deal with a screw cap
Most often, such jars open without much difficulty, but sometimes, no matter how hard you try, nothing works. One of my friends constantly performs a funny trick: with the words “Open up, police!” taps the lid with his finger, and then unscrews it with a slight movement of his hand. I don’t understand how she does this, it doesn’t work for me. But fortunately, there are many other proven methods.
- Use a special key
. It's good if you have a special can opener for such lids in your kitchen drawer. It works both for twisting and unscrewing, without damaging either the glass of the jar or the lid. Maybe it’s worth purchasing it, especially since it’s so inexpensive? - Hit
. The easiest way to open a jar without a key is to turn it over and, holding it suspended, slap the bottom, or, conversely, place it on your palm and hit the lid. It almost always works, except in very difficult cases when the problem is not the vacuum, but the fact that the lid is stuck.It’s worth knowing this secret: it’s better to twist the jar, not the lid.
- Increase the hitch
. If the cause of difficulty is your hands slipping, proceed as follows. The jar, lid and hands should be dry and grease-free. Put a rubber or silicone glove on your hand (regular gloves you use when washing dishes work well). In mild cases, you can get by with a kitchen towel. Polyethylene film increases the grip of the lid and the hand very well. Sandpaper can also help. Place some kind of “gasket” on the lid and start unscrewing the jar from the lid, and not vice versa. True, you still have to apply a considerable amount of torque. And if your hands also hurt, then this method is definitely not for you. - Use the laws of physics
. Take a leather belt and thread it through the buckle. Throw the resulting loop over the lid and tighten it tightly, directing it counterclockwise. Then rotate so that the can goes clockwise and the lid goes counterclockwise. - Knock
. Gently tap the top and sides of the tight lid with something wooden or plastic - a spatula, the handle of a knife. Do this carefully so as not to damage the jar. If the reason is not that the lid is too worn in, after such manipulations the jar will open without difficulty. - Take a ride
. A simple method often helps: place the jar on its side, and roll the edge of the lid along the edge of the countertop several times back and forth, slightly pressing on top with your hand. The tightly pressed surface of the edge of the lid will relax a little, making a quiet pop, after which the jar will open quite easily. - Heat
. Fill a bowl with hot water and place the jar in it with the lid down. Leave it like this for 10 minutes, then remove it and open it. Running hot water will also work well if you place the illumination jar under an open tap. When exposed to heat, the lid expands and is easier to unscrew. You can also place a very hot towel on the lid. And the fastest way to heat the lid is boiling water: just pour it over the sink directly from the kettle for a few seconds.Please use caution. If too hot water hits a very cold jar, the glass may crack.
- Depressurize
. Is the problem that the cap has retracted too much under the vacuum? This means you need to ensure air access inside the can. Insert a table knife between the neck and the lid and carefully turn it a little, moving the edge of the lid to the side, away from the glass. A gap of 0.5 mm is enough for depressurization to occur.You can do this with a can opener, or in general with any one that you don’t mind, but if you plan to use this jar with a lid further, it is better to take a table knife with a blunt rounded end - it will not damage the glass or scratch the lid.
- Lubricate the thread
. For jars with honey and jam, this method is suitable: place the jar upside down, and drop a little vegetable oil in several places between the neck and the lid. Leave for 15–20 minutes. This time should be enough for the oil to penetrate into the cracks, lubricate the surfaces and make it easier to unscrew the lid.By the way, this “oiling” also has a pleasant bonus: the oiled thread will not stick for a long time in the future. You just need to make sure that the oil does not get inside the product itself.
Photo gallery: Helpers for opening screw-on glass jars
Screw cap wrenches work on the principle of minimizing your effort in unscrewing. Take a knife with a thick round end to avoid chips and scratches, and pry the cap open, letting air under it. Try opening a jar with a screw cap while wearing household gloves. Vegetable oil is an excellent lubricant. thread of a screw-on jar and makes it easier to unscrew. The method with a belt is very old, but effective. Hot water perfectly heats the lid and the air inside the jar, after which opening it will not be difficult
Homemade tool for opening screw caps
A simple homemade tool that makes it easier to open screw caps on glass jars with homemade ingredients.
Now winter has already arrived, which means it’s time to try various homemade canned goods, as well as other pickles and preserves prepared since the summer.
I must say that now screw caps like these are very often used to close glass jars with home canned food.
As you can see, these lids come in different diameters, both quite large and quite small. These lids are good because they do not require any seaming machine to close them, since they close quickly and easily, with one movement of the hand. In addition, such lids can be used many times, well, at least three or four times.
But these lids also have one significant drawback, which is that they are very difficult to open. Often, even a physically strong person is unable to open a jar closed with such a lid. That is why many DIYers are trying to make homemade keys to make opening these covers easier. However, the industry has long been producing plastic keys like these that are suitable for opening screw caps of almost all available sizes.
However, by and large, no keys are needed to open such covers, since they can be easily opened in other, fairly simple ways.
For example, a jar with a screw cap can be easily opened if you put the lid in hot water for a while. However, this method, in my opinion, is not very convenient, and also in some cases not safe. For example, if the jar is very cold (say, it was just taken out of the refrigerator or underground), then it can easily burst from hot water.
I believe that perhaps the easiest and fastest way to open jars with similar lids is to pry off the lid using a regular awl or a knife with a thin tip. To do this, you just need to slide the tip of the knife under the lid from below, and using it as a kind of lever, try to slightly pull the side of the lid away from the neck of the jar. Naturally, this must be done very carefully so as not to damage the lid and jar.
In this case, you need to listen, because if everything goes well, you should hear a characteristic click. This means that the pressure inside the can has balanced and become equal to atmospheric pressure. After this, the lid is very easy to open by hand, and even a child can do it.
Here, by the way, it is necessary to make a reservation that such a tight opening of the lid is caused precisely by the difference between the pressure of the air layer inside the can and the external, that is, atmospheric pressure. Since homemade products are sealed in glass jars while hot, the air layer inside the jar is also hot, which means its pressure is increased. However, after cooling, the pressure of the air gap decreases and becomes below atmospheric pressure, that is, a vacuum forms under the lid. As a result, the lid is strongly pressed against the neck of the jar under the influence of atmospheric pressure, and it is very difficult to open it. Therefore, by prying the lid off with a knife, we simply balance the pressure under it, after which the lid opens easily.
But the fact is that it is not always convenient to use a knife to open such lids. For example, it is very inconvenient to pry off the lids on jars with wide shoulders with a knife.
Therefore, I decided to make a fairly simple homemade tool for more convenient opening of such screw caps, which would be suitable for almost all cans. Moreover, by and large, this will, of course, be a prototype, which can then be modified based on the results of its use.
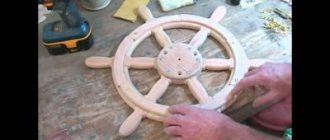
And as a basis for this tool, I decided to use this hook with a screw thread (it is also called a ring screw or half-ring), which is sold in almost any hardware or construction store.
In total, to make such a tool we will need the following accessories: Materials:
• A piece of well-dried birch branch with a diameter of 3-4 cm and a length of 20-30 cm. • A ring screw with a diameter of 3.5-4 mm.
Tools:
• Shiloh. • Axe. • Knife. • Electric drill. • Electric sharpener, as well as an abrasive stone. • Metal drill with a diameter of 2.5 mm. • Fine tooth hand saw. • Anvil with hammer. • Chisel. • Pliers. • Sandpaper.
The procedure for making the tool.
Stage 1. Making a wooden handle.
Step 1: Roughing the handle. Using an ax, we perform rough processing, that is, we trim the tip of a birch branch to a diameter of approximately 3 cm.
By the way, I must say that to make this work easier, you can take a piece of a ready-made round handle for a garden tool, for example, a rake or a hoe, but I didn’t have one on hand.
Step 2. Sawing off the tip of the workpiece. Using a saw with a fine tooth, we saw off the tip from the blank of our handle.
Step 3. Drilling a hole for a ring screw. To make it easier to screw the ring screw into our handle, and also to prevent it from cracking, we drill a hole with a diameter of 2.5 mm in its end.
Step 4. Finishing the handle blank. Using a knife, we process the blank of our handle cleanly, trying to cut off small irregularities and give it a cylindrical shape.
Step 5. Sawing off the handle blank. Using a saw with a fine tooth, we saw off the blank of our handle.
Step 6. Processing the ends of the handle. Using a knife, we process the ends of the handle, trying to round them.
Step 7: Finishing the handle. We finally process our handle with sandpaper.
Step 8. Screwing the ring screw into the handle. We screw the ring screw into the handle, but not completely for the convenience of its further processing.
Stage 2. Formation of the working part of the tool.
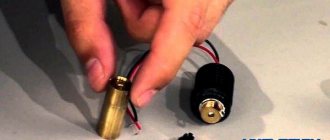
Step 1. Shortening the tip of the ring screw hook. Using a hammer and chisel, cut off the excess tip of the ring screw hook, placing it on the anvil.
This is perhaps the fastest way to shorten the tip of a hook, much faster than, for example, sawing it off with a file, hacksaw or grinder.
Step 2. Forming the working tip of the hook. Using an electric sharpener, we grind the end of the hook of our ring screw, thus forming its working part.
And we finally finish it on an abrasive stone.
This is what the working part of the hook finally looks like, which, in fact, we will use to pry off the lids on the jars.
Step 4. Varnish the tool handle.
We coat the handle of our tool with varnish. I chose a matte varnish in a light shade. Thus, our tool is finally ready. Tool testing.
All that remains is to test our tool in action. Therefore, we take a jar closed with a screw lid and carefully insert the tip of the hook of our tool under the lid, between the threads of the jar, and then slightly pull back the lower edge of the lid.
After a click is heard, easily open the lid by hand.
In the same way, I opened another jar.
However, it should be noted that the steel of the ring screw turned out to be a bit soft. Because after using it a few times, the tip of the hook was slightly bent.
In addition, it turned out that such a sharp tip on the hook is also not particularly needed. Over time, it can be turned and rounded. Well, in general, since this was a prototype, in the future I will probably make a similar tool from stronger steel.
Become the author of the site, publish your own articles, descriptions of homemade products and pay for the text. Read more here.