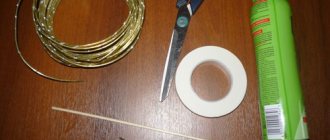
DIY band saw. Blueprints.
Making a saw yourself is a painstaking and complex, but completely doable task. The easiest way to assemble a homemade band saw is on a wooden frame - you don’t have to cook anything, and almost everyone has carpentry tools.
Frame assembly
For the frame, it is better to choose strong and solid wood, otherwise the structure will be unreliable and will vibrate. Some elements, such as a desktop, can be made of plywood, and the ribs are edged with slats for rigidity. The cheapest option is to disassemble the old furniture, using plywood on the pulleys and table. A maple beam is suitable for the supporting rod.
First of all, you need to decide on the drawings, according to which the frame will be assembled in the future. So, the size of the band saw itself will depend on the height of the working room. It is necessary to think in advance about the convenient height of the table, the length of the rod and the diameter of the pulleys. The drawings can be either conditional, reflecting only general dimensions, or detailed, as in the photo.
Installation of rod and pulley supports
The simplest do-it-yourself band saw is on a wooden C-shaped frame, where the support rod is made of timber at least 8x8 cm thick, to which two supports are attached to one (relatively rear) part.
The pulleys will be held on them. It is better to make such supports from strong material; multilayer plywood with a durable core is acceptable.
The distance between the supports must be selected so that the logs needed for sawing fit there. In any case, it is recommended to make the distance “with a margin” so that there are no problems in the future.
Assembling the desktop
The height of the table should be comfortable for working on it, and at the same time accommodate the lower pulley and drive pulley, the motor and a large amount of chips. The shape itself can be anything, but it is often made in the form of a closed cabinet that serves as a container for sawdust.
It is advisable to provide a simple way to open the table and a waste tray - this will make cleaning the saw much more convenient.
The tabletop can be installed directly on the lower support. If the height of the lower support is not enough, make a simple stand for the entire structure, raising it to the required height.
Cutting pulleys and attaching them to supports
The diameter of the belt drive pulleys can be chosen arbitrarily, but the larger the pulley, the longer and better the saw works. In this case, you need to select the blades correctly, the ideal ratio is 1/1000 of the blade to the pulley diameter. Thus, for forty-centimeter pulleys, the tape should be 4 mm. But with proper operation, even on narrow pulleys you can safely work with 6 mm blades.
The diameter of the belt drive pulley must be selected depending on the diameter of the main pulleys, belt length and engine speed.
1. Calculate the circumference of the saw pulley: D = 3.14 * pulley diameter.2. On average, the speed of the web should be 30 m/sec.3. The number of revolutions is determined: O = 30/D;4. The ratio (C) of the motor revolutions (RM) to the revolutions of the belt drive pulley is calculated: C = RM/O;
5. Drive pulley diameter = D/S.
The edge of the blade pulleys is made convex, with an angle of 5-10 degrees - thanks to this, the saw blade self-centers and does not fall off.
But on the belt drive pulley it is better to make a shallow groove in which the belt will be located. You can cover the pulleys with ordinary inner tubes from a bicycle or car.
The diameter is chosen one or two sizes smaller than the pulley. This rubber cover prevents the fabric from slipping.
The upper pulley is mounted on a movable block, which must move horizontally, providing belt tension.
For this purpose, a special lifting mechanism is provided. The simplest option is a beam located under the block and attached to the lever with a very tight spring. By pressing the lever, the beam raises the block with the pulley, providing the required tension.
It is necessary to provide a way to secure the lever in a given position, for example, with several bolts located at different levels. The spring will provide the necessary pressure and at the same time will relieve tension, preventing the tape from breaking.
The lower block consists of two pulleys mounted on an axis - driven and driven.
It is important to properly balance the upper and lower pulleys in the same plane, minimizing the “eights” when the wheels move.
To attach the upper pulley, it is convenient to use self-aligning bearings, which will allow you to quickly remove and put on the wheels.
But they need to be attached to the pulleys as tightly as possible, otherwise the bearings will become loose very quickly. After securing the wheels to the frame, you should test run the saw, using maximum caution.
Installation of blade guides
To ensure that a band saw on wood makes an even cut and the blade is not “pressed” by the wood being cut, guides are mounted along the blunt end of the saw on a narrow beam.
The simplest option is to screw three roller bearings to the beam. The flat side of the canvas rests on one, the other two hold the tape tightly on the sides.
It is imperative that the guides are perfectly aligned at the attachment point on the support, otherwise even a microscopic vertical deviation can result in 3 mm at the opposite end. It is best to mark the position of the beam with the canvas stretched to its maximum and the guides already installed. This guarantees their exact position relative to the saw blade.
Instead of two bearings on the sides, you can make wooden stops. It would also be a good idea to install additional guides under the tabletop, and not just on top.
It should be taken into account that the guides should be as close to the workpiece as possible, ideally at a distance of 3-4 cm from the log. Therefore, if you plan to saw workpieces of different thicknesses, it makes sense to adjust the height of the guides.
Final finishing
The wooden saw is ready for use after assembly, but it is better to make a casing that covers the upper pulley.
This is not so much for aesthetic purposes as it is for safety - even if the tape slips off the pulley, it will remain in the casing.
It wouldn’t hurt to make a container for chips that is easy to take out and empty.
It is better to take the belt drive out from under the table so that sawdust does not fall on it. To protect the engine, it is also recommended to install a casing to prevent the penetration of dust and other particles.
Hub and spoke replacement
To reduce labor costs when making a hub, it is recommended to make two circles with a diameter of up to 100 mm:
- from a wooden board 30 mm thick;
- from timber 55-60 mm thick.
When the glue on the rim is completely dry, you need to arrange sockets for the spokes on the inside. The size must match the section. In this case, it is desirable that the knitting needle is not inserted too easily, but requires blows with a mallet.
Nests are made using a mallet and chisel. Using a feather drill or a milling cutter with an attachment will make the job much easier.
Making a wooden wheel with your own hands
Today we will make a wooden wheel with our own hands, by the way, this wheel is quite suitable, both for the interior of a cottage or home, and for a functional wheel from a cart or horse-drawn cart, the principle of operation will be approximately the same.
Tools and material for making a wheel
Tools: - Screwdriver or shaped screwdriver - Construction tape (meter) - Circular saw, or jigsaw, or wood saw - Construction angle 90 degrees - Pencil or ballpoint pen
— Protractor, regular school one
Material: — Wooden beam — Plywood half sheet
— White wood screws
As you probably understood, in the tool you can use, ideally a circular saw, if not, then a jigsaw, but if you don’t have that, then you can use a hacksaw for wood, it will take a long time, but it’s possible.
Wooden wheel drawing
I hope you don’t have any questions based on the drawing; along the perimeter, all the bars are 37 cm, and the inner spokes of the wheel are 39 cm. During assembly, you may have to shorten the spokes a little, but this is not a fact.
Stages of making a wheel with your own hands
First stage So, the first stage will be to purchase the necessary timber, there are two options, either you buy a ready-made timber of the required size, or you process the timber using a circular saw. In our case, we purchased a ready-made beam measuring 3 meters long, 9 cm wide and 4.5 cm.
The thickness of this timber, if cut correctly, is enough for two wheels.
Second stage The second stage will be the production of blanks for the wheel body and spokes, let's start with the body, a total of 8 blanks are needed, they must be adjusted to the size - 37 cm long, 4 cm wide and 2 cm.
thickness, pay special attention to trimming (sawing off) the lengths, they must be perfect, otherwise the future structure simply will not come together.
We make knitting needles
Now we need to make knitting needles, as you already understood, there should also be 8 pieces, only the size is slightly different - 39 cm long, 2 cm wide and 2 cm thick. You can do one trick with the knitting needles, since they will close and connect into one whole, and then center themselves, then you can cut four knitting needles to 39 cm each, and the remaining four to 37 cm each. This will make it easier to connect. Now we need to cut off the ends of the body for further joining, be careful at this stage.
Take one workpiece and place a mark at one end exactly 1.7 cm (17 mm). Do the same procedure on the other side of the workpiece and draw a line from the mark to the corner, it should look like in the photo. Carefully cut the corners along the marked line, just take your time, these cuts determine how smoothly the workpieces will fit together.
We make fasteners We put all the processed parts aside for now and start making fasteners, the material in our case will be a plywood sheet, but you can also use the remains of a wooden beam. In total, you need to make 8 parts for fastening the body, 8 parts for the wheel spokes and one centering part (fasteners for the spokes in the center). The size of the housing fastening part is 7 cm on the outer sides and 5 cm on the inner sides.
, and the cutting angle is exactly 45 degrees. The size of the spoke fastening part is 8 cm long, 2.5 cm wide, look at the photo to see what you should get. We will do the centering for the spokes by outlining a can of putty in a circle. We cut it in a circle with a jigsaw and it turns out to be such a beauty.
Assembling the body and spokes Now we need to return to the body parts, prepare a flat surface and place all the parts next to each other, corner to corner, if you did everything correctly, then you should end up with a wheel edging like this. If everything fits together, then take the fastening blanks for the body and fasten them with white self-tapping screws. We screw it around the entire perimeter one by one, preferably clockwise, so as not to get confused.
We divide each part of the body in half and apply it to the middle of the knitting needle, it should turn out like this. We fasten the knitting needles with fasteners. Well, the final touch will be to tighten the centering to the spokes, thereby securing the entire structure as a whole. We hope that it was not difficult for you to make a wooden wheel with your own hands using these instructions. You can treat the finished surface with varnish, paint, stain, wax or any other method you desire.
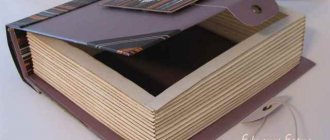
Photo of the finished product And now you can admire the final photo by capturing the top view.
Source: https://svoimi-ru4kami.ru/masterim-derevyannoe-koleso-svoimi-rukami
DIY running wheel for cats
Depending on the breed, cats can be active or passive. Some sleep for almost a day, only interrupting for food, while others have a hunting instinct that forces them to be very active. Such cats need to splash out their energy every day.
In small apartments there is not much room for animals to run around, and the owners are unlikely to be delighted with an animal endlessly jumping on the walls and windows.
Benefits of a running wheel
In fact, the simulator will be useful for a cat with any character. Energetic animals will be able to run around in it to their heart's content, and calm ones will be able to shake out their fat a little.
The problem of excess weight is especially acute in castrated and sterilized cats. For them, the wheel will be an effective way to lose a couple of extra pounds. The owner should remember that obesity in an animal is also fraught with problems with the heart and joints, just like in humans. In addition, your pet will appreciate the original design of the wheel. He will clearly enjoy the activity - depression will go away and his mood will improve.
You can make a running wheel for cats yourself
Self-production will allow you to save not only a decent amount of money (from 5 thousand rubles), but also as a result you will receive an original design that no one else will have. However, before you start purchasing materials, you should study the information about what the wheel should be like so that the cat likes it.
What you need to know about the running wheel
For the “cat simulator” to be successful, it is not enough to have all the necessary tools and preparations. It is important that the cat likes the final design. To do this, it must meet the following requirements:
Large wheel diameter. The cat will not have to bend its body unnaturally if the size of the circle allows it to keep its back straight. In pet stores you can find wheels with a height of 80 and 120 cm, but this is not the limit. If, for example, a Maine Coon is going to jog in it, then the diameter of the wheel can be made even larger.
Assembling a decorative cart for the garden with your own hands
Decorating the interior space of a summer cottage is an interesting and exciting activity. Many different elements allow you to make the territory of your country house unique, unlike all the others. Some decorative details can be purchased in specialized stores; some, if you have some free time, are not difficult to make with your own hands. Today we will talk about making a decorative country cart for the garden.
Types of decorative carts
There are many options for this product. Some of them are large and require enough free space to accommodate them. Others are small, can be equipped with only a pair of wheels and can be located on any free piece of land.
Most often, decorative carts and trolleys serve as original flowerpots for placing various flowering plants in pots or boxes of various shapes.
Structurally, a decorative garden cart consists of several basic elements. These include a body, which can be onboard or in the form of an open flat platform, one or two wheelsets and shafts.
The body of a decorative garden cart, or body, is not difficult to make from edged planed lumber or sheet wood materials, having previously marked, cut and connected the parts according to a pre-designed shape and size using self-tapping screws or nails.
As a rule, the difficulty in independently designing such decorative products is caused by the wheel manufacturing process. A simpler option is a one-piece product, cut from one piece of plywood or wood of sufficient thickness.
Prefabricated versions consisting of several parts are more difficult to manufacture. It is on the manufacturing technology of such a wheel that we will dwell in detail.
Making a wooden cart wheel
Almost any prefabricated wheel is a ring-shaped rim, inside of which there are spokes and a central axle.
To make a rim, you must first make a full-size template. To do this, you will need a sheet of plywood, chipboard or OSB of sufficient size. A circle should be marked on it, the diameter of which will be equal to the diameter of the wheel rim.
Drawing a circle with a large diameter can be challenging. To make the process easier, let's do the following:
- mark on the workpiece its center, located at the intersection of the diagonals (if the workpiece is rectangular) or approximately at an equal distance from the edges;
- hammer a nail No. 40 or 50 into the resulting point to a depth of 15-20 millimeters;
- in a thin strip of sufficient length we will drill two holes with a diameter of 5 and 8 millimeters. The distance between the holes is equal to the diameter of the marked circle.
- Use the smaller hole to install the strip on the nail, and tightly insert a pencil into the larger one, and mark the circle by rotating the strip around the nail.
Next, through the center of the circle we draw two mutually perpendicular diameters - segments connecting the points of the circle. After this, we will mark two more diameters, offset relative to the first ones by an angle of 45°. Thus, we divided the circle into 8 equal parts.
Types and sizes
Decorative carts harmonize perfectly with the landscape style of the dacha. When decorating a site with a cart, it is worth choosing the dimensions of the cart so that it fits into the garden color.
Carts for decorative gardens have the following specific features:
- small dimensions, up to 1 m long. This decorative cart is ideal for decorating small areas with flowers. It is installed with your own hands near a small garden house;
- medium size parameters with a length of up to 2.5 m. The cart has from 2 to 4 wheels and can be used to decorate the home landscape with flowers. Sometimes the cart is placed close to the fence;
- a large-sized form with a length of more than 3 m. To manufacture a bulky cart, precise drawings are required so that all the decorative elements of the cart look holistically. Huge carts are installed exclusively on a vast landscaped area of the garden.
DIY band saw for woodworking
When selecting equipment for a home workshop, a band saw is rarely included in the category of the first-priority tool: most operations can be performed without it. For a long time I made do with what I had, but as a result I was ready to make a band saw. As a result of my searches, I came across the website of Canadian inventor Matthias Wandel. He proposed making the band saw almost entirely out of wood. At the same time, its characteristics were very decent, and any spare part was then easy to make yourself.
Main characteristics of my homemade bandsaw
My saw is different from the one in the developer’s drawings, but I didn’t try to repeat the project exactly the same. Much depends on the selected engine, saw blades and workpieces. I used the canvases that I could find. An asynchronous electric motor of suitable power was also lying around in the bins. The saw blades turned out to be slightly shorter than recommended - I decided not to risk it and reduced the internal size of the frame by 10 mm.
Band saw design. Most of the parts are made of wood.
| Characteristic | My saw | Author's saw |
| Height (without cabinet), mm | 1 200 | 1220 |
| Width (with table), mm | 900 | 720 |
| Depth (with table), mm | 500 | 460 |
| Wheel diameter | 16m (400 mm) | |
| Table (width x depth), mm | 510 x 470 | 490 x 460 |
| Table tilt, degrees | 0-45 | |
| Weight (without cabinet), kg | 50 | 45 |
| Maximum workpiece thickness, mm | 260 | 270 |
| Distance of the canvas from the frame, mm | 400 | 394 |
| Blade length, mm | 2 667 | 2 700 |
| Blade width, mm | 6-16 | 4-18 |
Making a band saw frame
This is the main element of the machine. I used pine inch planed on a surface planer to a thickness of 19 mm. The frame is glued together from several layers of overlapping boards. Do not use chipboard, MDF, plywood or furniture board for the frame. The frame has a C-shape, where the base for the guide of the tension mechanism with the upper wheel is mounted on top, and two legs connected to the base are attached at the bottom. The frame consists of six main layers and additional overlays.
To increase rigidity, diagonal elements are provided. When gluing in stages, it is necessary to control the perpendicularity of the elements so that the frame is flat (without twisting). I glued the frame without a base, leaving empty grooves for it. It is more convenient to glue the base after installing the lower wheel axle block. My supply of clamps was not enough, so I additionally used self-tapping screws. The surfaces of the finished frame were sanded and varnished in two layers.
On the picture:
1. Gluing the first layer of the frame. This operation sets the shape of the frame. 2.When gluing the following layers, the lack of clamps is compensated for by self-tapping screws. 3. Guides for the movable block of the upper wheel are screwed to the finished frame. 5. Sawing grooves in the movable frame of the upper wheel block for inserts. 5. Now the triangular inserts can be glued into the grooves of the movable frame... 6. select the quarters on the sides. 7.
Saw blade tension device. 8. In this position, the stop is visible; it is still assembled without the rotation handle. Three adjustment screws of the oak plate adjustment block act as a spring. top wheel. 9.Gluing a wheel from three plywood circles. 10.Flanges (some with bearings) with linings are fitted to the wheel blanks and marked. eleven.
The engine pulley was ground directly on the engine itself.
Antique wood wall light
And for dessert, a decorative wall lamp.
In winter, I gave my husband the idea to make a wooden lamp in an old style. I found a photo on the Internet.
Having chosen the option they liked, the couple got to work.
The wooden surface is aged. Painted and varnished.
This is what ended up happening.
The lamp was later replaced with a model more suitable in style.