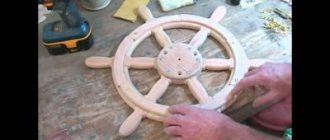
Even the most modern body of evidence has considerable weight. During seasonal work when bees migrate, the apiary owner has to constantly move and rearrange the hives. It is difficult to do without labor mechanization. Apilift is a convenient means of transporting bee houses. How to make such a convenient lift with your own hands.
The lower the overall weight of the apiary cart and the greater the strength, the more convenient and practical it is. The standard option is a platform (according to the size of the hive), a lifting mechanism (lever), two wide wheels, a comfortable long handle and a fastening mechanism.
When compared with a homemade cart, the finished models are strong, lightweight and durable, have a simple lifting mechanism, compact size and a warranty period, which is important.
If you do not have welding skills, then it is better to purchase a ready-made apilift, factory-produced. The price of such mechanization is not high. The main advantages are obvious:
- Stainless steel frame – light and durable. If you buy such material, the cost will not please you;
- properly sized, securely fortified platform;
- several options for clamps at the bottom and top for reliable fastening;
- two wide wheels with all-terrain tires designed for difficult terrain;
- the handles are located in such a way that a person of any height can comfortably use the beekeeper's cart.
The wheel mechanism is equipped with a shock-absorbing system, since hives often have to be transported not on asphalt, but over rough terrain. It is important not to harm the bee family - the factory version eliminates accidental falls.
Another advantage is that the cart folds easily and does not take up much space during winter storage. Self-production does not guarantee such convenience.
Expensive but convenient options, such as Kaptarlift from Hungary, equipped with an electric lift, are a real dream, but they are not cheap. Is it possible to do such an apilift yourself?
It is important to clarify that all imported lifts are designed for polystyrene hives, which are several times lighter than wooden ones.
A few more words about the cons. Ideally, a practicing beekeeper needs two devices:
- for daily work, a small winch - lift, turn, move the hive a little in the sun;
- for loading and unloading onto an on-board vehicle - a kind of miniature loader.
Therefore, many people make lifts themselves, focusing on the individual specifics of the work.
Design Features
The lift has several key elements: frames, wheels with thick tires, a moving carriage and lifting block, fixing cables and bearings.
Frame
The hive trolley includes two frames - static and movable. The first serves as a frame, the second moves in parallel and guarantees support for the entire trolley. The frame material is a square profile metal pipe. The cross-sectional width and thickness of the pipes determines the stability of the entire system.
Wheels
The single wheel section includes welded brackets that guide the movement. The wheels can be disassembled and removed, the brackets are secured to the frame with bolts at the bottom and top, and secured with nuts after loading the hive.
The width of the wheels on bearings allows you to move the entire apilift. It is convenient to transport due to a strong one-piece base, inflated inner tubes and a corrugated towing cover.
Carriage
Withstands heavy loads, fixes clamps on the sides of the structure - they hold the entire hive at the same level.
In the center of the carriage there is a limiting cable, which serves as a winch element that lowers and raises the load. The carriage also contains forks - strong corners that stand inside and lift the hives.
Lifting block
The lever system lifts the hive to a significant height.
For this purpose, the apilift is brought to the hive, the grip width is measured with screws and brackets, the object is lifted with a lever and transported where required. Thanks to the presence of 6 bearings (4 on the bracket, 2 on the wheel base), the hive can be easily controlled and moved.
Types of wheelbarrows
Depending on the work and the number of wheels, wheelbarrows are divided into several types. For construction work, metal wheelbarrows with one wheel are used. For work in the garden and vegetable garden, you can use wooden wheelbarrows, also with one wheel.
Devices for moving heavy loads with two or more wheels are called trolleys.
Varieties of garden wheelbarrows can be seen in the photo:
The main and most important advantage of the car is its reliability. Maneuverability also plays an important role. If a person uses a wheelbarrow in a vegetable garden or garden plot, a narrow path along which one can roll a one-wheeled wheelbarrow will be sufficient. It can also be easily unloaded and the contents turned over by slightly lifting the handle of the wheelbarrow.
Unfortunately, you can’t ride a two-wheeled car along a narrow path; there is a chance of damaging and crushing the plants.
To maintain balance and stability, it is necessary to build a wheelbarrow with spacers. And when you load it with a heavy load, make sure that it does not tip over and try to support it or support it on one side.
The main advantage of a two-wheeled wheelbarrow is its stability. And when such a device is loaded, there is no chance of capsizing.
A two-wheeled wheelbarrow is convenient for transporting building materials, long boards, and large branches. It is advisable to load them so that the center of gravity is in the middle of the body.
The design of the wheelbarrow can be different, with one handle or two. One cross handle is much more convenient, since you can hold on to it with one hand, and the other will be free.
Manufacturing
If you have an apiary, you probably have a need to transport hives. When the question arises of how to make this device with your own hands, you can refer to the step-by-step instructions, having previously prepared all the necessary materials, drawings and components.
Materials
The list of necessary elements to create a structure includes:
- Metal profile, cross-section – square (from 25x25 mm to 40x20 mm);
- Fasteners: M6-M8 bolts, nuts, self-tapping screws;
- Handle-holder with a comfortable non-slip coating made of rubber or plastic;
- Tensioner springs;
- Steel cables, diameter – 3-4 mm;
- Reel-tensioner of the working cable (height – 34 mm, diameter – 50 mm outside and 30 mm inside);
- Handle to reel;
- 2 wheels with a diameter of up to 400 mm;
- 6 ball bearings.
Tools
To work with the material you will need:
- Screwdrivers for fastening;
- Hammer and drills;
- Welding machine and grinder saw;
- Tape measure for measurements;
- Blueprints.
Having collected all the elements and components, we begin the phased production of equipment.
Assembly
The beginning of the apilift assembly is the connection of the base frame. The racks on the sides are welded so that the final product has dimensions of 1570x370 mm.
Next, different elements are added step by step:
- Perpendicular to the frame, 4 tubes and the outer beam are welded from the sides and flat.
- Crossbars are made at the top and bottom according to the size of the pipes; in the case of middle crossbars, smaller pipes are taken (for example, 3x2 cm).
- Place the second beam at a distance of 50 cm from the upper transverse tube, then the third at a distance of 38-40 cm from the lower one.
- For the bearings, a vertical opening of 20 cm is cut, bolts are placed along the edges to eliminate the risk of the bolts flying out of the ditch during operation of the hive cart.
- Holes for M8 bolts are drilled on the sides of the third beam; brackets will be placed here.
- 20-30 cm are removed from the top of the beam, handles with a rubberized coating are welded. The frame is ready - then it will be equipped with all the basic elements for transporting cargo.
- Take a 4 cm bearing and place it on the upper transverse frame at a distance of 13 cm to the right.
- The fasteners are fixed on top to prevent the cable from falling out of the working unit.
- Similarly, on the left side, at a distance of 130 cm, a groove for the roller and a working cable are inserted, the upper end is nailed to the left sidewall.
- The coil is placed on the second crossbar from above, the distance from the edge of the frame is 12 cm to the right.
- A reel axle is inserted into the bearing - the lifting cable will be screwed onto it.
- On the other side of the coil, a 20 cm lever is welded with a freely rotatable handle, which can be rotated around its axis.
- A piece of steel rod is nailed next to the reel and handle as a locking element.
- The lever handle is connected by a cable to a tongue with a spring. The tongue serves as a preventative against emergency lowering of the carriage; in a quiet position, it is pressed against the stopper by a spring.
- Make 25x25 mm brackets from the profile, place the wheel axles on them, and secure them with nuts.
- The brackets are fixed to the frame with 110x25 mm steel plates and bolts, which outwardly looks like two tubes of 23 and 30 cm, welded perpendicularly. This design can tilt down at any angle due to retractable wheels on the brackets.
The final stage
At the final stage, perform the following actions:
- Assemble the carriage, including clamps. A frame is made on ball bearings, with dimensions 72x38 cm, from a 3x2 cm pipe.
- At the bottom, two crossbars made of 3x3 cm pipes are placed for clamps on the sides, which grip the body of the transported hive.
- Adjust the clamps. The hinge will tilt under the action of traction, the square-tractor tube from the side clamp will be skewed, so the angle of inclination is adjusted with bolts and springs. The greater the tilt, the more you need to tighten the clamps.
- The clamps are made from tubes up to 45 cm long; holder legs are welded from the edges - segments 9-13 cm long.
- To prevent the hive from slipping, the inside of the legs are ribbed.
- The clamp is inserted into pipes with a larger diameter, and a cable block is welded in the middle of the lower crossbar.
- To lift a load on an apilift cart by the bottom, you will need to attach tubes with a diameter of 25x25 mm and a length of 9 cm at the bottom of the carriage.
- The movement of the entire structure of the apiary cart occurs vertically, due to the operation of 4 bearings on the sides of the axial frame.
Blueprints
The pictures show drawings for a standard version of the trolley, with a load capacity of up to 150 kg. Using them, you can easily assemble a simple lift from available and inexpensive materials yourself.
If you need to change the dimensions of the lift, then, guided by the drawings, you need to add centimeters proportionally on each side and along the length. The indicated dimensions will provide a maximum load of up to 150 kg; additional fasteners will make the cart heavier.
Usage
For correct and efficient operation of the apilift, it is recommended to adhere to several rules:
- Before starting work, check the lift for compliance with technical requirements - use it lightly, paying attention to the tightness of the screws and nuts, the roller system, the tightness of the bolts and the fit of the tubes, washers, and the complete fit of the fasteners into the working grooves.
- When transporting heavy hives, it is important to check the reliability of the fastenings and fixations. It is better to lighten the hive from unnecessary load, moving elements of the box, so as not to frighten the insects. If the cables break, the bees may become aggressive from stress and some of them will die.
- During transportation, it is important to work in protective clothing, with a fine mesh and a sprayer, in order to protect yourself from insect attacks in the event of an emergency fall of the hive.
- It is important to pay attention to the installation of small parts - the technical performance of the entire mobile installation depends on them.
How is the cargo cult doing now?
Over the past 75 years, most cargo cults have disappeared. However, the cult of John Frum is still alive and well in Vanuatu. And moreover, on February 15, the citizens of this country celebrate their most important national and religious holiday, John Frum Day, for which we congratulate them.
One more attribute of the cargo cult can be identified: the so-called ritual inactivity; Having built ritual airfields, the islanders began to wait for the coming of their ancestors in many days of silence and vigil without leaving their place. Dreaming of “heavenly gifts,” the savages stopped hunting, cultivating the land, and generally scrounged for food and farming.
Airplane replicas sometimes look amazingly authentic. But they still don't fly.
The irony is that in some cases the idea of a gift from heaven turns out to be justified: governments begin to help the Papuans so that they do not starve to death in their ritual inactivity and drop humanitarian aid from airplanes. This only reinforces the savages' confidence in their rightness, after which they begin to worship John Frum and build straw airfields with even greater zeal.
Factory solutions
What are the differences between cart wheels? Why do their prices vary widely? There are quite a lot of differences between them.
Fastening
- A wheel with a bracket is useful because when the wheelbarrow is tilted, it independently turns in the desired direction. This feature will make the 1-wheel garden cart more manageable. But a 2-wheeled garden cart will do just fine without this element: any rotation of the wheel will not cause its center of gravity to shift beyond the wheelbase.
When the wheelbarrow is tilted, the bracket itself turns in the desired direction.
- Swivel wheels are useful if you have to roll the wheelbarrow on paths with a small turning radius. For movements in a straight line, products with a fixed position of the axis of rotation are sufficient.
However: a 4-wheeled garden cart with swivel wheels is much more convenient, since it can move in any direction, and not just along its longitudinal axis. Of course, this property is only useful on smooth, hard paths.
Bearing
A regular bushing (especially a plastic one) has a much shorter service life than a carbide bearing. Among the latter, there is also a price differentiation: rolling bearings (ball or roller) that are more wear-resistant and provide less rotational resistance are more expensive than plain bearings.
A bearing with an axle inserted into it.
Pneumatic tires are valued by manufacturers as more expensive than solid tires.
How much is the difference in price justified for the buyer?
- Pneumatic wheels for carts and garden wheelbarrows can provide higher maneuverability compared to cast ones. By slightly deflating the tire, you can reduce the specific ground pressure and thereby be able to drive on sand or clay.
- Pneumatics better absorb shock loads from potholes and bumps on the path. If, say, you are building a house with your own hands and transporting a couple of dozen glass blocks to the construction site, this property will be very useful.
Pneumatics. The camera's nipple is clearly visible in the photo.
The disadvantages of pneumatic tires are quite predictable: they have to be inflated from time to time, and there is always a risk of puncturing the tube. (See also the article Welding machine for a summer residence: features.)
Helpful: An excellent alternative to an airbag is a molded polyurethane foam tire. It is almost as elastic as pneumatics, does not require inflation and is not afraid of punctures.
Hub material
The maximum load that a wheelbarrow or cart can withstand is determined by both the number of wheels and the material of their hubs.
In order of increasing strength, the materials used can be arranged as follows:
Hub made of galvanized steel.
Diameter
The general pattern is this: the larger the diameter, the greater the maneuverability of the cart or wheelbarrow, the less unevenness is felt when moving it. A reasonable minimum diameter for uneven terrain is 200 mm; the maximum size offered by manufacturers is 450 mm.
Alas, most single-wheel designs are designed in such a way that it is impossible to install a wheel larger than the standard one; But two-wheeled garden carts generally allow such a replacement. (See also the article Cultivator for the garden: features.)
Brake
It is useful in those rare cases when four-wheeled garden carts are used on a site with a noticeable slope. If the wheels are not turning, it is enough to equip one of them with a brake; For turning wheels, it is advisable to equip any two of the four wheels with brakes.
Product with a brake.