What would New Year be without Father Frost and his companion Snegurochka? We invite you to decorate bottles of champagne with these indispensable characters of the New Year celebration. At first glance, it seems that making such bottles of champagne is very difficult. I would like to assure you that this is only at first glance. In fact, the main thing is accuracy and a little patience. Each bottle is made in just one evening. Thus, by spending just two evenings, you will receive unique bottles of champagne.
- We will need the following materials and tools:
Instead of beads, you can use sequins and beads for decoration.
2. First you need to prepare the bottles. To remove labels from bottles, soak them overnight in cold water. After the bottles are cleared of all labels and glue, you can begin making Father Frost and the Snow Maiden. Let's start with making Santa Claus. Apply glue to the middle of the front and back of the bottle. You should not apply glue in a circle around the entire perimeter. Two drops of glue on the front and back of the bottle will be enough.
3. We glue our tape evenly on the back side of the bottle, and form a corner like this on the front side. Cut off the excess part of the tape. The main thing is to carefully tighten the tape. Make sure that the tape does not wrinkle or sag.
4. Similarly, we cover almost the entire surface of the bottle. This will be the top part of Santa Claus's fur coat.
5. We glue the lower ribbons strictly horizontally.
6. From a piece of padding polyester we form the fur part of Santa Claus’s fur coat. And at the same time we hide all the unsightly joints of the tape.
7. Glue the ribbon with beads along the contour of the fur part. We glue the fur on both sides.
8. We complete the work with the obligatory attributes of Santa Claus. We sew a small bag with gifts and tie it with a belt. We make a beard from the same padding polyester. We cover the bottle cap with red cloth or ribbon and decorate it with a white edging. Santa Claus is ready.
9. We use the same principle to dress the Snow Maiden. To do this, cover the bottle with blue tape. The only difference is the length of the upper and lower parts. The Snow Maiden's legs are longer, so there are slightly more horizontal stripes.
10. In the center of the bottle we glue the white part of the Snow Maiden’s fur coat, under which all the seams are hidden.
11. Cover the bottom edge of the fur coat with beads. On the front of the fur coat, we glue the beads only on the outside.
12. We make a fastener for a fur coat from two beads.
Do you like giving gifts? I am very! And I really want the gift to be liked, to please, to suit the situation and to be original. Today I propose to dress up a bottle of champagne - the most popular New Year's drink. In this form, it will become a suitable souvenir for the Christmas tree. I will tell you how to make Santa Claus clothes for champagne with your own hands, a master class, I hope it will be clear and useful to you.
So, to make “Santa Claus” clothes for champagne, we will need:
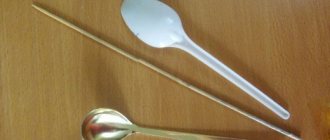
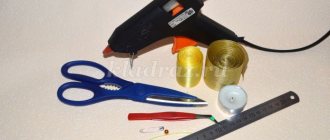
— red and white fleece; - white quilted lining fabric; - padding polyester; — white fantasy yarn YarnArt texno (you can take any white yarn for knitting); - a piece of fabric 10:15 cm from women's nude tights; — transparent glue for gluing fabrics (for example: Moment-gel, Dragon, hot gun); - wooden kebab skewer or any wooden stick; - sequins in the shape of snowflakes; — red ribbon 30 cm; - white and red threads.
To make the eyes, take two smooth buttons on a stem and nail polish black, brown and white. Or a pair of store-bought doll eyes.
Of course, you will also need:
- sewing machine; - scissors and ruler; - chalk and pencil; - needle and sewing pins.
How to make Santa Claus clothes for champagne with your own hands
We cut out the parts in accordance with the inscriptions on the “Santa Claus” clothing pattern for a bottle of champagne.
Torso.
We take one part of the body and lay out the edge of the front and the face on it as in the photo.
By the way, we also suggest you read our article on how to put a cover on a really high-quality and tasty drink.
We secure these details with pins and outline the oval of the face with chalk.
Sew along the marked line, leaving the top open. We cut off the excess nylon along the edges, but not too close to the seam. This entire allowance will subsequently be hidden.
We sew the white edge strip along the very edge using a curly seam. I chose the one like in the photo.
Now you can sew both parts of the body. This is what the backside looks like:
Let's do the lining.
We pin the details of the “Santa Claus” champagne cover made of quilted fabric with pins and sew them together. We close a strip of white fleece (on the pattern - “bottom edge”) into a ring and sew it together. We connect the lining and the edge. At this stage you need to pay attention: all seams are inside out! We turn the body inside out and put it on the lining.
Turn and pin the edge. We sew it immediately with the same curly seam. This is what the bottom should look like:
Making a lapel for a hat is very simple. We bend, chop, sew along the intended line. We cut off the excess very close to the seam, but carefully.
When sewing the collar, we leave about four cm open. We turn out both parts.
By the way, you can decorate champagne using the decoupage technique. You can also find out how to do it on our website.
Hands
Before sewing the white lapels to the champagne cover, we connect the sleeve parts on one side with a stitch of 8-10 cm. We cut off the lapel facing the wrong side of the sleeve and sew it together. We turn it onto the face and use the same curly seam to secure the beauty. Now you can connect the entire sleeve (sew inside out and turn it inside out).
It is always better to sew small parts first, and then cut and turn them inside out. This is how we will make the mittens.
All the main details of the New Year's clothing "Santa Claus" for champagne are prepared and the most interesting remains. If you compare ten Santa Clauses sewn using this pattern, then they will all be the same only up to this point. And then... Facial expression, position of hands and collar, fluffier or longer beard, more interesting jewelry - everyone can look special!
Face
We take the padding polyester and tear it and fluff it into pieces. Fill to the desired shape (so as not to tear, but not too weak). We make a tight ball for the nose and slip it into place. We seal the hole. To make the face expressive, you need to stitch through certain points and slightly tighten the thread, giving the desired shape. We make markings with pins as in the photo.
The same color indicates pairs of points that must be attracted to each other. The order is: blue, red, green, yellow. And to highlight the wings of the nose, you need to lay the thread on top. After all the tightening has been done, the upper hole of the head can be sewn up.
You can, of course, buy ready-made ones and glue them on. But we will do better! Take smooth buttons on the stem, about 1cm in diameter, and paint the iris with brown nail polish. Let it dry. Black varnish for the pupil. Then, in white - a small stroke or dot. We dried it and sewed it onto New Year's clothes for a bottle of champagne.
We also paint the eyelashes with black varnish, scooping it onto a needle or toothpick. And the eyebrows are white. Our Santa Claus is gray-haired, isn't he? And lightly tint the cheeks with dry blush.
Assembly
We pin the lapel of the hat with pins. The edges should meet at the back. Carefully sew with hidden stitches.
The lapel itself can be glued into place, or you can sew it (more carefully) at the very edge, pulling the threads well. The hat will fit like a glove!
Sew the collar along the top edge. We will definitely connect the front with several stitches, so the collar will fit more beautifully.
Hands
We first fill the sleeves and mittens with padding polyester and then sew them together. At the same time, we tilt the mittens slightly, forming a hand pose. We sew the finished arms under the collar.
The beard is the pride of Santa Claus! You can do it in different ways. The main thing is that it should be white and elegant. Even threads, even a piece of fur, must be tried on the doll and evaluated. If you like it, feel free to sew it on.
For my champagne outfit, I knitted a beard from YarnArt texno yarn. It is thin with artificial, but like swan's down.
For the beard we cast on 60 loops. Stocking knitting. We knit several rows, then close off 20 loops on both sides, and continue to knit the central 20 to the desired length. It turns out to be a beard and hair at the same time. We distribute it over the champagne case so that the back of the hair covers the back of the head, and in front we pull it up to the nose (grandfather should still have a mustache!). Pin and sew.
We sew a bag from a rectangle. We fill it with padding polyester and tie it with a ribbon. We make a staff from a kebab stick, wrapping it with padding polyester. Glue the bag and staff to Santa Claus's mittens.
We decorate “Santa Claus” clothes for champagne with our own hands with snowflakes or other sequins. All! Can be put on a bottle. Well, admire your work, of course... And give it as a gift!
We also invite you to find out how it’s done
Do you want to beautifully decorate the table and interior for New Year's Eve? The traditional hero of the holiday is Father Frost. You can make an original souvenir from it with your own hands. Read tips, get ideas. They are all very simple and understandable. Even a beginner can make such a product.
Materials and tools
To make a beautiful and original “Father Frost and Snow Maiden” craft, you just need to take the available tools or buy them. They are inexpensive, but will allow you to make a very decorative, elegant thing. So, you will need the following:
- The base can be any bottle, glass or plastic. You can use unnecessary empty one or one that will be served on New Year's Eve. Christmas tree decorations are made from small bottles or jars of yogurt or baby food, and full-fledged figures for the interior are made from a five-liter water bottle.
- Decorative materials. The choice depends on what you have on hand or at your local craft store. It can be: bias tape, fabric, cotton wool, padding polyester, tinsel, sequins, beads, buttons, lace, braid, snowflakes, paper, foil - in a word, everything your imagination desires.
- Scissors, glue, needle and thread, paints and brushes.
The necessary tools are determined by the method in which you will make the craft.
We sew Santa Claus - a case for champagne
In anticipation of the New Year holidays, I suggest you sew a decoration for the New Year's table - Santa Claus on champagne.
We will need (Fig. 1):
- foam ball with a diameter of 6 cm;
- shabrak;
- artificial fur;
- fleece in nude, white and blue colors;
- crepe satin blue;
- bias binding to match crepe-satin;
- hemispheres for eyes;
- a little holofiber;
- snowflake-shaped sequins;
- pattern (can be purchased in my store or made by yourself);
- textile glue;
- scissors;
- iron and sleeve block;
- sewing machine.
rice. 1
We cut out two parts of the body from the shabrak and glue on crepe-satin (one side of the shabrak has an adhesive coating). We process long sections with bias tape (Fig. 2).
rice. 2
We fold the parts with crepe satin towards each other and sew the long sections with a seam over the edge (Fig. 3).
rice. 3
Using an iron and a sleeve block, we form a round shape (Fig. 4).
rice. 4
We cut out the details of the fur coat and handles from fleece. We sew and turn it right side out (we leave a small hole in the handle parts for turning and stuffing) (Fig. 5).
rice. 5
We cover the ball with flesh-colored fleece, and wrap the excess fabric with thread, forming the so-called neck. We form a nose from a small circle of fleece and sew it onto the middle of the future face of Santa Claus. Glue hemispheres in place of the eyes (Fig. 6).
rice. 6
We put the fur coat on a piece of chabrak (Fig. 7) and insert the head with the neck into the hole in the body. Sew on (Fig. 8).
rice. 7
rice. 8
Let's start making the hat. We cut out a rectangle according to the volume of the head, sew the short side, and wind the upper part with thread (Fig. 9).
rice. 9
From the fur we cut out a strip for the lapel of the hat and the trim of the fur coat (do not forget to take into account the direction of the pile) (Fig. 10).
rice. 10
We attach the blue part of the hat to the head with a basting stitch, we also sew the fur strip to the head butt to the blue part of the hat and turn it up (Fig. 11).
rice. eleven
We stuff the handles with holofiber not very tightly, sew up the hole and decorate the wrists with fur (Fig. 12).
rice. 12
We sew the handles with the upper part to the body (Fig. 13).
rice. 13
Let's start making the beard. We cut out several rectangles from white fleece with a difference in length of 1.5 cm. Important: the rectangles must be cut so that the fleece stretches along the long side of the rectangle. Cut into “noodles” 0.3-0.5 mm (Fig. 14).
rice. 14
Starting with the longest one, we sew the beard parts to the head, gradually moving towards the nose (Fig. 15, 16).
rice. 15
rice. 16
Forming curls. To do this, simply stretch the noodles. If the rectangles were cut correctly, then curls are formed (Fig. 17, 18).
rice. 17
rice. 18
We decorate the fur coat with sequins (Fig. 19).
rice. 19
From a suitable stick you can make a staff by wrapping it with silver braid (Fig. 20).
rice. 20
Using the same principle, you can make a snowman and a Snow Maiden, and in general anyone your imagination tells you!
Santa Claus (do-it-yourself) from a bottle of champagne
You will be making the actual packaging or garment for the base, meaning it should be removable. This offers some benefits:
- Allows you to use several times (for the next year).
- Suitable as a separate gift for relatives (they will buy champagne themselves).
- Such a souvenir can be made for sale.
Do-it-yourself Santa Claus craft from champagne is done in different ways. The methods may be:
- Creating a costume from ribbons or with subsequent decoration.
- Sewing or knitting clothes for figures.
- Painting and surface decoration.
Choose the method that makes the most sense to you. Try a few or use what you have at home.
We sew a suit
Making Santa Claus from a bottle with your own hands is very simple, if you make an outfit separately, and then just put champagne in it. You are not a fashion designer, and comfort of clothing is not required here. The main thing is that she looks beautiful. A coat for Santa Claus can be sewn from two halves (for the front and back).
This is done like this:
- Draw an outline like a shirt or robe on a piece of paper or directly on fabric. Make the sleeves one piece with the front or back. It makes no sense to cut out the armhole and sew them in separately. Simplify everything. Make both parts the same.
- Sew the resulting parts from the inside out using a machine or by hand.
- Turn out and decorate at your discretion with any white trim (lace, braid, ribbon, frill, tinsel).
You don’t have to make sleeves for the costume, but if you want the Santa Claus craft to look more realistic, not only sew them, but also fill them with something (cotton wool, padding polyester or other stuffing). The bottom should be sewn up and something similar to mittens should be made. Make a hat or cap.
We tie the bottle
In this way, Santa Claus can be made from plastic or glass bottles. It is better to do this work with crochet.
The easiest way is to create a tight-fitting red suit and sew white decoration on top. It can be either knitted or any other. They do it, of course, by immediately tying in a different color, but it’s more complicated. If you only know how to work with knitting needles and you have them, make a red “tube” on four knitting needles or circular knitting needles according to the principle of a regular sock.
Paint the bottle
If you don't have any time, use other simple methods. The Santa Claus craft from a bottle can be made using regular surface painting.
To do this, do the following:
- If possible, it is better to soak the bottle labels, although this is not necessary. The same applies to degreasing the surface.
- Take red paint and a sponge or wide brush. Cover the surface of the bottle with it. In the case of champagne, up to the top golden label. Acrylic fits well. You can buy a can of white paint and tinting (red for Santa Claus, blue for Snow Maiden). You may have to do more than one layer, or even better, first prime it with white or a special compound. In a word, try to achieve an even colored surface.
- After drying, you create decor: glue on white trim from ribbons, lace, and tinsel. You can even use elements of decoupage, that is, ready-made napkins with decor, stencils.
- Treat the finished product with clear varnish to add shine and greater durability.
Plastic craft bottles: master class
Everyone usually has this material. Depending on the size of the bottle, you can make either a Christmas tree toy or a full-fledged interior decoration.
To create such a souvenir, any of the technologies listed above are suitable.
You can try another quick method. To make a beautiful and neat Santa Claus from plastic bottles, you need to do the following:
- Take a bottle and cover it with paper. This makes it easier to work in the future.
- Wrap the bottle with cloth or a red bag, together with the lid, and secure it with glue.
- Use cotton strands to trim coats and hats.
- Draw a face on cardboard and glue it to the base.
- Make hands from rectangles of fabric. Decorate the bottom with cotton wool in the form of cuffs. Glue the elements to the bottle.
- All that remains is to make the beard and accessories. The gift bag is usually sewn, and the staff is made from a pencil, rod or stick wrapped in satin ribbons. A beard is usually made from cotton wool, but it can even be made from plastic spoons.
Using the same technology, you can make any figurine or even create a plot composition. So, the “Father Frost and Snow Maiden” craft will take its rightful place on your holiday table or under the Christmas tree.
Children will do this with great pleasure. If you may not entrust your child with a bottle of champagne for the holiday table, then you will be happy to give away the plastic “waste” for creative research.
So, you have learned how to make a Santa Claus craft with your own hands from scrap materials. All options are very easy to do. Even a child can cope with this task, so you can turn preparing decorations and souvenirs for the home and gifts into an exciting family activity.
Content
It seems to us that we have not yet written everything about crafts for the New Year, although there are a lot of interesting articles and ideas on this topic on our portal. But one topic was only partially covered - a cover for a bottle of champagne for the New Year. It’s easy and quick to make, and as a present or as a table decoration it turns out original and fun. Stock up on felt, fabric, old jeans, beads, buttons and all the related materials and let's create!
At the very end of the article there is an interesting master class on decoupage techniques, but be sure to read and look at all the ideas that we have collected.
We use ribbons and bias tape
A do-it-yourself elegant Santa Claus is made from a bottle by gluing ribbons to the base or directly to the bottle. It is better to use the first option so that the suit is removable. Why do this was stated above. So, do the following:
- Buy the required amount of red and white ribbon. The length can be easily determined by first wrapping the bottle, for example, with a sewing tape measure. The width depends on the dimensions of the bottle. For champagne, a one-centimeter ribbon is suitable; for a five-liter plastic bottle, it is better to take a wide one, as for braiding a braid. If possible, it is better to purchase not an ordinary red satin ribbon, but bias tape, as it will be easier to wrap the bottle with it. Don't forget about the decor.
- Get to work. Make a paper base in the form of a cylindrical surface according to the size of the bottom of the bottle. Place the workpiece on it.
- Start winding the ribbons from the narrow part, that is, from the neck, gradually moving to the base with the paper layer. Glue each row of ribbons halfway or on the edge of the previous one. Instead of winding, you can connect pre-cut pieces of tape. They do this both at an angle and in strictly horizontal rows. Use the same principle to make a hat.
- When the red base is ready, decorate it with white ribbons or any other elements.
The Snow Maiden is made in the same way, only the colors of the ribbons are different, and instead of a hat they make a kokoshnik.
We elegantly decorate a bottle of champagne
A bottle cover for the New Year can be made from simple ribbons, thin ribbons, beads or beads and pearls strung on a fishing line. Whatever you have enough imagination for, design it. The basic idea looks like this:
You can take a wider ribbon, then it will be easier and faster to decorate the bottle. You can also stick various beads and any other decor onto the ribbon itself to make the product look more elegant. You can use several ribbons of different colors to create something like a fancy bottle costume, look at the photo:
And here is a girlish version for you. Thus, it is quite possible to decorate a bottle of champagne for a wedding or Valentine’s Day:
Creative bottles for the New Year
And now, when you have already learned how to decorate champagne with ribbons, you can try and get creative. Use all available materials, natural materials, your imagination, the imagination of children, friends and go ahead and create! We will help you with this a little!
Please note that you can buy flowers ready-made, or you can also make them yourself. We have a lot of articles on the topic of creating flowers, be sure to read them!
Take a look at the first option. Lace and gathered wide ribbon are used here.
The combination of gold and red always looks luxurious. By the way, use yellow - this is the color of the coming year and it should bring good luck.
Twine for bottle decoration
You can create country style decor using twine. This is quite painstaking work and you will need glue, but in the end you get very stylish clothes for bottles for the New Year. From the same twine you can twist improvised flowers and decorate the bottle with them. In addition, you can glue acorns, spruce branches, slivers of cones and other natural materials.
By the way, empty bottles can also be decorated and used as a vase or a decorative element for interior decoration. You can put dried flowers, tree branches, and decorative feathers in such vases.
Paper for decorating bottles of alcoholic beverages
Don't underestimate paper. This can be regular colored paper, silk paper, corrugated paper, thicker colored double-sided paper. You can make a DIY champagne case for the New Year using one of these types of paper:
All you need is a small amount of corrugated paper, Christmas tree beads, gift ribbons, Christmas decorations and glue.
And for the next option you only need red, black and gold paper and now your bottle of champagne is dressed in a Santa Claus costume.
Also make the hats from thick cardboard and add cotton wool or a special filler for toys.
The exact same option can be made from felt or any suitable fabric:
Well, since we have smoothly moved on to fabric, we suggest looking at a few more interesting options that can be used as a bottle cover for the New Year:
It is most convenient to present a bottle of champagne or wine in a bag as a gift.
Well, to create a beautiful and more complex case you will need a pattern for a bottle of champagne for the New Year. We offer several options.
Don't forget that a quality product will require seam allowances and good material.
Champagne with sweets
Sweets and champagne are a traditional New Year's gift. You can combine sweets and drinks by creating a composition in the form of a bunch of grapes. For this you need:
- small round candies;
- green or yellow foil;
- thick green paper;
- marker;
- glue or double-sided tape.
Unwrap the candies and make a new foil package for each one. Using a marker, draw the outline of a bunch of grapes on the bottle, fill it with candies - they can be glued with tape or glue. When the silhouette is filled in, begin to create volume by adding candy in the second and third layers. Cut out leaves from paper and add them to the composition. Tie a voluminous bow at the base of the bunch.
Sources:
https://svoimirukamy.com/ukrashenie-shampanskogo-na-novyj-god.html https://mactera-rukodeliy.ru/dekor/lenty-kandzasi/ukrasit-shampanskoe.html https://zatusim.com/new- year/ukrashenie-butylki-shampanskogo.html
Knitted covers
This is for amateurs and craftsmen! Well, or for those who are not afraid of work, like to try something new and, in general, are a jack of all trades. In the end, everything can be learned. Although there is one trick - the cover can be made from the sleeve of an old sweater or jacket. You just need to carefully cut out the required size and hem it well so that the cover does not come undone while you are bringing the gift to a visit.
You can knit a short cover, without a bottom or with one - that’s how it turns out:
Don't forget that next year is the year of the yellow dog, so knitted clothes for a bottle for the New Year can be made in bright yellow tones. On top, by the way, you can sew or hang a souvenir in the shape of a dog made of felt. In our articles we talked about how to sew such souvenirs, but let’s give another example:
You can take a very simple route - knit a thin scarf and a hat specifically for your idea. It looks very elegant and festive! Corresponds to the spirit of the New Year and winter:
A knitted bag will require a little more time and thread, but you can beautifully present some good alcohol in it.
Feel free to use other materials to complement your knitted design. This can be felt, thick suiting fabric, thick colored cardboard, jeans and other materials.
You can always be creative, especially if you're good with crochet or knitting, and knit, let's say, a story cover. Something like that:
LiveInternetLiveInternet
—Categories
- dacha (501)
- pharmacy (486)
- baking pies (373)
- knitting collars (174)
- pumpkin dishes (157)
- baking cupcakes (154)
- baking pies (151)
- meat recipes (98)
- embroidered shirt (84)
- Easter baking (70)
- recipes for guests (68)
- quick recipes (68)
- liver recipes (60)
- baking pancakes, pancakes (50)
- porridge recipes (27)
- soup recipes (24)
- MULTICOOKER (17)
- chicken (5)
- porridge (2)
- soup (2)
- recipes home. cheese (9)
- one pot recipes (3)
- beads (197)
- vegetable dishes (612)
- fish dishes (284)
- all sorts of interesting things (71)
- baked goods (93)
- baking without oven (117)
- baking buns (108)
- unsweetened pastries (154)
- baking cookies, shortcakes (284)
- baked goods with cottage cheese (360)
- baked goods with fruit (441)
- baking cakes (453)
- embroidery (643)
- knitting (1783)
- blouses, jackets, sweaters (217)
- dress, sundresses, skirts (203)
- knitting pattern calculation (14)
- Irish knitting lace (398)
- knitting socks, slippers (77)
- knitting hats (1206)
- knitting scarves, stoles, gloves (149)
- clothing decor and various tips (5)
- dessert (68)
- for children (237)
- filling out a diary for dummies (76)
- crocheted toys (2323)
- toy making lessons (75)
- crochet flowers (73)
- for translations (59)
- message codes (3)
- conservation (348)
- preserved jam (272)
- educational program on computers (71)
- music (64)
- drinks (42)
- pizza (25)
- useful tips (209)
- weight loss (145)
- recipes all from minced meat (126)
- all recipes with potatoes (95)
- all recipes with chicken (264)
- miscellaneous recipes (81)
- salad recipes (281)
- wedding (6)
- funny. (6)
- sauces, gravies, mayonnaise (51)
- bags (234)
- knitting patterns (641)
- clothing decoration (394)
- knitting lessons (296)
- sewing lessons (379)
- comfort (155)
- sewing trousers (108)
- sewing modeling (115)
- sewing (570)
- skirts (231)
-Music
—Search by diary
—Subscription by e-mail
-Statistics
Glitter and glitter bottles
New Year is all about radiance, brilliance, fireworks, colorful lights. An excellent option for decorating a bottle of champagne. Use glitter, loose glitter of different sizes and colors, and glue. Apply it to the entire surface of the glass and while the glue is still wet, carefully apply the glitter so that it is distributed as evenly as possible. You can use the ombre technique so that the bottle has beautiful color transitions:
Large sparkles also look beautiful, they can even be mixed with confetti:
Decorative details for decoration
Clothing for a bottle of champagne for the New Year can consist of individual beautiful New Year's details. We suggest you first look at the ideas and then try to make them:
Use regular corks and glue to create a decor that will fit perfectly on the New Year's table.
And a hat with a beard will help you dress up the bottle as Santa Claus:
The hat can be made from felt, felted from wool, or any other material. Use cotton wool or special decorative material as a beard.
Ribbon, bow and Christmas tree decorations and your New Year's clothes for the bottle are ready.
Remember what New Year's compositions we have already suggested you make using fir branches, beads, pine cones and other decor. It can be used to decorate alcohol:
Simple manufacturing methods
For a Santa Claus figurine, it is enough to prepare the necessary materials and tools. You can easily find them without leaving your apartment. The simplest option for creating a New Year's character involves using an empty plastic bottle.
From a standard bottle
This method of making a New Year's character is considered the most economical. This is explained by the fact that the work will use items that are unlikely to be used for any other purposes.
Santa Claus made of plasticine. New Year's craft
List of required elements:
- a standard plastic milk or soda bottle;
- cotton wool;
- sheets of red paper;
- black plasticine;
- red napkin;
- empty pill packaging;
- scissors;
- a simple pencil;
- quick drying glue.
In the process of making Santa Claus, you can also use various decorative elements. With their help, it will be easy to create the smallest details of the image and turn the product into a real masterpiece.
The process of making a fairy-tale character is simple and consists of the following steps:
- The empty plastic bottle is thoroughly washed with tap water. It is important to approach this work responsibly, as leftover milk or drink can ruin the appearance of the finished figurine.
- The container is left for a few minutes, which is necessary for the remaining moisture inside to evaporate.
- The red napkin is rolled into a tube and carefully inserted into the neck of the bottle. If one piece is not enough, you can add several more items of the same color.
- At the next stage of work, the eyes of Santa Claus are made. To do this, take an empty package of tablets.
- Using scissors, separate 2 adjacent cells.
- Pupils pre-molded from black plasticine are placed inside.
- The cells are covered with back foil and then glued to the outer surface of the bottle.
- A piece of cotton wool is rolled into a circle to be used as a nose.
- It is glued to the base at a short distance from the eyes.
- A cone scan is applied to a sheet of red paper.
- It is then cut out, folded and glued at the contact point.
- A piece of cotton wool is attached to the top of the formed headdress, and a frill of the same material is attached to the bottom.
- A long blank (the future mustache) is rolled out of cotton wool, which is placed above the nose of the fairy-tale character.
- The beard and hair are done in the same way.
- All parts are glued to plastic.
Separately, you can make a staff, which should be leaned against the figurine. If you have the desire and time, it is recommended to decorate the fairy-tale hero with affordable decorative elements.
Some more very unusual ideas
Sequins, twine, stones and the boundless imagination of the needlewoman are used here. And the next option is very gentle and is more suitable for a wedding. But if you choose darker lace inserts, it will also work for the New Year:
How do you like the decoration with pasta? The photo shows empty bottles, but what's stopping you from decorating a bottle of champagne with pasta?
The pasta can be glued in a chaotic order and both the bottle and the decor can be painted over with spray paint, or you can paint the decor separately and only then glue it on.
To make the New Year holidays fun and festive, decorate your home with various cute little things that will make it fabulous and magical. In addition to the New Year tree, garlands, snowflakes on the windows and festive compositions, it is worth taking care of an unusual table setting. Choose a beautiful tablecloth, dishes, crystal glasses, bright napkins, arrange candlesticks with decorative candles and don’t forget about champagne, without this drink the New Year is somehow incomplete. Not just champagne, but a bottle in the shape of Santa Claus will look original on the table. We will tell you how to make a similar decor from felt with your own hands below in this master class with step-by-step photos.
To decorate champagne, we will need:
- champagne;
- red and white felt;
- pencil and ruler, lighter, scissors;
- red bias tape 10 m;
- red ribbon wide 2.5 cm – 2 m;
- lace, sequins, half beads;
- Kinder egg for Santa's hat;
- glue Moment (gel) I only use it. You can take any other one that you are used to.
To begin with, we make a base cylinder for champagne. We take felt 20x30cm, this piece of felt is just right for champagne. We try the rectangle on the bottle and glue it, but so that the cylinder can easily be put on and removed from the bottle. I glued it end to end with satin ribbon.
Now we make the shoulders: cut the felt vertically to the point where the bottle becomes straight. These strips were cut off on both sides (shown by the black line in the photo) to make the case shaped like a bottle.
Next we glue the strips. I glued it end to end on the inside with satin ribbon. I didn’t photograph this moment right away, I’ll show it at a later stage of the work.
This is the preparation I got
The most important thing is to make a beautiful shape for the decoration, so that it is even and easy to put on and take off. At first I made it from paper, but there are bumps on the workpiece and they are very clearly visible. Then it is very difficult to hide. I decided to try it with felt and was right. Of course it's a little more work, but it's worth it. The base turned out smooth. Another advantage of felt is that it stretches; if you pull the binding a little during the process of braiding the bottle, then together with the felt you can slightly adjust the size.