Before the onset of the New Year, a lot of trouble awaits us - we are thinking over options for celebrating the holiday, scouring the Internet in search of unusual dishes for the menu, looking for the most beautiful Christmas tree at the markets and, of course, preparing New Year's decor and gifts. Of course, modern industry allows you to solve many issues with one visit to a megamarket or large shopping center - here you will definitely find a variety of garlands, Christmas tree balls, toys and themed figurines.
However, the assortment of stores remains the same from year to year. In addition, you can only buy Chinese jewelry without spending too much on your budget, and exclusive glass toys are not cheap. The same problems begin to bother us when looking for gifts for colleagues and distant acquaintances - it is not possible to buy everyone a good surprise, and we absolutely do not want to give an inexpensive figurine in the form of the symbol of the year or a Christmas tree candle.
Garnish the champagne before serving to wow your guests!
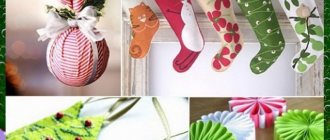
We will show you a way out of this situation! It’s no wonder that handmade decorations and surprises have become increasingly popular lately. All kinds of handmade items are a great way to make a lot of gifts that will cost you little, but will look like real designer items! Spend a couple of evenings on creativity - and fairy-tale pictures will appear on your windows, your Christmas tree will be decorated with unusual toys, and everyone you know will receive a nice New Year's present.
One of the items that can be themed around is a bottle of champagne - the most traditional New Year's drink. Moreover, such a decorated bottle of sparkling wine has enormous New Year’s potential - decorated champagne can be given to colleagues, played as a prize at a corporate event or party, or simply placed on a festive table to be opened before the New Year 2020.
Traditional decoupage of bottles for the New Year
The traditional design of a New Year's bottle is accessible to absolutely everyone: this type of decor does not require a “stuffed” hand, expensive materials, or napkins with original images. For traditional decoupage, everything that can be easily found at home (white gouache, glue, brushes of different thicknesses, paper, glitter and cotton wool, scissors) and bought at a hardware store (colored interior paint, finishing coat - varnish) is quite suitable.
Before decorating, you need to decide on the base material to cover the bottle. For traditional decoupage, interior or artistic acrylic paint, gouache with glue are suitable. Since white paper, cotton wool and silver sparkles will be involved in decoupage, the color of the base should be different: for a New Year's theme, blue, light blue, and red are suitable.
When choosing a gouache coating with glue, it is worth remembering that they need to be secured with a non-water-based finishing varnish.
When the base layer has dried, you can move on to the second stage of traditional New Year's decoupage - applying applique.
Namely:
- We cut out snowflakes of different sizes and shapes from plain paper;
- Before gluing, we apply the applique to the bottle in order to have an idea of where the elements will need to be glued (you can use a pencil to mark the places for the snowflakes and inscriptions to distribute the ornament evenly);
- We place the dry elements on a dry surface, coat the top with special glue for decoupage or PVA, diluted one to one with water.
Apply glue from the center to the edges, avoiding the appearance of creases, folds and air bubbles. Next, we apply the inscription “Happy New Year” in calligraphic font using white paint, and decorate the bottle with glitter and cotton wool. Place cotton wool with PVA glue around the neck of the bottle (small pieces of cotton wool can be glued in the center of the snowflakes). We use glitter mixed with glue to decorate the applique, inscription, draw geometric snowflakes all over the bottle, etc.
Step-by-step master class: decoupage a bottle for the New Year using napkins
Decorating with napkins is the most popular type of decoupage, which makes it possible to get an original, beautiful craft. In order to decorate a New Year's bottle in this way, we will need: tableware, New Year's themed paper napkins; the basis; silver paint; regular foam sponge; PVA glue; tassels; scissors; optional, decorative sparkles, sequins, etc.
To get an original, beautiful product, we need:
- Apply base. As a base, you can use a white artistic primer or acrylic paint. In order to obtain a voluminous, unusual relief in the decoupage style, the base should be applied with a sponge. Coating in this way must be done in several layers (an additional layer can be applied only after the previous one has completely dried).
- Prepare applications. We cut out the elements we like from the napkin (this could be the inscription “Open for the New Year”, an image of Father Frost, the Snow Maiden’s granddaughter, a snowman, an elegant Christmas tree, New Year’s toys, etc.). If you decide to use the entire napkin (for example, if it is a napkin with a winter landscape), then it is advisable to reduce its size as much as possible by cutting off unnecessary edges.
- Glue the appliqués. We glue the elements using PVA (diluted with water 1:1) or special decorative glue for decoupage. Place dry elements on the dried surface and begin gluing from the middle to the periphery.
- After the applications have dried, we continue decorating the bottle using silver paint. We apply the paint with a foam sponge, going over the applications and thus hiding their borders, over the entire surface of the bottle. The inscription “Happy New Year” can also be loosely coated with silver, and then duplicated with white or colored acrylic paint.
- We wait until the layer dries completely and add decorative elements (for example, you can add shiny sequins or beads to the image of an elegant Christmas tree, and add a white decorative primer applied with a sponge to the winter landscape as snow, etc.)
After the product has dried, we coat it with a finish - a special decorative varnish.
Decoupage of bottles for the New Year with textiles
Decoupage of bottles with textiles is an interesting and unusual design method, which this master class will help you implement. To decoupage bottles with fabric, we will need: thin white fabric, a napkin with New Year-themed images, acrylic paint to match the motifs on the napkin, PVA glue in a 1:1 ratio with water, finishing coat.
To design a bottle you need:
- Prepare the surface (remove the labels and degrease it with alcohol, acetone) and the application (cut out the elements from a napkin).
- It is good to soak the fabric in a container with an adhesive solution and place it on the bottle, forming folds and leaving space for the images.
- After the fabric has dried, glue the applique using PVA or decoupage glue.
- Cover the fabric with gouache or acrylic paint to match the applique (if the drawings have clear edges, then it is not necessary to paint over them).
- Dry the product naturally or with a hair dryer and open it with a fixative.
The varnish should be chosen depending on the base (acrylic or gouache) and the desired effect (for example, yacht varnish will give white images and backgrounds a yellowish tint).
Decoupage of New Year's bottles (video)
Bottles decorated using decoupage will become an original New Year's present for family, friends and colleagues, a unique decoration for the New Year's table, will appeal to both adults and children, and will create a festive mood! Choose the equipment you like and create an unforgettable holiday atmosphere!
3. Simplicity. This is an excellent solution for lovers of simple and democratic design. To create decorative items, newspaper clippings, colored paper, and pages of glossy magazines are used. An excellent choice for a youth party. 4. Victorian style. The direction simultaneously combines elements of luxury and classics. The color scheme includes green, cream, gold, and burgundy shades. This amazing color combination will fit perfectly into your festive New Year's decor.
These are not all decorative options that can be used to decorate a bottle for the New Year. However, they look very beautiful, so we recommend paying attention to them.
Consider also. Our step-by-step photos and instructions will help you make this craft in no time!
How to decorate a bottle of champagne for the New Year with your own hands
Necessary materials:
Plastic knife - PVA glue - bottle - primer - decoupage napkin - 3 pcs. - silicone sealant - clear acrylic varnish - large and small brush - scissors
Manufacturing process:
Prepare the container for decoration - wash and remove the labels. Apply a layer of primer with a wide construction brush. After an hour, the glass surface will dry, carefully apply a second coat. A fragment of images must be laid out on a well-painted, bright background. Cut out the desired motif from the decoupage napkin and separate the top layer of the napkin. To carefully glue the motif to the surface, take a simple file, place the cut out design in it with the outer side down and gently sprinkle with water. As soon as the napkin is wet, straighten out all the folds, drain off excess water, and transfer to a surface coated with PVA glue.
Using your fingers or a brush dipped in glue, smooth the napkin. As soon as the drawing dries, coat it with the next layer of PVA. To give the image volume, apply silicone sealant to some fragments. Level the sealant over the fragment and leave to dry. Take a second similar decoupage napkin. Cut out the parts that you plan to add volume to. They must be immediately applied to the sealant. Cover the bulk parts with a thin layer of PVA and wait until completely dry. Give your craft a glossy shine by using clear acrylic varnish. Tie a beautiful bow to the neck.
DIY champagne bottle - master class
Materials needed:
Multi-colored glitter - paper or newspaper - glue - rubber gloves - champagne
Stages of work:
Coat the container thoroughly with glue, distribute all the glitter, and leave to dry. To add originality, decorate the bottle with additional details. It is not necessary to cover the entire surface; you can also alternate different colors. This decor option will look simply amazing!
Do the same. To create, you will need the simplest tools, materials and a little patience.
DIY New Year's champagne bottles
Option with candies.
You will need:
Hot glue gun - plastic decorative beads - chocolates - Christmas tree decoration with pine needles and bow
How to do:
Cover the container with candies, moving from top to bottom. Place the candies asymmetrically so that the craft looks natural. As a result, you should have a “nut” bunch. It should decorate the bottle on one side. At the very end, decorate the craft with Christmas tree decorations.
DIY champagne bottle photo
:
Try making this interesting craft:
You will need:
Acrylic paints - PVA glue - semolina - napkin - acrylic varnish - champagne
How to do:
1. Remove the label from the vessel and thoroughly degrease the surface. This can be done using an alcohol solution or dishwashing detergent. 2. Using a foam sponge, prime the container with white paint. A total of 3 layers are required. 3. Take a napkin with a suitable picture. Place it on the file with the reverse side, carefully wet it with a damp brush, straightening out all the wrinkles and bubbles. Allow excess water to drain. 4. Attach the napkin with the file to the surface, smooth it through the file. 5. Carefully pick up the file from the edge and begin to remove it, holding the napkin so that it does not drag behind it. 6. As soon as you remove the file, glue the napkin with PVA glue, diluted in advance with water in a ratio of 1 to 1. 7. Dry the napkin, proceed to further decoration. 8. Paint the back of the vessel. The color of the paint should be as close as possible to the color of the napkin. 9. Draw snowflakes on the back side. 10. Make snow drifts. To do this, use semolina and glue. Lubricate suitable areas with glue, sprinkle semolina on top, and let dry. Repeat the procedure again. 11. Do the same with the top of the vessel, wait until it dries. 12. Prepare a foam sponge, apply a layer of paint (white). 13. Apply a layer of acrylic varnish.
DIY champagne bottles for the New Year
.
Try one of the simplest, but very effective decor options.
Take a bottle of champagne and apply a layer of glue on top. This is very convenient to do with a brush or spray. Roll the vessel in confetti or large glitter so that it completely covers the greased surface. You can leave only the neck without decoration. This decorative option can be used for all types of surfaces, so use it to create a wide variety of crafts. You can alternate large and small sparkles, in this case the craft will look even more beautiful and original.
Pay special attention to the lid. It can be decorated with a blue or satin ribbon, New Year's tinsel, rhinestones, beads, seed beads, etc. However, it also looks impressive on its own, so if you have very little time, leave it as is.
New Year is a holiday for which it takes more than a day, or even one week, to prepare. Experienced housewives create menus, experiment with options for preparing holiday dishes, and create crafts to decorate the house. For table decoration, you can make a bottle, the creation of which we described in detail in our master classes.
In the pre-holiday hassle, there is not always enough time to look for gifts for family and friends, and decoupage of bottles for the New Year can help you out.
Without leaving home, without spending effort or extra money, you can make an unusual gift with your own hands that will surprise and delight absolutely everyone with its originality.
Photos of the best options for decoupage of a glass jar
Decoupage for beginners.
Master class “Coffee Preferred Set.” Coffee
is one of the oldest and most popular drinks in the world.
It is not without reason that Ethiopia is considered the birthplace of this wonderful aromatic drink, on whose territory the province of Kaffa was located, where a simple shepherd discovered the unique properties of coffee. This happened a long time ago, around 850! So says the legend... Today, the victorious march of coffee across the planet continues successfully, since coffee production has become a real industry in which new trends regularly appear. There are hardly many people for whom morning coffee would not become one of their favorite traditions that gives them energy for the whole day! Ivashchenko Victoria Nikolaevna, teacher of additional education at the Municipal Budgetary Institution of the Secondary School of Education and Science of the City of Salsk, Rostov Region.
Description of work: The master class is designed for children of primary, middle and high school age, teachers and parents. Purpose: Gift, kitchen interior decoration. Goal: creating the “Coffee is Preferred” set with your own hands. Objectives: - learn to create interior items using the “direct decoupage” technique; — improve skills in working with the necessary materials and tools, observing safety rules; — develop individual creative abilities and artistic taste; - cultivate diligence, perseverance, accuracy in work. Materials, tools: - glass coffee jar; — 2 plywood blanks of small boards-stands for cups; - PVA glue; - scissors, brushes; - acrylic paints “gold”, “bronze”, white, brown; - acrylic lacquer; - universal acrylic contour; - foam rubber; Decoupage card “Roses”; - leg-split; — universal glue “Dekokley”; - burlap; — decorative elements (half beads, dried star anise flower, cinnamon sticks, coffee beans); - sandpaper, - floral “grass”; - wet wipes. Progress:
If, while cleaning your pantry, you come across an old glass coffee jar, do not rush to throw it away: glass is the most environmentally friendly and beautiful packaging for any product.
Any container can be beautifully decorated, while giving a second life to a seemingly unnecessary item. Let's disassemble and thoroughly wash the jar, then dry it thoroughly. Let's cover the surface of the jar, except the lid, with white acrylic paint, using a piece of foam rubber. Let's leave it to dry and work on the coasters for the cups, sanding them. Let's cover the coasters with white paint, just like the jar before. While the surfaces are drying (which takes very little time), we select a decoupage card with a floral pattern and cut out the elements we like according to the size of the surfaces to be decoupaged. We pour coffee beans into the lid, pursuing two goals: decoration and creating a supply of coffee for a rainy day. Carefully seal the lid. By diluting PVA glue with water in a 1:1 ratio, we perform decoupage work. We cover the surfaces with craquelure varnish, avoiding decoupage elements. Let's dry it. After the paint layer has completely dried, apply brown paint over the varnish layer. Artificial aging cracks appear, which is very important now. When the paint layer dries, very carefully apply bronze or gold paint and rub it with a napkin. Using a universal acrylic outline, we point out the decoupage elements. Varnish the surface with acrylic varnish in at least three layers. Let's dry it. We take out decorative elements that we may need from the treasured “handicrafts chest”. It is far from certain that all decorative elements will be needed. You may have to turn to your treasured chest again, because ideas come in the process of work: nuances are always important! We start with a jar, decorate the neck of it by wrapping it with twine and gluing a neat twine bow. Then we decorate the top of the lid by placing decorative grass, anise flower, coffee beans, half beads and cinnamon sticks on a piece of burlap. We use any transparent universal glue that is not afraid of moisture. We decorate the coasters for cups more modestly, but emphasize that they are intended for coffee
cups! As a result, we get a decorative and utilitarian set for coffee lovers.
An ordinary coffee can is primitive and not very interesting. It’s better to make an almost masterpiece using very simple materials and tools. The result is a practical coffee can, but with a unique artistic design. We will use the simplest decoupage technique. The most basic thing we need is a napkin with an interesting vintage pattern. Materials and tools for decoupage of a glass jar:
- napkin with a decorative pattern;
- PVA glue ;
- water;
- acrylic pearl varnish;
- white acrylic paint;
- pigment - concentrate;
- brush;
- jar is the basis.
How to decorate a jar for coffee or tea? Yes, very simple! You need a little time and the necessary materials. The decor of a coffee can is done like this:
1. Degrease the surface with alcohol. 2. White acrylic paint is diluted with concentrated pigment. For this case, a slightly lilac color was suitable. Mix the paint.
3. We paint the glass part and the lid. It is most convenient to paint using a sponge. Apply the paint in three layers, giving each layer time to dry.
4. Cut out the required part of the napkin, separate the two lower layers that come without a pattern from this paper element.
5. Dilute PVA glue with water. The ratio of the mixture components is 1:1. 6. Apply the napkin element and coat it with diluted glue with a brush over the entire surface. In this way we apply all the selected elements.
7. When the glued elements are completely dry, we coat the entire area of the jar and lid with acrylic-based pearlescent varnish.
8. The decorative coffee jar, which can be used for its intended purpose, is ready!
What is decoupage
The decoupage technique is an appliqué made from various materials that are easy to shape. Various pictures are cut out, attached or glued to the surface to be decorated, followed by processing. For beginners, the process will seem impracticable, but this is only at first glance. The main condition is patience and a little imagination. The result will be a masterpiece that is in no way inferior to antiques. This idea gave home craftswomen the idea of making New Year gifts from bottles with their own hands.
Design options
Classic (straight)
Suitable for beginners. In this format, you can easily and quickly learn how to glue selected paper pictures (napkins, cardboard, photographs) onto a prepared base. As a result, you achieve complete coverage of space;
Reverse (illustration inside)
Used for clear glass. The element is glued with a pattern to the glass, decorated with a background accordingly, thereby creating a window behind which the intended content can be seen;
Artistic (smoky)
To perform in this format requires some experience in using color (shading, stretching, shadows). Paint with halftones and shadows is applied around the selected image, the result is a non-standard picture on glass;
3D volume – living design
To work, you can use fabric, relief paste, beads, ribbons, flowers, branches and many different little things. By connecting the elements in the planned sequence, you get the expected unique three-dimensional pattern.
Decopatch is considered a type of decoupage. The principle is to cover the required area with small pieces of paper. This way the entire product is covered, creating the appearance of an antique cracked painting.
New Year bottle design options
Since preparations are underway for the New Year, Christmas motifs should be present in the equipment. The most popular material for work is three-layer paper napkins, with New Year's drawings or photos. In addition to these you will also need:
- PVA glue, if there is no special one for decoupage;
- acrylic paint (in this case white);
- acrylic varnish, preferably transparent;
- nail polish remover (always on hand);
- cotton pads;
- red and green ribbons, each 1 m long and 0.5 m wide;
- dry sea salt (the grind should be fine);
- brush for varnish and glue;
- sponge or paint brush;
- paper and scissors;
- rubber spatula;
- container with water.
When all the auxiliary materials and tools are prepared, you should pick up a wine bottle, and it will be even more interesting if it comes with contents. An alternative would be to decoupage a bottle of vodka for the New Year.
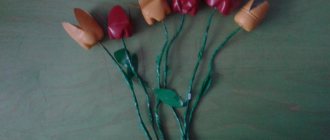
Champagne and tangerine pineapple
Today, master classes on making pineapple from champagne and sweets are especially popular. But now we want to tell you how to decorate a bottle of sparkling wine with tangerines and get an original decoration for the festive table for the New Year with your own hands.
Material:
- a bottle of champagne;
- tangerines;
- satin ribbon;
- corrugated paper;
- corrugated cardboard;
- sisal;
- twine thread;
- glue.
Master Class:
- First, let's prepare the tangerines; to do this, we tie each fruit with a satin ribbon as shown in the photo, and fasten the ends of the ribbon with glue.
- We take the bottle and cut out the base from corrugated cardboard to the size of the bottom.
- On one side of the cardboard base we glue a small square cut from orange corrugated paper.
- On the other side we glue a square, which is 1 cm larger than the circle.
- We cut off the sharp corners of the square, apply glue to the edges and glue the paper to the cardboard.
- Now we also cut out a rectangle from orange corrugated paper, the size of which should be 2.5 cm below the bottom of the bottle and not reach 4 cm from the neck.
- Next, measure 3 cm from the top on the paper, make holes into which we insert a green satin ribbon.
- Then we retreat 2.5 cm from the bottom and glue the cardboard bottom.
- Apply glue to the remaining 2.5 cm of paper and glue it to the bottom as well.
- Insert a bottle of champagne into the resulting bag and tie a ribbon on a bow.
- Now we take the tangerines, apply glue to the tape and glue the fruits in one row.
- Next, just above the tangerine we glue green sisal.
- Then we again make a row of tangerines, and so on until the neck.
- Cut out a rectangle from green corrugated paper, wrap the neck, and glue the edges.
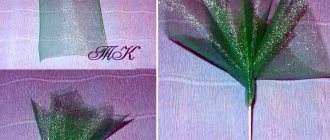
- Now we also cut out 12 blanks measuring 10 by 4 cm and 8 blanks measuring 16 by 4 cm from green corrugation.
- We make leaves from each piece. To do this, cut off the sharp edges, pull in the middle and stretch with scissors.
- And now we glue the leaves to the neck. We make the first row of 4 smaller petals, then glue the 2nd and 3rd rows in a checkerboard pattern. For subsequent rows we use larger petals. We glue the last row onto the bag so that the bottle can be easily taken out of it.
- We decorate the bottom of the neck with sisal and tie it with twine. And the end result was such a tasty, aromatic and bright pineapple.
We invite you to familiarize yourself with what a fishing balancer looks like
DIY bottle decoupage master class
First of all, prepare a bottle of wine by placing it in a container with warm water so that the labels are wet. Wait until they move away. Then, using a cotton pad, apply nail polish remover to the bottle and degrease the surface. Then paint it white. The number of layers depends on the covering power of the paint, through which the glass should not be visible.
The next stage is working with napkins. They need to be divided into layers; only the upper part, which has a pattern, is suitable for decoupage. We cut out those motifs that we like best or that are suitable, and first think through their location. There are two gluing options to choose from: stick the design on the base on top of the glue, or first apply a napkin and apply a layer of glue on top. The result is the same, the choice is up to the craftswoman.
Attention must be paid to this point: when gluing the napkin, it must be ironed with a spatula so that air bubbles do not collect. In this way, the entire bottle of wine is gradually coated with glue and each of the napkin elements is glued step by step. The resulting decoupage should dry well, then use a brush with acrylic paint to walk along the edges of the design to smooth out the outlines. Now coat the entire surface with varnish in several layers, allowing each of them to dry.
The final stage. Depending on the design decision, coat individual areas with glue and roll these areas on a sheet of paper with salt sprinkled on it. The result will be a snow effect. And tie the neck of the bottle with ribbons, tying a bow. The end result is a bottle of wine in a gift box.
This was bottle decoupage for the New Year for beginners. A photo or video master class will serve as a visual example. For those who are not new to this technique, we can offer a more complicated option.
What other materials should I use for decoupage?
In this master class we used the simplest material - a paper napkin. But needlewomen always have a reasonable question: what else can be used for decoupage? The following materials are great for decorating glass jars:
- Old newspapers (the older the better) - they make a great vintage style jar)
- Notes.
- Textile.
- Cereals (yes, rice, beans, buckwheat or millet make an excellent “edible jar”). Just after work, do not forget to fill your work with varnish or epoxy glue, otherwise bugs or ants may appear in the grain.
- Ribbons and lace are suitable for decorating jars in baby-style.
- Rhinestones and nail stickers - unexpected, right?
In general, whatever material you choose, it must be thin so that it sticks easily. Well, after finishing work, do not forget to use a protective varnish.
The idea of a master class on decorating using the decoupage technique with an aging effect came to me thanks to a very creative person, the author of the blog about knitting We create - don’t be lazy!))) - my friend Elena Tvorogova.
In the comments to the master class on decorating a jar of cream using the decoupage technique with two-step craquelure, Elena asked to show some way to create craquelure without resorting to the use of water mordan and gum arabic, which I love so much.
And although today’s master class will not directly touch on the topic of creating craquelure using inexpensive improvised means (you can read about this), I hope it will be no less useful and interesting.
You can age the surface of a new product, giving it the appearance of an old, rare, well-used item, not only with the help of craquelure. Today I will show several techniques for aging surfaces that are no less popular among decoupage artists, which, moreover, do not require the use of special expensive materials.
We will talk about artificially created abrasions - a technique that is often used to decorate decoupage works in the “shabby chic” style, and about spraying. Both of these techniques, no worse than craquelure, allow you to create stylish vintage items using improvised materials.
Decoupage champagne
The main attribute of the New Year's table are bottles of champagne. So why not add a pop of color to your holiday table setting? An interesting and unusual way to decorate bottles with your own hands - with fabric. Basic materials as in the previous version, only minor changes:
- instead of wine, let's take a bottle of champagne;
- a piece of fabric, preferably cotton;