It's time to find out if you can make a built-in bookcase with your own hands.
The following video will teach you how to make such a bookcase in just 15 minutes:
Built-in and with glass
A classic five-wall corner wardrobe can be used as a complement to existing furniture or as an element of a complete composition. It is distinguished by its special depth of shelves, blank side walls and large dimensions. It is not recommended to install it separately - it will take up a lot of space and will bring little benefit.
The assembly and installation of a built-in wardrobe is not ideologically different from the assembly of a classic wardrobe. Difficulties may arise when attaching the top part - it is important to maintain a 90-degree angle between the parts.
Making a bookcase with glass doors with your own hands will also not be difficult if you use our tips. If you like products with glass doors, you can easily order them in furniture stores and factories. There is always a ready-made door for standard cabinet sizes; a special one will be made for unusual models. All that remains is to attach it to the assembled cabinet.
DIY bookcase with glass doors
Wardrobe drawings with dimensions
A wardrobe is an essential piece of furniture in the house. But what if the family budget cannot bear its acquisition? The idea of creating a wardrobe with your own hands has its positive aspects: you can design the product in accordance with the wishes of family members, adapt its dimensions to the dimensions of your apartment and acquire skills that will be useful in the future while working on the item.
Also, on assembly you can save about 2/3 of the cost of a similar product purchased in a store.
- Creating a Project
- Installation process
Preparing cut parts for assembly
Creating a Project
You should start with a project that will help you imagine what the final appearance of the cabinet will be and will become the basis for all subsequent work on cutting parts and their further assembly.
Having at your disposal drawings of the wardrobe with dimensions, you can calculate the material for all parts.
It is better to make the body and outer shelves from laminated chipboards. For the internal filling, ordinary chipboard is used, and plywood is used for the back wall.
Please note that in the model diagram, the outer case walls are 10-15 cm deeper than the internal filling (shelves and partition walls).
This is necessary so that later there are no difficulties with installing mechanisms for installing sliding doors. It is not necessary to build a closet exactly this wide. If the area of the apartment does not allow it, or your needs require smaller furniture, one of the sections can be removed.
Another important point.
In order to easily lift the finished product, the diagonal length of the side wall should be several centimeters less than the height of the walls of the room. Otherwise, it will be impossible to install the cabinet in place, since its top will rest against the ceiling.
Having checked the dimensions again and drawn up the detailing (the quantity of each part with its exact dimensions) of all the elements, we order them to be sawed in a furniture workshop.
It should be taken into account that laminated chipboard has a certain structure, and errors in the description of dimensions will affect the correct cutting of parts. For example, a part designated as 800×600 is different from a part designated as 600×800—this can be seen in the photo.
All dimensions are indicated only in millimeters to avoid confusion when cutting out cabinet parts. In the same workshop you can order sliding doors, rollers and guides for them.
Projects - archives of 3D models PRO100
Each item will have a tag attached to it with the details listed on the detail sheet.
Having sorted out the details, the places where the shelves, bottom and top are attached are marked on all future walls, and holes are drilled for their installation. This must be done at the initial stage, since later, once assembled, working with a drill will be inconvenient and you can make a mistake or make a defective hole.
All ends that will be on the front side should be refined by covering them with edge tape in the color of the chipboard.
Having cut a piece of tape of the required length, it is applied to the end and ironed with a hot iron (an old one, which you don’t mind).
The glued strip is pressed firmly onto the surface by hand, and after the glue has cooled, the edge of the edge is cut off with a sharp knife. Trimming one side must be done in one go, without stopping the knife blade, otherwise burrs will remain on the decorative tape.
After this, the cut corners of the edges are sanded with fine sandpaper.
Installation process
It is important to take into account that it is easier to assemble the cabinet parts on the floor, laying them out on a flat plane. You can do the work yourself, but it’s more convenient if you have an assistant who can support the part being mounted in a timely manner or hand over the tool. If the design has legs, they are screwed to the bottom first.
Since the box is quite large, the legs are arranged four in a row every 75 cm. To avoid scratching the floor during installation of the finished product, felt pads are glued to them.
After this, the side walls are attached to the bottom of the cabinet.
At this stage, you need to make sure that the frame parts are at an angle of 900 in relation to each other. To do this, you can use a template made from two perpendicularly connected planks.
Now we join the side walls with the upper plane.
Their ends are positioned in relation to each other so that the top overlaps the end part of the walls. From the very beginning of assembling the parts, you should ensure that the parts are laid face down.
If it turns out the other way around, then you will have to turn the frame over to attach the back wall, and this, firstly, is extra work, and secondly, the frame does not yet have sufficient rigidity and may warp.
After this, in accordance with the drawing, internal partitions and shelves are mounted.
The main body of the cabinet is assembled and it's time to nail the back wall. It can consist of one solid piece of plywood or joined together from several parts. The wall should be nailed with small nails 3 cm.
You need to hammer in the nails carefully, placing them vertically in relation to the end, otherwise you can chip the chipboard.
Along the upper and lower edges, nails are punched at a distance of 15 cm, and on the sides the gaps can be left larger: 20-25 cm.
The finished cabinet frame is installed in place, and the rail mechanism is installed.
The top guide is screwed on first, and then the bottom. This order was established so that when attaching the upper strip, you do not accidentally damage the already installed lower guide.
If it turns out that the guide is slightly longer than the required size, the excess is cut off with a hacksaw.
Sliding doors are installed last.
Putting them in place yourself will be very difficult, especially if they are made of glass or have a mirror surface, so you will need the help of a second person.
Perhaps the assembly will take more time than you planned, but your home will be decorated with such a modern hand-made wardrobe.
A bookcase is characterized by two main qualities:
- significant weight of books
- shallow depth and a large number of shelves.
These qualities determine the main compositional and design features of the bookcase.
Step-by-step instruction
To fulfill such an idea, you will need healthy enthusiasm, start-up capital, working tools and the following instructions.
Step 1. Think of a place for your future closet.
Step 2. Decide on the type of bookcase. Only based on this choice can you proceed to the next stage.
Step 3: Take measurements. If you have already figured out the area where the cabinet should be located in the future, it is very important to measure this place in order to understand what size cabinet you need.
In this matter you need to be very careful and precise. As the saying goes: “Measure twice and cut once.” But it’s better to measure it ten times, especially if at school you didn’t have much success either in geometry or in works.
Step 4: Make drawings. This is perhaps the most difficult and responsible point. A competent drawing means a wonderful bookcase is almost ready.
You can find various versions of drawings on the Internet and adjust them to your dimensions. If the idea of a unique designer cabinet is firmly stuck in your head, draw its diagram yourself.
Step 5. Purchase building materials. The most common and cheapest option for making furniture is chipboard.
For normal cutting of chipboard, you need a special, expensive tool, so show your drawings to a specialist who works in the place where you purchase the material, and he will easily solve your problem at a reasonable price.
You can find out how to make a rack here.
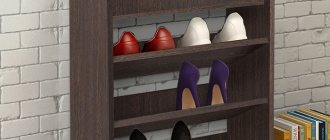
And this article will tell you how to make a shoe cabinet.
But chipboard shelves are short-lived; they soon sag and break under the weight of books. It would be more practical to use MDF - a denser material made from tightly compacted sawdust, or various types of natural wood.
So, you will need:
- MDF, chipboard or wood, cut according to your drawings;
- plywood for the back wall of the cabinet;
- drills, nails, nuts, etc.
You can make either an open cabinet, without doors, or a closed one. But it would be more rational to opt for a closed type of bookcase, because in this case dust will settle on the books much less, which will save time when cleaning.
You may be interested in an article on how to make your own wardrobe from plasterboard.
You can read about how to update an old cabinet here.
In addition, constant exposure to direct sunlight leads to damage to books: they quickly turn yellow and become dilapidated. True, there are also people who like to inhale dust and enjoy the look of books stylized as antique. If you are one of them, feel free to choose a bookcase without doors.
Bookcase design
Like any other wardrobe, a bookcase can be made using our online designer. But before you start designing, it is necessary to at least approximately conduct an inventory of the book stock to determine the basic parameters of the shelves. To create a cabinet you need to know the number of books of each typical size (most books have standard sizes)
Such an inventory of books by size will allow you to determine the number and size of shelves. In this case, the area and volume of the cabinet will be used in the most rational way. This geometric arrangement of books is good for small libraries. If a collection of books requires alphabetical or thematic placement, then the shelves will have to be made identical, focusing on large-format books. This method is more logical for organizing books, but is irrational for organizing space.
With any decision, you need to keep in mind that the smallest books are best placed at eye level, and the most popular publications should also be stored there. Large shelves, from which it is inconvenient to take books, are best placed in the upper and lower zones of the bookcase.
What to consider when drawing a cabinet drawing
Before manufacturing, it is necessary to think over the configuration of the product, its location, materials, textures. The optimal placement of a bookcase is in an office for work, living rooms, and spacious corridors. It is not recommended to install furniture under books in children's rooms and bedrooms, as printed materials contribute to the collection of dust.
When drawing up drawings of bookcases, the following dimensions are important: height, width. The diagram indicates not only general parameters, but also data on all elements, the number of blocks for books.
The depth of the shelf for standard publications should be at least 20 cm; for large volumes, at least 30 cm will be required. The recommended thickness of the shelves is at least 2 cm. The indentation for the plinth, which will take from 3 cm, is taken into account.
When drawing a bookcase drawing using a building level, you need to check how level the floor is. If there is a slope, you will need to level the surface or hide imperfections by reducing the height of the legs. The diagrams must reflect the functional details of the cabinet - the location of the lighting, corner shelving, sockets if necessary, etc.
Source: vseme.ru
Construction of a bookcase
Even at the design stage, it is necessary to provide for very frequent vertical walls of the bookcase. For shelves made of laminated chipboard or MDF with a width of 150 - 200 mm, the length of the shelf should not exceed 350 - 400 mm, then their deflection under the weight of books will be invisible.
To avoid such a palisade of vertical walls - the supports of the shelf can be made from an ordinary board with a thickness of 35 - 45 mm. Such a board with a width of 150 - 200 mm can have a free length twice as long - up to 800 - 900 mm, so that the deflection from the weight of the books does not appear. Such boards can be ordered in a carpentry workshop according to the designer’s drawings - no other parameters of the bookshelves will change as a result, except for the gap between the shelves, which will decrease from the transition from MDF to thicker boards. The boards can be laid on the same supporting elements as regular shelves, but it is better to tie the entire structure together at the top and bottom using overhead corners.
You can connect the resulting bookcase from shelves and wall-racks using a back wall made of laminated fiberboard.
After assembling the entire shelf, it is pushed into the design location and secured to the walls to prevent it from tipping over. After such fastening, you can mount the sliding doors, and after them, place the books in their places.
Have you always dreamed of being an interior designer? Or you just don’t know where to inexpensively order high-quality and beautiful furniture? helps your dreams come true. On our website you can find online furniture modeling kits. For example, a constructor for designing a computer desk. Now you don’t need to adapt to the imagination of manufacturers, because you can come up with a design that suits you yourself. you will find all the necessary information. Create a project and order the furniture of your dreams!
Bookcases are usually installed in the living room, but if there is space, they can be located in the bedroom or hallway. This piece of furniture can have different sizes and characteristics, and also has different capacity. Many people love to read books, so to optimally store their library, they need a cabinet that has the right dimensions and other features. If you can’t find the optimal model, then you have the opportunity to make a bookcase yourself from different materials.
Before direct work related to the formation of a bookcase for books with your own hands, you need to determine which model will be created. The designs should be well suited to the style of the room, its color scheme and other parameters of the room.
Bookcase models can be:
- open - they consist of open shelves, so there are no doors. Creating such a cabinet is a simple job that does not require purchasing a lot of expensive materials. The disadvantages include not very presentable appearance;
- closed - such models are considered the most optimal for structures intended for storing books. This is due to the fact that they are equipped with doors, so the books are reliably protected from direct sunlight, dust or possible moisture. For a more attractive appearance of such a cabinet, glass doors are used, but for this purpose glass with high strength is used.
By design, DIY bookcases can be:
- vertical;
- horizontal.
To select the optimal design, it is necessary to take into account the dimensions of the room itself in which it is planned to install the piece of furniture. Additionally, you need to remember about the style of the interior and the availability of free space in the room, since an overly bulky design in a small living room will visually reduce its size and negatively affect its attractiveness.
Additionally, there are different types of cabinets:
- cabinet - most often chosen by many people for the convenient arrangement of a large number of books, newspapers or magazines, and it is also possible to store many other small items. The contents of such a cabinet are chosen by the direct users, so it can be equipped with hinged or sliding doors, and it can also be made without facades;
- modular - consists of a large number of different modules, and they can be combined and rearranged, which allows you to always effectively change the appearance of the cabinet. Thanks to this unusual option, you can embody original design ideas for every room and style. If the room where you plan to install the cabinet is small, then several modules are removed to save space;
- built-in - usually this design is formed by connecting different numbers of sliding doors. The peculiarity of this option is that all walls are fixed directly to the walls of the room, as well as to the ceiling and floor;
- corner - chosen for small rooms. It occupies a certain corner of the room, so significant space is saved. It is well suited for different interiors, is compact in size, has excellent capacity and creates easy access to books.
If you choose a built-in version of a bookcase, then it is advisable to form it in a certain niche of a particular room.
Built-in
L-shaped
Classical
Types of bookcases in the interior - their advantages
Models of book shelving are divided into 2 types: closed and open.
The closed version of the furniture is the most gentle for paper products, since it does not allow dust, moisture, or direct rays of the sun to enter. The disadvantage of closed furniture systems is their massiveness. The designs are not suitable for compact spaces. In models with closed facades, 2 types of doors are used: compartment and hinged.
The open-type furniture façade provides direct access to publications. The models are aesthetic and spacious. Decorative items are also displayed on open surfaces. Racks are suitable for both spacious and small spaces. The disadvantages of the design are the lack of protection from the rays of the sun, moisture, and dust.
Printed materials in open-type structures will require regular maintenance. It is also necessary to pay attention to the humidity level in the room. Designers complement open bookshelves with blocks with doors - hinged or sliding. Additional elements for storage are located in the lower, upper or side parts of the structure.
Bookshelves are divided into horizontal and vertical. The execution option is determined in accordance with the dimensions and style of the room. Based on their shape, there are corner bookcases, rectangular-shaped products and round structures, as well as shelving-type models.
Bookcases are available as cabinet, modular or built-in.
Cabinet structures for storing books and magazines are the most common in interior design. The filling and finishing of the furniture is selected in accordance with the design concept. The product can be with open shelves or with doors: sliding (compartment type), hinged, glazed, etc.
Modular furniture for books allows you to combine elements of different heights, widths, and configurations. The design is universal because it can be located in rooms of different sizes. Modular furniture blocks are easy to disassemble and move.
The built-in design for books is represented by a system with sliding or hinged doors. The furniture is large in size and has deep shelves. The peculiarity of the model is the fastening of parts to the ceiling, wall panels and floor.
Doors can be frame or glass. The frame parts of the doors are made of MDF boards lined with veneer or polyvinyl chloride film. Frames are made of aluminum with imitation metal or the frame is covered with decorative film to resemble valuable wood species.
Bookcases with glass doors are aesthetically pleasing and make it easy to find the volumes you need without opening the doors. Solid wood furniture in combination with glass is used in high-tech, modern, and English classic styles.
Glass doors can be in the form of swinging doors, sliding panels, or bar glass. A slight tinting of the glass is allowed, which will partially protect paper products from direct sunlight.
Tools and materials
Before directly creating the structure, you should decide what materials will be used for this. It is possible to use different materials, but wooden cabinets are considered the most suitable for different rooms. For this, different types of wood can be used, for example, cherry or oak, birch or walnut.
You can buy solid wood or veneer; any option is of high quality and beautiful appearance.
If it is not possible to spend a lot of money on the purchase of such an expensive material, then choose MDF or chipboard, as well as other lumber, on top of which there is a high-quality polymer coating. MDF is considered the ideal choice for obtaining an inexpensive and acceptable quality cabinet. It is produced by dry crimping and is characterized by high strength and environmental friendliness.
Additionally, you need to decide what the doors will be made of. They can also be made from wood, but plastic or glass can be used for this. Glass doors are considered the most interesting and unusual, so they are chosen quite often, but you must make sure that high-strength tempered glass is used.
Tools you will need:
- screwdriver;
- Grinder;
- sandpaper;
- a machine designed for high-quality milling;
- drill and hacksaw;
- tape measure with pencil;
- wood glue and varnish;
- fasteners;
- blanks intended for forming shelves and made from high-quality furniture panels;
- plywood used for the back wall and lid;
- material for the legs, with small wooden elements made of oak considered optimal.
The structure, made of high-quality wood, will last for many years and will always delight you with its unusual appearance, and such models are suitable for any interior.
MDF boards are ideal for a bookcase
Before the actual process of creating a structure, the following preparatory steps are performed:
- a specific model is selected that will be created with your own hands;
- the entire cabinet is visually divided into individual component elements, after which a drawing is generated for each part;
- to simplify the process of creating a drawing and diagram, you can use modern and easy-to-use computer programs;
- it is decided what dimensions the cabinet will have, the main parameters being: width, height and distance between the shelves;
- according to the drawings, the parts that act as the main elements are cut to obtain a complete and high-quality cabinet;
- if chipboards are used, then it is advisable to order cutting from specialists, since if you do not use specialized equipment, you will end up with uneven cuts, chips and other defects;
- If you need to make rectangular ends of the panels, then they can be easily and quickly covered with veneer.
When preparing parts, you must constantly check the existing drawings and diagrams, since there is a high probability of creating low-quality elements that cannot be used in the future.
Cutting out curly parts
All parts need to be sanded
Bookcase parts
Preparatory stage
Bookcase dimensions.
The preliminary stage of cabinet installation involves drawing up a sketch of the future structure, working out the smallest details, and determining the location. Break the cabinet down into its component parts and draw each piece. If you do not have the necessary experience, you can use specialized computer programs. When calculating, it is necessary to take into account that in most rooms there is a baseboard that can “eat” about 5 cm of the cabinet. Also, the baseboard will not allow you to move the cabinet close to the wall; the situation can be solved by bevelling the vertical ribs on the side of the baseboard or removing it completely.
When determining the size of the cabinet, it is necessary to consider not only the height and width of the structure, but also the distance between the shelves and their number. The minimum shelf depth recommended by experts is about 20 cm. If your books are large, it should be increased to 30 cm. In order to avoid sagging of the shelves, their thickness should be at least 2.5 cm.
After preparing the drawings, you can begin the actual manufacture of the cabinet, namely the preparation of its parts. Sawing parts can be done by specialists or independently. The complexity of the process lies in the need to use an expensive machine for sawing chipboard, the purchase of which solely for the installation of a bookcase is not advisable. At home, the machine can be replaced with a jigsaw, but in this case the quality of the cut decreases and chips form.
Return to contents
End milling
This procedure is not particularly long or complicated, but you will have to pay a lot of attention to it, since without this process the result may not be very attractive. For ideal operation, the following rules are taken into account:
- cutters designed to form a beautiful and optimal relief are selected correctly;
- the overhang is clearly and correctly set, having the necessary parameters;
- High-quality and modern milling equipment is used.
The main features of milling include:
- the router is securely fastened and prepared;
- when feeding a workpiece onto it, it is not allowed for it to deviate or move to the sides, as this guarantees a poor work result;
- when performing the process, you must ensure that all movements are smooth and careful;
- before work, it is recommended to make sure that the equipment is working properly, for which milling is performed on a small unnecessary element;
- processing of slats should be carried out only after setting the optimal size;
- after work, the place where the workpiece touched the working part of the tool is checked;
- if there are small irregularities, they are carefully smoothed out with sandpaper, since if this process is not completed, then after covering the elements with varnish, the irregularities will be clearly visible.
Thus, milling is easy to do if you follow the basic steps and rules, and also use high-quality and modern equipment.
End milling
Milling grooves
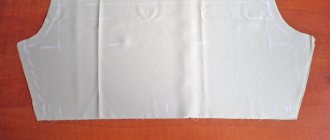
Back wall
In photos of different bookcases it is almost impossible to see the back wall, so it is usually well hidden. This allows you to use inexpensive and easy-to-process materials to create it. Typically a standard chipboard sheet is used for this.
Although the back wall cannot spoil the appearance of the cabinet, the reliability of the entire piece of furniture depends on its correct fixation, since it acts as a connecting element.
To form the back wall, a sheet of chipboard or plywood is most often used. These materials are considered easy to process, so cutting out parts of the required size from them will not be difficult. Cutting can be done with an electric or hand jigsaw, and a special sawing machine is often used. Before cutting, you need to apply markings to the sheet so that you get a perfectly smooth back wall with the required dimensions. The chamfer is removed using sandpaper.
If you want to get a fairly reliable back wall, it is recommended to use chipboard instead of plywood. This material has more weight, and it is also quite easy to attach. It can withstand different loads, so it is considered an ideal choice for a cabinet on which many heavy books will be placed.
Chipboard is most often used for the back wall of a bookcase.
Preparation of cabinet parts
The installation process below looks at creating a standard rectangular open cabinet from oak veneered chipboard. If you prefer rectangular ends of chipboard panels, you can simply cover them with veneer or oak slats, which must be prepared in advance. To do this, take a board 3 m long and 30 cm wide. Saw off blanks 1.6 meters long from several such boards. Next, adjust them to the desired size; for this, a sawing machine, a guide and a template are used to align the board. The template has the following dimensions: width 250 mm, thickness 20 mm, length 1500 mm. During the cutting process, the template should be located under the board.
Then cut the required number of slats, which you pass through an electric planer or planer, using maximum care so that they turn out perfectly even and parallel to each other. The next step is to grind the slats. This is necessary to remove waves after the planer, since in the future they can interfere with milling. After preparing the slats, they are glued to the chipboard using clamps. To prevent the workpiece from being pressed when the clamp is clamped, place plywood of the required thickness. In the process of clamping parts, glue may come out of the seams; carefully wipe it with a rag or wait until it dries and carefully remove it with a chisel. The slats are joined at an angle of 45°.
Milling the ends must be done with correctly selected cutters for the relief and a clearly set overhang. When feeding the workpiece into the router, do not tilt it in different directions and maintain a smooth movement. After milling is completed, check the contact area between the working part and the workpiece. If you find crotches between them, remove them using 150-grit sandpaper, otherwise the differences will become noticeable after varnishing.
The back wall of the cabinet is one of the most inconspicuous sides of the cabinet, which also requires careful finishing and processing. The reliability of the design depends on its installation, since the rear wall serves as an additional connector for the entire cabinet.
To create the back wall, you can use a sheet or pieces of plywood, which are easy to process; the material will not require much time to install. Using a saw and an electric jigsaw, cut to the required dimensions and remove the chamfer with sandpaper. A more reliable back wall will be a structure made of chipboard, which is significantly heavier in weight.
Return to contents
Cabinet assembly
How to make a bookcase with your own hands? After completing numerous preliminary works, the actual assembly of this structure begins. This process is divided into successive stages:
- Initially, the place where the work will be performed is selected, and it must be represented by a flat surface, since if there are distortions, various irregularities may appear in the final structure;
- the side walls are attached to the upper part, and a corner is used to check the evenness of the elements, and only after measurement is fixation performed, and this approach will prevent unevenness at the joints;
- holes are drilled for fasteners, for which a drill is used, and its diameter should be slightly smaller than the selected fastener;
- the parts are securely and firmly tightened together with fasteners, and the optimal choice for this process is considered to be a confirmat screwed with a hexagon;
- after fixing the upper structural element, fixation of the lower part begins, and before this you also need to pay a lot of attention to quality measurements using a corner;
- then the back wall is attached, for which a pre-cut sheet of plywood or chipboard is used, and for this you can use nails or even a construction stapler;
- the shelves begin to be attached, and they will be subject to a really significant load due to the use of a large number of books, so it is not advisable to make them removable;
- It is advisable to fix the shelves with a confirmation that ensures the reliability and durability of the elements;
- doors are installed using hinges if the structure being created is formed with facades.
Thus, the bookcase can be made by hand. In this case, the ideas of future users are embodied, and a truly interesting design is achieved. The optimal materials for this are wood or MDF. During the process, a lot of attention is paid to creating a drawing, choosing quality materials, correct measurements and reliable fixation.
Drawings, diagrams and videos
Below you will find a selection of drawings of the bookcases described earlier, as well as some others.
DIY bookcase drawings
And if suddenly you have an old bookcase that you inherited from your grandmother gathering dust, then you can restore it at home with your own hands. The following video will show you how to polish its surface:
Source: ciscoexpo.ru