December is coming and soon humanity will begin to decorate their homes with New Year's attributes and prepare for the New Year!
Snowflakes, especially those made by yourself, are perfect for decoration.
Snowflakes can be made from various materials:
- from paper
- from felt
- from pasta
- from dough, from caramel... it would take a very long time to list.
Let's look at each in more detail.
The most popular material for snowflakes is paper.
Paper snowflakes for New Year 2020, 20 New Year ideas
Not only children, but also adults love to craft with paper. Therefore, a good and simple idea would be to cut out small, medium and large snowflakes to decorate your apartment or home. They will serve as the basis for creating hanging garlands or become a beautiful decor for window glass or curtains. Well, to make the masterpiece look skillful, it is important to print the template in advance, prepare scissors and white, silver, blue or gold paper.
The stencils proposed below can be made by a child as homework for kindergarten or labor lessons in primary school.
Snowflakes from pasta, master class in the photo
In order to decorate a beautiful Christmas tree, you don’t have to spend money on buying expensive Christmas tree decorations. It is enough to turn on your creative imagination to make with your own hands a masterpiece that no one else will have. For example, from the same pasta that is sold in any store in the cereal department.
Items required for crafting:
- pasta of various shapes: cones, vermicelli, spiral, snails, fusilli, spaghetti, ravioli, farfalle, etc.;
- glue;
- fine or sea salt (you can also use glitter);
- acrylic paint.
Step-by-step instruction:
1) To make a snowflake from pasta, it is enough to connect all the elements on a flat surface so that you get a beautiful work.
2) After all the elements have been connected, they must be glued to each other so that the shape remains smooth and beautiful, as it was originally.
3) If the product is well glued, then it can be painted with white paint and sprinkled with sparkles to give them additional shine.
4) After drying, the finished product can be hung on a satin ribbon and hung on a green beauty - a Christmas tree.
Large protrusions on the window in the shape of a pig
Well, it's time for our pig. It's time to start making it. The fact is that it is impossible to make snowflakes of this kind. I suggest you replace them with an equally interesting decoration in the form of protrusions. Which, by the way, on the window look no worse than other decorations.
These piglets are quite easy to make. The only thing is that you will have to be a little patient. Because they require attentiveness and accuracy from themselves.
First you need to choose a template that suits you. Then print in the desired color. I would advise choosing something bright. It will look much more interesting.
Now that the template is ready, carefully cut it out according to the main office. Now that the part is cut out, you can begin the second part of the work.
Before you start cutting out the internal parts, decide what you are doing. Personally, in my experience, there are two options: thin manicure scissors and a stationery knife. If you chose the second option, then be sure to decide on the surface on which you will cut the part. Since during the work, stripes may appear that you did not expect at all.
The ideal way would be to use a clean cutting board for such purposes. She is tough and no cuts are scary for her.
Well, we’ve decided on the subject to cut out and the location too. Now we can get down to business. The finished vytynanka can be used to decorate windows and doors. It looks very nice.
Decide on templates; there are quite a few of them in this article. It would be great to focus on several options at once. It will look more interesting and beautiful.
It's time to move on to the next sub-topic, go down to the heading below and study another type of snowflakes.
New Year's snowflakes made from toothpaste and brushes, master class in the photo
A snowflake on the window will give any room an atmosphere of comfort and warmth. However, in order not to spoil the glass and to easily wash it after the holidays, it is better to use proven techniques, such as vytynanki or toothpaste. But if the first allows you to reproduce even paintings, the second allows you to reproduce exclusively individual objects, such as snowflakes.
Items required for crafting:
- stationery scissors;
- A4 paper;
- a simple pencil or black pen;
- 1/2 sponge for washing dishes;
- toothpaste (you can use the cheapest one);
- convenient plate;
- old toothbrush.
Step-by-step instruction:
1) Draw a snowflake on a white sheet with a pencil and cut it out with scissors.
2) Wet a sponge with warm water and wipe it over the surface of the glass where the snowflake will be applied.
3) Place the finished template on this place and moisten it with gentle movements using a sponge so that it sticks.
4) Dilute a small amount of tooth. paste with warm water so that the finished mass is not too thick and liquid.
5) Using a toothbrush, spray the induced solution along the contours of the snowflake and inside.
6) Let it dry a little, and then remove the paper snowflake.
Video on how to draw a snowflake in Illustrator
This method is significantly different from the previous ones. But still ideal for decorating your windows. But there is one “but”, to make this kind of snowflakes you need a little knowledge. You need to know how a certain program works, it’s called Illustrator. It is she who will help in making beautiful products.
We press the play button and start studying. We will draw a snowflake at our own discretion.
Wow, I would never have thought that with simple movements you could create a whole masterpiece. I hope you liked this method of making snowflakes. I assure you everything will work out, the main thing is to act.
Well, guys, we're coming to the end again. While I was writing this article, I kept replaying the sight of snowfall in my head. It’s so great when you’re walking along a snowy road, and such light white beauty falls on you from somewhere above. Mmm, the new year is coming soon and you should think about decorating your apartment now.
Let's say goodbye, choose the appropriate technique for making snowflakes and get down to business. Everything is very easy and simple, the main thing is to start. I think that you understand me. See you friends!!!
Snowflake made of glue, master class in the photo
Oddly enough, New Year's crafts can be made not only from improvised materials, but also from glue. To do this, it is enough to allocate 30-40 minutes of free time, having prepared the following items before starting work: hot glue and PVA, a thick bag, stationery scissors, glitter, satin ribbon or rope, and a brush.
Step-by-step instruction:
1) On a bag that is sure not to melt, draw a snowflake using hot glue.
2) After the glue has dried, remove it using running water.
3) Trim all the irregularities with your own hands and give the craft an artful appearance.
4) Cover the snowflake with PVA glue and glitter.
5) Hang the finished product on the Christmas tree or decorate a window with it.
Modular snowflakes step by step production
In general, the number and shapes of snowflakes simply cannot be counted. They can be of completely different types. Probably everyone noticed this more than once during a snowfall. I’m writing about snow and I really wanted it as soon as I was already bored with autumn. Sorry I got a little off topic and I'm already back.
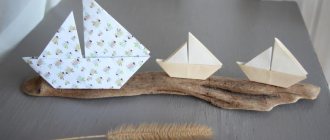
In this topic, I propose to make you this unique decoration using the origami technique. Many people also call it modular. Because to create it we will need many similar parts. Therefore, before you begin assembling the product, you will need to start manufacturing modules.
Here is one of the presented module diagrams. There is nothing complicated in this case. Please note that the size of the finished product will depend on the size of the module made. That is, if you want to get a huge snowflake as a result. Then the blanks will be made from a whole sheet of paper. If you want smaller work, then we will divide the sheet of paper into several parts.
Here is another detailed diagram for making parts using the origami technique. It is practically no different from the previous one, but is described in more detail. That's why I decided to share it.
As a result, when the modules are ready, you can begin assembling the product. By the way, a snowflake can be absolutely anything, both in shape and color.
When assembling snowflakes, use your imagination. Oh, how useful it is here. And your product can be the most unique.
And if this is your first time encountering such a technique, let’s turn to a professional for help. You can really rely on them. That is why I present to your attention a short but very informative video tutorial, which is presented below.
Follow all the recommendations and you will definitely succeed. Then perhaps your own ideas will appear.
The New Year's snowflake turned out to be very original. What I liked most is that brightly colored paper was used to make it.
By the way, while making this kind of jewelry, did you ever have a desire to do something a little differently? Share your opinion directly in the comments, I will be glad to see the finished product.
DIY beaded snowflake
On the eve of the New Year 2020, with the help of beads you can make not only a snowflake, but also the symbol of the Chinese horoscope - the Dog. However, if even a child can reproduce the first craft, the second craft cannot always be repeated by a master. Therefore, we suggest starting with an easy one...
Items:
- snow-white and blue beads;
- thin wire;
- wire cutters;
Step-by-step instruction:
1) Cut the wire into 10 even pieces, making a hook on each to hold the beads.
2) String beads and glass beads onto each part, repeating the pattern of the snowflake shown in the photo below.
3) Leave 0.5 mm empty at the end, connect all the parts together and twist.
4) Cut off the excess wire using wire cutters, and hang the finished product on a satin ribbon or string.
DIY 3D paper snowflake
You can hang a voluminous snowflake from the ceiling, which will give the interior airiness and lightness. And thanks to the 3D effect, it will seem more multifaceted and interesting.
Items:
- ruler;
- black pen;
- 6-8 sheets of white A4 paper;
- stationery scissors;
- stapler
Step-by-step instruction:
1) Cut all the sheets into even squares, and then bend each one so that you get a triangle.
2) Make several cuts at a distance of 2 cm, up to 3 cm long.
3) Connect the cut cuts together using a stapler.
4) Do the same with the rest of the petals, and then connect them together.
PAPER SNOWFLAKES
You will need paper and scissors.
- Take a square sheet of paper and fold it diagonally in half (Fig. 1)
- Fold the resulting triangle in half again (Fig. 2).
3 and 4. The new triangle is formed by eye. The main thing here is that one side touches the opposite fold (Fig. 3 and 4).
5. Then you need to cut off the lower part and you can already draw the outline along which you will cut.
Here are some examples of beautiful snowflakes.
You can decorate gift packages with these snowflakes.
What other snowflakes can you make for the New Year 2020?
There are many variations of snowflakes, the main thing is to choose the option that will bring only benefit and not torment. Therefore, if none of the above crafts are suitable, you can try making a snowflake with your own hands from other materials:
- rubber bands;
- felt;
- plasticine;
- cotton wool;
- satin ribbons;
- balls;
- thread;
- napkins;
- polystyrene foam;
- gypsum;
- newspapers;
- newspaper tubes;
- bottles;
- bushings;
- glaze;
- salt dough;
- disk;
- rain;
- isolona;
- origami;
- ear sticks;
- foil;
- eggs;
- plywood.
Tips from needlewomen
When making holiday crafts, don’t be afraid to experiment and make your own adjustments. Often, it is with a creative approach that the most original and interesting products are obtained.
Creating some models takes a lot of time, this should be taken into account if you have no experience in needlework.
There is an important nuance - the thinner the paper, the more elegant the craft will look. Initially, you can train using a thicker, office paper, but translucent snowflakes made from thin tracing paper look the most beautiful.