The simplest hidden wiring detector in a hurry
When you plan to hang a picture or wall clock, how do you choose the right place? You are probably thinking about how the painting will fit into the interior of the room, which wall is best to place it on and how. But have you ever thought that not everywhere you can hammer a nail into the wall and drill a hole for a dowel? It's not about what material your walls are made of, since there is a more significant circumstance - this is the electrical wiring. In order not to damage the wires walled up in the wall, you need to know where they are laid.
There are several ways to find out approximately where the electrical cable runs: you should look at the technical documentation of the apartment and look at the wiring diagram of the electrical network; if there is none, then pay attention to the location of the branch boxes, from which the wires go to sockets and switches. As a rule, smart electricians lay the cable at a right angle.
It’s good when you replaced the old electrical wiring and are aware of its placement, but what if the previous owner of the house was a self-taught electrician and did not follow the basic rules of wiring? There are cases when, in order to save money, the wires are routed along the shortest path: from the boxes diagonally and horizontally - in this case, you cannot do without special means for detecting it.
In stores and radio markets they sell special devices called “Hidden Wiring Detector”. They are cheap (low class) and expensive (high class). A low-class device detects the source of electromagnetic radiation - these are live wires and electrical appliances. High-class detectors are more accurate and functional: their work is aimed at identifying wires directly, even those that are without voltage.
For home use, a simple detector that you can make yourself will be enough for us. As you understand, the simple circuit we have assembled refers to budget devices - therefore, we will not be able to create a high-end device. But a homemade product will help you avoid getting into trouble when performing construction work and at the moment when you decide to decorate your room with a beautiful painting or wall clock. In order to quickly assemble a hidden wiring detector ourselves, we will need three non-scarce radio components, which will not be difficult for us to find.
The main element is the Soviet K561LA7 microcircuit (the detector itself is assembled on it). The microcircuit is sensitive to electromagnetic and static fields emanating from conductors of electrical energy and electronic devices. The microcircuit is protected from increased electrostatic fields by a resistor, which is an intermediate element between the antenna and the IC. The sensitivity of the detector is determined by the length of the antenna. As an antenna, you can use a single-core copper wire 5 to 15 centimeters long. For stable operation and without compromising sensitivity, I chose a length of 8 centimeters. There is one caveat: if the antenna length exceeds the threshold of 10 centimeters, there is a risk of the microcircuit going into self-excitation mode. In this case, the detector may not work correctly. Also, if the electrical cable is buried deep in the plaster, the detector may not make a single sound.
If your homemade detector does not work correctly, you should experiment with a long copper antenna. It can be either shorter or longer than the recommended length. When the detector stops responding to anything except the electrical cable, then you have found the desired length (if you have chosen the wrong length, the detector may respond to a simple touch from a person or any objects).
We have sorted out the nuances, now we move on to the third element of the circuit - this is the piezoelectric element. A piezo emitter (piezoelement) is necessary for auditory perception of the electromagnetic field; when this happens, the emitter makes a crackling noise. A piezoelectric element, or simply a “squeaker,” can be obtained from a non-working Tetris, Tamagotchi or watch. You can also replace the tweeter with a milliammeter from an old tape recorder. The milliammeter will show the level of the emitted field by deflecting the needle. If you decide to use a piezoelectric element and a milliammeter, the crackling noise produced will be a little quieter.
The circuit is powered by a voltage of 9 volts, so we will need a Krona battery. The circuit can be assembled on a printed circuit board or mounted. Wall-mounted installation for a simple circuit consisting of 5 elements would be preferable. Take cardboard, place the microcircuit with the legs down and pierce holes under each leg with a needle (14 pieces, 7 on each side). After preparing the place for the microcircuit, insert the legs into the holes made and bend them. This way we will securely fix the integrated circuit on the cardboard and make the work easier when soldering wires.
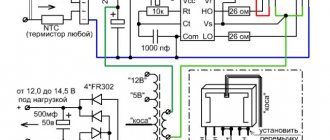
To avoid overheating the microcircuit, you should use a low-power soldering iron. Usually a 25 Watt soldering iron is used for soldering radio components. Let's start assembling the detector according to the diagram given in the article. If you have followed all the above recommendations, then the circuit should work instantly without any adjustments. Now we find a suitable case and integrate the circuit into it. Make holes under the tweeter and glue the piezo emitter on the back side. To prevent the detector from working constantly, solder a toggle switch into the power supply circuit break. Rebooting the detector by turning the toggle switch on and off will help you remove the microcircuit from self-excitation mode.
By tradition, I would like to end the article with a video report on the work done. The video tested the operation of a homemade and factory-made hidden wiring detector. As it turned out, the made detector more accurately showed the location of the electrical cable than a cheap purchased detector.
Having assembled a detector to search for hidden wiring, you should not be afraid of damage to the electrical network of your home, because you will always be able to find the electrical cable. Good luck in mastering simple circuits in radio electronics. If you have any questions, please contact me in the comments - we’ll sort it out!
About the Author: Maxim Lapitsky
Greetings, dear readers! My name is Max. I am convinced that almost everything can be done at home with your own hands, I am sure that everyone can do it! In my free time I like to tinker and create something new for myself and my loved ones. You will learn about this and much more in my articles!

