The Advent wreath is the first sign of the arrival of Christmas, a traditional decoration in Catholic homes during the period of fasting and anticipation of the Nativity of Christ (Advent) , which is celebrated on December 25. The classic wreath has a round shape made of fir branches with four candles. A traditional Christmas wreath with candles is placed horizontally - for example, placed on a table. However, a wreath without candles can be hung on a wall or door. On the wall it decorates the house and reminds the whole family of upcoming joyful events, and on the door it tells those who come about the cordiality and hospitality of the owners and their readiness to share the holiday with the guest. However, today the Christmas composition is not only an attribute of a religious holiday, but also an element of New Year's interior decor. It is made not only from pine branches, but from a variety of materials. The flight of fancy is not limited here! Making it is a very personal, unhurried and creative process. This is what they do for loved ones with love, investing their whole soul. And they not only decorate their home, but also use them as Christmas gifts. And since the Russian Orthodox Church celebrates Christmas on January 7, we still have time to prepare gifts for this bright holiday with our own hands. Moreover, this is also a great way to keep your children busy for a while and entertained on a snowy, cold day.
I have already devoted several posts to the topic “How to make a Christmas wreath with your own hands.” For example,
Classic coniferous wreath
Wreath made of branches of deciduous trees.
Mediterranean wreath
And in the previous article I started a story about how to make a Christmas wreath out of paper. And since there were so many interesting ideas, I decided to continue this topic at least a little longer.
How to make a paper wreath with your own hands (master class)
An elegant and unusual wreath made of paper with your own hands will decorate the interior and can become a symbolic decor in preparation for the seasonal holidays. You can learn how to make a paper wreath with your own hands on this page. A master class, richly illustrated with photo materials, will help you make an unusual decorative decoration, a beautiful wreath from paper. We suggest you try to make a paper wreath with your own hands using light corrugated and colored paper, wallpaper in combination with napkins and elegant braid.
Textile headband with flowers
How to make a headband with flowers with your own hands? The master class (photo of the finished product is below) will help you with this. The previous section discussed the technology of making paper decor. Fabric is used here. Depending on the appearance of the flowers you want, you can use both natural and synthetic materials.
To create realistic elements, chiffon and nylon are suitable. For simplified colors, you can even take fleece or felt. Working with fabric goes like this:
- Like paper, blanks for petals and other details are cut out of chiffon.
- Here it is necessary to process the edges of the elements over a candle flame so that the threads do not fray. This operation also adds volume to the petals.
- Separately make the center (pistle) and stamens, if necessary.
- The elements can be carefully sewn together or glued together.
The assembly and decoration of the rim is carried out similarly to the previous options.
How to make a wreath from corrugated paper and flowers for it with your own hands
A corrugated paper wreath is light, airy and elegantly simple.
Corrugated paper wreath in the photo
You can easily make a wreath from corrugated paper with your own hands if you use the following master class with step-by-step instructions and photos:
Before you make a wreath from corrugated paper, you should prepare all the necessary materials and tools. We also recommend reading in advance about how to make flowers from corrugated paper for a wreath and choosing the appropriate options.
Materials for it:
- base for a wreath made of foam with a diameter of 20 cm;
- corrugated paper of different colors;
- satin ribbon;
- glue gun
Progress
- Cut a strip of paper 3-4 cm wide and wrap it around the base for the wreath. Try to wrap it so that the white base is not visible; each subsequent layer slightly overlaps the previous one. Secure the remaining tip of the paper with glue.
- Cut corrugated paper of various colors into strips of about 5-6 cm. Twist the strip to make a rose. To do this, fold the strip lengthwise slightly obliquely and begin to form the core of the future flower by twisting the tube. Then, gradually straightening and pulling out the paper, wrap the strip around the formed tube to get a flower. Glue the end of the strip. You need to make about 20-30 of these roses.
- After you have made the required number of roses, you can begin to fix them. Glue the roses close together with a hot glue gun, being careful not to leave any gaps between the flowers. If desired, the wreath can be made double-sided, then the number of roses must be doubled.
- After the entire wreath is covered, select a ribbon or braid that matches the color. Make a hanger.
- Make a bow from the same braid and glue it to the tape using a glue gun.
- The wreath is ready. The core of the roses can be additionally decorated with beads or rhinestones, this will give the wreath an even more elegant look.
Now you can hang it on a wall, window, or put it on a table, shelf and admire the fruits of your labors! This wreath will fit well into a shabby chic style interior.
Christmas wreath made of cardboard cylinders.
Beautiful Christmas wreath
from cardboard cylinders left over from toilet paper and kitchen towels.
Cut the cylinders into small rings, give them an elongated leaf-like shape, fold them into a wreath shape and glue them together!
As you can see, it's very simple. And a very nice result. In this version, the resulting wreath was not painted, leaving it a “cardboard” color, but you can paint it - either the entire wreath in silver or gold, or the leaves in different colors - for example, traditionally green, red, gold, or more modernly - silver , purple, hot pink.
After the Christmas wreath is formed and glued from the leaves, attach bows, Christmas tree balls and a couple of satin ribbons to it. You can attach other Christmas tree decorations, entwin the leaves with streamers of different colors (then it is best to paint the leaves green), stick figures of angels, Santa Claus, and New Year's deer on it - in general, give room to your imagination.
And as a result of very simple manipulations, such a wonderful Christmas wreath appears, made literally from nothing, very original and cute.
If you have a lot of cardboard cylinders from toilet paper, you can also use them to make decorations for gift boxes.
Please note that here unpainted cardboard is combined with matting and braid - gifts are decorated and packaged in such an old rustic style. That is, this is a thoughtful move - not to paint the cardboard.
And, of course, a small handmade card on a gift looks very cute - take note.
ticca.ru
How to make a vintage wreath from colored paper with your own hands
An unusual wreath made of colored paper and leftover wallpaper will help diversify the interior and reduce costs when preparing for various holidays. Before you make a wreath of colored paper with your own hands, select a suitable idea and materials that match it. We suggest making a vintage wreath from colored paper with your own hands, which will fit perfectly into any modern interior.
Vintage wreath made of colored paper in the photo
Materials:
- round cardboard base;
- a piece of fabric or finished braid;
- wallpaper remnants;
- figured hole punch;
- glue gun and glue gun refills;
- decorative braid for hanging.
Progress
- Cut out two circles from thick cardboard using a compass (alternatively, you can take a round object and circle it). The diameter of the workpiece does not matter, it all depends on your desire. Glue the circles together using PVA glue - this will give the cardboard additional strength. You can also use a ready-made wreath base.
- Cover the circle with braid or a strip of fabric so that it completely covers the entire cardboard base. Secure the end of the braid with glue.
- Cut paper (you can also use colored, wrapping or designer decorative paper, paper napkins, etc.) into squares approximately 6x6 cm in size.
- Using a hole punch, make shaped corners on each square.
- Fold each square to form a triangle. If the drawing is on paper only on one side, then it is better to fold it with the colored side inward.
- Heat the glue gun to the desired temperature. Glue the resulting triangles close to each other.
Wreath with candle
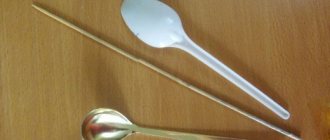
This decorative decoration is incredibly easy to make. A paper wreath is made from thin strips. Blanks should be made in two or three green colors. We cut out strips 1.5 cm wide and 12 cm long. At least 24 pieces of such blanks should be cut. We will make our own New Year's wreath from paper using a disposable plate. Take a cardboard base and cut out the bottom. You should get a circle, which we will now decorate. To do this, take one of the strips and wrap it around the base. The ends of the paper strip should be glued together. Next we glue a piece of a different shade. Moreover, it is advisable to place the paper blanks tightly, or better yet, overlapping each other. This way the base will not show through.
When the cardboard is completely sealed, you can start cutting the edges of the blanks. The end of each green piece of paper must be shaped into a zigzag. When this stage is completed, you can decorate the wreath. Fold the white rectangular paper into an accordion shape. We glue it to the bottom of the wreath, and the top of the candle should be decorated with a flame. Cut out the shape of a drop from yellow and red paper and connect them together. Now you should glue them to the candle. All that remains is to scatter the foam balls over the wreath and glue on a big red bow.
Quilling: “Field wreath”
Many wreaths, even those made from paper strips, are not just beautiful decorations, but also powerful amulets. They protect the house from negative energy and bring good luck to its inhabitants!
Each detail in the wreath has a certain meaning, so the choice of elements to decorate the craft must be taken very seriously. So, for example, a wreath decorated with flowers guarantees all household members happiness in family life, love and mutual understanding. Bees symbolize hard work, and spikelets woven into a horseshoe shape bring good luck! In order to make such a wonderful wreath you will need:
- paper strips: white and black with a width of 1.5 mm, dark green, light green, emerald, pink, white, light yellow, red, purple and blue - 3 mm. Black and yellow - 7 mm, as well as white - 1 cm;
- PVA;
- scissors;
- glue gun;
- quilling tools;
- comb;
- green wire;
- foam circle with a diameter of 25 cm;
- brown paper twine;
- orange stamens.
Detailed description of the work. To make a wreath with your own hands, you must first prepare the base for it. To do this, you need to wrap a circle of foam plastic with twine. And then secure the ends with glue. Once the base for the wreath is ready, you can proceed to the next stage of the MK. That is, to paper rolling.
At this stage we recommend that you make the spikelets first. For such a wreath you will need 24 spikelets.
Each spikelet consists of elements fastened together called a “droplet” and paper strips glued to them. Having finished with the spikelets, twist the cornflowers. These beautiful summer flowers will add color and interest to your wreath.
For a wreath of this size you will need about 12 cornflowers. It's very easy to make them. Take a strip of black paper with a white border and cut it into fringe. Roll into a tight spiral. Secure with glue. Stepping back a couple of mm, glue a strip with purple fringe on top. To create the petals, use blue ribbons 0.3 cm wide. Roll them into a roll and, using a template, unravel them to a diameter of 1.1 cm. From the resulting circle, make an element called a “heart”. For each flower, make 5 petals. Glue the petals to the stamens.
Now we will tell you how to make daisies with fluffy petals. For the core, twist a yellow ribbon (0.7 cm) with fringe into a tight spiral. Secure it with glue. Glue a wide white stripe with a long fringe to it.
At the next stage of the master class you will need to twist the leaves. First, we make a spiral - 0.8 cm. Next, we form the “eye” element and turn its tips in different directions. After this, we glue the 3 parts together, as shown in the photo:
Now let's start creating small pink flowers. Instead of a core, we use orange stamens, and make the petals from tight spirals. We use a ribbon with a diameter of 0.8 cm.
To decorate the wreath we will also need bright green grass. To create a blade of grass, 1 ribbon is enough.
Tight elongated rolls of rich green and red colors, glued together, will replace the buds for us:
In order for them to look more natural, they need to be glued to the wire in 3-4 pieces. for each “twig”:
Bees are made in the same way as bumblebees.
To learn how to twist them, you can watch a short video.
This step-by-step tutorial shows in detail how to make a bumblebee body, head and wings. A bee is created using the same principle, with the only difference being that it has a pair of additional smaller wings. When all the blanks are completed, they will need to be attached to the wreath step by step:
The most convenient way to start this process is by gluing the spikelets. And then add flowers, buds and bees.
Wire wreath with stems
To begin, unwind enough wire to wrap around the head twice and cut it off with wire cutters.
Twist the ends of the wire around the resulting circle very tightly so that it is reliable and safe. Double-check that the circle fits well and comfortably on your head, then set it aside.
Now that you have the base for your wreath, it's time to start creating the flowers! Cut 15 cm of wire using special wire cutters.
Fold in half and twist the ends together, forming a stem with a small loop at the end.
Wrap the small loop and the rest of the barrel tightly with kraft paper tape. Please note that the tape holds well if it is wound on the same tape, so make sure that it tightly covers the previous layer, and so work your way down the stem.
Tip: the process will go faster if you hold the tape diagonally to the stem and twist the stem itself with your fingers. Cut off the excess tape with scissors and wrap it around the end.
Quilling: “Advent Wreath”
The New Year holidays are rightfully considered the most fun and long-awaited. Preparation for them sometimes takes several months, because zealous housewives not only carefully think through the menu for the New Year's table, but also decorate their homes.
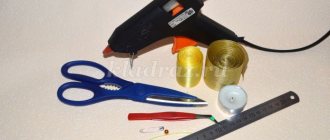
Today, especially for beginner craftswomen, we want to talk about how you can make the most important Christmas decoration yourself - a New Year's wreath using the quilling technique! To make it, you need to prepare the following materials and tools in advance:
- quilling tools;
- paper strips;
- scissors;
- glue;
- a few clothespins.
Before you start, try making a small sketch on paper. A pencil sketch will help you decide on the style of your wreath, as well as understand what paper figures you will need to make it.
Kanzashi technique
In addition to the above, there is another way to make a headband with flowers with your own hands from ribbons. This is a very labor-intensive method compared to all previously discussed. Those made using the technique are decorative (unrealistic), but very unusual, bright and beautiful.
For production, as a rule, wide ones are used. They are cut into squares, the edges of which must be very carefully processed over the flame. The resulting blanks are folded in different ways into petal-like parts. Small blanks can be glued together, stitched or joined by melting the material with fire. Using different colors and folding patterns, very diverse compositions are obtained. These decorations look impressive on a headband, on hairpins, and on elastic bands. It would be original to create a single set in this way.
You learned how to make a headband with flowers with your own hands. Choose the method you like, prepare materials and tools. Create spectacular jewelry yourself.
At the New Year's party in kindergarten, it is customary to dress up children in different costumes. The images of forest animals, including the baby squirrel, have long been established. Recently, parents have been buying costumes for children, but part of the outfit, for example, a mask, can be made at home with the child.
Step-by-step instructions for making a head wreath with your own hands
At fashion shows in recent seasons, you can often see the demonstration of dresses and sundresses in combination with wreaths adorning the heads of models. The sizes of the compositions are very diverse, as are the colors. The trend for this accessory was immediately appreciated by the fair sex. Moreover, age does not matter. Everyone can choose the ideal model for themselves, highlighting their natural beauty.
Wildflowers are the main assistants in weaving
The most accessible and cheapest material for creating bright decorations are wildflowers. But do not underestimate them - the smells of wild plants create an aromatherapy effect, and their beautiful appearance gives the decoration tenderness and naivety. Before weaving a wreath of wildflowers, it is better to understand what they mean. Poppy is a symbol of passing beauty and youth. White field chamomile has long been considered a symbol of innocence and tenderness. Cornflower is a sign of modesty and holiness, strength and health. Periwinkle meant a declaration of love, yarrow meant free will, and immortelle meant health.
Suitable for whom and for what occasions?
Almost all women can use a wreath to decorate their hair. Another question is the choice of floral composition and flower sizes. Teenagers and girls can safely try on any form. The main criterion is compatibility with the outfit. For women, discreet compositions of small buds are more suitable. The color scheme should consist primarily of pastel and light colors.
The main purpose of the wreath is considered to be special occasions and holidays. In recent years, there has been a popularity of using the accessory in the image of a bride. Little girls and grown ladies look equally good with delicate little buds on their heads. This emphasizes femininity and gives the appearance a delicate note and charm.
Folk festivals and holidays can also be an occasion to transform your hair by decorating your hair with a wreath. Today's youth love to celebrate Ivan Kupala. Girls with a floral arrangement on their heads look mysterious and charming. This holiday is not complete without an obligatory attribute - a wreath woven from fresh flowers.
When using a floral accessory, it is important to remember that it is appropriate in the spring and summer. Although some fashionistas manage to combine it with fur coats and high boots. You can adapt the accessory to the time of year using decorative elements that correspond to the flowering time. Fall decorations look beautiful and appropriate with yellowed leaves.
The wedding hairstyle can be complemented with delicate wreaths made of beads or flowers.
It is appropriate to wear the accessory even in everyday life
Little girls and grown ladies look equally good with delicate little buds on their heads
Cute little ladies can wear a wreath for a photo shoot
Flower wreath - a magical decoration
Weaving flower wreaths is an art. Since ancient times, girls have decorated their heads with this unusual but affordable accessory. And there was a whole science about how to weave a wreath of flowers. A certain set of different types of flowers in the correct order could give its owner happiness in family life, prosperity, love or health.
Not a single ceremony or festival could do without a ritual decoration of flowers. They were hung on the door as a talisman and placed on women in labor to ease contractions and prevent the evil eye. It was especially important to know how to weave wreaths for Ivan Kupala. Such an accessory was considered a powerful remedy against evil spirits, capable of protecting its owner. This is due to the fact that wormwood was woven into the decoration, which, according to legend, has magical properties.
How to make it yourself
For manufacturing you will need the following materials:
- wire;
- flowers on branches or individual buds;
- tapes.
To ensure that the base is firmly fixed on the head, you can use a headband. It is recommended to complement the flowers with beads and various greenery. This way the composition will look more beautiful and richer.
The only tools you need are scissors. To make it easier to attach flowers, stylists recommend using a glue gun. The hot fixation method will quickly and reliably fix the desired fragment to the base. This will save a lot of time drying the surface.
Elements for the composition are used from different materials. For celebrations and stately events, the hair is decorated with a headband of live inflorescences. But plastic and paper are more often used. A composition made of fabric looks very impressive. The skill is honed over the years, resulting in buds that cannot be immediately distinguished from real flowers.
Made from artificial flowers
Step-by-step instruction:
- Measure the circumference of your head to create a wire frame. If it is not possible to take measurements, then you should make a wire rim with open ends to which the ribbons are fixed. By tying it at the back of the head, the wreath can be worn in different sizes. If you use a measure, you need to cut 3-4 wire rods with a length equal to the circumference of the head plus 4-5 cm to fix the ring. Twist the base from them without closing the ends.
- Take branches of artificial flowers and separate them into individual buds and leaves. Short branches are also suitable for the composition. Flowers need to be cut close to the base so that the stems do not interfere with the fastening.
- First make a preparation of buds and leaves, laying them out on the table. Larger fragments are placed in the center, and smaller ones are placed toward the back of the head. Flowers should have the same tone and size, and the overall composition should be complemented by greenery from leaves and twigs.
- Cut circles from felt with a diameter smaller than the flower buds.
- Glue a felt piece onto each fragment so that there is a free strip 0.5-0.7 mm wide in the center.
- String all the elements one by one , pulling the wire base into the empty space in the center of the felt.
- Distribute and adjust the composition.
- Twist the ends of the wire , wrapping each other several times.
- Cover the junction of the rim with flowers.
How to make paper flowers and leaves
Nobody wants to waste time cutting out each petal individually. Fold the kraft paper several times like an accordion, bend it 4 cm at a time, then fold it in half and cut out several layers at a time.
Cut out round petals with a small loop at the top. Make sure that you cut all layers evenly and that the petals do not move. We made petals 5 cm wide and 4 cm long, but you can also do this with other sizes.
While your petals are still in a neat pile, wrap them all tightly around the pencil, then twist each one individually. Make sure that the stripes on the kraft paper line up along the pencil.
Place a small drop of glue on the stem, about 2.5 cm from the top.
Let the glue cool for 2 seconds, then glue on your first petal. Press the bottom of the petal onto the stem and glue 5 more petals, wrapping them around the stem.
Once the 6 petals are glued on, wrap the ribbon around the base of your flower, working your way down the stem and wrap it all the way around. Press the tape well at the base of the flower, this will help it hold firmly enough.
At this stage your flower may look like a bump, so now is the time to shape those petals. Twist the petals outward, wrapping them around a pencil, and alternatively, twist one or two petals inward, which will give the flower more naturalness.
Look at this big beautiful flower! Once you master this, the rest will be easy.
For orange flowers, cut out the petals a little smaller than for pink ones, about 3 cm wide and 4 cm long, to give the wreath some variety and volume. But the creation process is absolutely the same!
And those green leaves? Exactly the same, but instead of 6 petals you need to take 2 or 3.
These bright green companions are simply smaller versions of their dark green friends. Simple enough!
Put on some good tunes and repeat the process until you have everything you need to create flowers and leaves. We believe that five flowers of each color is enough for a wreath, they cover 2/3 of the wreath in a circle, leaving a little space, which will give your image its own special style and naturalness.
How to weave a wreath of dandelions?
Weaving flower jewelry was part of the mandatory summer entertainment program for every girl. Many people still remember how to weave a wreath of dandelions. It is better to choose flowers with a long and strong stem. Finding them is quite easy: they grow in the shade of trees. To make the wreath lush and beautiful, the buds need to be selected fresh and with large heads.
The technology of how to weave a wreath (the process diagram is given above) is quite simple. Having reached the desired length of the decoration, you need to connect its ends. Applying the end of the product to the beginning, we unfold the flowers away from ourselves. After which you need to take a new dandelion and attach it to the beginning of work. Next, we place the stem behind the head of the first flower and wrap it around until it becomes short. Then we take the next one and repeat this procedure until the entire base of the wreath is hidden behind the flowers. You can fasten the decoration using blades of grass or thread.
A romantic wreath of dandelions, thanks to its bright yellow color, looks very impressive, but has several drawbacks. Such decoration is not particularly durable and after a while loses its fresh appearance. You can also stain not only your hands, but also your dress with milk. It is better to weave a decoration from field chamomile, which can be found in any clearing.
How to weave a wreath of daisies?
Chamomile has always been considered a symbol of purity and innocence, and jewelry made from this flower adds freshness and romanticism. Weaving a chamomile wreath will not take much time. To do this, you just need a bouquet of flowers with long stems and a couple of blades of grass or thread to hold the composition together. You need to start weaving a wreath with two flowers; to do this, you should wrap one stem around the other, after which you take a third flower and apply it to the structure. Wrap the third flower around the second bud, creating a loop and securing the stems together. We do the same with the next flower, and this procedure must be repeated until the desired length of the decoration is obtained.
The principle of how to weave a wreath from daisies is almost no different from weaving from dandelions. The only thing to keep in mind is that chamomile stems are denser and need to be woven a little tighter. It is better to choose younger plants with flexible stems, this will make weaving easier. When the wreath reaches the desired length, you should fold the ends together and carefully tie them with thread or blades of grass, trying to hide the ends of the stems under the buds.