There are many options for making an artificial Christmas tree. Today you will learn how to make a Christmas tree out of paper with your own hands. To do this you need a piece of whatman paper or cardboard. The width of the leaf affects the height of the tree, and the length affects the width of the base. It's a little complicated, but now you'll understand everything.
How to make a Christmas tree from corrugated paper with your own hands?
1.
Take a sheet of Whatman paper in A3 format. Its width is 30 centimeters and its length is 42 centimeters. This means that the tree will be no more than 30 cm high, and the base width no more than 21 cm. Divide the length of 42 cm by 2, we get 21 cm, and mark the midpoint with a pencil on the edge of the sheet.
2.
Attach a pencil or pen to a thread or rope. We press one end of the rope with our finger at the marked point, and with a pencil, pulling the rope tight, we draw a semicircle on the other side of the sheet.
3.
Using scissors, cut the sheet along the drawn semicircle.
4.
We bend the sheet on the side along a line from the middle marked point to the edge of the semicircle. Cut off this piece of sheet.
5.
We roll the sheet into a cone, adjusting the required width of the base and aligning its edges from below. Glue the two parts of the sheet along the seam with simple tape on top.
6
. You can wrap the resulting cone on top with any material - colored paper, corrugated paper, colored cellophane, rope, etc. Next is a story about how to make a Christmas tree from corrugated paper. First you need to try on the required amount of paper. To do this, secure the paper with tape on one side and wrap it around the cone. Cut off the required amount with a margin of 2-3 cm.
7.
Using double-sided tape, secure the paper to the cone. We wrap the paper at the bottom into the base and secure it with tape.
8.
Then we start decorating the Christmas tree. You can attach a colored ribbon from top to bottom using tape.
9.
You can cut a strip of corrugated paper 5-6 cm wide and as long as the width of the roll. Then fold it in several layers and cut 2-3 mm on one side.
A Christmas tree made from corrugated paper turns out lush and beautiful. On the eve of the New Year, be sure to make such a Christmas tree with your child, or maybe several, to decorate every room. This craft is the main symbol of the most favorite children's holiday, so it will be an excellent New Year's home decor, decoration of any surface, and a source of pride for the child.
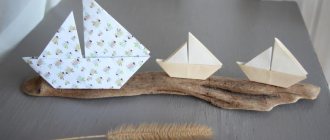
Christmas tree made of skirts
The manufacture does not require materials to form the base, and they are not needed here. An excellent choice for a holiday craft is a Christmas tree made from corrugated paper, if you have one. The rest of the equipment will not be difficult to find in any household.
Materials and tools:
- threads;
- a skewer with a length equal to the expected height of the Christmas tree;
- scissors;
- ruler;
- stapler or glue gun;
- sheets of corrugated paper.
If you want to decorate the composition, the list is supplemented with hot glue and the decorations themselves. The latter are either ready-made or Christmas tree crafts made from corrugated paper. This Christmas tree is so easy to make that even the smallest family members can handle it.
How to make a Christmas tree:
1. Prepare squares of different sizes. The first should be the two largest sheets, for example, 17 cm each.
2. “Accordions” are formed from the squares so that the folds go along the corrugation.
3. The blanks are folded along the fold line and tied in the middle.
4. The edges are trimmed to create corners.
5. The sides are fastened together with a stapler or glue gun. As a result, the workpiece will open and you will get a skirt.
6. Repeat steps two through four for all sheets.
7. Take a skewer. The largest circle made is put on it.
8. The subsequent skirts are strung in descending order by size. The smallest of the blanks should be on top.
9. If there is an empty piece of the skewer, it breaks off.
10. Decorations are glued.
The result was a lush and light attribute of the New Year.
Christmas tree with round branches
A more complex version, similar to a colorful picture, is made from dense material. When you have several multi-colored unnecessary buttons or small bright accessories and a jar in the house, then you can create a craft made from thick corrugated paper.
In addition to decorations, you will need the following materials: cardboard, thick corrugated paper, a jar or basket. A hot glue gun, a compass and scissors will be useful for this work.
Materials and tools:
- green corrugated paper (the floral corrugated version is recommended, as it is dense and able to hold its shape well);
- cardboard sheet;
- wicker basket;
- jar, bottle or pot;
- compass;
- scissors;
- hot glue gun;
- small decor as decoration (beads, small Christmas decorations, bows are recommended);
- flock (lint powder to give a fluffy effect);
- PVA glue for gluing glitter and flock.
1) Take a compass and cardboard. We set the center to the corner of the sheet and draw a circle with a radius equal to the height of the “trunk” of the craft. You will get a quarter circle.
2) Cut it out, roll it into a cone and glue it together.
3) Glue the jar to the base with the bottom facing out. It should partially go inside the cone. This will be the trunk.
4) Cut several ribbons into branches. We prepare them in such a way that they are wider on the lower rows of the Christmas tree and narrower on the upper ones.
5) We twist each strip once in the middle.
6) We connect the edges.
7) We straighten the leaves so that we get a petal.
 We take the widest branches and glue them in a row on the bottom of the cone.
9) Glue the following rows in descending order of the width of the petals, placing them in a checkerboard pattern.
10) The composition is completed by a Christmas tree craft made of corrugated paper in the shape of a small cone.
Another DIY Christmas tree craft made from corrugated paper is ready to decorate your home. The work will be quite durable and with wide leaves, on which it is very convenient to glue various kinds of decorations from buttons to tiny toys. The second option proves that you can create DIY Christmas tree crafts from corrugated paper yourself without any problems.
Curly herringbone
This work will require time and painstakingness, so at some stages it is worth resorting to the help of the younger generation. The result is not just a fluffy beauty, but also a children’s craft: a Christmas tree made of corrugated paper.
Devices and materials:
- transparent glue;
- iron (if foamiran is selected);
- scissors;
- cardboard;
- decorations;
- 4 sheets of A4 corrugated paper or foamiran.
The specified quantity is suitable for a craft with a height of 20 cm. If desired, replace the cardboard with a purchased cone.
1) A cone is rolled out of cardboard and glued together, if one was not purchased.
You can fasten it with either glue or a paper clip.
2) Squares measuring 2x2 cm are cut from the sheets.
3) On each square, cut a fringe up to half a leaf long. The cuts are made not on the side, but on the corner.
4) For foamiran. Place the fringe against the hot iron for a minute. It should become wavy.
5) Prepared crafts from corrugated paper for the Christmas tree are glued to the base, but not with “needles”.
6) The crown of the head is decorated.
The Christmas tree can be decorated with beads or other small and light decorative elements.
Crafts differ in complexity of execution and appearance. The second will become an original decoration, as if it came straight out of a picture. And the first and third ones will not only serve as a symbol of the holiday, but will also be a good activity, because you can involve the whole family in making them.
Manufacturing methods
It doesn’t matter what kind of Christmas tree you are going to make - flat or three-dimensional, the algorithm of actions will be the same, just in the first case the paper or elements made from it are glued onto a flat plane, for example, a postcard, and in the second - onto the surface of a prepared cone.
And so it is: it copies the template to the desired size. Magic Forest: Suddenly standing in the forest. For these scissor cuts, all you need to do is copy the original, write it on cardboard, cut it out using a folding frame, and stick the parcel on it. You will need: pencil, scissors, cardboard or cardboard and glue.
However, if you don't want to wait that long, you cut a branch - here from a gnarled magnolia - so it can be safe. Attach the clips with candles and look ahead. Ice flowers: early in the window, today in the glass. To make this, fold some pretty cardstock in the center, draw a large crayon shape like a pine tree, and cut with a cutter.
A DIY corrugated paper Christmas tree can be made from:
- stripes glued in tiers;
- the same ribbons, but cut into thin strips in the form of a fringe;
- a large number of blanks rolled into fluffy “balls” from the previous paragraph;
- fringe elements twisted in the form of needles.
Choose the method you like, but keep in mind that the final impression of the souvenir depends on the additional decor chosen and the color of the paper. It can be not only green, but also any other, as well as metallic with sparkles, etc.
Home Christmas decoration
Then fold the sheets outward and insert another colored paper. Are you looking to make your own Christmas decor this year? The Christmas decoration on the shelf always looks the same. So how would you make your Christmas decorations this year? Not only does it look unique and specially loving, but it's also fun—and livens up the anticipation of the Christmas season.
New Year's decoration: as individual as you!
From Christmas star to table decoration, Santa boots to Christmas decorations, Christmas gift and Santa Claus for window sill: there's nothing you can't do with a little patience and a touch of the finger. And where you're already doing it: Make your own this year.
Master class on Fairytale Christmas tree
To complete this you will need:
- whatman;
- bright green corrugated paper;
- stapler;
- office glue or glue stick.
Algori:
1. We make a cone - this is the basis for our craft. To do this, take whatman paper, draw a circle, cut out a quarter and glue it or fix it with a stapler.
2. To make a Christmas tree from corrugated paper, cut out a strip as long as possible and 5.5 cm wide. We braid it, the process is clearly shown in the video.
3. The result is a beautiful braid that is attached to the cone.
4. Take the braid and glue it to the base with glue. Then we go further along the spiral, do not forget to gather the side without cloves.
5. It is recommended that the teeth do not overlap, but are next to each other. After complete drying, the “needles” must be lifted. This action adds splendor. The corrugated paper Christmas tree craft is ready. All that remains is to dress it up.
DIY Christmas tree: master class “Christmas trees made from wrapping paper”
A very impressive and elegant product can be made in another way, however, compared to the previous one, this one will require more time. Work like this:
- Cut the paper into strips.
- Fold each strip into a small rectangle and make several cuts on one side.
- Unroll the workpiece back into the tape. The result was a fringe along one edge.
- Roll the element into a tight roll, secure the edge so that it does not unwind, and “fluff” the fringe.
- Make the required number of elements for your product. The parts can be made the same or decreasing in size towards the top tier.
- Now, in order to get an elegant and fluffy Christmas tree made of corrugated paper, you need to glue the completed blanks onto the base. If you have a three-dimensional foam cone, you can use pins with different colored heads instead of glue. By sticking them into the middle of the part, you will receive not only a fastening element, but also an imitation of a Christmas tree decoration - the decor of your souvenir.
- Decorate the product with beads, bows, sparkles.
Christmas decoration for small apartments
Thus, you make original jewelry from pine. Small colored felt beads are simply glued to the inside of the pins. A little effort - great effect! A visit has been announced and you are looking for an original table decoration in a short time? This is a makeshift Advent wreath on view. The Christmas tree is part of the Christmas holiday. But in many small apartments, the majority takes up the most space. Either find a minimal model or simply move the Christmas tree to the wall: as a two-dimensional object.
Idea #1
To make this beauty we will need: a bottle cap, a wooden skewer, a piece of a bright cloth for decoration and corrugated paper. We start the process by dividing the cork in half, then insert a skewer and decorate the base.
Then we move on to the paper: cut it into strips of different widths, then divide it into equilateral triangles. At the end we string them onto a knitting needle from largest to smallest. All Christmas tree crafts made from corrugated paper are ready.
do it yourself (easy way)
The manufacturing technology is as follows:
- Cut the paper into strips. The width of the blanks depends on the size of your product. You can make wider tiers at the base, and then, moving towards the top, reduce them. The length of the elements should correspond to the circumference of the cone or be longer if you fold the parts.
- Form the elements into accordions or neat folds of different or equal widths.
- Glue the prepared parts sequentially onto the Christmas tree blank, starting from the bottom tier, covering the upper edge of the previous one with the next one.
- Decorate the product at your discretion.
You learned how to make a Christmas tree from corrugated paper. You can quickly and easily make a wonderful craft with your own hands. This method is suitable for children's creativity - both in the family and in a circle.
We have the most beautiful Christmas decoration instructions for you. They should inspire you and motivate you to make a Christmas decoration this year - without limiting you. Resolution is what you like! And if you don't find what you're looking for in our collection, we have more ideas for table decorations, Christmas wreaths and more. Have you ever turned your refrigerator into a snowman?
More inspiration for your Christmas decorations
Create a Christmas tree from book pages. Origami snowman in a glass ball. Will there be snow again for Christmas? Then take the winter into a glass. The exceptional Origami Snowman in glass is also a great gift idea for those who dream of a white Christmas.
Idea No. 3
Take double-sided cardboard. Fold it in half, draw a diagonal, cut it out. Along the fold line we make an incision of one contour from the bottom up, the other from the top down. We insert into each other. Cut the outer side of the triangle into small strips. Then we direct the strips to the sides.
Christmas tree crafts made from corrugated paper will create a festive atmosphere in your home and will be a creative gift for guests.
Green beauty: flat or voluminous
A DIY Christmas tree made of corrugated paper can be made either in the form of a relief or a three-dimensional object. For each decor option, choose the appropriate manufacturing method. A flat Christmas tree is good to use on a postcard, gift box, as a magnet, or as an element of a garland. Although all these details are easy to make in the form of three-dimensional Christmas trees, a voluminous souvenir is most suitable as a table or floor holiday decoration.
To make a full star, repeat the entire folding process with a total of eight squares and insert the individual segments into each other, inserting the paper bonuses from the longer prongs above the shorter prongs of the next segment. Playful things are part of Advent, such as cookies and candles. Get inspired and decorate old drawers and drawers with winter elements.
You will need: wooden crates or crates, fir, Santa figurine, hot glue, white spray paint, protective tarps, gold gold and other decorative items depending on the option. So let's decorate the jars on an outdoor tarp with white spray paint and let them dry. Then decorate the wooden boxes in the meantime with some gold leaf, branches and pine cones and then new man and white saplings with some hot glue to stick into the boxes.
No glue
New Year's holidays are ahead. Adults and children have begun their pre-holiday chores. Buy or make gifts for loved ones with your own hands. Installing a New Year tree. Lately, people are decorating their home to make it individual and different from others. A Christmas tree craft made from corrugated paper is a creative idea for decoration.
- Whatman paper for cone;
- corrugated paper;
- threads; needle;
- decorations.
1. make a cone, cut it out and secure it (you can use thread or tape).
2. Cut the shelves 3 - 4 cm long.
3. Gather and assemble onto a thread as in the photo.
4. If the strip is long, you can simply wrap the cone, securing only the base and the top.
5. Decorate with a bow, balls, rhinestones.
The long-awaited New Year holidays will come very soon. Preparing for the New Year becomes a priority, because you want to bring a spark of joy and magic into your home. It is not surprising that a DIY Christmas tree made from corrugated paper deserves special attention.
Cone base for a three-dimensional Christmas tree
Have you decided to find out how to make a Christmas tree from corrugated paper? The master class will teach you how to do this in several ways. Whatever you choose, the decor is always glued to the frame in the form of a cone. If you don't know what to use as a base, pay attention to one of the following options:
But please, just watch, don't suck - otherwise, then there might be nothing left of the sweet candies! Here's how to do it: Fill the overpipe well with moss, carefully hot glue the candies onto the insert cone, then insert two skewers into the bottom of each cone and finally place them in the moss.
Fold 20cm of decorative ribbon and place it as a hanging loop between the fabrics. Pour the pieces together, leaving a hole. Pour in the filling and draw a decorative circle in the center. You will need: pencil, scissors, fabric scraps, cotton filling, gift ribbons and a sewing machine.
- buy a foam blank;
- roll up a “ball” of paper, trim the bottom and glue the base in the form of a circle;
- make a cone according to a template from a sector of a circle;
- make it out of papier-mâché with a frame.
The choice depends on the available materials, the amount of time and the size of the tree.
Fluffy Christmas tree
A fluffy and voluminous Christmas tree can be created from beautiful corrugated paper. It is envisaged to use simple technology to implement the task. In addition, an elegant Christmas tree craft made from corrugated paper can take its rightful place in the home or office. It is recommended to complement the composition with a scarlet bow, gold or silver beads. The decoration promises to transform the entire interior...
Materials and tools:
- A4 cardboard;
- green corrugated paper;
- scissors;
- glue;
- pencil;
- decor - beads, bow.
1. The initial task is to correctly determine the height of the future tree. Then you should draw a circle on cardboard of a suitable size and cut it out. At the first stage, a cone is created, glued at the edges.
2. The cone structure is wrapped in green paper and glued together.
3. To create a New Year's craft, cut strips of fine fringe, which will determine the degree of fluffiness of the spruce needles.
4. A long piece is wound around a pencil, after which it is glued at the base.
5. Paper “needles” are tightly glued to the cone.
6. The final step is to decorate the homemade forest beauty with beads.
This DIY Christmas tree craft made from corrugated paper will bring the necessary New Year's shades to the interior.
Parents with children can choose a suitable master class in order to independently create the most stylish version of New Year's decor. Many Christmas tree crafts made from corrugated paper deserve attention due to their lightness. Careful actions and maximum effort will allow you to become the owner of the best forest beauty made of paper.
3D postcard “Accordion Christmas tree” step by step
A handmade 3D postcard “Accordion Christmas tree” is an original gift with which children can surprise and delight their loved ones.
To work you will need:
- Double-sided colored cardboard for the cover of the postcard;
- Green colored paper for the Christmas tree;
- Colored paper of any color for decorating cards (gifts, stars, balls, etc.);
- A simple pencil, ruler, scissors, glue stick.
Postcard “Christmas tree accordion” step by step
Making a Christmas tree
The volumetric Christmas tree consists of 6 accordions of the same length but different widths. Therefore, cut 6 strips from green paper, the widths of which are: 1cm, 2cm, 3cm, 4cm, 5cm, 6cm. The length is equal to the short side of the paper.
You should take into account the size of the postcard; in this example, the Christmas tree is glued to half a cardboard sheet.
If you need more, all sizes can be doubled, and even add a few more accordions, for example, 7cm and 8cm, to make the Christmas tree even more magnificent and beautiful.
Place a strip of paper in front of you with the narrow side, and start making an accordion from it, bending folds of the same width (about 1 cm) up and down.
You will get this kind of accordion.
Turn all 6 strips of green paper into accordions.
Making the cover and finishing the card with an accordion tree
For the cover, prepare cardboard; in this version, only half of it is used.
Fold the paper in half.
Glue all the accordions, aligning them along the fold. Glue on one side first.
And then apply glue to each and press it on top with the second side of the cardboard. It will be easier for children to glue each accordion separately. Both sides should also be aligned along the fold and end-to-end. The “Accordion Christmas Tree” postcard is almost ready.
All that remains is to glue a star to the top and a trunk to the bottom, which, by the way, is also made with an accordion. And then there is room for creativity. Decorate the postcard with any decor, cut-outs, drawings, both in the middle and on top. You can also glue another cardboard cover on top, 5-10 cm larger than the one on which the Christmas tree is glued.
Source: https://tratatuk.ru/prazdniki/novyj-god/3d-otkrytka-elka-garmoshka.html
White beauty
To make it you will need:
white crepe paper,
I also made a cone base out of cardboard.
I cut a long strip of white paper 2 cm wide and gathered it together with thread into an accordion along the edge.
And I pasted the base in a spiral from bottom to top.
I decorated it in the same way as the first one using foam balls (they are light and stick well to thin paper) only with silver sparkles.
I made a flower on the top using white ribbon and beads.
Christmas tree made of paper
green crepe paper,
red speckled paper,
I made a base for a cone-shaped Christmas tree out of cardboard. Height 14 cm.
To prevent the white from showing through, I covered it with green paper.
Now you need needles. I made them using the quilling technique.
I cut strips of green crepe paper 1.5 x 15 cm. I made fringe and twisted flowers. In total I needed 120 of these dandelions.
I glued everything evenly to the base. The Christmas tree is ready, now you can decorate.
I made bows from red paper with a white bead in the middle.
I didn't have any shiny beads, so I took foam balls and covered them with gold glitter. The result was such brilliant beauty.
I glued a gold bow to the top of my head.
And the beautiful New Year tree is ready.
Christmas tree made of corrugated paper
You can make this New Year’s beauty with your own hands from corrugated paper and decorate it with buttons and beads.
This Christmas tree will be an excellent homemade gift for the Christmas and New Year holidays.
-green corrugated paper.
I used floral corrugated paper - it is thicker and holds its shape well than the thin corrugated paper that is sold in office supplies.
You can use a pot, jar or bottle.
-scissors and compasses
- little things for decoration.
You can use buttons, beads, bows, small toys, and decorative elements.
Step 1. Using a compass, draw a quarter circle on a piece of cardboard, as shown in the photo. Cut it out.
Step2. Glue it into a cone.
Step3. Glue the cone to the basket.
Step4. Cut out strips from corrugated green paper.
Step 5. Twist the strip in the middle.
Step 6. Fold the two twisted halves.
Step 7. Using two thumbs, make an indentation for the petal, stretching the paper in opposite directions.
Step 8. You need a lot of such petals and their width should decrease with each new row.
Step 9. We begin to peck the petals from the very bottom row.
Step 10. Second row we begin to glue the petal to the border between the two petals of the bottom row.
Step 11. Continue gluing the third, fourth, fifth…. row in the same way until our Christmas tree is completely covered with petal-twigs. We hide the top with a small cone of corrugated paper.
Now let's start decorating our Christmas tree.
You can decorate with buttons, beads, various ready-made decorative elements, satin ribbon bows, small toys, for example, from a kinder surprise, or even small candies.
How to make a New Year's card with a picture of a Christmas tree?
A postcard with a New Year's tree is one of the most relevant attributes, because it is so nice to receive, as an addition to the main gift, a beautiful handmade card with warm words and best wishes. You can make a card with a Christmas tree in different ways, using different materials.
A simple but cute option:
It is done simply - a smaller sheet is glued onto a sheet of thick paper of pink (or another) color, sewn along the contour with thread (you can do it by hand), visually forming a frame.
On the second sheet, a simple Christmas tree is drawn, onto which rhinestones, beads, and buttons are glued in a chaotic manner. We sign the card at our discretion (Happy New Year, Happy New Year, Merry Christmas, Congratulations, etc.
) You can write a wish on the back of the card.
Another simple option:
On a sheet of cardboard we glue a Christmas tree made of green colored paper, made up of two parts (or more), glue one under the other by the top. We glue a fabric New Year's hat onto the top of the head, and attach a bow made of ribbons (thread, yarn) to the hat. Decorate the applique with snowflakes.
Charming Christmas tree made of paper:
We glue the Christmas tree in two copies (one on top of the other) onto a colored thick sheet of paper. One Christmas tree is slightly smaller than the second. Glue the Christmas tree by the middle to create a three-dimensional look. We glue the trunk and round toy balls so that they are also voluminous; they can be placed on a small piece of plasticine. You can decorate the card with ribbons.
The essence of this postcard is not outside, but inside:
On the outside, you can limit yourself to the usual inscription “Happy New Year”. And we will make the Christmas tree inside from strips of colored paper folded like an accordion. We glue the accordion on both sides of the postcard, so that when the recipient of the postcard opens it, our Christmas tree will open in front of him.
Christmas tree on a postcard made of threads:
We cut out a thick sheet of cardboard in the shape of a triangle - this will be our Christmas tree. We wrap this piece of cardboard with threads of different colors, decorate it with beads or seed beads. Glue it onto a thick sheet of cardboard and decorate it with lace and snowflakes.
A simple but original option:
A sheet of cardboard is folded in half into the shape of a regular postcard, and we make cutouts on the front side with the outline of a Christmas tree. We paint the back side green. You can “hang” toys with rhinestones in front or stick modest bows made of strings.
Interesting Christmas tree:
- This Christmas tree is quite simple to make - cut a thread of yarn, bend it in the shape of a Christmas tree, and fasten it with buttons.
- And a few more original ideas:
- Postcard “Herringbone” made using the quilling technique:
Corrugated paper card:
Volumetric paper postcard:
Postcard “Christmas tree” made from paper tubes:
Source: https://www.bolshoyvopros.ru/questions/1240706-kak-sdelat-novogodnjuju-otkrytku-s-izobrazheniem-elki.html
Another Christmas tree made of corrugated paper. Master Class.
For the second Christmas tree we will need:
-green corrugated paper.
I used floral corrugated paper - it is thicker and holds its shape well than the thin corrugated paper that is sold in office supplies.
You can use a pot, jar or bottle.
-scissors and compasses
- little things for decoration.
You can use buttons, beads, bows, small toys, and decorative elements.
- flock (lint powder), glitter, artificial snow to imitate frost or snow.
Flock (lint powder) is a powder for giving a “fluffy” texture.
-PVA glue for fixing glitter or flock
Step 1. Using a compass, draw a quarter circle on a piece of cardboard, as shown in the photo. Cut it out.
Step2. Glue it into a cone.
Step3. Glue the cone to the basket.
Step4. Cut out a strip from corrugated green paper.
Step 5. Fold the strip as shown in the photo.
Step 6. Curl the edge of the strip with the fingers of both hands, stretching the paper in opposite directions. We do this in small steps.
Step 7. We glue our strip to the cone with a heat gun. You need to start gluing from the bottom of the cone, moving up in a circle.
Step 8. There is no need to tear off the strip; we glue it in a circle.
Step 9. Continue gluing the strip.
Step 10. Our fluffy Christmas tree is ready!
Let's start decorating!
I glued the beads, coated individual branches of the Christmas tree with PVA glue and sprinkled them with lint powder.
How your Christmas tree will be decorated is your imagination!
Christmas tree made of paper ropes
You will need several strips of green cardboard, twine, double-sided tape, glue and scissors. It’s simple - we make a frame, glue strips of twine onto double-sided tape, and then onto the frame in layers. We shape the top and spandrel it onto the Christmas tree.
Origami tree from a magazine
Such homemade original Christmas trees will decorate the interior of your home for the New Year holidays like nothing else. They can be made quite simply and even children can make such a craft.
A great way to use up waste paper and create a real work of art.
There are old magazines in every home; it’s a shame to throw them away; they lie on the shelf and gather dust. But now their turn has come to be even more useful. This manufacturing method is called paper origami - a simple and accessible type of home creativity for everyone. But since the New Year is around the corner, we will make a Christmas tree to decorate your home or holiday table.